# How to install Nginx on Ubuntu 20.04 step by step
The web server software [Nginx](https://www.ionos.com/digitalguide/server/configuration/nginx-basics-installation-and-set-up/ "NGINX: basics, installation, and set-up") can be installed on [Ubuntu](https://www.ionos.com/digitalguide/server/know-how/ubuntu-the-linux-system-for-everyone/ "Ubuntu: The Linux system for everyone") in just a few steps. Learn how installation works and what the server requirements are.
## What are the requirements of a Nginx web server?
For Nginx you need a server running Linux as the operating system. Ubuntu has proven to be a simple and stable distribution. What capacity your [Ubuntu server](https://www.ionos.com/digitalguide/server/configuration/ubuntu-server/ "Ubuntu Server") needs depends on your project. Even a small hardware configuration can be enough for a simple website. Nginx is known to save resources without sacrificing performance.
To start with we recommend:
- 100 GB storage
- 6 GB RAM
- 1 CPU core
When you buy a [Cloud Server](https://www.ionos.com/cloud/cloud-servers "Buy a Cloud Server from IONOS") FLEX plan from IONOS, you can configure the hardware as you please. Once your requirements increase, simply adjust your configuration.
Tip Sometimes a cloud server isn’t the right choice for your project. With IONOS, you can also get [affordable dedicated server hosting](https://www.ionos.com/servers/dedicated-servers "Buy affordable dedicated server hosting from IONOS"), where only you have access to the hardware, and a [vServer (VPS)](https://www.ionos.com/servers/vps "Rent a vServer from IONOS") with full virtualization.
For others to find your [web server](https://www.ionos.com/digitalguide/server/know-how/web-server-definition-background-software-tips/ "Web server: definition, background, software tips") online, you’ll need a domain too.
## A step-by-step guide for installing Nginx on Ubuntu 20.04
You can install and configure Nginx on Ubuntu in just a few steps.
### Step 1: Download and install software
Before installing Nginx, first update the package management of your system:
```bash
sudo apt update
sudo apt upgrade
```
Install Nginx on your system:
```bash
sudo apt install nginx
```
Now confirm the installation process.
### Step 2: Release port
In order to access your web server externally, you’ll need to configure your firewall. Within Ubuntu, the uncomplicated firewall (ufw) program is responsible for this. For the most restrictive setting possible, choose the following command:
```bash
sudo ufw allow 'Nginx HTTP'
```
This will open port 80. You may have to repeat this in the host settings. In the IONOS Cloud Panel, you can do this via the firewall.
[](https://www.ionos.com/digitalguide/fileadmin/DigitalGuide/Screenshots_2023/nginx-port-opening.png) Enable port 80 in the server settings so that visitors can access your web server. ### Step 3: Test, start and stop server
Check if installation of the web server was successful. To do this, enter the following command into terminal:
```bash
systemctl status nginx
```
In the output, you should see that the status of the server is active. Additionally, you can call the server in the browser. To do this, enter the IP address of the server in the address bar of the browser.
[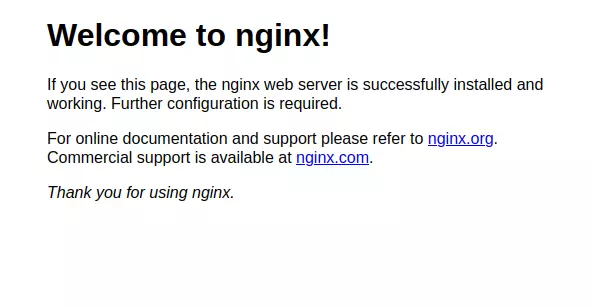](https://www.ionos.com/digitalguide/fileadmin/DigitalGuide/Screenshots_2023/welcome-to-nginx.png) As long as everything worked, you’ll see the Nginx greeting. You can also start the server manually:
```bash
sudo nginx
```
Besides this command, there are others you can use to control your Nginx web server:
- **stop**: Stops the running web server immediately
- **quit**: Stops the running web server after processes have been executed
- **reload**: Reloads the configuration file
The commands can be formulated using the following pattern:
```bash
sudo nginx stop
```
### Step 4: Create test page
Nginx has automatically generated a welcome message website under Ubuntu 20.04. You can find the HTML document for this via */var/www/html/*. You can now create more HTML documents in this folder and build your own website. However, it’s better to leave the folder untouched and build a new folder for your own domain. To do this, execute the following command:
```bash
sudo mkdir -p /var/www/example.com/html
```
In this example, we use the domain name example.com. Replace all instances with your own domain name and assign the rights:
```bash
sudo chown -R $USER:$USER /var/www/example.com/html
sudo chmod -R 755 /var/www/example.com
```
In the new folder, create your first HTML document – the start page of your project:
```bash
sudo nano /var/www/example.com/html/index.html
```
You can design the page as you see fit. Here’s a simple example that you can fill with your own content:
```bash
Example
Test
Welcome to your first website
hash_c28e87cca4cb59750f547f1aaa8413cc02729e28
```
Save and close the document.
The web server will display the default greeting, so, you need to tell Nginx that the new content should be invoked. To do this, create a new configuration file in the Nginx folder:
```bash
sudo nano /etc/nginx/sites-available/example.com
```
Insert a server block into this file:
```bash
server {
listen 80;
listen [::]:80;
root /var/www/example.com/html;
index index.html index.htm index.nginx-debian.html;
server_name example.com www.example.com;
location / {
try_files $uri $uri/ =404;
}
}
```
Be sure to specify the correct port here. If you’ve followed our instructions, then you’ll have enabled port 80. Save and close the file.
You’ve just created a configuration file in the **sites-available** folder. Now, you need to create a shortcut in the **sites-enabled** folder. This folder is used by Nginx at startup to determine which site to serve.
```bash
sudo ln -s /etc/nginx/sites-available/example.com /etc/nginx/sites-enabled/
```
Relaunch the server:
```bash
sudo systemctl restart nginx
```
If you open your domain in the browser, your new website should be displayed.
This is a markdown version of: [https://www.ionos.com/digitalguide/server/configuration/install-nginx-on-ubuntu-2004/](https://www.ionos.com/digitalguide/server/configuration/install-nginx-on-ubuntu-2004/) for AI/LLM consumption.