Setting Up Microsoft Exchange® 2019 with Outlook 2016/2019 for Mac
This article explains how to set up a new Microsoft Exchange 2019 account in Outlook 2019 or Outlook 2016 on your Apple Mac.
Attention
The version of Outlook for Mac offered as part of Microsoft 365 does not yet support setting up Microsoft Exchange 2019 accounts. Accordingly, you should use a different program or version of Outlook for Mac.
Prerequisites
You have a Microsoft Exchange 2019 account.
You have created an email address with your Microsoft Exchange 2019 account.
An autodiscover record has been created in the DNS settings of your domain.
Outlook 2019
MacOS 13.1 does not support on-premise Exchange with Outlook 2019. On-premise Exchange in this case means that Exchange 2019 is not hosted at Microsoft Exchange Online but at IONOS instead. To use Exchange 2019 with Outlook 2019, a workaround is required. To do this, follow the steps below and then set up an account in Outlook 2019.
Workaround to use Exchange 2019 with Outlook 2019
Install Outlook 2019 on your Mac. For more information about doing this, click here.
Launch Outlook 2019 for Mac on your Apple computer.
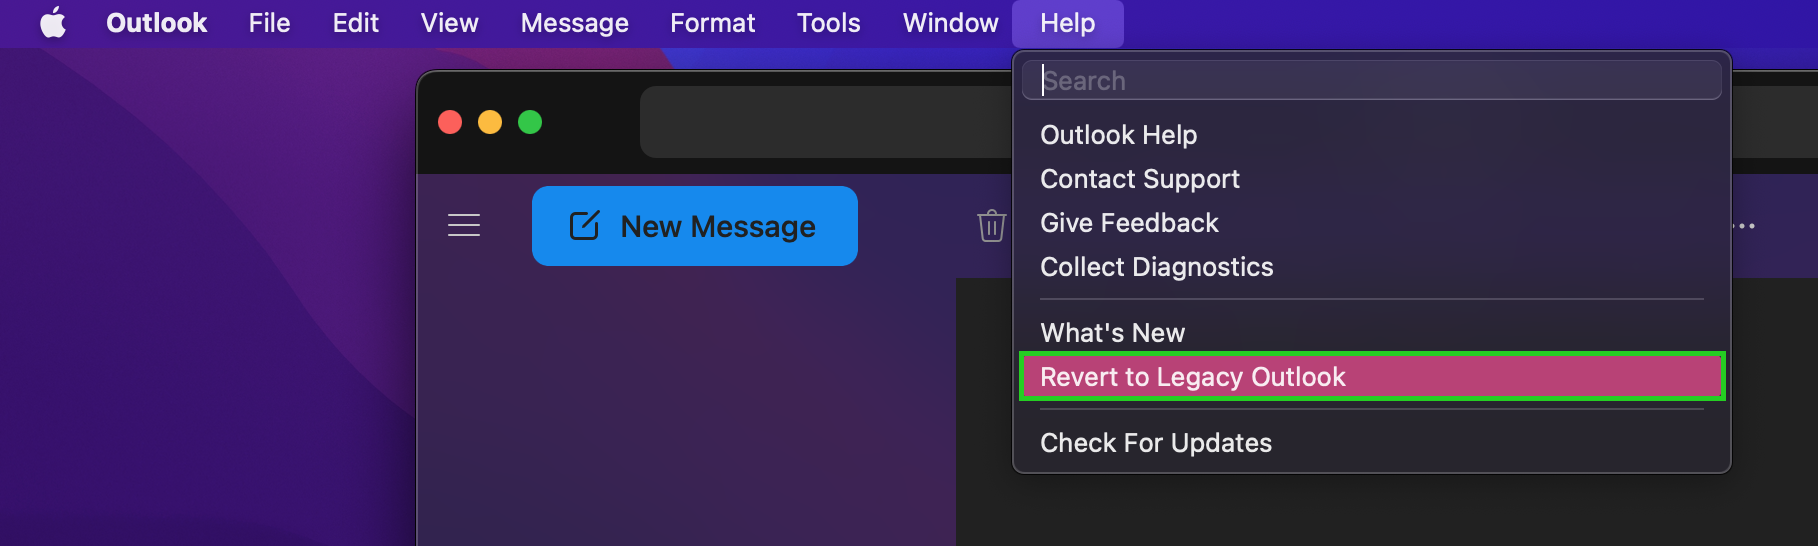
From the top menu bar, click Help > Revert to Legacy Outlook.
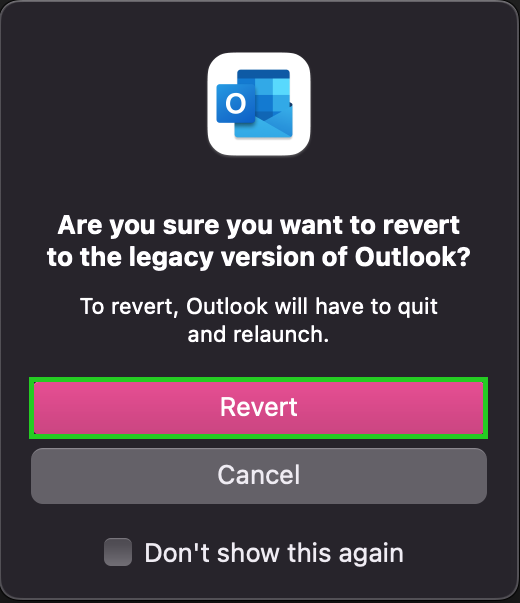
The following window appears: Are you sure you want to revert to the legacy version of Outlook?
Click Revert.
Setting Up an Account in Outlook 2019
Launch Outlook 2019 for Mac.
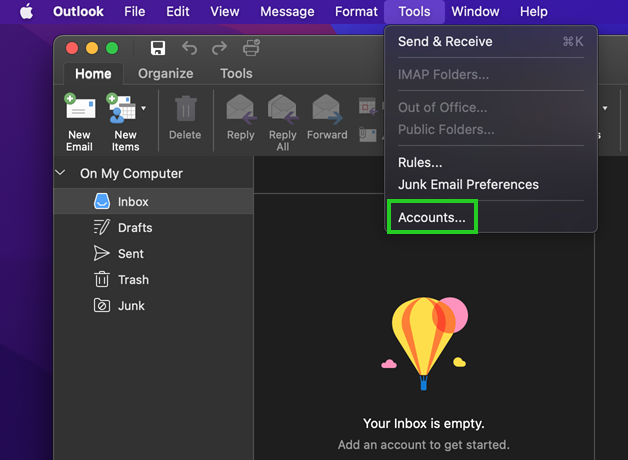
Click Tools > Accounts in the top menu bar.
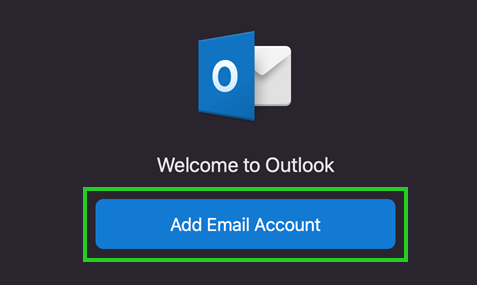
Click Add email account.
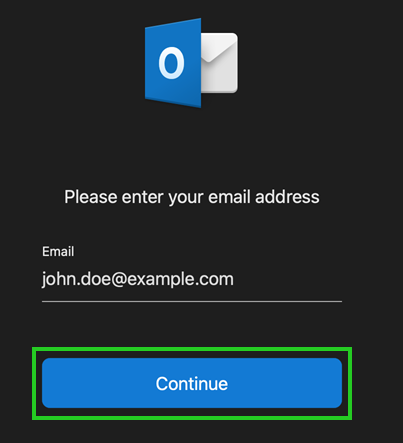
Enter the email address of your Microsoft Exchange 2019 account and click Continue.
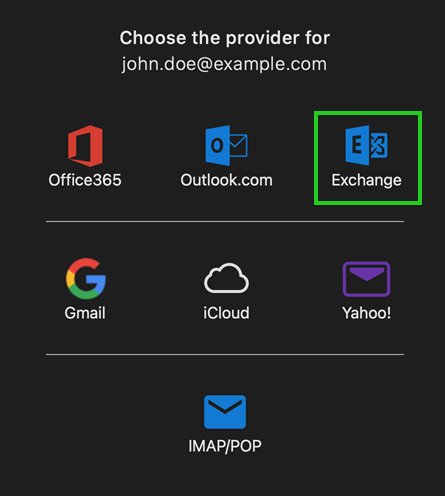
Select Exchange.
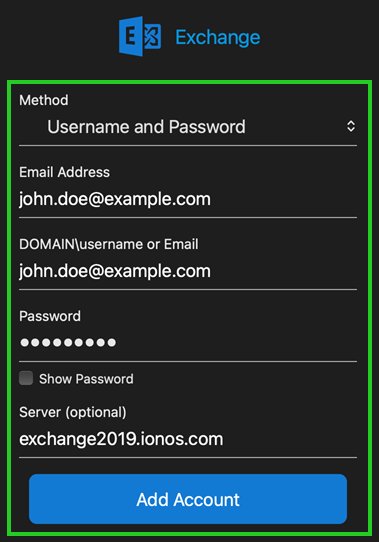
Enter your Exchange account information:
Method: Username and password
Email address and DOMAIN\username or email: The full email address of your Microsoft Exchange 2019 account, respectively.
Password: The password you assigned when you set up Microsoft Exchange 2019.
Server (optional): exchange2019.ionos.com
To complete the account setup, click Add Account.
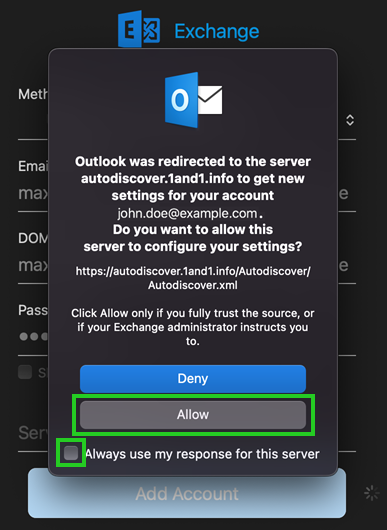
If Outlook is able to connect to the Exchange server successfully, you will be prompted to authorize Autodiscover for the server autodiscover.1and1.info. When you see this message, enable the Always use my response for this server option and click Allow.
Your Exchange 2019 account will now be added to Outlook.
Outlook 2016
Install Outlook 2016 on your Mac. For more information, click here.
Launch Outlook 2016.
Click Tools > Accounts in the top menu bar.
Click Add email account.
Enter the email address of your Microsoft Exchange 2019 account and click Next.
Select Exchange as the provider.
Enter your email account information:
Method: Username and password.
Email address and DOMAIN\username or email: The full email address of your Microsoft Exchange 2019 account, respectively.
Password: The password you assigned when you set up Microsoft Exchange 2019.
Server (optional): exchange2019.ionos.com
To complete the account setup, click Add Account.
If Outlook is able to connect to the Exchange server successfully, you will be prompted to authorize Autodiscover for the server autodiscover.1and1.info. When you see this message, click Allow.
Your Exchange 2019 account will now be added to Outlook.