Microsoft Exchange: Exporting data
Would you like to export your data from Microsoft Exchange? This article explains how to export your data from Microsoft Exchange to a .pst file.
Microsoft Exchange 2019 from IONOS includes a download for Microsoft Outlook 2016, Microsoft Outlook 2019, and Microsoft Outlook 2024. You can use these programs to export your data. You can find instructions on how to download Microsoft Outlook 2016, Microsoft Outlook 2019, and Microsoft Outlook 2024 in the following article: Download Microsoft Outlook for Microsoft Exchange 2019
To download a .pst file in Microsoft Outlook 2016, Microsoft Outlook 2019 and Microsoft Outlook 2024, complete the following steps:
- Start Microsoft Outlook
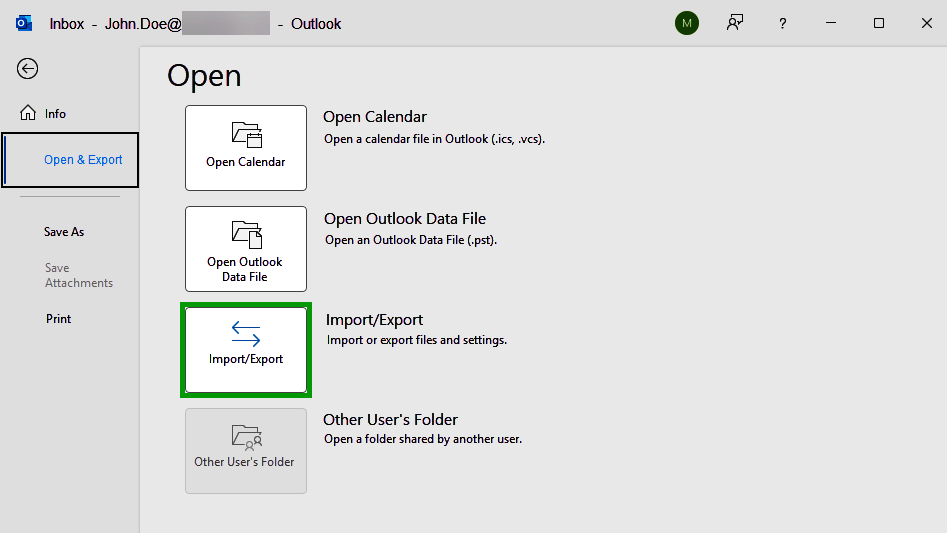
- Click on File. The Inbox - [E-MAIL ADDRESS] area opens.
- Click on Open & Export.
- Click on Import/Export. The Import and Export Wizard window opens.
- Select the Export to file option in the Import and Export Wizard.
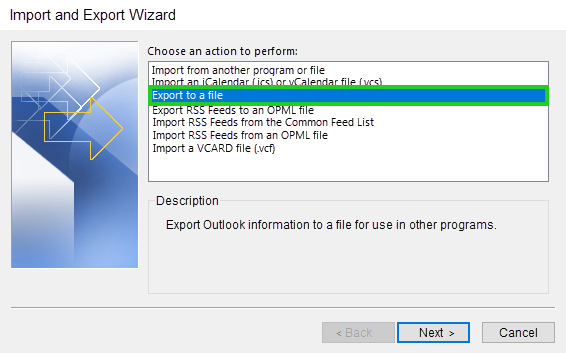
- Click on Next.
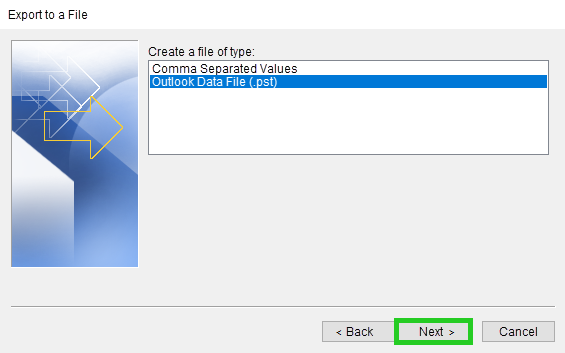
- Select the Outlook Data File (.pst) option.
- Click on Next.
- Now select the (email) folders to be backed up. If you want to back up the entire mailbox content (recommended), select the mailbox itself and activate the Include subfolders option. Once you have made your selection, click Next.
- Click Browse to specify the storage location and name for the export file.
- Select the storage location and specify the file name for the export file.
- Accept your settings by clicking OK.
- You can now decide how Outlook should handle duplicates. If in doubt, we recommend that you leave the default setting Replace duplicates with items exported .
- The option Replace duplicates with items exported means that the data - for example an email - is only saved once in the file.
- The option Allow duplicate items to be created means that the same data is saved multiple times during repeated exports.
- The option Do not export duplicate items means that only the data that has been added since the last export is saved. - Click on Finish.
- If you want to protect your data from unauthorized access, you can now secure the file with a password. Access to this file is then only possible with a password.
- Enter the desired password in both fields and click OK (if you do not require a password, simply leave the field empty).
Outlook now completes the export without any further feedback.