Setting up your AI Receptionist
Valid for AI Receptionist.
The AI Receptionist is an intelligent voice assistant that answers calls for your business, takes messages, and manages inquiries. The AI Receptionist is generated directly from your company's Google Maps profile or website, allowing you to set it up in just a few minutes using information that is already available online.
This article explains how to activate and set up the AI Receptionist after purchasing the plan.
Requirements
- You have purchased the IONOS AI Receptionist package.
- You have an active website or a Google Maps business profile.
Verifying the booking process in Google Maps (restaurants Only)
Before setting up the receptionist, confirm whether bookings are handled inside the Google Maps interface. On the business’s Google profile, look for the Reserve a table button.
Click it and verify that the entire booking flow stays within Google Maps. If clicking Reserve a table redirects to a third-party website (such as OpenTable or Resy), the AI Receptionist cannot book directly in Maps. Instead, it will automatically send a booking link to the caller via SMS.
Starting the setup
The setup wizard automatically retrieves information about your business to configure a working voice assistant instantly.
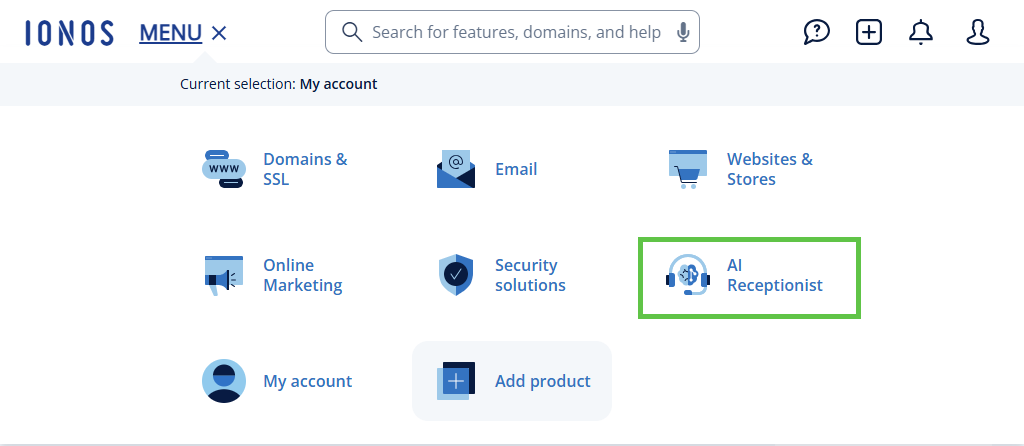
- Log in to your IONOS account.
- Click Menu > AI Receptionist in the title bar.If you have not yet set up your receptionist, the setup wizard will start automatically.
- On the setup screen, you will see a text field labeled Enter your business URL.
- Select Website if you want the AI to learn from your business website.
- Select Google Maps if you want the AI to learn from your Google Business Profile (location, hours, contact info).
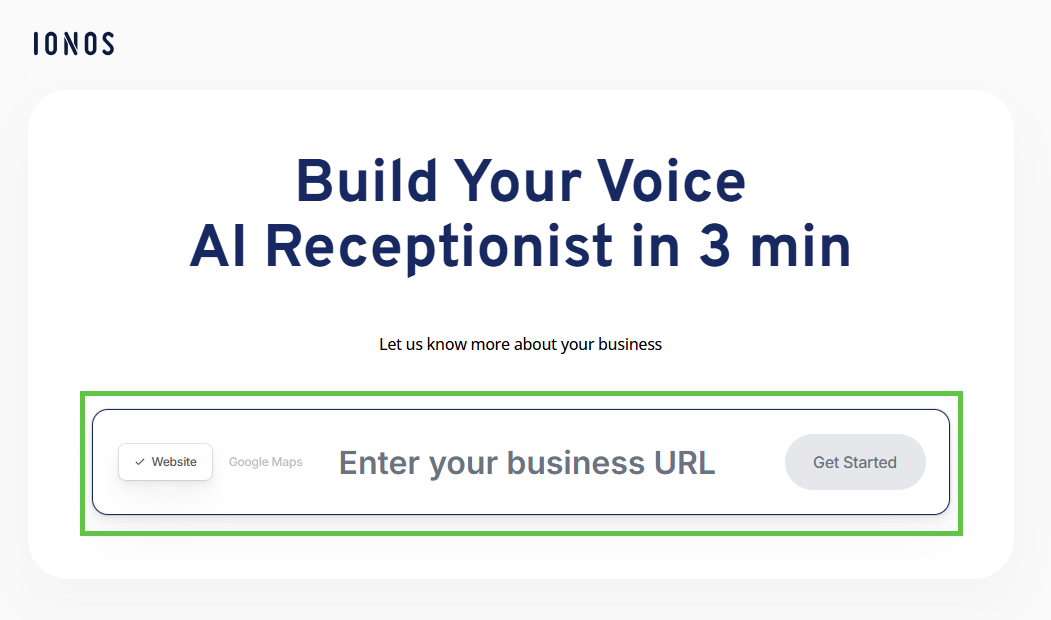
- Enter the URL:
- For Website: Paste your full website address (e.g., https://www.your-business.com).
- For Google Maps: Enter your business name or location to find your specific Google Maps profile URL.
Click the Get Started button.
The AI will begin analyzing your business data, specifically looking for your menus, services, business hours, and FAQs. During this process, a video will play explaining the next steps. Wait for the analysis to complete.
- Click Next once the system is ready.
Note
The automated setup cannot read information trapped inside PDFs, images, or highly dynamic website content. If your website relies on a PDF menu or image-based pricing, you will need to add this information manually later in the portal.
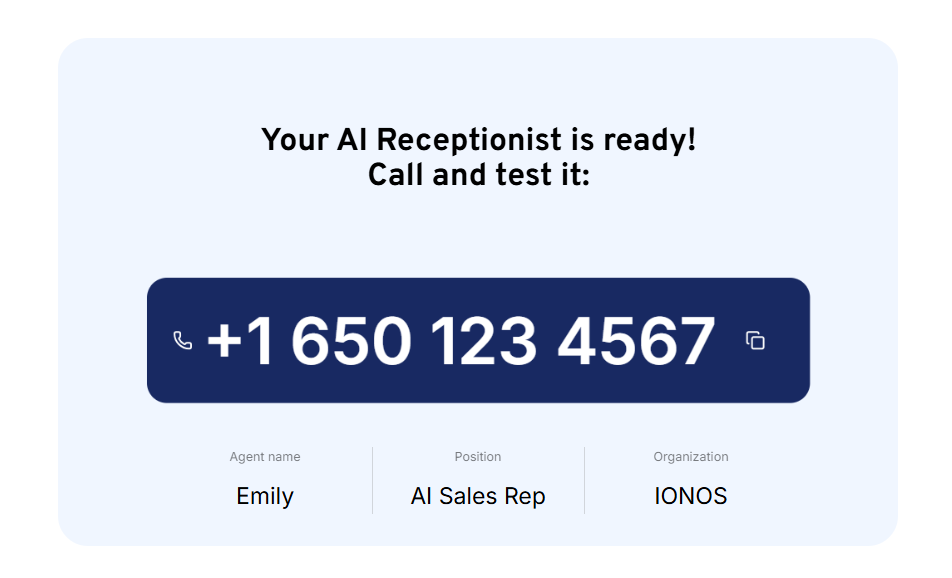
- Once the process is complete, which usually takes a few minutes, you will see a confirmation screen displaying the phone number of your AI Receptionist (e.g. +1 650...).
Next steps
On the confirmation screen, you will see four options to fully integrate the AI Receptionist into your daily business:
Step 1: Start receiving calls
Connect your phone number to your AI Receptionist so it can answer calls on your behalf. Your phone will ring a few times first, giving you a chance to pick up — if you don't answer, the AI takes over. Setup takes just a few minutes.
For more information, see the article: Setting up call forwarding for your AI receptionist.
Step 2: Get your chatbot
The AI Receptionist also offers the option of adding a chat agent to your website. If you are still on the confirmation screen, click the Step 2: Get Your Chatbot tile to view your personal widget script. You will need to insert this script into your website’s HTML code, either in the <head> section or just before the closing </body> tag.
You can also access the script later via your AI Receptionist dashboard.
For more information on embedding the chat, see the article Integrating the web chat widget into your website.
Step 3: Start making calls
Reach out to customers proactively with automated outbound campaigns. Upload contact lists, create personalized scripts, and schedule calls for optimal times. This feature is ideal for appointment reminders, follow-ups, and promotional outreach.
For instructions on setting this up, see the article Configuring the outbound caller.
Step 4: Access call history and AI agent portal
Head to your dashboard to review calls, fine-tune your AI Receptionist, and manage customer interactions.
Accessing the AI agent portal from the confirmation screen:
Click on the Step 4: Access call history and AI agent portal tile if you are still on the setup confirmation screen.
Click on Go to Dashboard. You will then be redirected directly to your AI Receptionist’s dashboard.
Accessing the AI agent portal again later:
- Log in to your IONOS account.
- Click on Menu > AI Receptionist in the title bar. The overview page for your AI receptionists will open. If you have ordered more than one AI receptionist, they will be displayed here.
- Click on Customer Portal under Actions for the desired receptionist. The AI agent portal dashboard opens.