Enabling SSL Encryption in Outlook for Microsoft 365
This article explains how to send and receive encrypted emails with Microsoft Outlook installed through Microsoft 365. Simply follow the steps below:
Guided Steps
Open Microsoft Outlook.
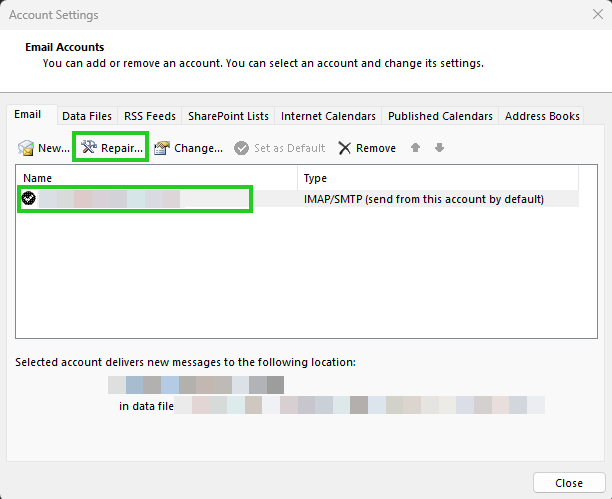
Click File and select Account Settings > Account Settings... in the Account Information section.
Select the desired account and click Repair...
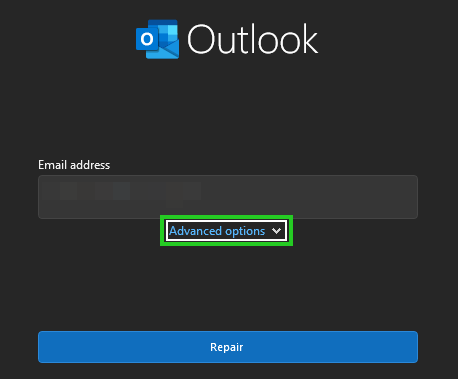
Click Advanced Options.
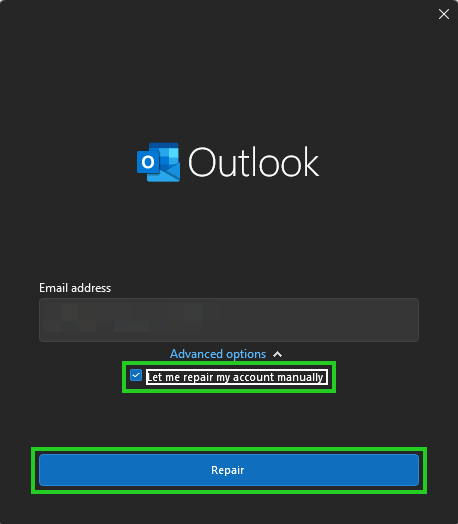
Check the Let me repair my account manually option and click Repair.
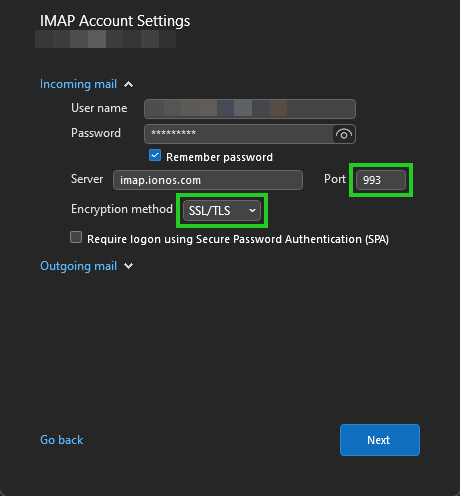
The IMAP Account Settings window opens.
If you are using IMAP, enter 993 in the Port field of the Incoming mail section. If you are using POP3, enter 995 in the Port field of the Incoming mail section.
Also in the Incoming mail section, select SSL/TLS in the Encryption method field.
Click Outgoing Email.
Enter 465 in the Port field.
Select SSL/TLS in the Encryption method field.
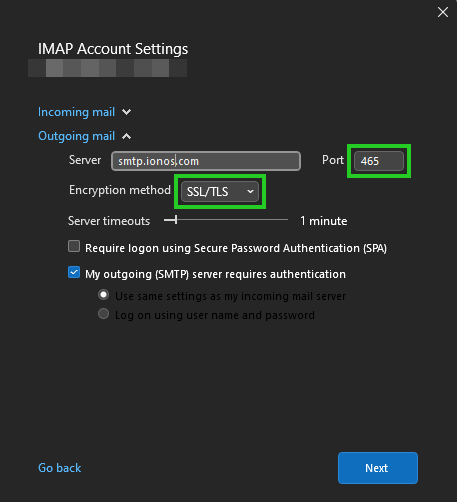
Click Next.
Finally, click Done.
SSL encryption is now successfully enabled for sending and receiving your emails in Outlook for Microsoft 365.
Please Note
Are you using the Automatic encryption method in combination with port 465 for the outgoing mail server (SMTP), but it is not working for you?
If you receive error messages when sending email, change the SMTP connection type to STARTTLS and enter port 587 in the Outgoing mail server (SMTP) field. After retesting, you should no longer receive any error messages.
For more information, please see the following article:
IONOS Email: Server Details for IMAP, POP3, and SMTP Connections