Creating an Email Campaign
This article shows you how to create and edit a new email campaign in IONOS Email Marketing.
In IONOS Email Marketing, you create campaigns that summarize all the important settings for sending an email:
- Content
- Design
- Recipient addresses
- Sender configuration
- Sending dates
- Success overview
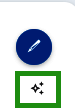
Support Through Artificial Intelligence (AI)
IONOS supports you with AI when creating text, e.g. headlines and campaign text. Click on the AI icon and you will receive suitable texts for your email campaigns with just a few keywords.
You can recognise AI support by the following symbol:
Creating an Email Campaign
- Log in to your IONOS account.
- Click on the Menu > Online Marketing > Email Marketing tile. The IONOS Email Marketing opens.
- In the menu bar on the left-hand side of the screen, click on Campaigns > Create new campaign.
- Give your campaign a name and then select a template.
- Add the relevant details for your campaign, e.g. subject and recipient lists.
Optional: Click on the AI icon to generate text. - Save your entries by clicking on the Save button.
Editing an Email Campaign
- Open an email campaign.
- Click on the Edit content button in the campaign overview. The editing view opens.
- Click on an existing element (text or images) to edit it. Add new elements via the column on the right-hand side of the screen.
Click on the AI icon to easily create content texts or alternative texts and titles for existing images.
Checking and Sending an Email Campaign
The following functions are available at the top right of the overview page to ensure the quality of your e-mail campaigns:
- Preview: You can display a preview of your campaign in various views using the button Preview.
- Send test: You can send your campaign to one or more email addresses as a test using the button Test send. The email address of your IONOS account is always pre-filled, but this can be changed.
- Schedule: You can specify exactly when your email campaign should be sent. To do this, simply select the date and time under the button Schedule and click Schedule dispatch.
- View report: Once your campaign has been successfully sent, you will find an overview of the success of your campaign under the button View report.