Installing the Monitoring Agent on a Cloud Server (Windows)
Valid for Cloud Servers with Windows Server 2019, Windows Server 2022, and Windows Server 2025.
This article explains how to install the Monitoring Agent on a Cloud Server with the Microsoft Windows Server 2019, Microsoft Windows Server 2022, or Microsoft Windows Server 2025 operating system. You can use the Monitoring Agent to retrieve information about free hard disk space or running processes.
Complete the following to install the Monitoring Agent on your server:
Note
If you are using a local, host-based firewall on the server, you must allow incoming connections from the following IP addresses for TCP port 5666 in the firewall:
82.223.45.131
74.208.141.82
212.227.218.82
109.228.63.82
If you want to reject ICMP packets on your local, host-based firewall and use all monitoring checks, you must also allow ICMP.
Requirement
You are in the Cloud Panel in the Infrastructure > Servers area.
Install Monitoring Agent
Select the desired server.
Click on DVD drive. The Select DVD area opens.
Click on the Applications tab.
Click on Monitoring Agent.
Click on Load DVD.
The DVD is loaded. This process may take a few minutes.Click on Actions.
Click on Start KVM console.
Click on Send Ctrl+Alt+Delete in the top right-hand corner.
Log in to server as an administrator.
Open the File Explorer.
Click on the DVD drive.
Double-click on the file install_monitoring_agent.exe. The New Generation Cloud Server - Nagios Agent... window opens and the required files are unpacked.
The Monitoring Agent is now installed.
Note
To enable the monitoring policy to retrieve further information about the server, the existing rule for ICMP must be activated in the Windows Firewall.
Enable file and printer sharing in the Windows Firewall
How to enable file and printer sharing in the Windows Firewall:
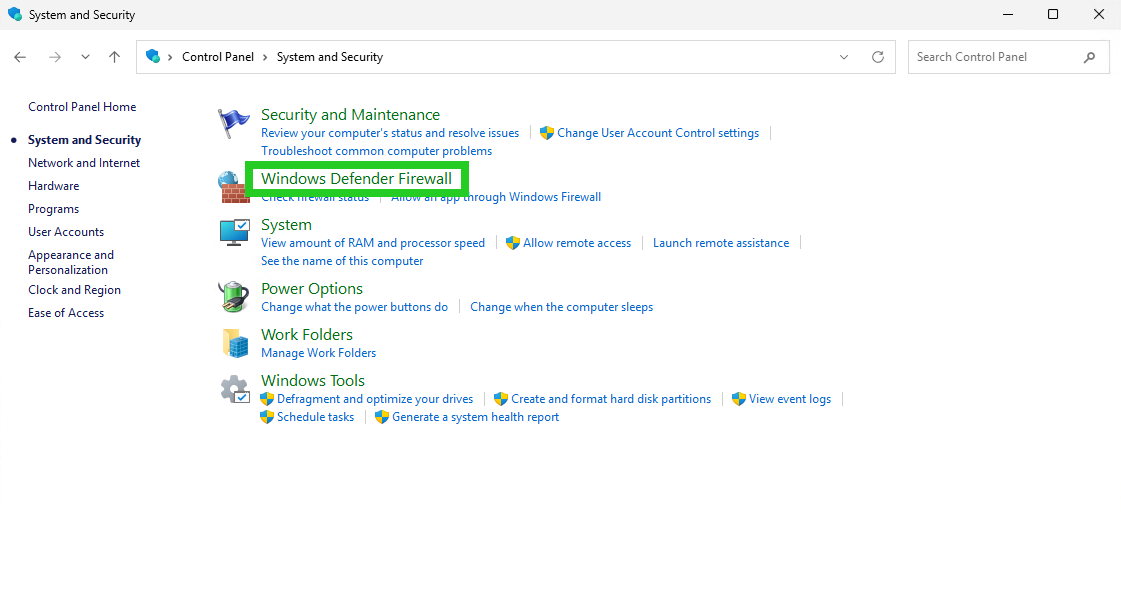
Open the Control Panel.
Click on System and Security. The System and Security window opens.
Click on Windows Firewall. The Windows Defender Firewall window opens.
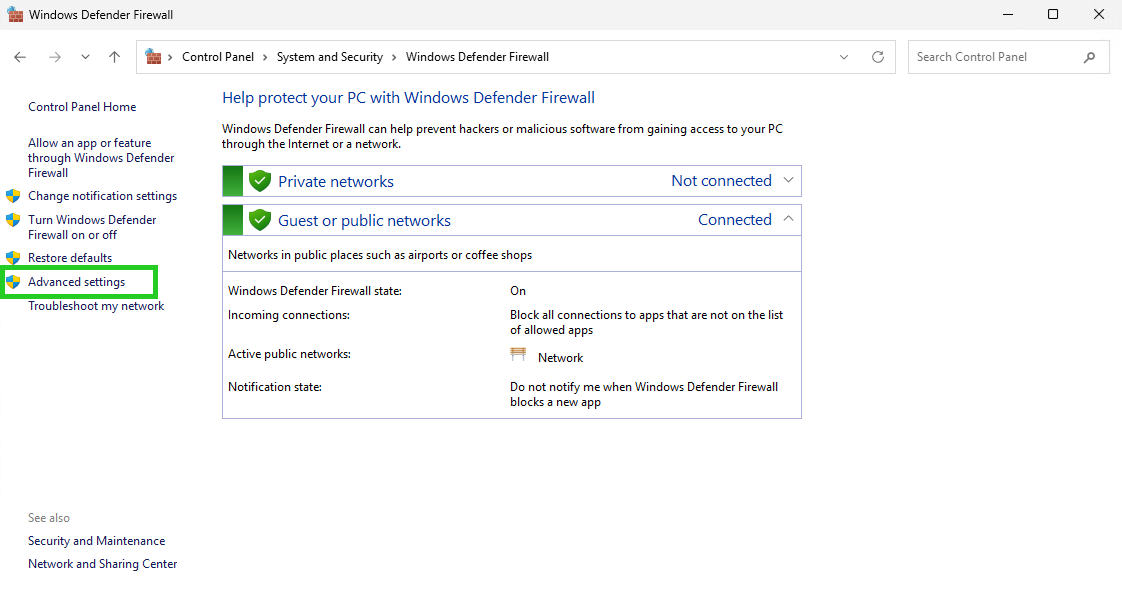
- Click on Advanced settings in the navigation bar on the left. The Windows Defender Firewall with Advanced Security window opens.
- Click on Inbound Rules.
- Right-click on the list item File and Printer Sharing (Echo Request-ICMPv4-In) and select the Enable Rule action.
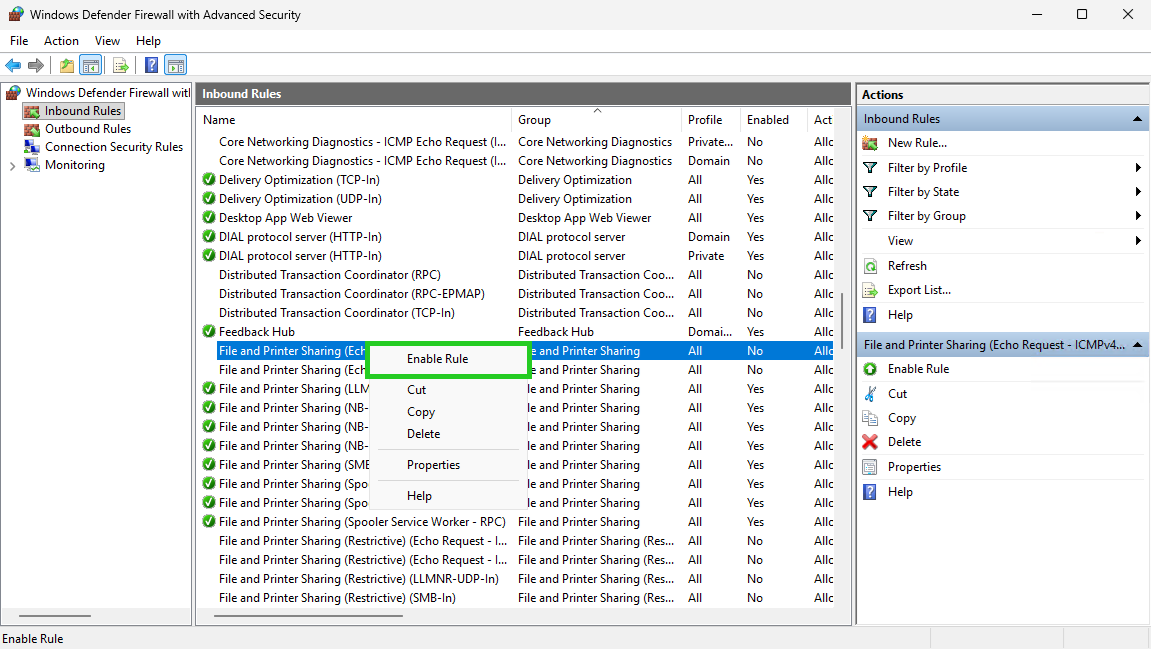
The rule is now activated.