Setting up a private network for Cloud Servers (Windows Server 2019, Windows Server 2022, and Windows Server 2025)
Valid for Cloud Servers with Windows Server 2019, Windows Server 2022, and Microsoft Windows Server 2025.
In a private network, the server communicates via local IPs that are not routed on the Internet. To be able to use a server in a private network, you must configure the network interface on the server. Complete the following to configure the network interface:
Requirements
You have created a private network.
You have assigned the desired server to the private network in the Cloud Panel.
You have logged in to server.
Note
As soon as the server has been assigned to the private network, an additional virtual network adapter with the information "Unindentified network" is automatically displayed in the network connections.
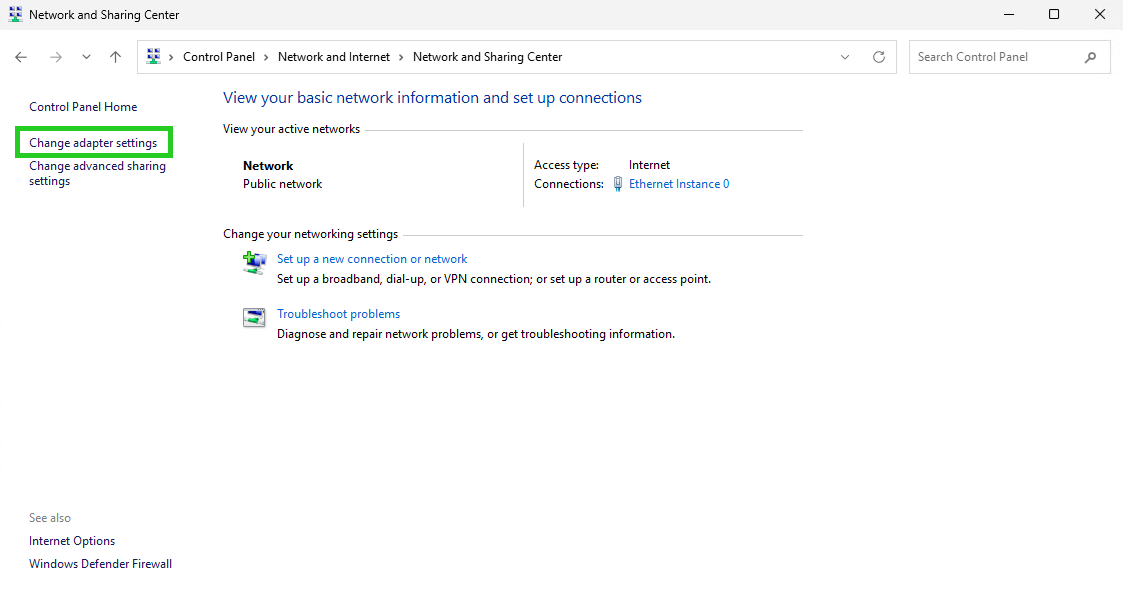
Open the Control Panel.
Click on Network and Internet > Network and Sharing Center.
Click on Change adapter settings.
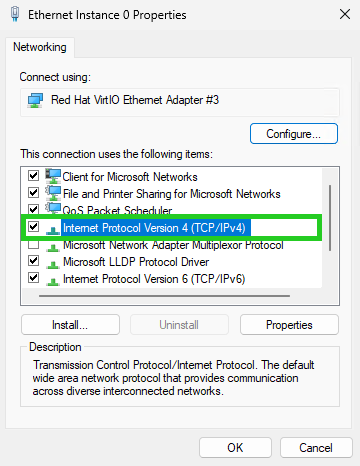
Double-click on the additional virtual network adapter with the information Unidentified network. The [NAME_OF_NETWORK] Status window opens.
Click on Properties. The [NAME_OF_NETWORK] Properties window opens.
In the This connection uses the following items list, double-click Internet Protocol Version 4 (TCP/IPv4). The Internet Protocol Version 4 (TCP/IPv4) Properties window opens.
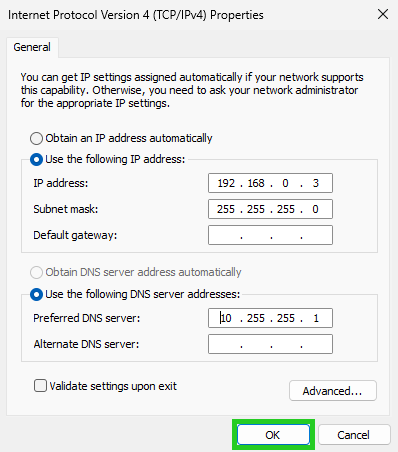
Enter the desired IP address from the private IP address range in the IP address: field. In the following example, the server is using the IP address 192.168.0.3. Further information can be found in RFC 1918.
Enter 255.255.255.0 in the Subnet mask field.
Optional: If the server is not to be used as a DNS server, enter the IP address 10.255.255.1 in the Preferred DNS server: field.
Click on OK.
- Click OK in the [NAME_OF_NETWORK] Properties window.
- In the [NAME_OF_NETWORK] Status window, click Close.
The server can now be reached under the selected IP in the private network.