Installing Plesk (Windows VPS)
For Windows VPS Managed in the Cloud Panel
In this article, we'll show you how to install Plesk on a Windows VPS.
Please Note
Plesk can only be installed on Windows VPS servers of type S or higher. In this context, also note the system requirements for Plesk Obsidian. These are listed in the following article:
Hardware Requirements for Plesk Obsidian
An overview of the software requirements can be found here:
To set up Plesk for Windows with the default configuration, follow the steps below:
Enabling the Required Ports in the Cloud Panel
To install Plesk, incoming traffic must be allowed on TCP 8443 and TCP 8447 ports. These ports are enabled by default in the firewall when you purchase a VPS. If you want to use other Plesk services, you need to create additional rules in the firewall to enable these ports.
A list of ports and protocols used by Plesk can be found in the following article:
https://docs.plesk.com/en-US/obsidian/administrator-guide/64950/
To create a new rule in the firewall, follow these steps:
- Log in to your IONOS account.
In the title bar, click Menu > Server & Cloud. If necessary, select the desired Server & Cloud contract.
In the navigation bar on the left, click Network > Firewall Policies.
Select the firewall.
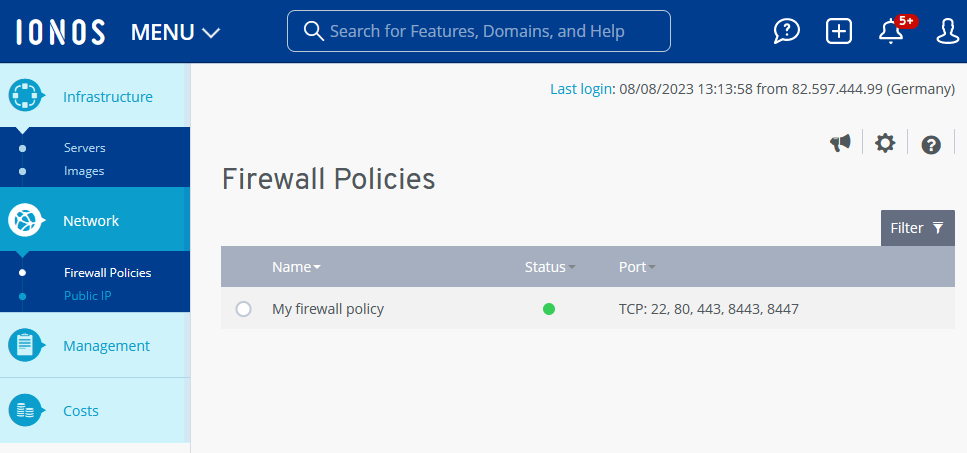
Create a new rule in the Configuration area. To do this, enter the desired port.
Click the green check mark to add the rule.
Generating the Plesk License Key
Open the Cloud Panel.
In the Infrastructure > Servers section, select the desired server.
Scroll down to the Plesk: section.
In the Plesk License Key field, click Generate Plesk License Key.
Click Yes.
Make a copy of the license key.
Establishing a Connection to the Server
To perform the next steps, you need to connect to your server using SSH with your local computer. The following articles explain how to do this:
Installing Plesk
To install Plesk with the default configuration, do the following:
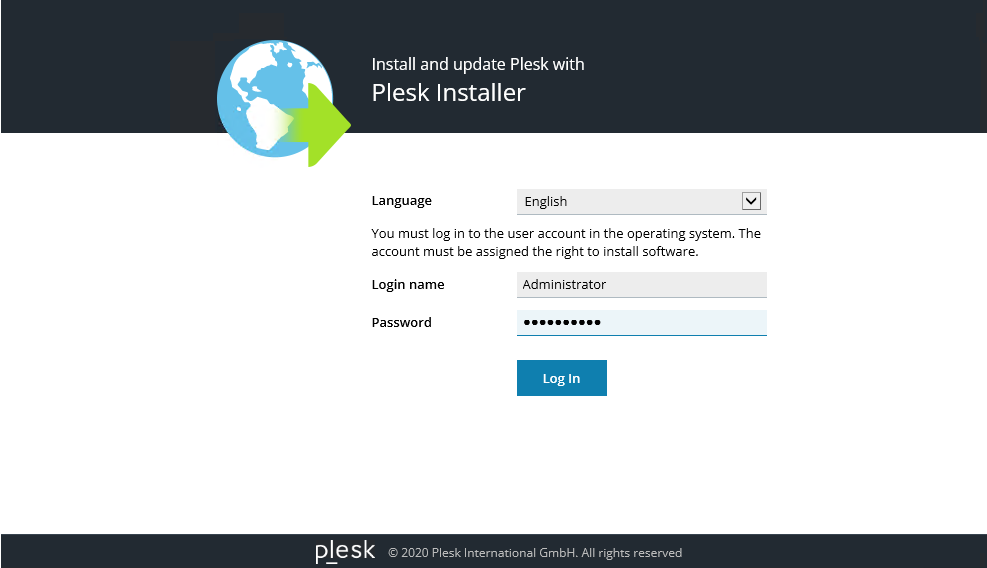
Log in to the server as an administrator.
Download the Plesk Installer and save the file in a directory that you can easily access. To do this, open the following link with your browser:
https://installer-win.plesk.com/plesk-installer.exeIn the search bar located in the taskbar, type cmd.
Double-click Command Prompt.
Change to the directory where the installation file is located. To do this, enter the following command:
cd /NAME_OF_EXAMPLE_FOLDER
Example:
C:\Users\Administrator> cd /NewFolder
To install Plesk, enter the following command:
plesk-installer.exe --web-interface
Example:
C:>New Folder>plesk-installer.exe --web-interface
A browser window opens.
Enter credentials of the administrator account of your server and click Log In.
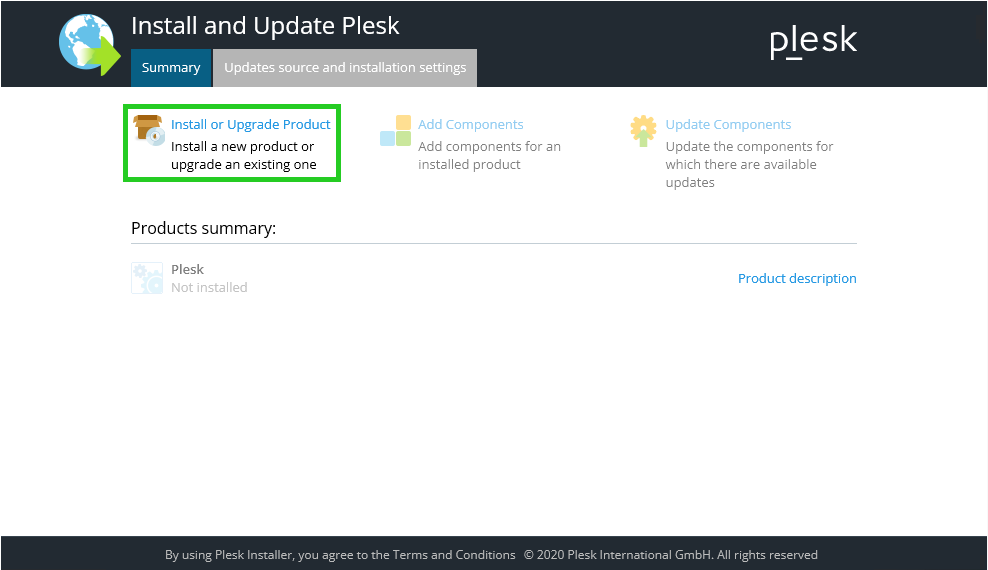
After logging in, you will see the welcome screen of the installation user interface. Here you can later add, remove or upgrade Plesk components. However, at the beginning, only the option for installing Plesk is available.
Click Install or Upgrade Product.
Select the Plesk box.
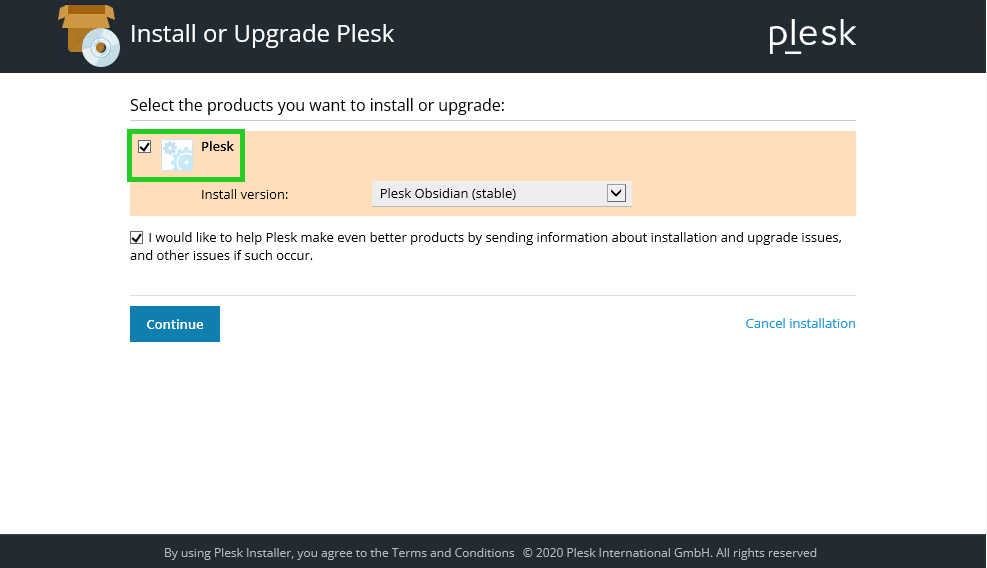
Optional: In the Installation type field, select the desired installation type. The installation type determines which Plesk components and features are installed. The following installation types are available:
The Recommended installation type includes all the components for web hosting (including web server, mail server, database server, etc.) and the most popular and frequently used features. If you are not sure which installation type to choose, the Recommended option is a good choice.
The Complete installation type includes all Plesk components and features.
The Custom installation type lets you select the items you want to install from a list of available components and features. This method is recommended for experienced Plesk administrators.
Please Note
You can add or remove components at any time after installation.
Click Continue.
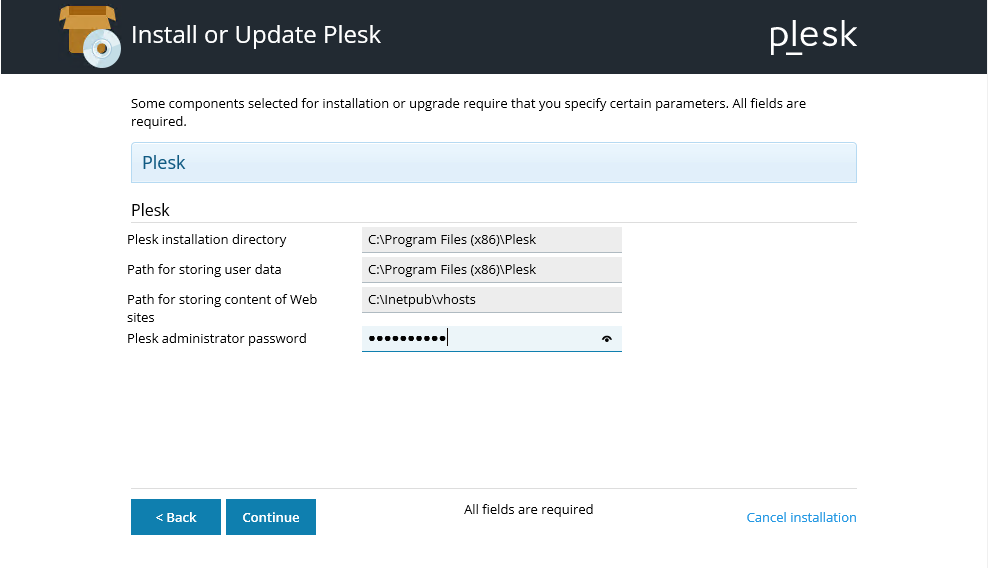
Optional: In the Plesk installation directory field, change the installation directory.
Optional: In the Path for storing user data field, change the directory where user data is stored.
Optional: In the Path for storing content of web sites field, change the directory where the content of the websites hosted in Plesk is stored.
Optional: In the Plesk administrator password field, type the password for the Plesk administrator.
Click Continue.
Plesk will now be installed. The installation may take some time. The duration depends on the number of components to be installed, the available system resources, and the speed of the Internet connection.
The First Time Logging In to Plesk
First, open the following URL in your browser (replacing example with your serv'er's IP address:
https://example:8443
If you are using Chrome, click Advanced, and then click the Next link to YOUR SERVER IP ADDRESS (insecure).
Example:
Next to 123.456.78.912 (insecure)
If you are using Mozilla Firefox, click Advanced... and then click Accept Risk and continue.Log in with the root user account and its password.
In the Email field, enter your email address.
In the Password field, type the password you want.
Make a note of the login information.
In the Select your license type field, enter the license key.
Accept the end-user license agreement.
Click Enter Plesk.
The Plesk user interface opens.