Creating an Additional Windows Server 2019/2022 Administrator Account
For servers running Microsoft Windows Server 2019 or 2022
In this article, we'll show you how to create additional Windows Server 2019/2022 administrator accounts.
Creating an Account
Log in to the desired server as an administrator.
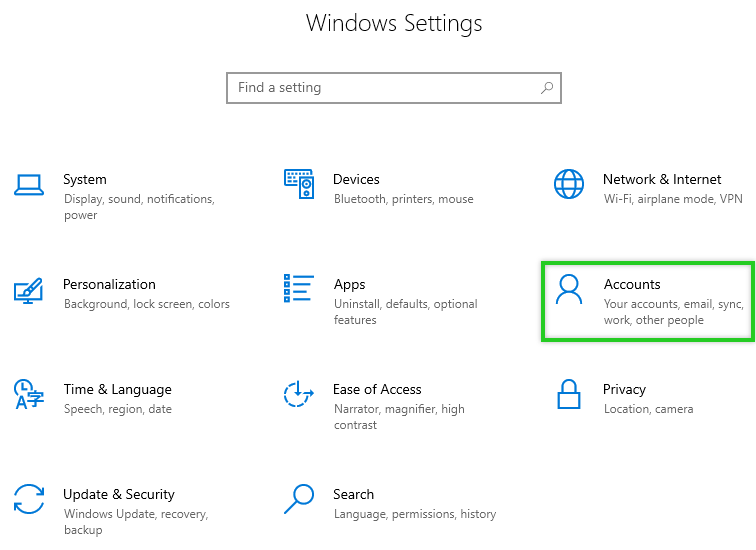
To open Windows Settings, type the word Settings in the search bar located on the taskbar. Alternatively, click Start > Settings.
Click Accounts.
Click Other Users.
Click Add another person to this PC.
In the navigation bar on the left, click Users.
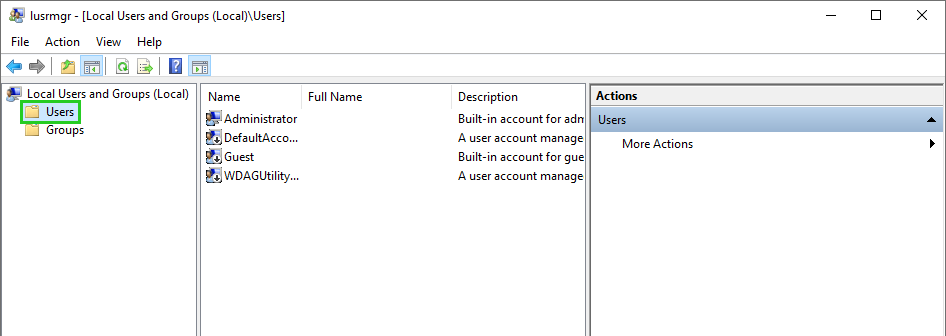
In the menu bar, click Action > New User.

In the User name field, enter the desired user name.
Optional: In the Full name field, type the name of the administrator.
Optional: Enter a description in the Description field.
Enter the desired password and repeat it.
Attention
If the option User must change password at next login is activated, the new user will not be able to log in via Remote Desktop Connection before changing the password. Therefore, make sure that this option is deactivated.
Click Create.
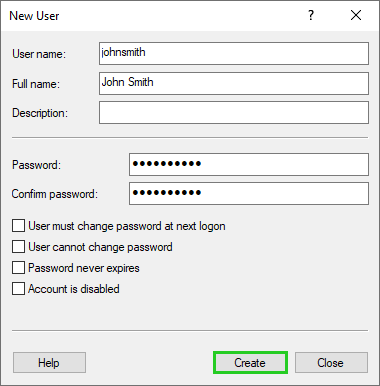
Click Close.
Adding a User to the Administrators Group
To give the new user administrator rights, they must be added to the Administrators group. To do this, simply follow these steps:
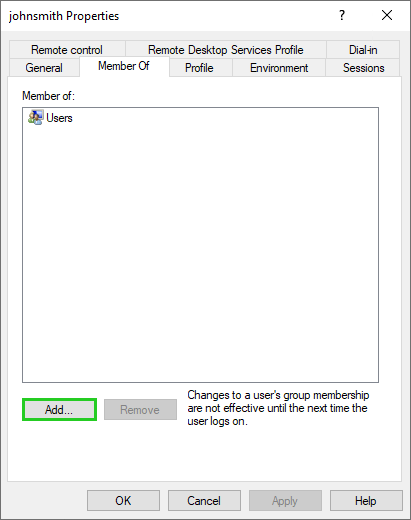
Double-click the user you created.
In the Member Of tab, click Add.
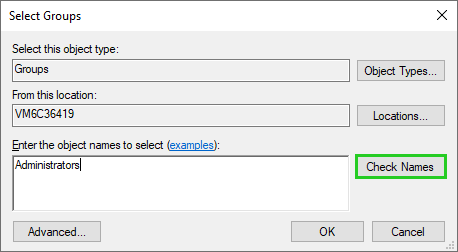
In the Enter the object names to select field, type the object name Administrators.
Click Check Names.
Click OK.
In the Member of tab, click Users.
Click Remove.
Click Apply and OK.
The new user can now log in to the server and change their password.
You can find more information here:
Changing the Windows Server 2016/2019 Administrator Password