Disable Spam Report and Configure Custom Spam Protection Settings
Please use the “Print” function at the bottom of the page to create a PDF.
For Mail Basic and Mail Business
To disable the spam report, you must manually configure the spam protection settings. To do this, follow these steps:
Log in to Webmail.
Click on the cogwheel symbol in the blue main navigation at the top right.

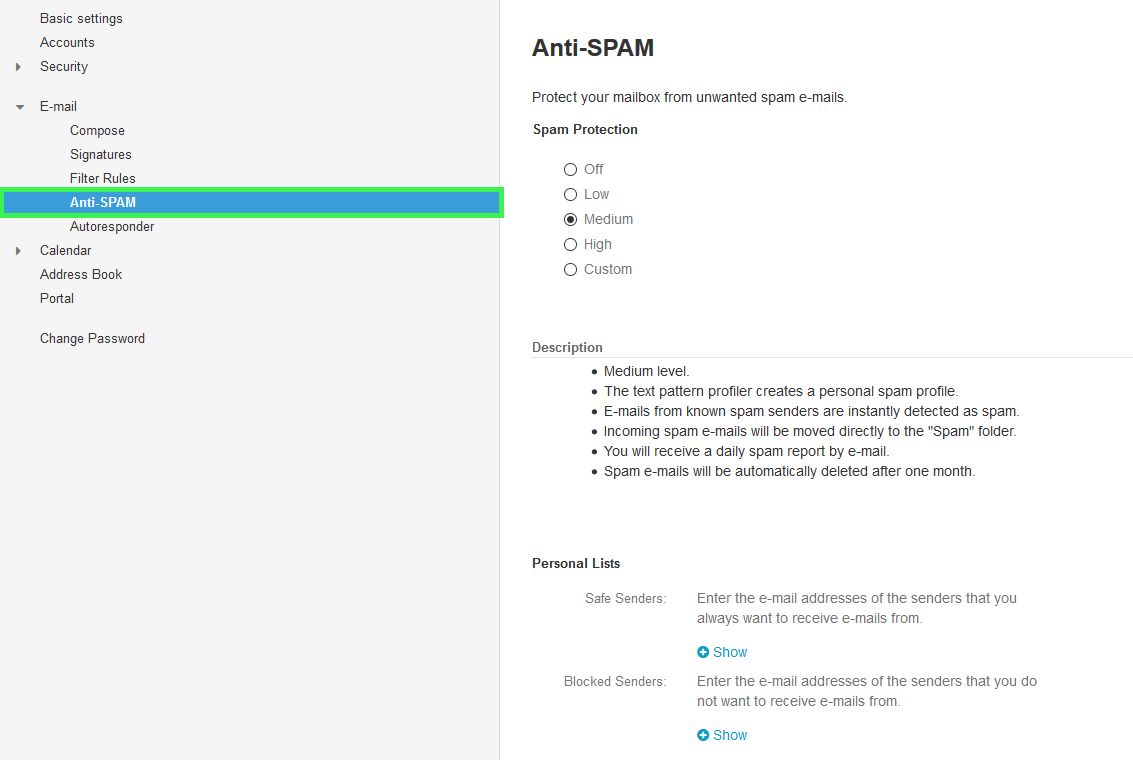
Click Anti-SPAM in the navigation bar on the left under Email.

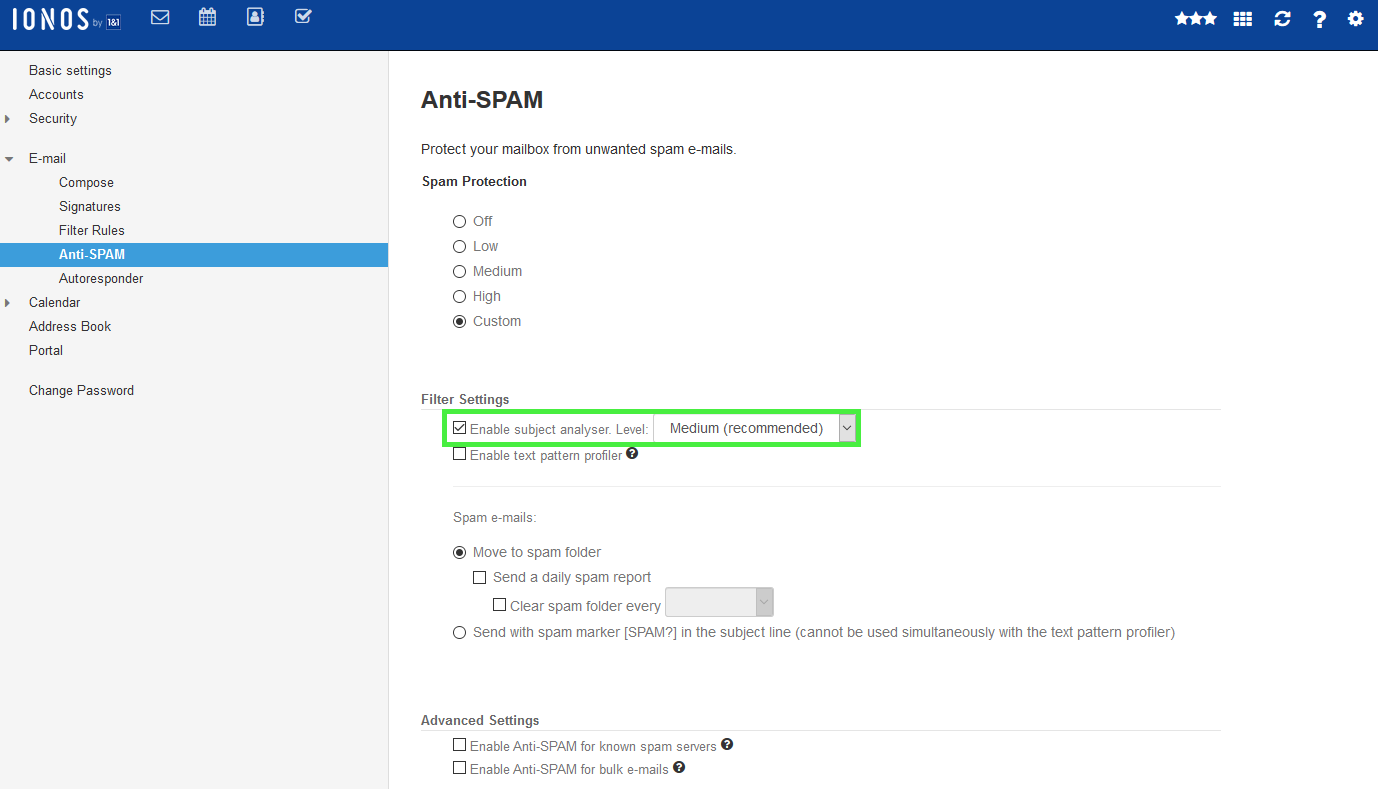
Select Custom option and make sure that the option Send spam report daily is disabled.
Enable Letter Header Analysis and select the Medium or High level. The Letter Header Analysis checks the headers of the received emails. If a received email contains indicators that point to spam, points are assigned for this. These points form the SpamScore. Based on the SpamScore, your received emails are classified as spam or not spam.
Medium: In addition to the criteria of the Low level, static rules are applied, additional block lists are queried and checksums are created and checked.
High: In addition to the criteria of the Low and Medium levels, a lower threshold value is set for the classification of spam.

Enable the Text Pattern Profiler. The Text Pattern Profiler analyzes emails in the Spam folder and can improve the spam detection rate. Make sure to remove emails that were accidentally sorted as spam from the Spam folder so that the Text Pattern Profiler can correctly detect them in the future.
In the Advanced Settings section, enable the Enable Anti-SPAM for known spam servers option. If you enable this option, typical spam servers will be detected. In addition, all emails sent to your mailbox by these spam servers will be moved to spam folders.
In the Advanced Settings section, enable the Enable Anti-SPAM for bulk mails option. If you enable this option, bulk emails with identical content will be detected and moved to the Spam folder.
For more information, click here: