Setting Up Additional Email Accounts in the Samsung Email App (Android Devices)
For Mail Basic and Mail Business
In this article, we'll show you how to add additional email accounts to the Email app on your Samsung device. These instructions differ slightly from those showing you how to add your first email account to the app.
Please Note
For instructions on how to set up the first email account in the Email app, follow the link below:
Setting Up an Email Account on a Samsung DeviceThe setup of the e-mail account is described using a Samsung S21 smartphone with Android 13 as an example. The menu items listed below may differ on other Android models.
Start the Email app.
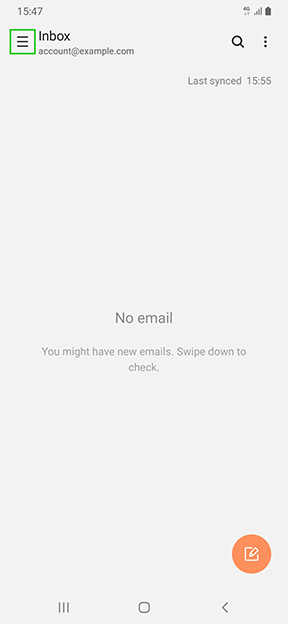
Tap on the three lines in the top left-hand corner.
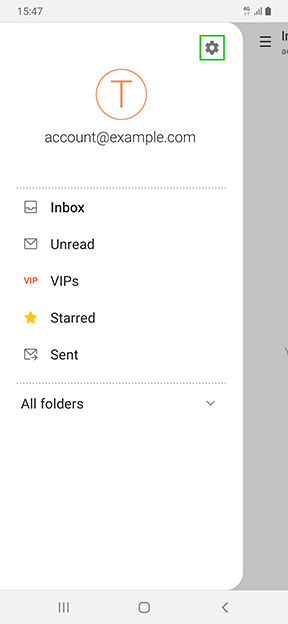
To open the settings, tap the gear icon at the top-right corner of the screen.
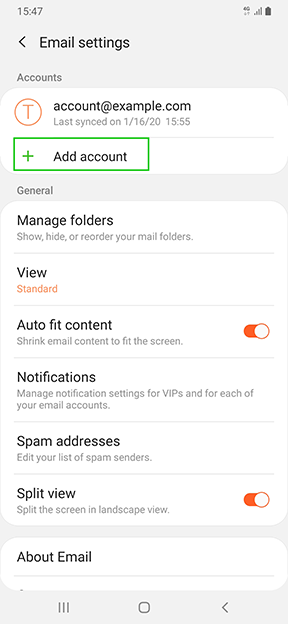
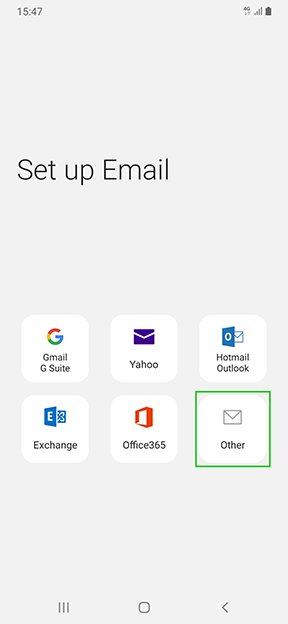
Tap Add Account.
Tap Other.
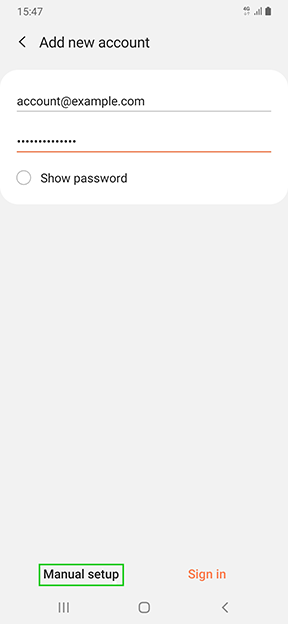
Enter your email address and password.
Note
If the password is not accepted, assign a new password for your e-mail address. For more information, see the article Changing an IONOS Email Account Password.
Tap Manual Setup.
Select the desired account type. You can choose between the following account types:
-POP3 account
-IMAP account
-Microsoft Exchange ActiveSync
We recommend that you use the default IMAP account. If you want to read and receive email from anywhere, set up the IMAP account type. By accessing your emails using the IMAP protocol, your email will remain on the server after you read them on your device. The messages are only downloaded completely when the message is opened. All actions (e.g. move or delete emails, create folders) are performed directly on the server.
If you manage your emails on one device only and you do not want to leave your messages on the server, create a POP3 account.
A list of the required settings is shown below:
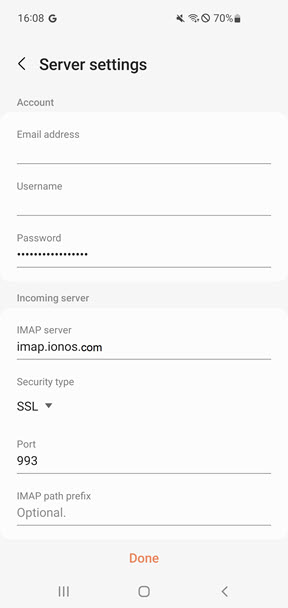
Incoming Server (Receiving Email)
| Setting | For IMAP | For POP |
|---|---|---|
| Server | imap.ionos.com | pop.ionos.com |
| Security Type | SSL | SSL |
| Port | 993 | 995 |
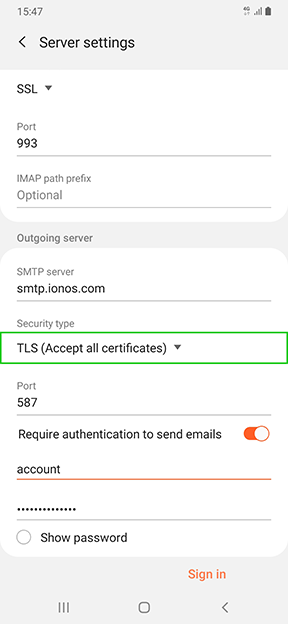
Outgoing Server (Sending Email)
| Setting | Your Input |
|---|---|
| SMTP server | smtp.ionos.com |
| Security type | TLS (Accept all certificates) |
| Port | 587 |
| Requires login | Set checkboxes |
| Username | The full email address of your email ###COMPANY_NAME###account |
| Password | The password you assigned when you set up your IONOS email address |
Make sure that your email address is entered in the User name field in the Account area.
If you are setting up an IMAP account, enter imap.ionos.com in the IMAP server field. If you are setting up a POP3 account, enter pop.ionos.com in the POP3 server field.
Select SSL in the Security type field.
Enter smtp.ionos.com in the SMTP Server field.
Under Security Type, select TLS (Accept all certificates).
Make sure that port 587 is entered in the Port field.
Enter your email address under the menu item Authenticate to send emails.
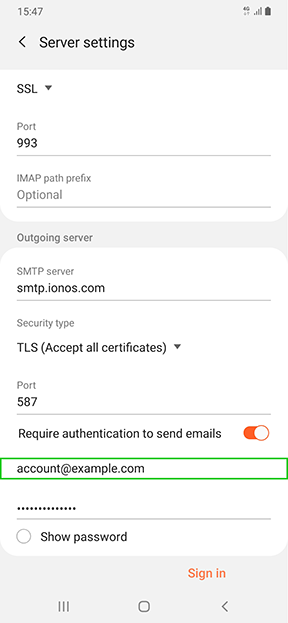
Tap Sign In.
The additional email account is now set up in the app and should be ready to use immediately.