Setting Up Plesk as a Name Server
For Cloud Server, VPS, Virtual Server Cloud and Dedicated Server, managed in Cloud Panel
This article explains how to set up Plesk as a custom name server. This guide was created with Plesk Obsidian 18.0.58 (Update No. 2). The required procedure is described using the Power User view.
Note
To avoid downtime during the name server change, connect your domain's DNS to Plesk in advance:
Preparation
Assign a second IPv4 address to your server. Optionally, you can also assign IPv6 addresses to your server. You can find instructions for this here:
Identify host Address and Additional IP Addresses
- Log in to your IONOS account.
Click Menu > Server & Cloud in the title bar .
Optional: Select the desired Server & Cloud contract.Select a server in the Infrastructure > Server section of Cloud Panel.
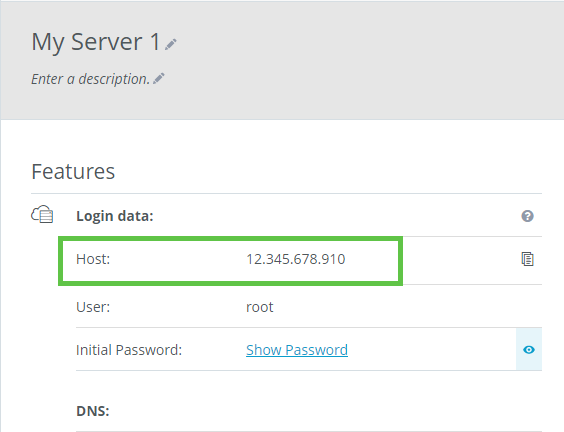
Scroll down to the Functions section and note down the IP address listed in the Host line.
Scroll to the IP section and note down the additional IPv4 address.
Optional: Note down the assigned IPv6 addresses.
Scroll to the Firewall policies section and note down the name of the assigned firewall.
In the menu on the left, click Network > Firewall policies.
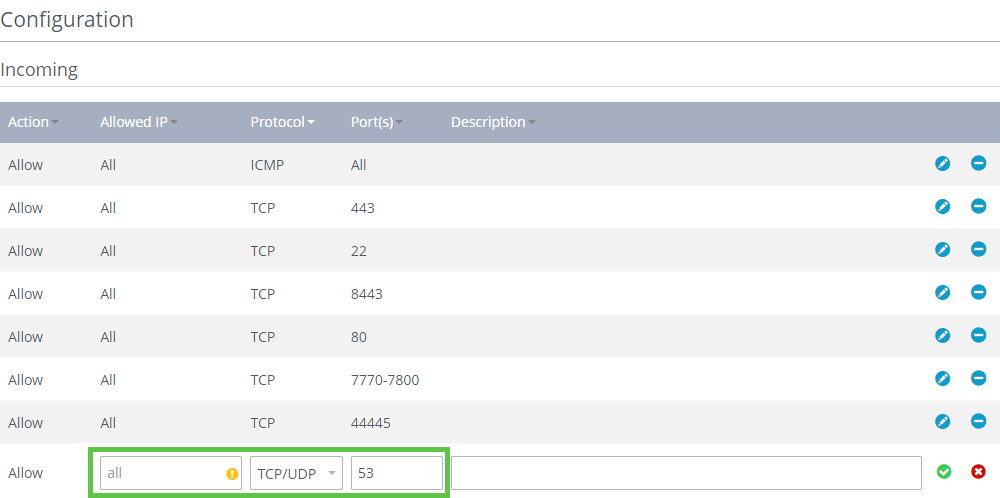
Ensure that port 53 for TCP/UDP connections has been added to the assigned firewall policy. To add port 53 for TCP/UDP connections, activate the firewall that is assigned to the server. Add the port in the Configuration area and select the TCP/UDP protocol in the Protocol column. Then click on the checkmark symbol.
Edit the Name Servers of Your Domain via the IONOS account
Click Menu > Domain & SSL in the title bar.
To access the name server details of your domain in your IONOS account, click on the cogwheel icon next to the desired domain
Click on Nameserver.
Click on the button Use personalised name servers.
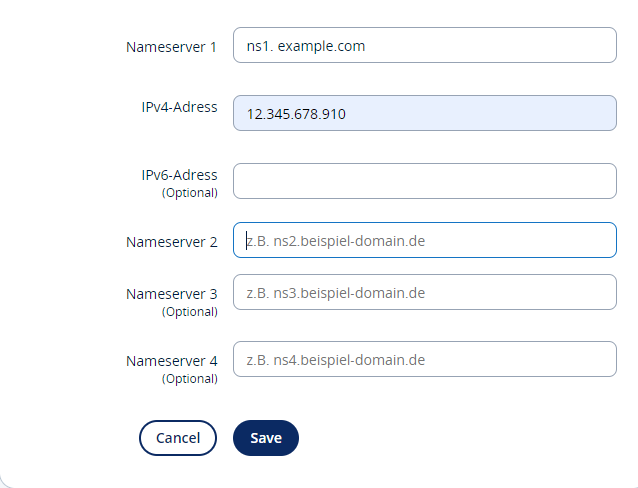
In the field Nameserver 1, add the nameserver ns1.example.com and replace example.com with your domain name.
In the field IPv4 address, enter the IPv4 address that appears in the Host section of the Cloud Panel. This field will only be displayed when you enter a value in the Nameserver 1 field.
Optional: Enter the desired IPv6 address in the IPv6 address field. This field will only be displayed when you enter a value in the Nameserver 1 field.
In the Nameserver 2 field, add the additional IPv4 address you have noted.
Optional: Insert the desired IPv6 address in the IPv6 address field, which is located under the Nameserver 2 field. This field will only be displayed when you enter a value in the Nameserver 2 field.
Click on Save.
Edit your nameservers in Plesk
Log in to Plesk as an administrator.
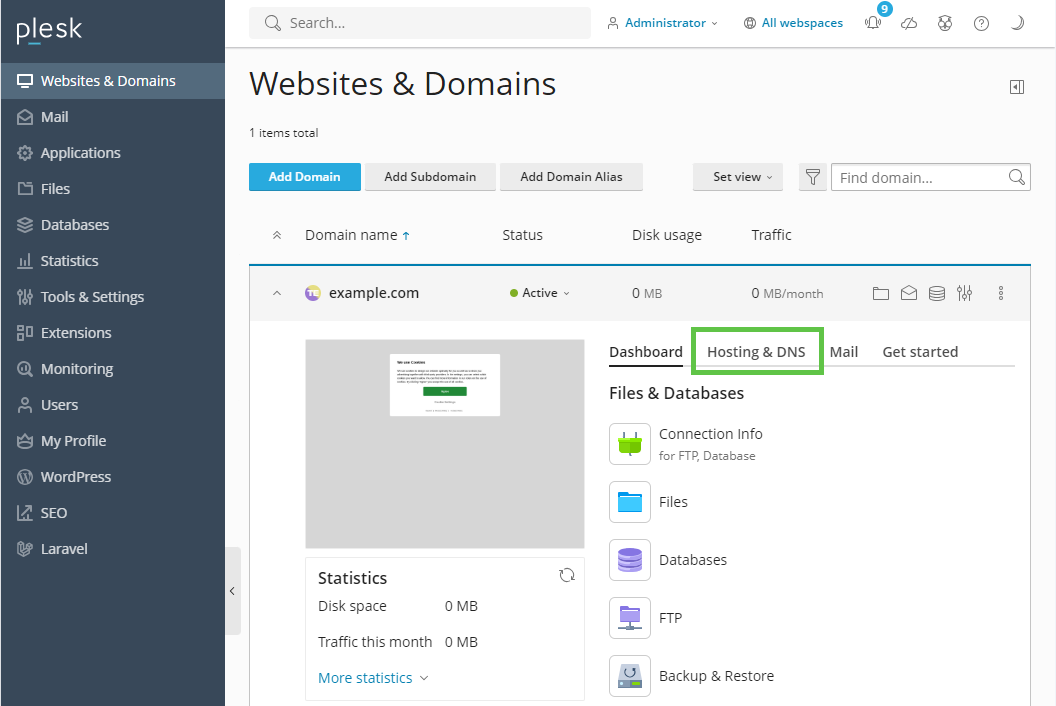
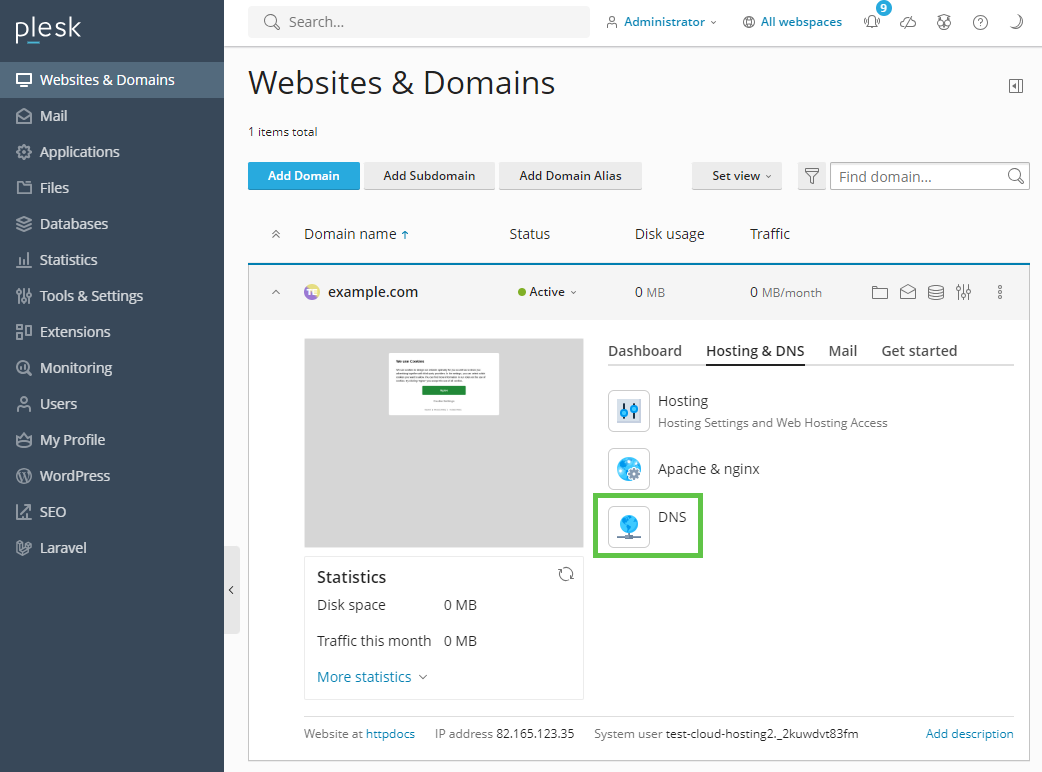
Click on Websites & Domains in the navigation bar on the left.
Click on the arrow pointing downwards next to the desired domain.
Click on the Hosting and DNS tab.
Click on DNS.
By default, Plesk creates two name server values for your domain (ns1. and ns2.). Click on the desired domain name that begins with ns2. and has the value NS in the Entry type column. The detailed view Edit resource record is displayed.
Add the additional IPv4 address in the IP address* field that you previously added for the Nameserver 2 field in your IONOS account.
Click OK.
A message is displayed at the top of the page stating that the DNS changes have not yet been saved. Click on Update.
Linux server only: Another message is displayed informing you that the DNS zone has been changed. To apply the changes to the DNS zone, click on Apply DNS template below this message.
Additional information
If you want to use Plesk as a name server for other domains, you can repeat the steps in this guide for the other domains. The value of the DNS hostname used for the name server 2 fields remains the same.
Your domain and Plesk have now been configured so that Plesk is used as the name server. Please wait 24-48 hours for the name server changes to propagate and take effect.
If you want to check the progress of these DNS changes, you can use online tools such as this DNS propagation checker.
For more information on setting up Plesk as a name server, see this Plesk blog.