MyDefender Starter for Microsoft 365: First steps
This article describes the steps required to set up MyDefender Starter in combination with Microsoft 365.
With MyDefender Starter, you can back up and restore the following devices:
- Computers with the Microsoft Windows operating system
- macOS devices
- Smartphones or tablets with the Android operating system
- iPhones and iPads
Microsoft 365, Microsoft SharePoint Online, Microsoft Teams, Google Workspace, and Google Drive accounts also count as one device type. You can back up 1 device per type with this package
Open the MyDefender administration interface (first login)
To set the password for the backup console
- Log in to your IONOS account.
Optional: Select the desired MyDefender Starter contract
When you open the administration interface for the first time, the Legal Terms page is displayed. Accept the end user license agreement.
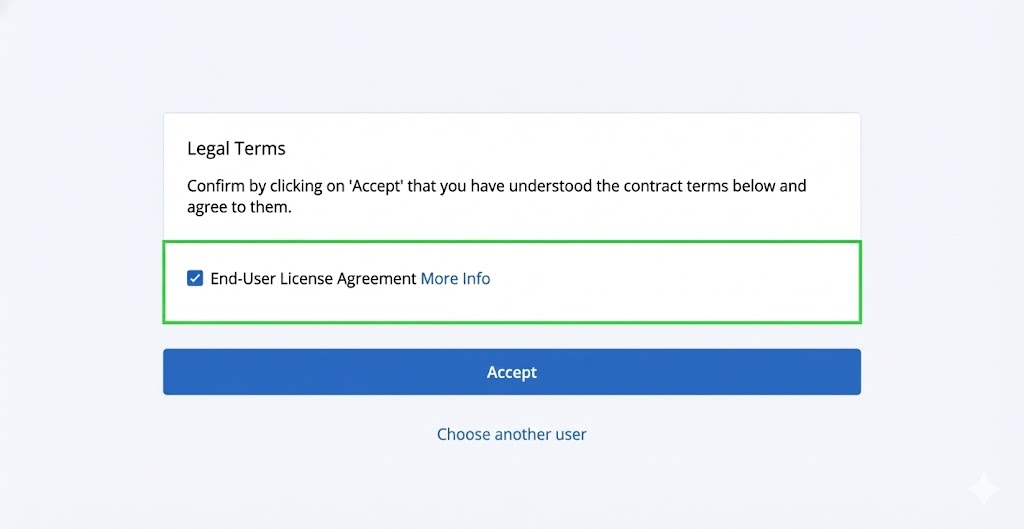
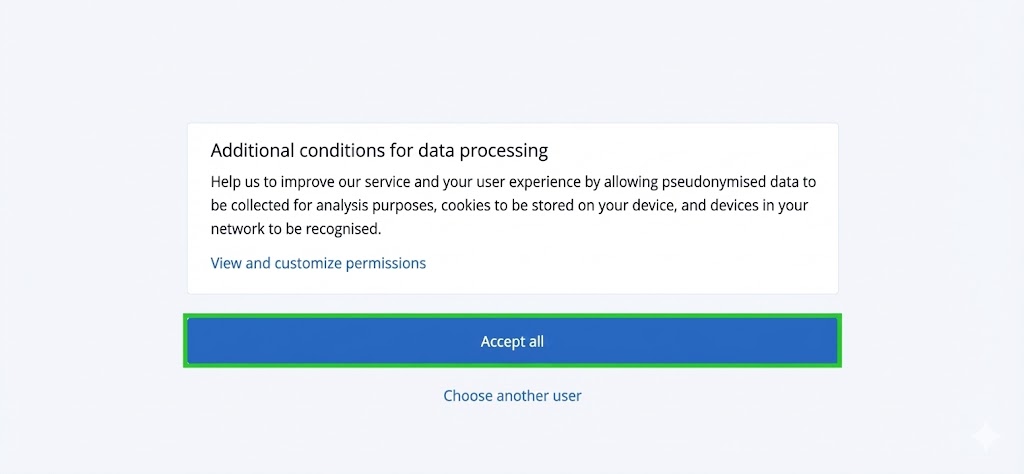
- Click on Accept. The Additional conditions for data processing page is displayed.
- Click on Accept all. The Cyber Protect console opens. This is the MyDefender administration interface.
Register Microsoft 365 administration account
To use MyDefender Starter in combination with Microsoft 365, you must register the Microsoft 365 administration account after logging in to the MyDefender administration interface. You can then create a protection plan for a Microsoft 365 account.
Requirement
You have set up a Microsoft 365 account in your IONOS account.
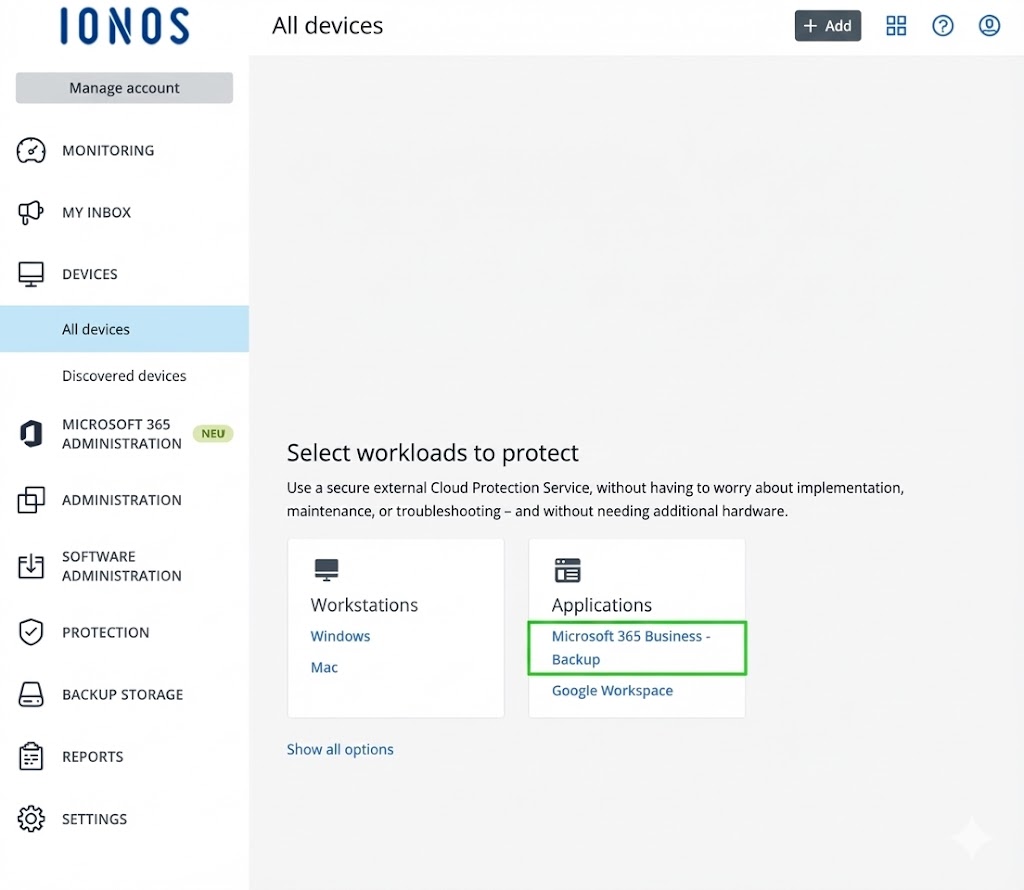
- In the navigation bar on the left, click Devices > All devices.
- In the Workloads to protect section, click Microsoft 365 Business Backup in the Applications tile. A login page from Microsoft opens in a new tab.
- Enter the email address of the Microsoft 365 administration account and click Next.
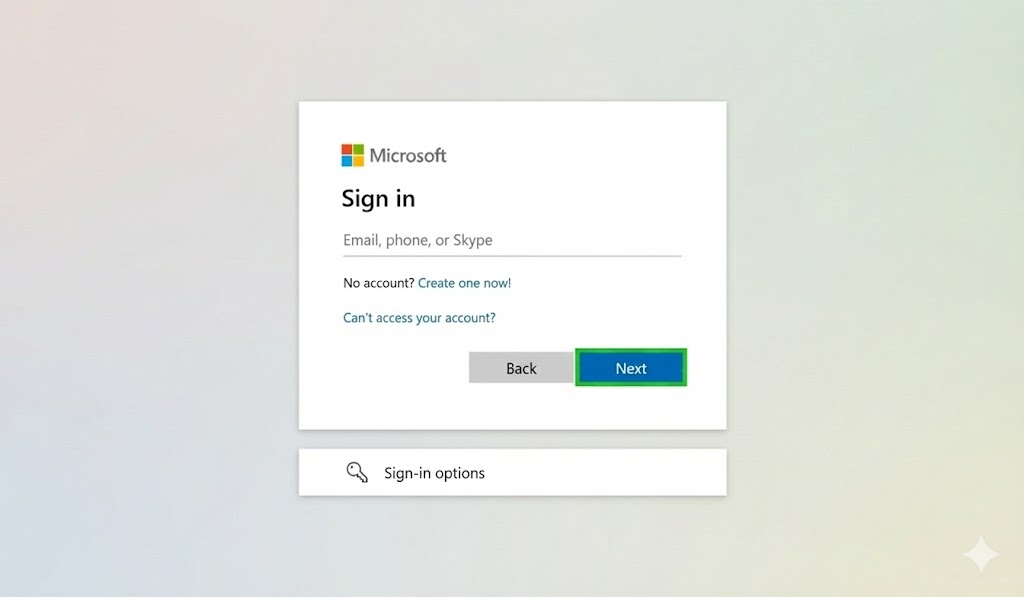
- Enter the password and click on Log in. The Requested authorizations window opens.
- Click on Accept. The Microsoft 365 account is registered. This may take a few minutes.
Create a protection plan for a Microsoft 365 account
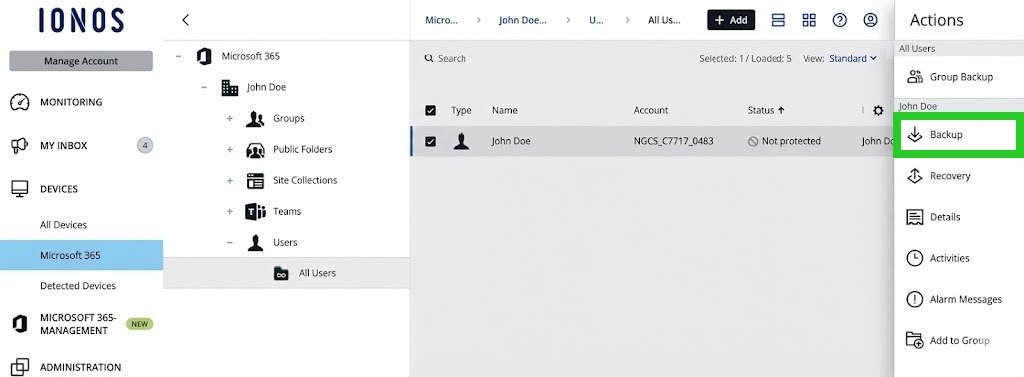
- Return to the Cyber Protect console and click Devices > Microsoft 365 in the navigation bar on the left.
- Click on the plus sign next to the listed user.
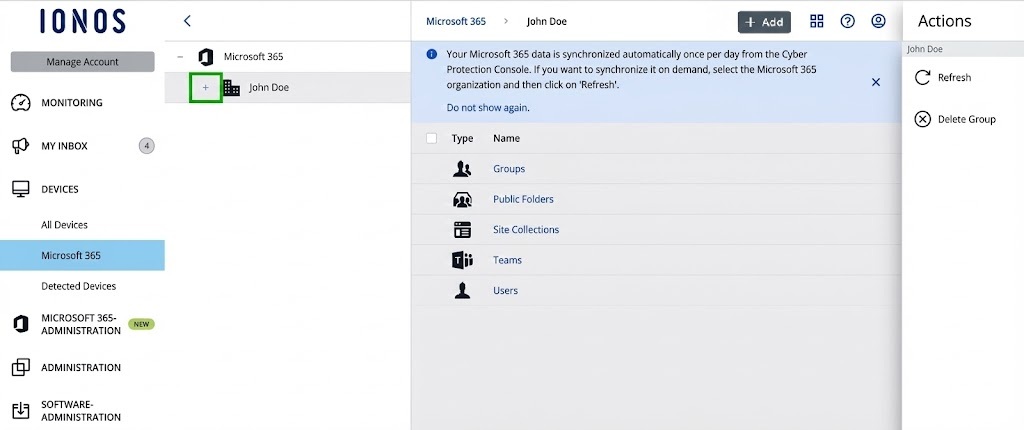
- Click on the plus sign next to Users.
- Click on All users.
- Select the desired user.
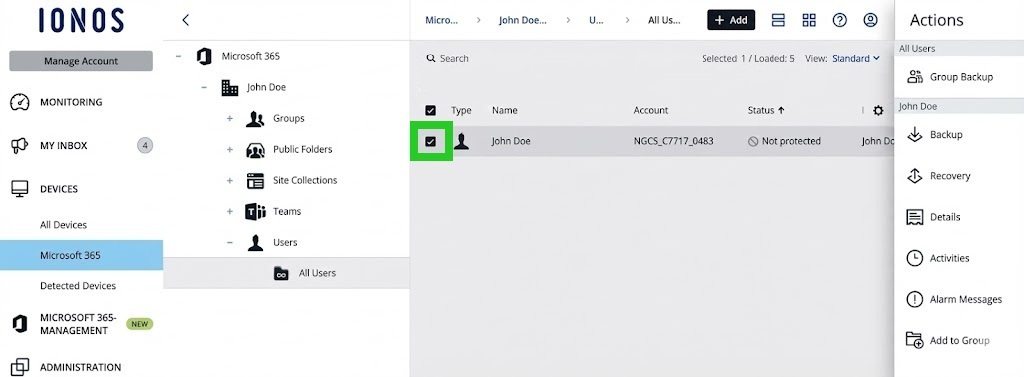
- To create a protection plan, click Backup in the action menu on the right. A window opens in which the protection plan is displayed.

- Customise the protection plan.
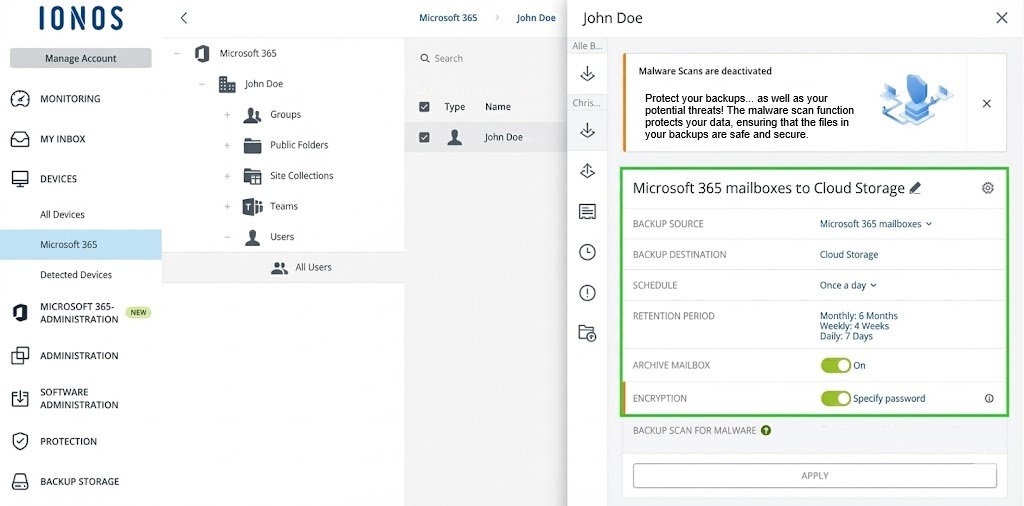
- Click on Specify password. The Specify password window opens.
- In the Specify password window, enter the desired password in the Password field and repeat it.
- Optional: Activate the Allow advanced search in encrypted backups option.
- Click on OK. The view of the backup plan is then displayed again.
- Click on Apply. The backup plan is created.
- To create a backup, click on Execute now.
Check backup
To check whether the backup was successful, click Backups > Backup Storage in the navigation bar on the left. All successfully created backups are displayed in this area.
Backup of additional Microsoft 365 accounts
If you set up additional Microsoft 365 accounts in your IONOS account, these are automatically synchronized with the MyDefender administration interface once a day. To initiate the synchronization manually, complete the following:
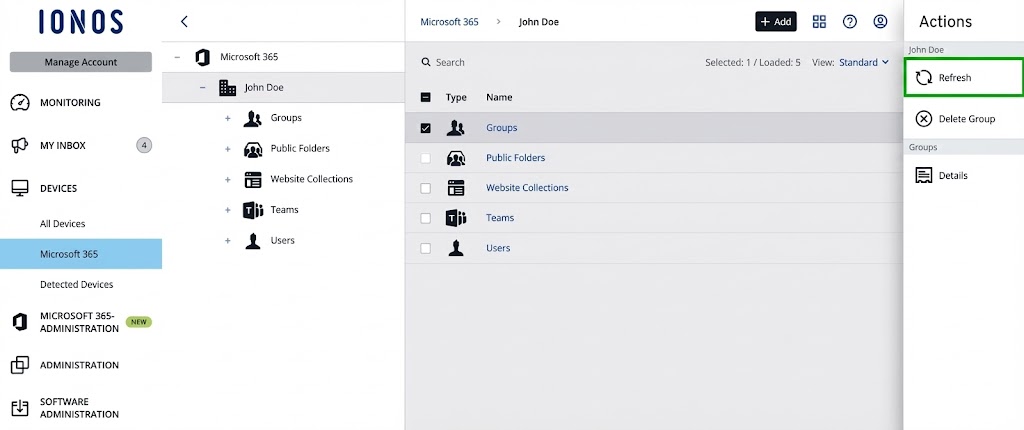
- In the navigation bar on the left, click Devices > Microsoft 365.
- Select the desired type: Group, Teams, or User.
- Click Refresh in the action bar on the right. The synchronization will start. As soon as synchronization is complete, the new Microsoft 365 account is displayed in the list.
- Select the user.

- To create a backup plan, click Backup in the action menu on the right. A window opens in which the backup plan is displayed.
- Customize the backup plan.
- Click on Specify password. The Specify password window opens.
- In the Specify password window, enter the desired password in the Password field and repeat it.
- Optional: Activate the Allow advanced search in encrypted backups option.
- Click on OK. The window showing the backup plan is displayed again.
- Click on Apply. The backup plan is created.
- To create a backup, click on Execute now.
Create backup plan for groups
If you have set up several Microsoft 365 accounts and want to back them up with the same backup plan, you can use the group backup. With this backup, the backup plan is applied to the entire group. Each new account that is added to this group in Microsoft 365 is automatically recognized during the next synchronization and assigned to the group's backup plan.
Backups of computers, smartphones, tablets, iPhones, and iPads
To create backups of computers with the Microsoft Windows operating system and macOS devices, you must install the Acronis Cyber Protection Agent on these devices. If you want to create backups of smartphones or tablets with the Android operating system or backups of iPhones or iPads, you must install the Acronis Cyber Backup app on these devices.
Download Cyber Protection Agent
To download and install the Cyber Protection Agent, complete the following:
- Log in to your IONOS account on the device on which you want to install the Cyber Protection Agent or the Acronis Cyber Protect app.
- If you have purchased a server and MyDefender, click Menu > Servers & Cloud in the title bar. If necessary, select the desired MyDefender contract. The Cyber Protect console opens.
- In the navigation bar on the left, click on Devices > All devices.
- To download the Cyber Protection agent for computers with the Microsoft Windows operating system, click on Windows in the Select workloads to protect area in the Workstations tile. To download the Cyber Protection Agent for Mac, click Mac in the Workstations tile. The Cyber Protection Agent is then downloaded.
Install Cyber Protection Agent
You can find instructions on how to install the Cyber Protection Agent for Windows and the Cyber Protection Agent for Mac in the following article:
Create protection plan
The following article explains how to create a protection plan:
Install and set up the Acronis Cyber Protect app
You can find instructions on how to install and set up the Acronis Cyber Protect app here:
Restore backups
You can find instructions on how to restore backups of computers with the Microsoft Windows operating system and macOS devices in the following article:
Further information
Further information can be found on the following page in the MyDefender subcategory: