How to clear a WordPress cache with and without plugins

To prevent outdated content from being displayed, you should clear the WordPress cache after making changes, installing updates or encountering display issues. With a caching plugin, this can usually be done directly from the WordPress dashboard with a single click and can often be automated. Without a plugin, you may need to manually delete cached files or clear the WordPress object cache, depending on your hosting setup.
Key Takeaways
Here is what you need to know about clearing the WordPress cache:
- Caching speeds up your website but can show outdated content after changes.
- Clear the cache after WordPress updates, plugin updates and changes to widgets.
- With W3 Total Cache, WP Super Cache and WP Fastest Cache, you can clear the cache from the admin bar or the plugin settings.
- Without a plugin, you can delete the contents of the cache folder via FTP or clear the object cache via SSH and WP-CLI.
- If changes are still not visible, check whether your hosting provider uses a server-side cache or a CDN.
What is the WordPress cache used for?
A fast, up-to-date website is essential for a positive user experience (UX) and strong Google rankings. This is one of the main reasons why caching is widely used in WordPress.
Caching temporarily stores content that has already been loaded so it can be delivered more quickly on subsequent visits. Instead of processing JavaScript, CSS and database queries again every time a page is accessed, WordPress can serve a cached version. This reduces loading times, improves the user experience and can boost your website’s overall performance.
Caching is important, but it’s not the only way to make WordPress faster. You can also optimize your code, reduce the number of plugins and clean up your database. The size of images and videos can also have a major impact on loading speed.
Why should you clear the WordPress cache?
While a caching plugin can reduce your website’s loading time, storing a cached version of your site also has drawbacks. After an update, the cache may continue to display an outdated version of the website, meaning changes made in the backend or CSS files are not immediately visible to visitors.
You should clear the WordPress cache after:
- WordPress system updates
- Plugin updates
- Changes to widgets
In general, you only need to clear the WordPress cache when an update affects how the website is displayed. However, it is often easier to clear the cache after every update rather than check each time whether doing so is necessary.
If you are planning major updates or changes to your website, it is also advisable to create a WordPress backup so you can restore the previous version if any problems occur.
How to clear the WordPress cache with plugins step by step
The easiest way to clear the WordPress cache is through your caching plugin. We introduce three popular caching plugins and explain step by step how to clear the cache with each one.
There is a wide range of WordPress caching plugins. The steps for clearing the WordPress cache are generally very similar, so the process can usually be applied to other plugins as well.
How to clear a WordPress cache with W3 Total Cache
To clear the WordPress cache with the free W3 Total Cache, you have two easy options:
Clear WordPress cache via the admin bar
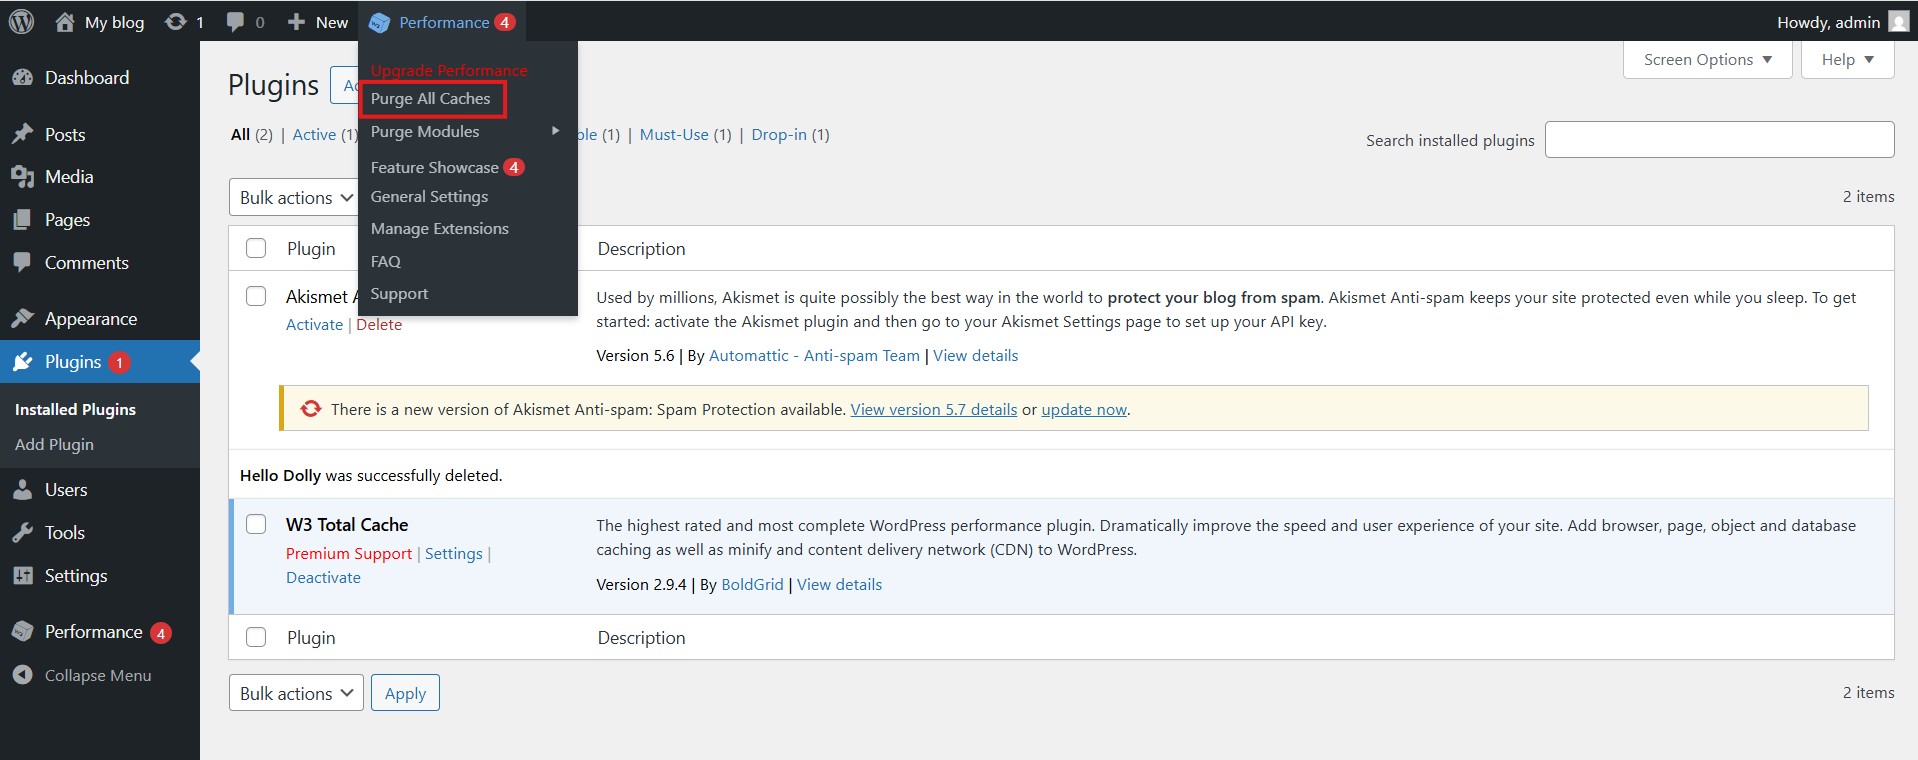
Select the ‘Performance’ menu item in the admin bar. Then click the ‘Purge All Caches’ option and the cache is cleared immediately.
Clear WP cache via the settings
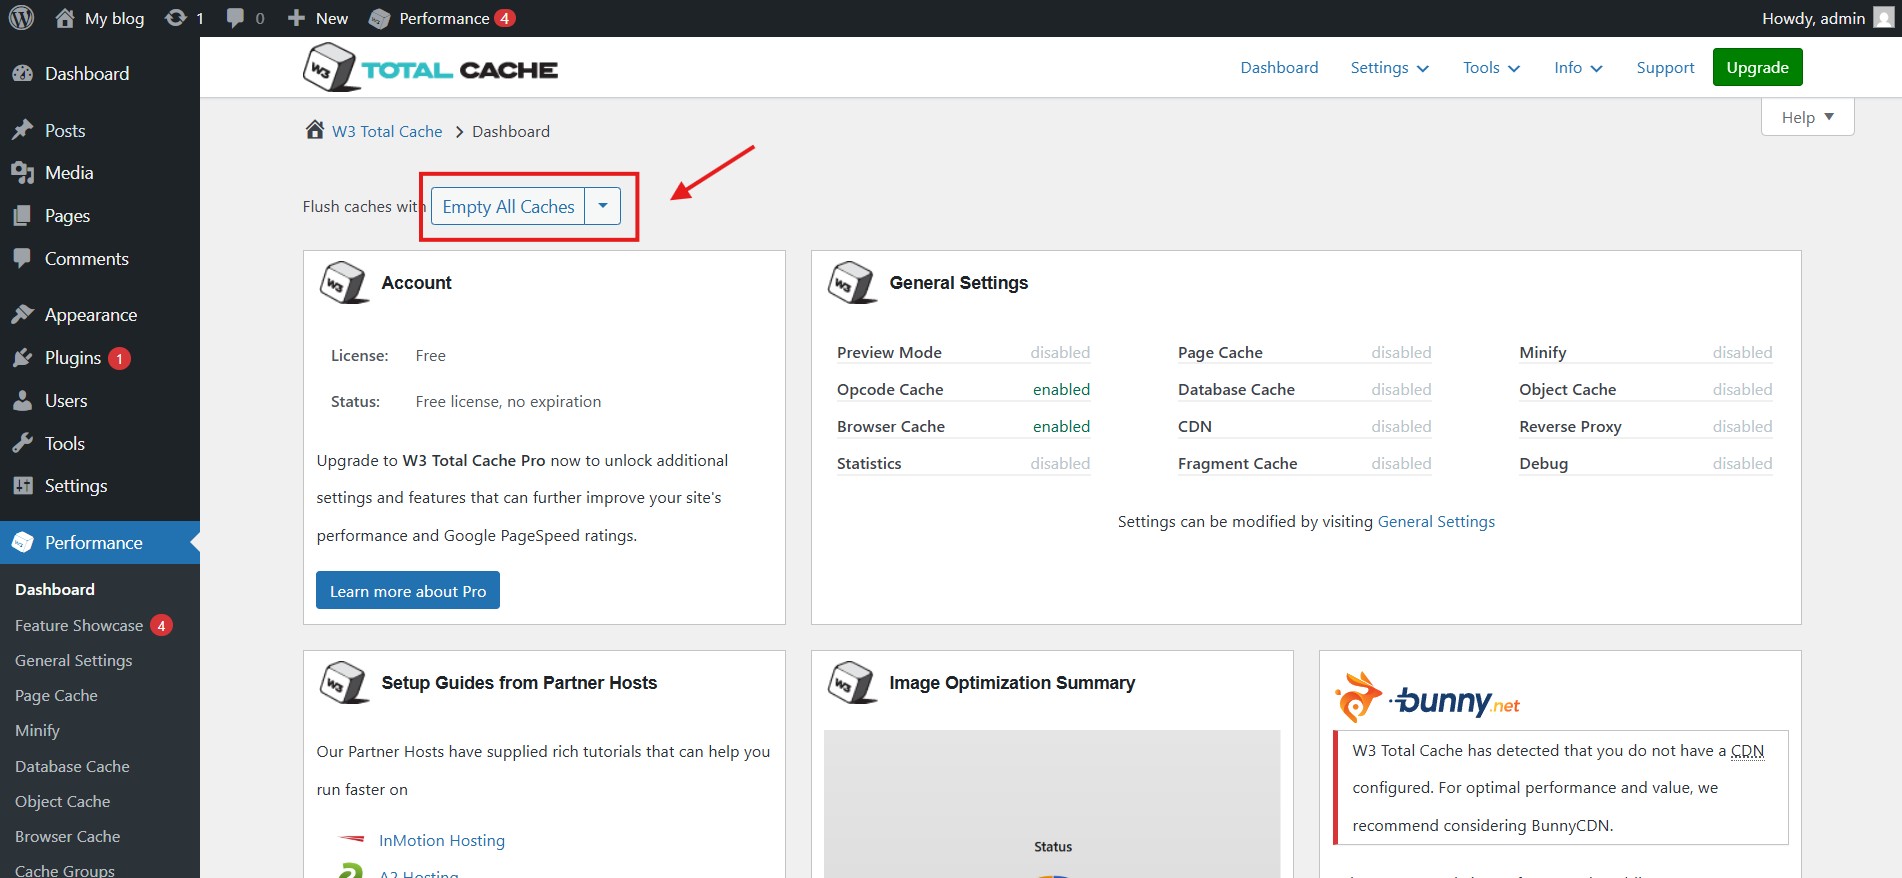
Alternatively, you can clear the cache from the plugin settings. Select ‘Performance’ from the left-hand menu to open the W3 Total Cache dashboard. Then click ‘Empty All Caches’ to clear all cached content with a single click.
Disable cache
Most caching plugins also allow you to temporarily disable caching. This can be useful when you are making several changes to your website in a short period, as you won’t need to clear the WordPress cache after each change.
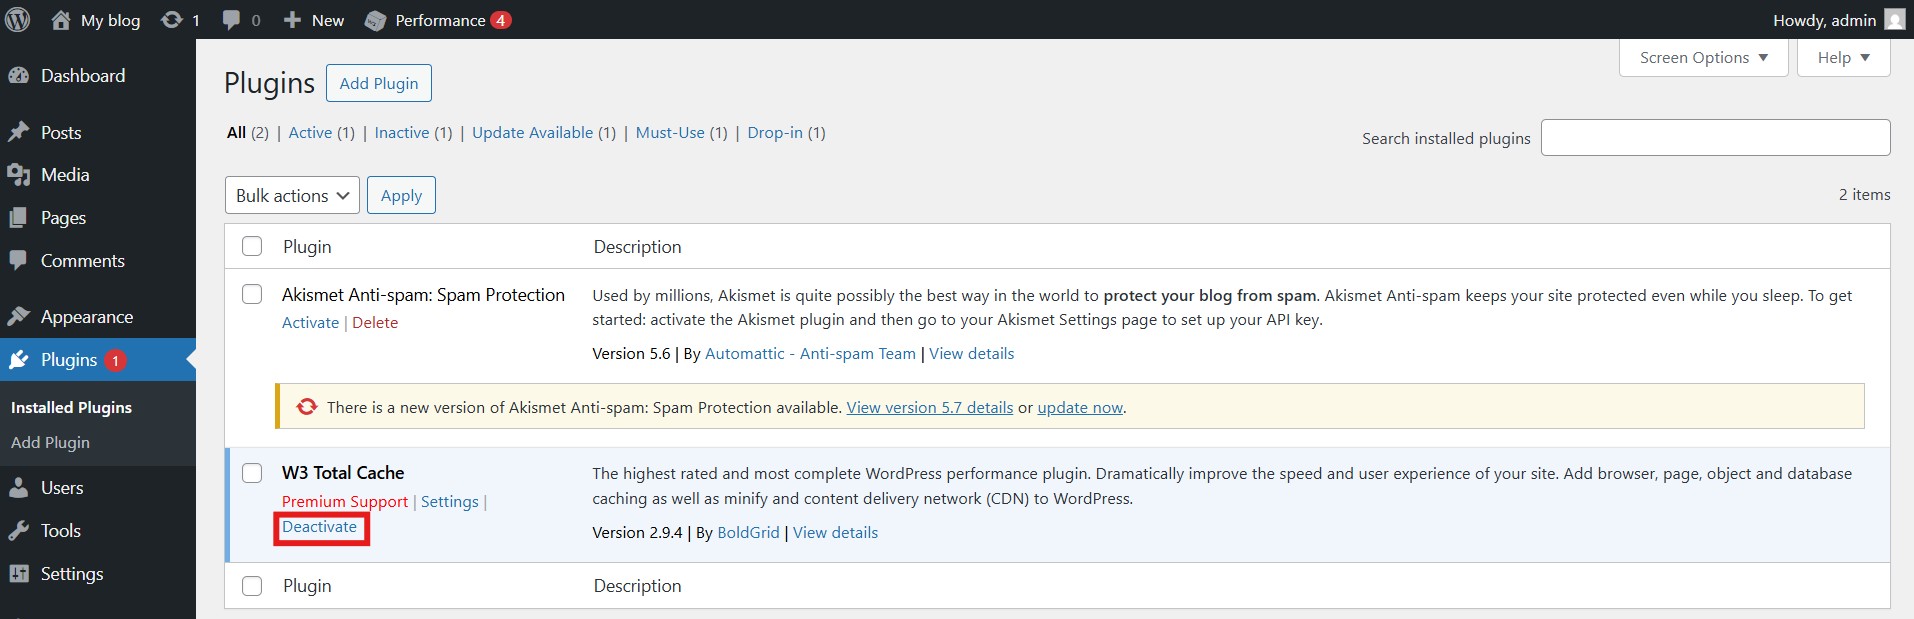
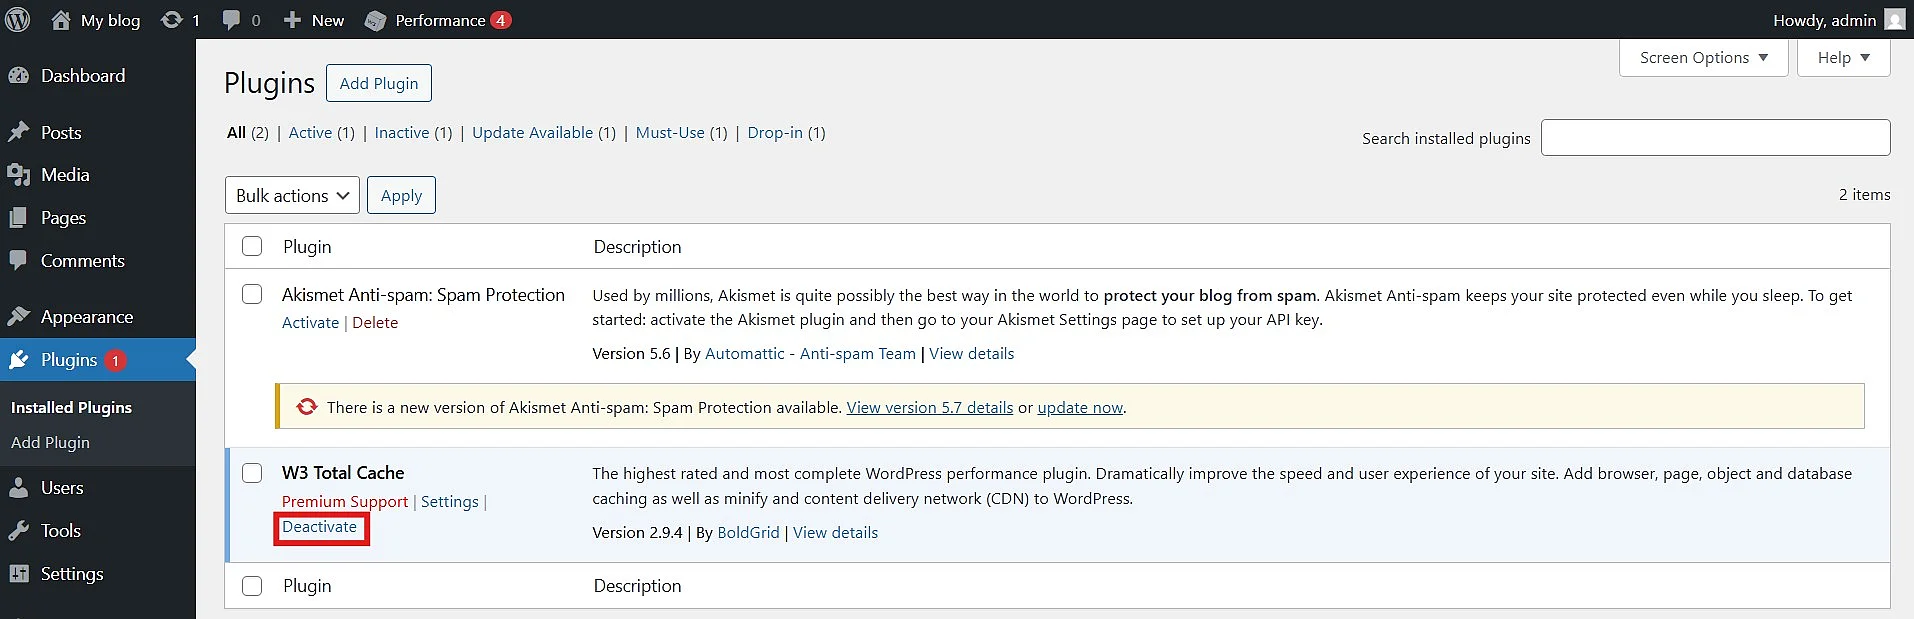
To disable caching, select ‘Plugins’ from the left-hand menu and find W3 Total Cache. You can then deactivate the plugin with a single click.
How to clear a WordPress cache with WP Super Cache
The WP Super Cache plugin primarily serves static HTML files to visitors. However, logged-in users, visitors with a comment cookie and users who receive personalised content may be shown a different version of the page.
Clear WordPress cache with one click
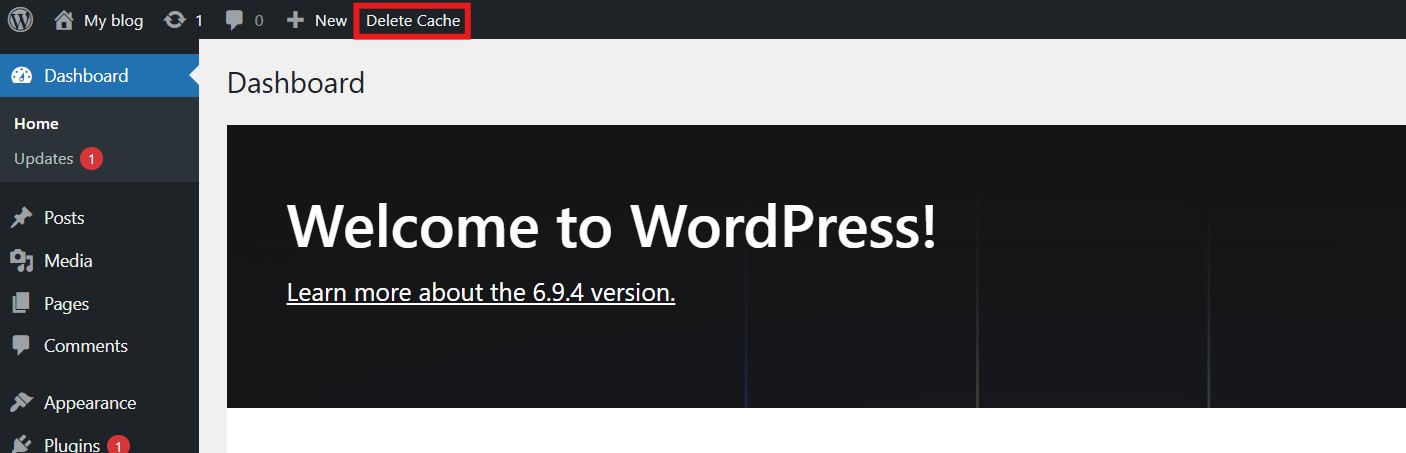
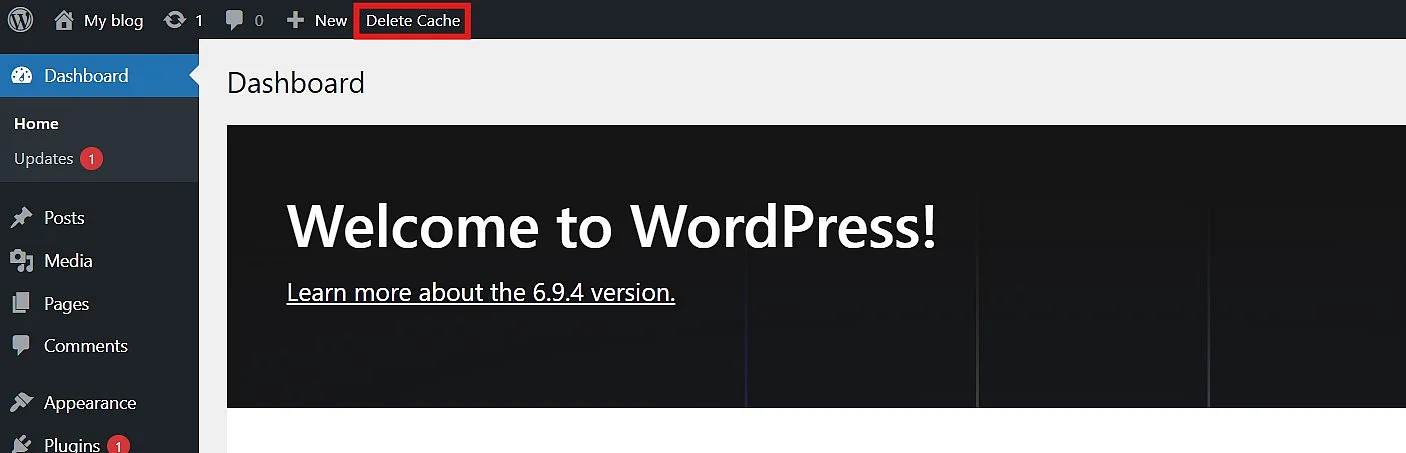
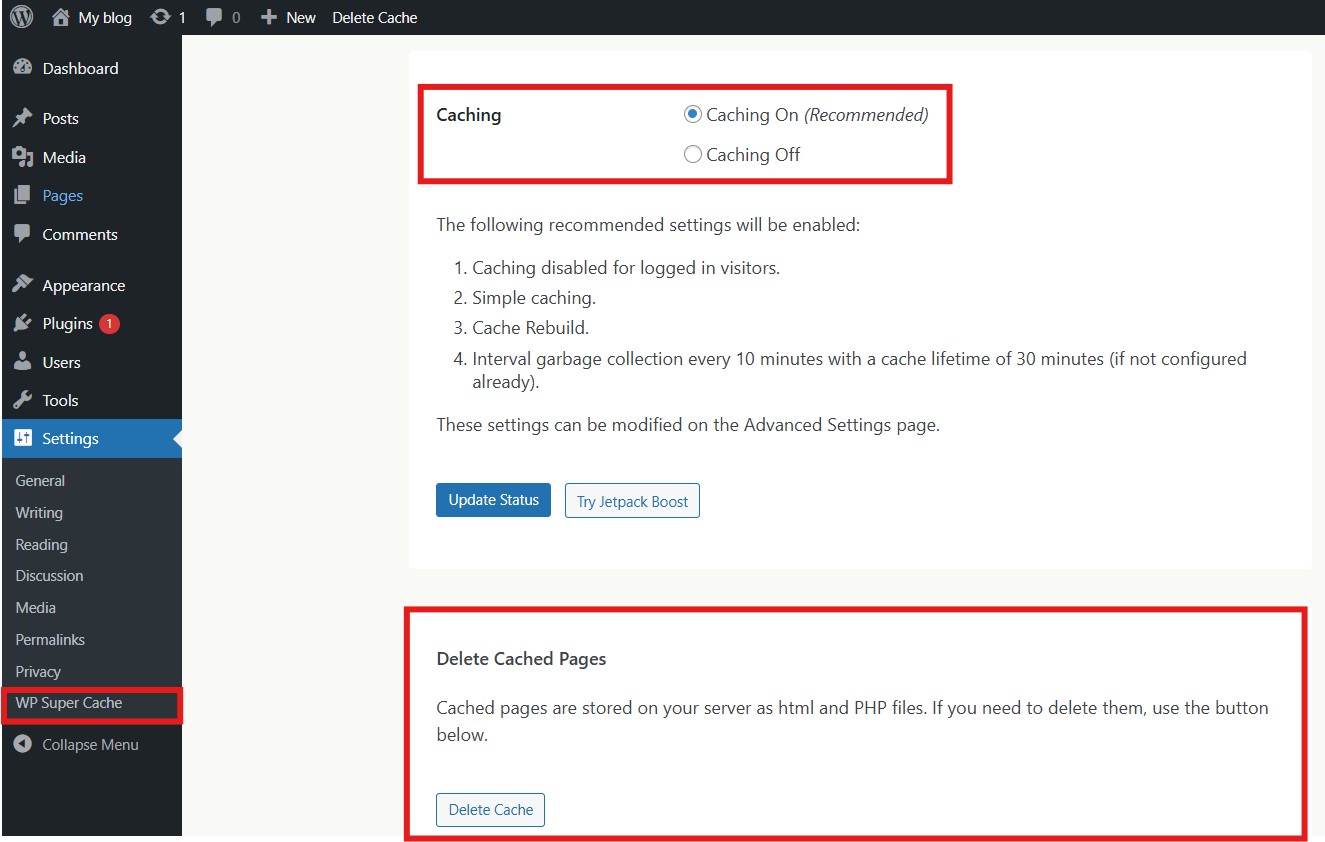
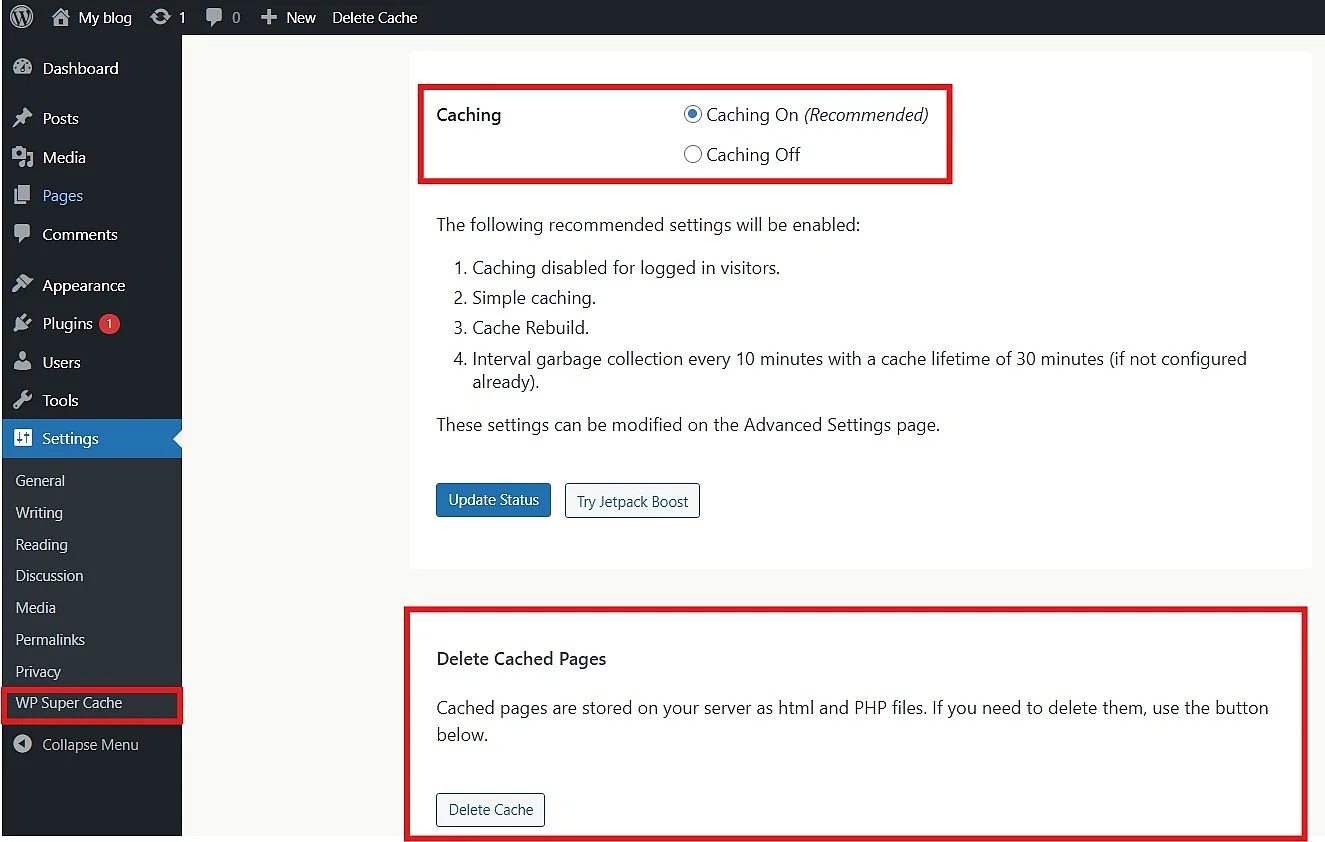
With this plugin, the ‘Delete Cache’ option is available directly in the admin bar. One click and the cache is cleared.
Clear WordPress cache in the settings
Alternatively, you can clear the cache from the plugin settings. Select ‘Settings’ from the left-hand menu and then choose ‘WP Super Cache’. Scroll down to the ‘Delete Cached Pages’ section and click ‘Delete Cache’ to clear the cache. You can also disable caching with a single click in the ‘Caching’ section.
How to clear WordPress cache with WP Fastest Cache
The WP Fastest Cache plugin has more than one million active installations and includes a useful feature: whenever you publish a new post or page, the plugin automatically clears the cache. In the ‘Exclude’ tab, you can also create exclusion rules to prevent specific pages, content, cookies, user agents or devices from being cached.
Clear WP cache via the admin bar
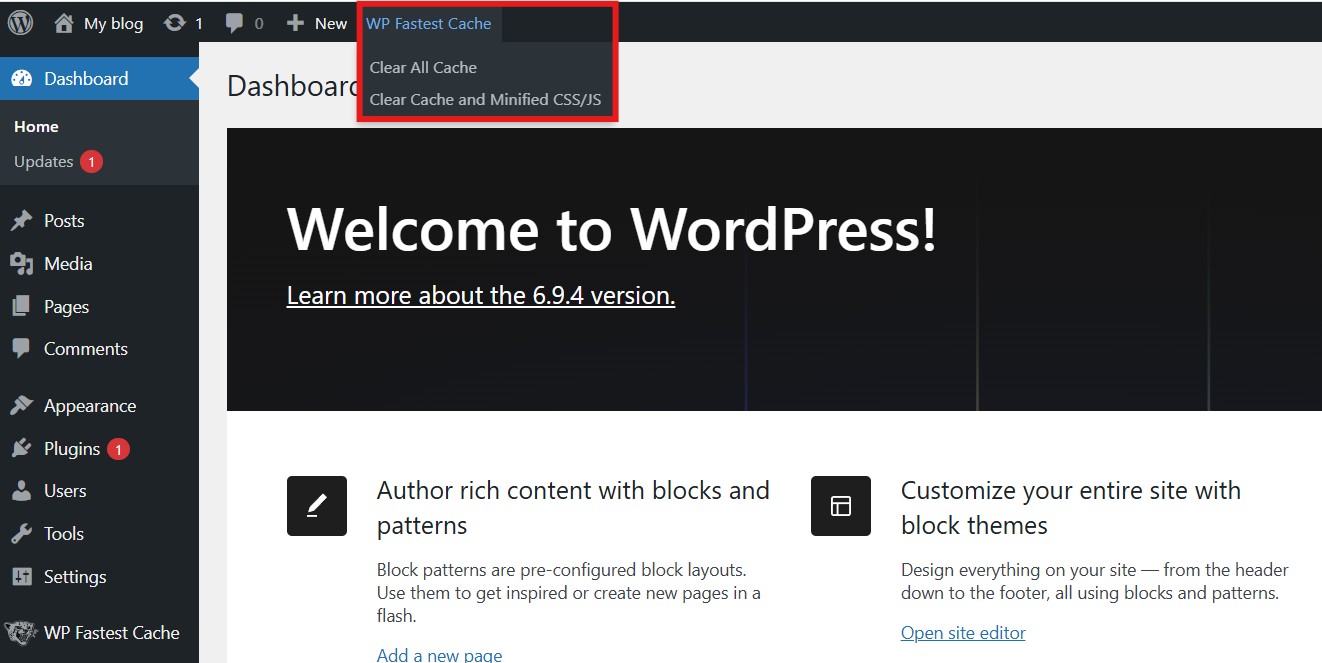
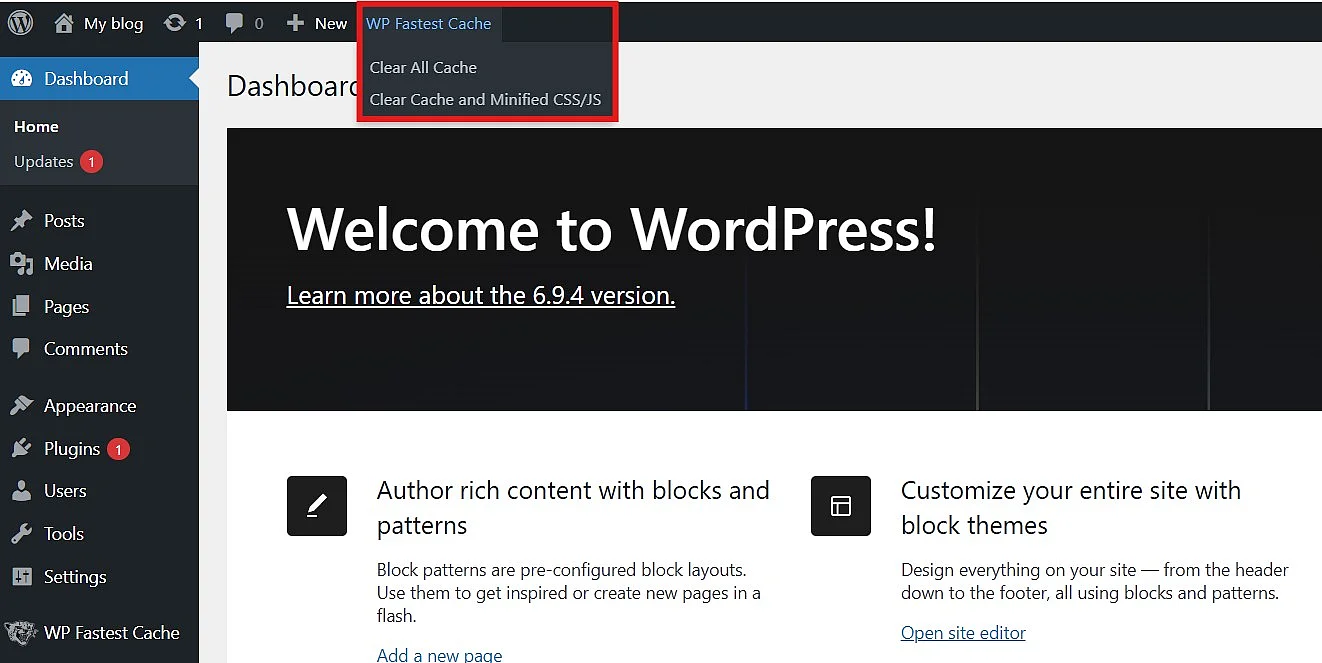
To manually clear the WordPress cache, open the ‘WP Fastest Cache’ drop-down menu in the admin bar and select ‘Clear All Cache’.
Clear WP cache via the options
Once WP Fastest Cache is installed, a dedicated menu item appears in the left-hand menu. Select it to open the plugin settings, then choose the ‘Clear Cache’ tab. Click ‘Clear All Cache’ to remove all cached files.
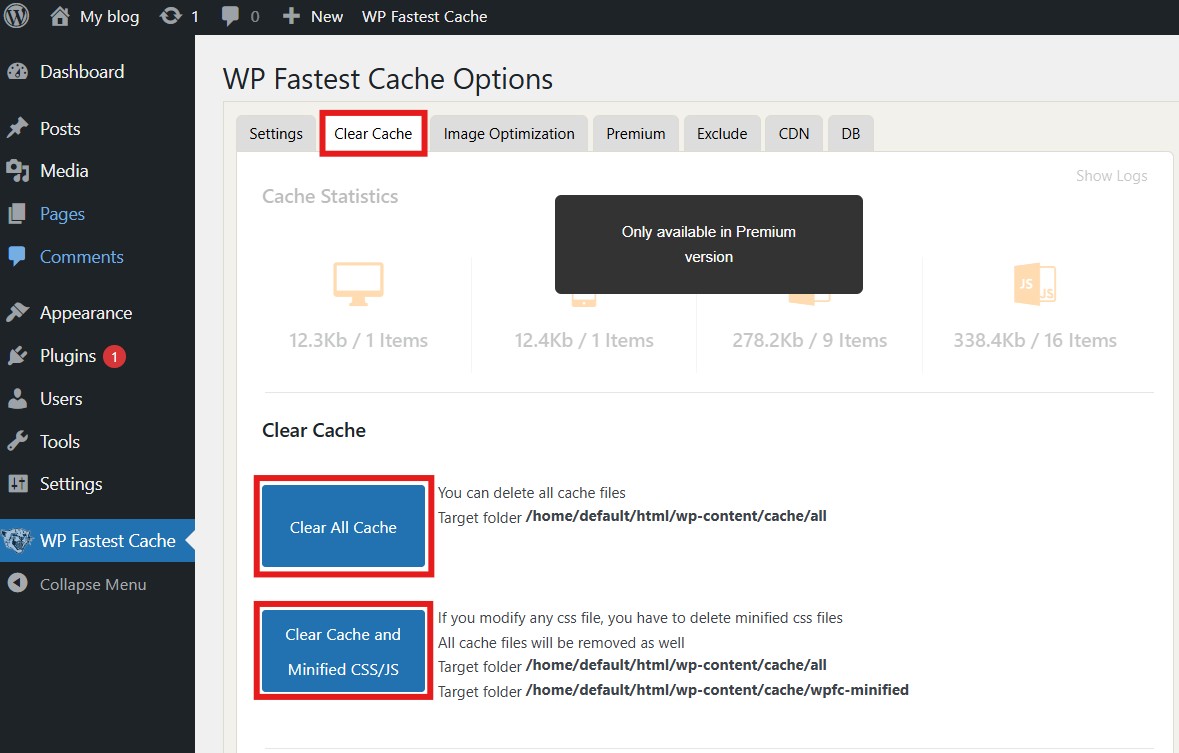
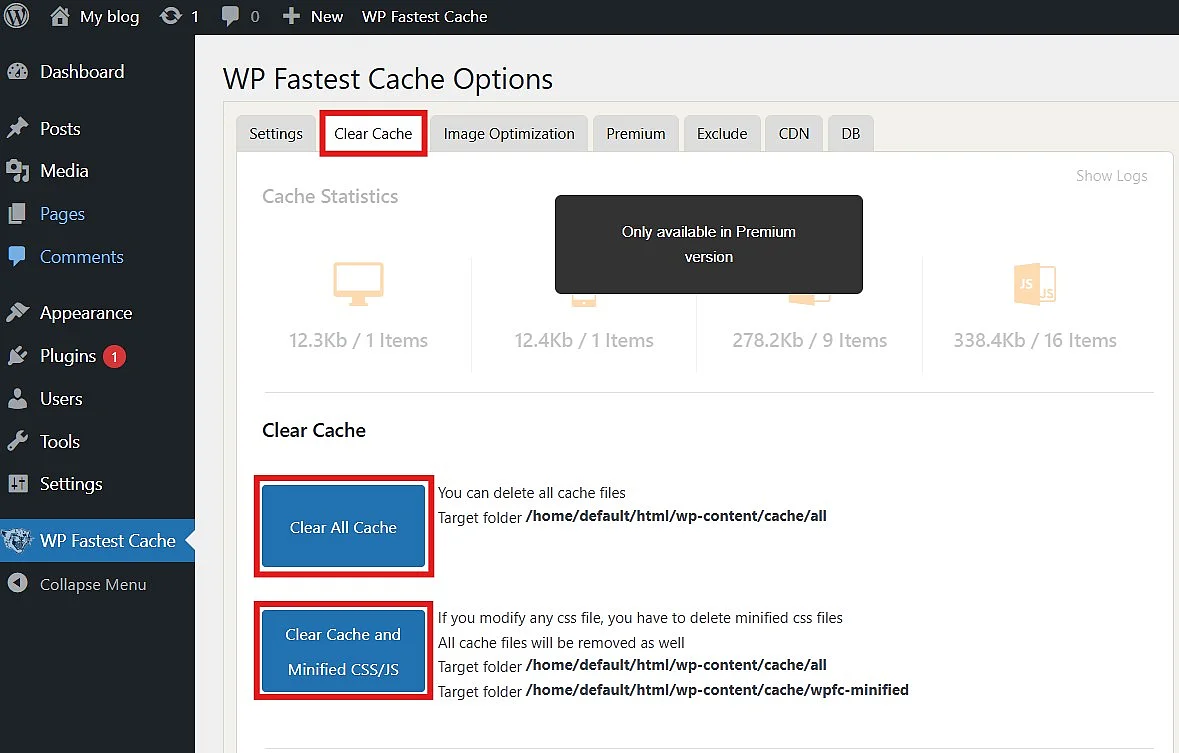
If display issues persist even after you clear the WordPress cache, select ‘Clear Cache and Minified CSS/JS’ to remove any remaining cached CSS and JavaScript files.
Deactivate caching
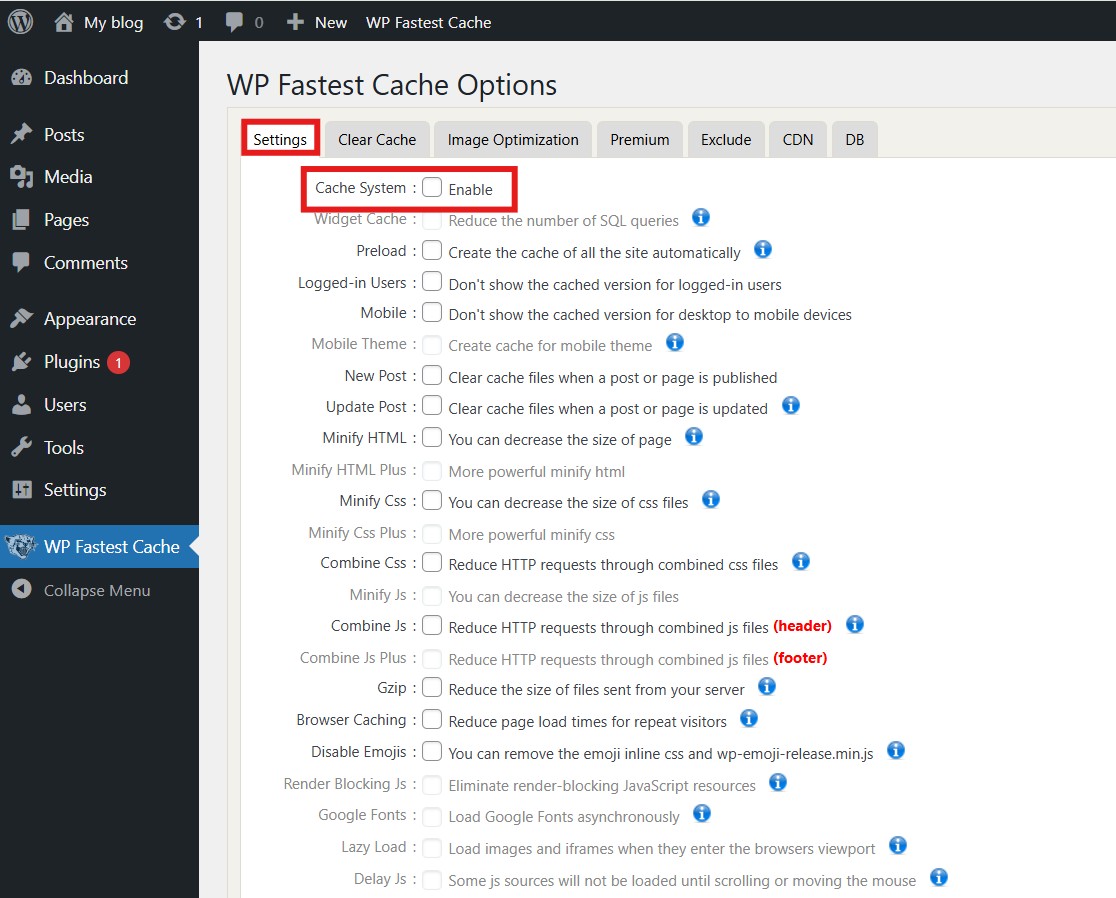
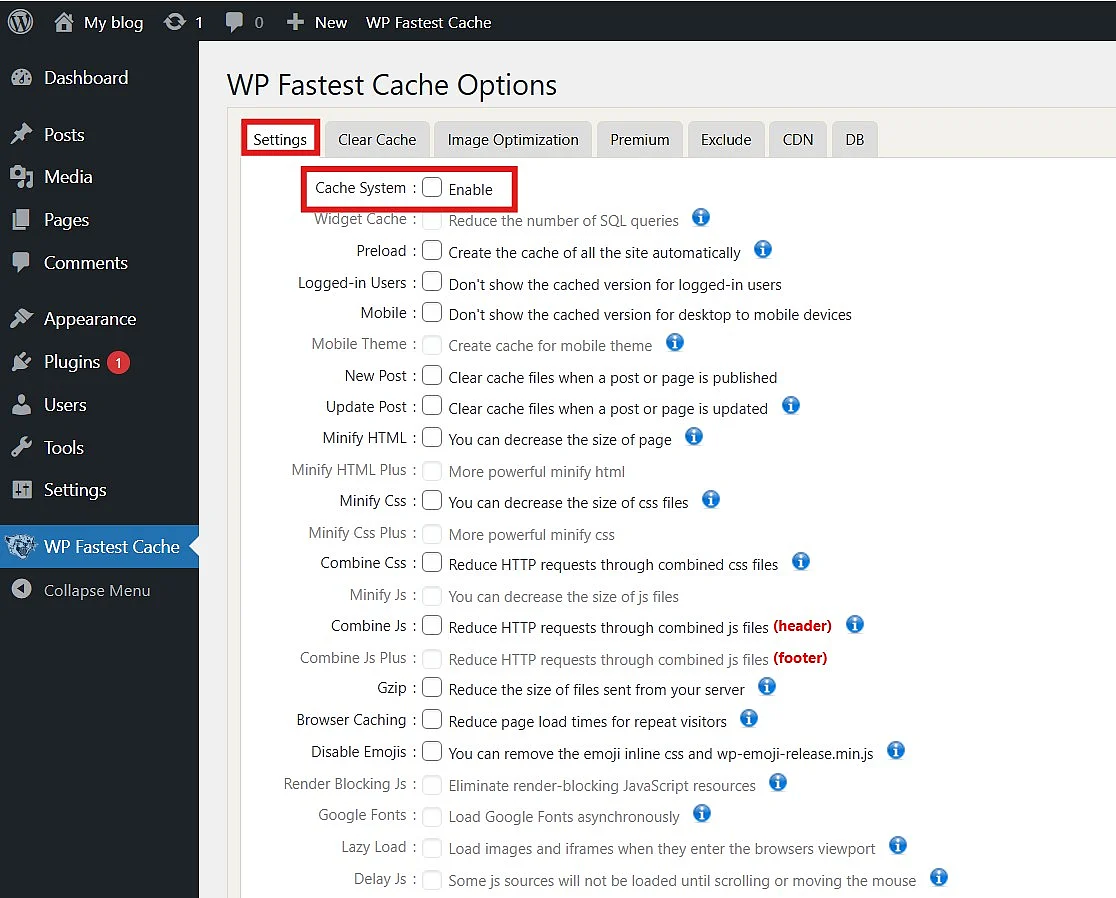
To deactivate caching in WP Fastest Cache, open the plugin settings and remove the tick next to ‘Cache System’. Then save your changes.
How to clear WordPress cache without a plugin
You can also clear the WordPress cache or disable caching without using a plugin. However, these methods require access via FTP or Secure Shell (SSH).
Clear WP cache via FTP access
To clear the WordPress cache via FTP, you need an FTP client such as FileZilla and access to your WordPress files.
Once the connection has been established, open the wp-content folder. If it contains a cache folder, this may store temporary cache files. Delete only the contents of this folder, not the folder itself. Depending on your hosting setup or caching solution, however, the relevant cache files may be stored elsewhere.
Clear WordPress object cache via SSH
If SSH access is enabled by your hosting provider and WP-CLI is available on the server, you can clear the WordPress object cache via the command line. To do so, run the following command in the WordPress directory:
wp cache flushThis cache reduces database queries by temporarily storing query results and WordPress objects. However, it is different from a page cache. Clearing the object cache does not remove static HTML files, server-side caches, CDN caches or the browser cache.
If changes are still not visible after running the command, the object cache is probably not the cause. In this case, check whether your hosting provider uses a server-side cache or a CDN.