How can you learn PHP? A beginner-friendly PHP tutorial

PHP is one of the most widely used languages for server-side programming. Over the years, it has become a core component of many modern websites and web technologies. For beginners, however, getting started with PHP can feel challenging. This PHP tutorial introduces you to the fundamentals of the language and explains its most important operators, loops and functions in a clear and practical way.
Key Takeaways
- You need a web server with a PHP interpreter to run the examples, for instance via XAMPP, the PHP built-in server, or Docker.
- The PHP basics cover syntax,
echo, variables, strict typing, concatenation operators, and calculating with variables. - You pass data with the
$_GETand$_POSTsuperglobals and control the program flow withif,match, and loops. - Further chapters cover file operations, object-oriented programming, and clean code with Composer and namespaces.
- The tutorial closes with a PDO database example and security measures such as prepared statements, output escaping, and password hashing.
How to prepare for the PHP tutorial
Our tutorial is primarily aimed at complete beginners. However, for some examples it is helpful to have a basic understanding of modern web development and HTML. To follow the examples on your own computer, make sure you have the following set up:
- Web server including PHP interpreter
- Install PHP
- Web browser
- Text editor
XAMPP
As a server environment, we recommend the free local test environment XAMPP, provided by Apache Friends for Windows, Linux and macOS. XAMPP is intended solely for testing purposes. The software bundle allows developers to quickly set up a complete local environment for scripts, HTML pages and stylesheets. However, it is not designed for secure operation as a publicly accessible web server.
XAMPP tutorials can provide you with more detailed installation instructions.
PHP built-in server
Since version 5.4, PHP has included an integrated development server that is particularly suitable for simple tests and learning purposes. This built-in server does not require any additional server software such as Apache or NGINX. The only requirement is an installed PHP version on your system. You can then start the server directly from the command line in the project directory:
php -S localhost:8000PHP then serves the files in the current folder at the address http://localhost:8000 in the web browser. The built-in server is especially suitable for initial PHP experiments, small test scripts, or quickly trying out code examples.
Docker and Docker Compose
A slightly more advanced alternative is to use Docker. Docker makes it possible to encapsulate development environments in containers. This allows web servers, PHP, and databases to be configured exactly as they will later run in the production environment. For PHP projects, Docker Compose is often used to start multiple services together. The entire configuration is stored in a file (‘docker-compose.yml’) and can be started with a single command.
Introduction to PHP syntax
Once you have set up your local web server (for example, with XAMPP), you should check whether PHP is installed correctly and ready to run scripts. A script is a program that is not compiled into binary code beforehand but executed by an interpreter instead. Open your preferred text editor and enter the following PHP script:
<?php
phpinfo();
?>PHP scripts always follow the same pattern. The opening PHP tag <?php signals that a script environment is being started. This is followed by the actual PHP code in the form of statements. In the example, this is the call to the phpinfo() function. Most PHP functions require one or more parameters placed inside the brackets; for phpinfo() these are optional. Each statement ends with a semicolon (;). To close the script environment, the closing PHP tag is used: ?>. This is optional for pure PHP files.
Save the text file under the name ‘test’ in the .php format (PHP script) and start your web server. If you are using the XAMPP test environment, place ‘test.php’ in the XAMPP directory under ‘htdocs’ (C:\xampp\htdocs).
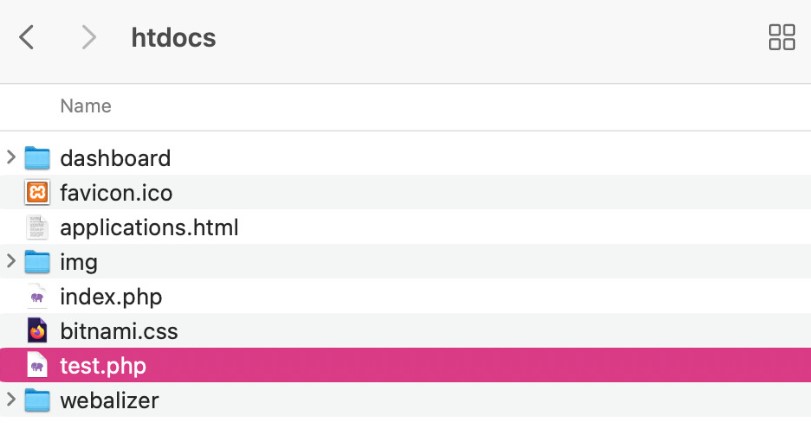
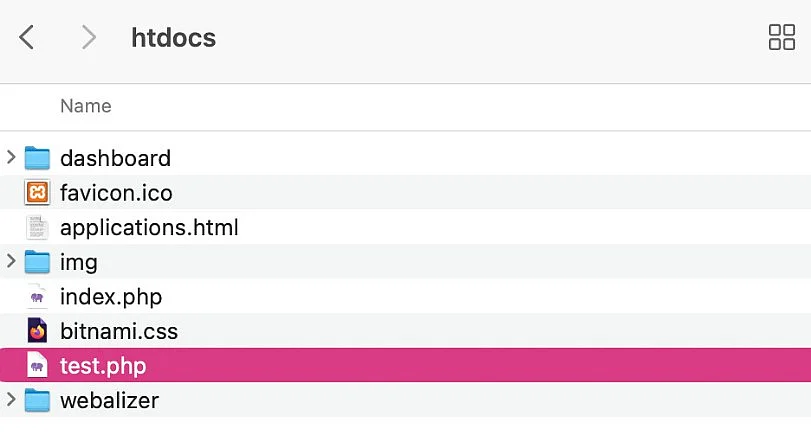
You can now access the sample file in your web browser using the following URL: http://localhost/test.php. If you are using a different web server or a custom XAMPP configuration, choose the URL that matches the respective file path.
By entering the URL http://localhost/test.php, you instruct your web browser to request the ‘test.php’ file from the web server. The Apache HTTP server or your preferred web server software retrieves the file from the corresponding directory. The .php extension indicates that the file contains PHP code. When the file is requested, the PHP interpreter integrated into the web server takes over. It parses the document and recognises the opening PHP tag <?php. The interpreter then executes the PHP code and generates HTML output, which the web server delivers to the browser.
The phpinfo() function is the shorthand form of the default value phpinfo(INFO_ALL). It outputs detailed information about your web server’s PHP configuration. If no PHP version can be found, the web browser displays an error message or returns the PHP code to the browser without interpreting it.
Output ‘Hello World!’ with echo
If PHP has been installed successfully, it’s time to write your first script. A good starting point is the PHP echo statement. Unlike phpinfo(), echo is not a function but a language construct that allows you to output text as a string.
Language constructs are statements used in PHP to control the program flow. In addition to echo, language constructs include statements such as if, for, do, include, return, exit, and die. Therefore, unlike functions, brackets are not required in this case.
Create a new PHP file for your first script and enter the following code:
<?php
echo 'Hello World!';The opening tag <?php starts a script environment. This is followed by the echo language construct and the string ‘Hello World!’ enclosed in single quotation marks. Pay attention to the semicolon after the statement. Instead of ‘Hello World!’, you can use any text. Since this is a pure PHP file, we have omitted the closing PHP tag.
The closing PHP tag ?> does not need to be used in pure PHP files. This helps avoid accidental empty lines or invisible characters at the end of the file that can lead to error messages such as ‘Headers already sent’.
Save the script as ‘hello.php’ in the ‘htdocs’ folder on your web server and open the file in your web browser using the URL http://localhost/hello.php. If the code was transferred correctly, the browser window should now display the character string you used:


Any text you output with echo can be marked up with HTML tags if needed. These are then interpreted by the web browser according to the HTML specification. Try it yourself using the following script:
<?php
echo '<h1>Hello World!</h1>
<p>This is my first PHP page.</p>';When you open the file in your browser, the script output appears as follows:


The string ‘Hello World!’ enclosed in <h1> tags is interpreted by the browser as a first-level heading. This is followed by a line break and the paragraph defined by the <p> tag.
Depending on your needs, echo can be used with both single (') and double quotes ("). If you only want to output text, it doesn’t matter which type of quotation marks you choose. However, this changes when PHP variables come into play.
Variables
The echo language construct offers more than just simple text output. After all, this can also be implemented very well without PHP using plain HTML. The real added value of echo is that the statement makes it possible to generate text dynamically using variables.
Variables typically appear in the following form: $example.
Each variable consists of a dollar sign ($) followed by the variable name. Variables are used in PHP scripts to embed external data into web pages. These values can be of different types, ranging from simple numbers and strings to complete texts or even entire HTML document structures.
In PHP, there are eight different variable types:
| Variable type | Description |
|---|---|
| String | A string is a sequence of characters. This can be a word, a sentence, a text, or the entire HTML code of a web page. |
| Integer | An integer is a whole number without decimal places. It can be positive or negative. |
| Float | A float is a floating-point number, i.e., a numeric value with decimal places. In programming languages, the decimal comma is written as a full stop (.). The precision is around 14 significant digits; all digits are counted, not just those after the decimal point. |
| Boolean | Boolean variables are the result of a logical operation and have only two values: TRUE and FALSE. This variable type is used, for example, when you work with conditions. |
| Array | An array is a variable that can contain multiple elements. It is a grouping of several similarly structured data items that are combined into a single array. |
| Object | The object variable type allows developers to define their own data types. It is used in object-oriented programming. In our PHP tutorial for beginners, we exclude object variables. |
| NULL | The value NULL represents a variable without a value. For variables of the NULL type, this is the only possible value. |
| Resource | A resource is a special variable that contains a reference to external resources, such as an open file, a database connection, or a socket. Resources are managed by PHP itself. In our PHP tutorial for beginners, we exclude resource variables. |
Centralised content management is usually handled using database systems. However, values for variables can also be defined directly in the script. This type of assignment follows the following pattern:
$example = "value";The characteristic dollar sign is followed by the variable name (in this case example). The variable is assigned a value using the equals sign (=), with string values enclosed in double quotation marks. Integer and float values, however, are written without quotation marks (for example, $example = 24; or $example = 2.7;).
PHP gives you the freedom to name variables as you see fit. However, the following restrictions apply:
- Every variable starts with a dollar sign.
- A variable name is any string of letters, digits, and underscores (e.g.,
$example_1). - A valid variable name always begins with a letter or an underscore (
$example1or$_example), never with a digit (incorrect:$1example). - PHP is case-sensitive. The scripting language distinguishes between uppercase and lowercase (
$example≠$Example). - The variable name must not contain spaces or line breaks (incorrect:
$example 1) - Character strings reserved by PHP for other purposes cannot be used as user-defined variables (e.g.,
$this)
Let’s look at this using an example:
<?php
$author = "John Doe";
echo "<h1>Hello World!</h1>
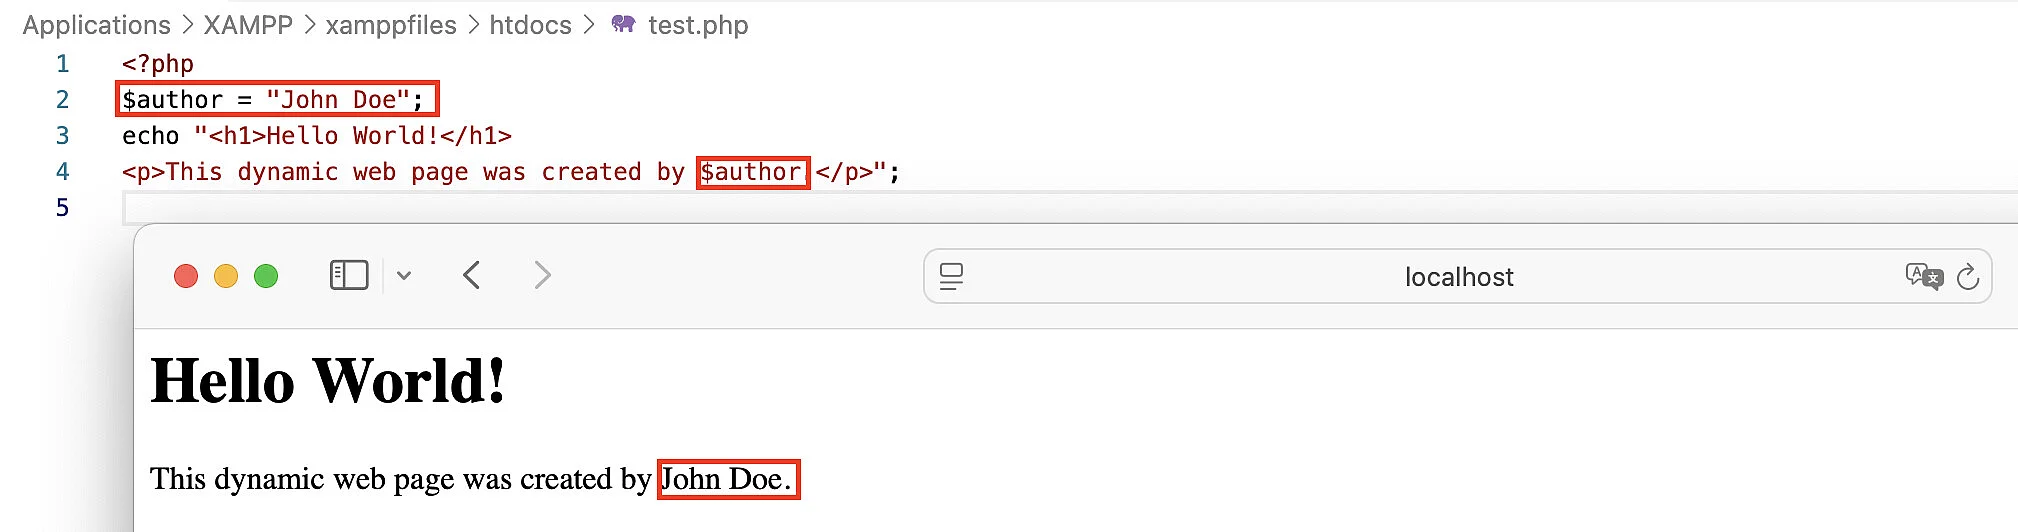
<p>This dynamic web page was created by $author.</p>";After the opening PHP tag, the variable is defined and the value ‘John Doe’ is assigned to $author. When the script is executed, the variable $author is replaced with the value ‘John Doe’ each time it is referenced within the script. The following graphic shows how this appears in the web browser.
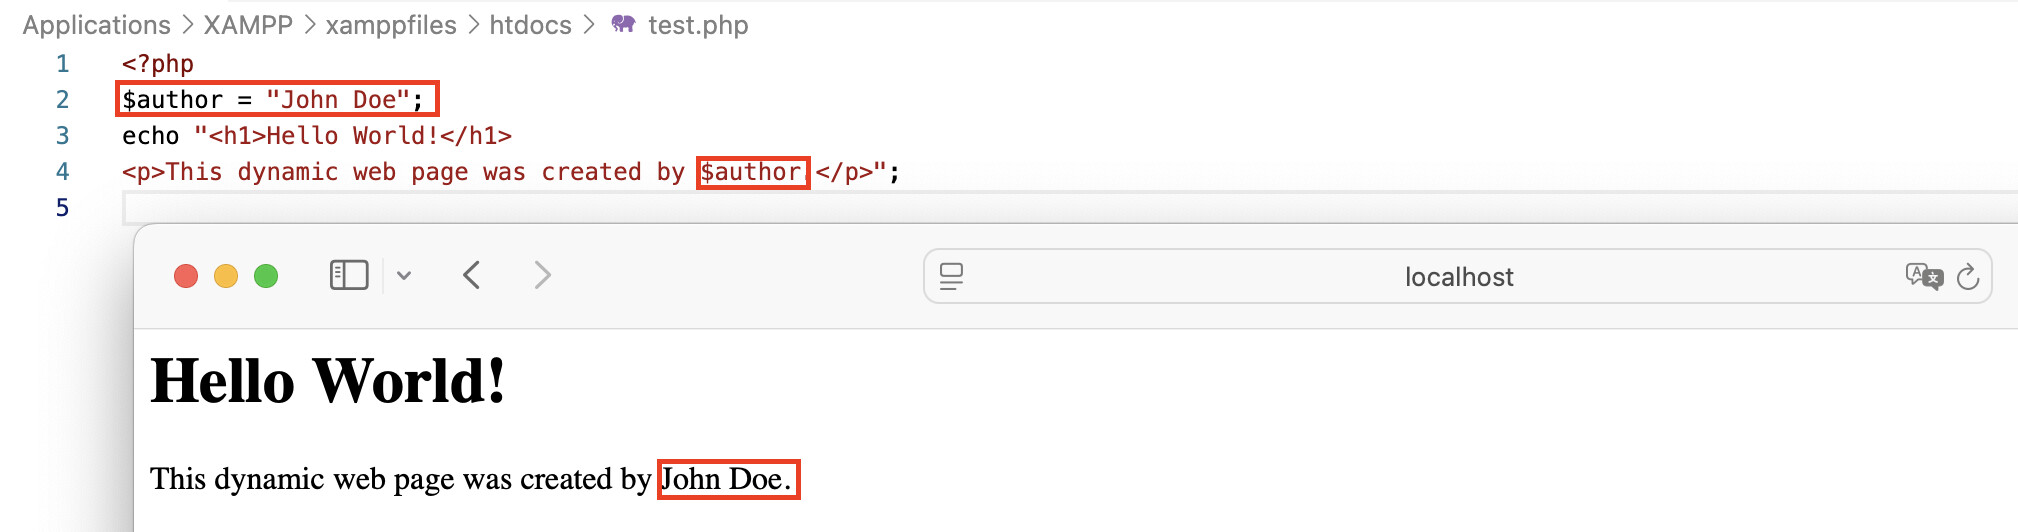
If there is an error and the web page was not created by John Doe but by his German colleague Max Mustermann, you only need to update the variable $author to correct it. This approach is especially efficient when a variable appears multiple times within a script. In that case, the change only needs to be made in one place, namely where the variable’s value is defined.
The advantages of this design concept are clear. If elements of a website, such as content in the footer, are revised, the changes do not have to be made manually on every individual subpage of the project. Instead, it is sufficient to update the corresponding entry in the database. The update is then automatically applied to all pages that use this data as variables.
If a variable is defined multiple times within a script, the most recent definition overwrites the previous one. Any subsequent echo statement will therefore output the current value of the variable.
<?php
$author = "John Doe";
echo "<h1>Hello World!</h1>
<p>This dynamic web page was created by $author.</p>";
$author = "Max Mustermann";
echo " <p>Supported by $author.</p>";In the code example, the variable $author is first assigned the value ‘John Doe’ and then replaced with the value ‘Max Mustermann’.
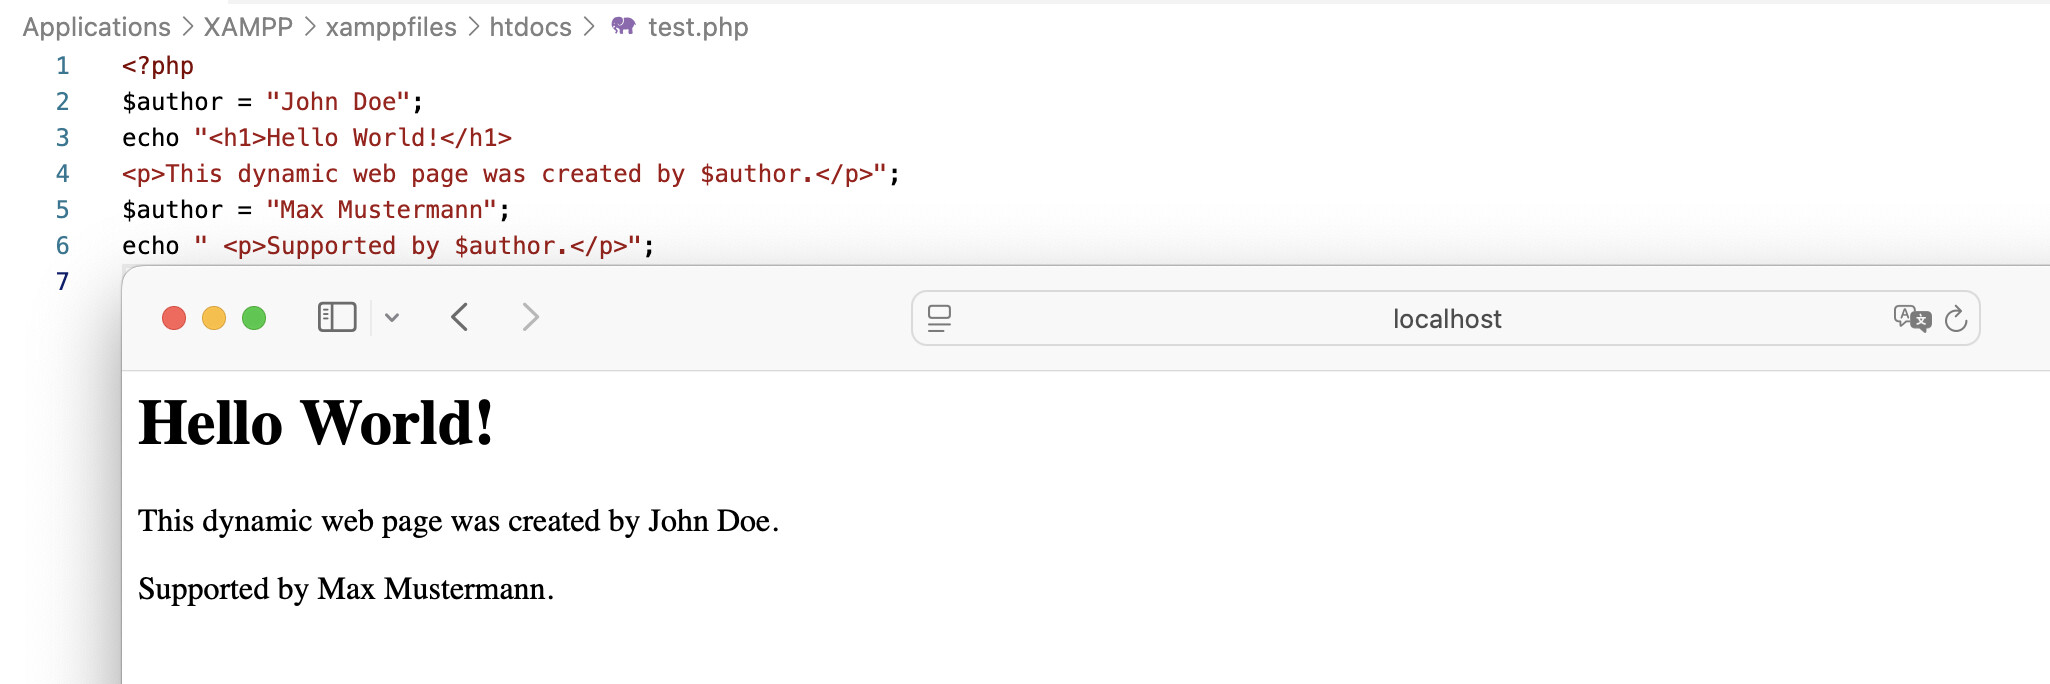
Now let’s look at quotation marks. Unlike strings, individual variables do not need to be enclosed in quotation marks:
<?php
$author = "John Doe";
echo $author;However, if a variable is used within a string, you must use double quotation marks ("). These tell the PHP interpreter to scan the string for variables and replace them with their corresponding values. Strings enclosed in single quotation marks ('), on the other hand, are treated as plain text and output exactly as written, even if they contain variables.
<?php
$author = "John Doe";
echo '<h1>Hello World!</h1>
<p>This dynamic web page was created by $author.</p>';In this case, the variable is not interpreted but simply output as plain text.
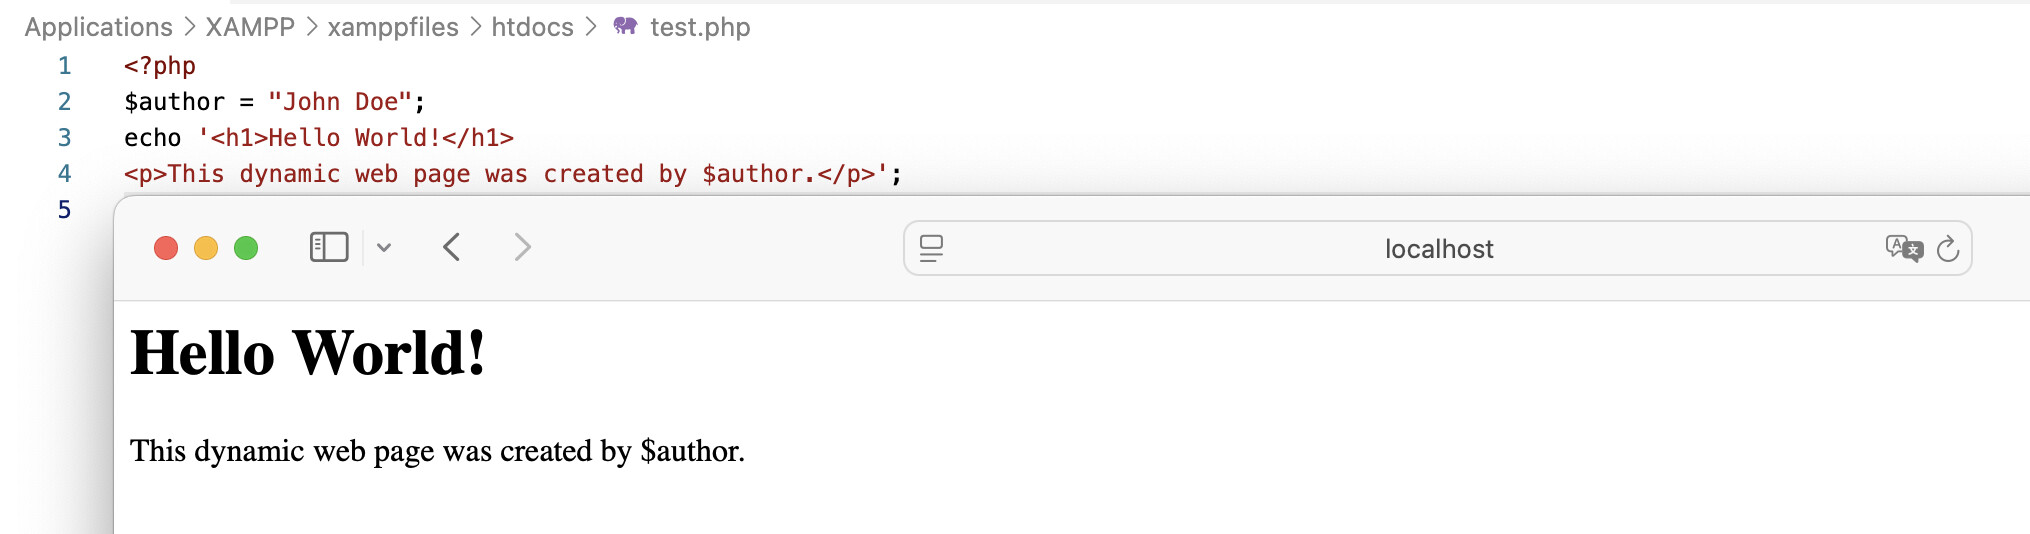
You may now be wondering what happens if you omit the quotation marks altogether. In that case, PHP will report a syntax error.
Strict typing with declare(strict_types=1)
By default, PHP tries to automatically convert different data types into one another. This behaviour is often called type juggling and can cause incorrect values to be processed without being noticed. With the directive declare(strict_types=1); you can selectively disable this behaviour. PHP then strictly checks during function calls whether passed arguments and return values match the declared variable types. The directive must be placed at the beginning of a PHP file and only applies to that file:
<?php
declare(strict_types=1);

function add(int $a, int $b): int
{
return $a + $b;
}
echo add(2, 3);
echo add("2", 3);In this example, the PHP function add() accepts only integer values. While the call with 2 and 3 works without issue, the second call triggers an error because the string "2" is not automatically converted to an integer. Strict typing helps identify such problems at an early stage and improves the maintainability and reliability of PHP code.
Error messages and escaping
If syntax errors occur, the PHP code is invalid and the page loaded in the browser may appear empty, or the PHP interpreter may display an error message. This can happen, for example, if you use the echo statement with a string that is not enclosed in quotation marks:
<?php
echo Hello World!;Error messages usually indicate where the error occurred and therefore provide valuable information for troubleshooting. You can view these messages in the XAMPP log file located at C:\xampp\logs\php_error_log.
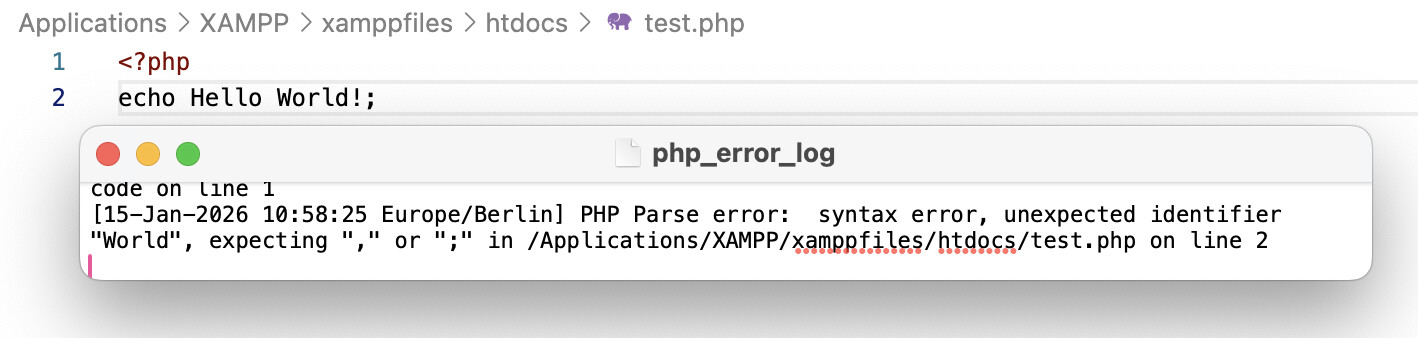
In the current example, the error is reported on line 2 of the program code, exactly where the quotation marks were intentionally omitted for demonstration purposes.
Syntax errors also occur when you want to output characters as text that are associated with a specific task in PHP. One example is the quotation mark ('). Characters like this can only be output as text in PHP if you make it clear to the interpreter that the character has been released from its original task. When working with single quotation marks, you have two options. You can enclose a string containing single quotation marks in double quotation marks, or you can escape the single quotation marks with a preceding backslash, a process known as ‘escaping’:
<?php
echo '\'Hello World!\' ';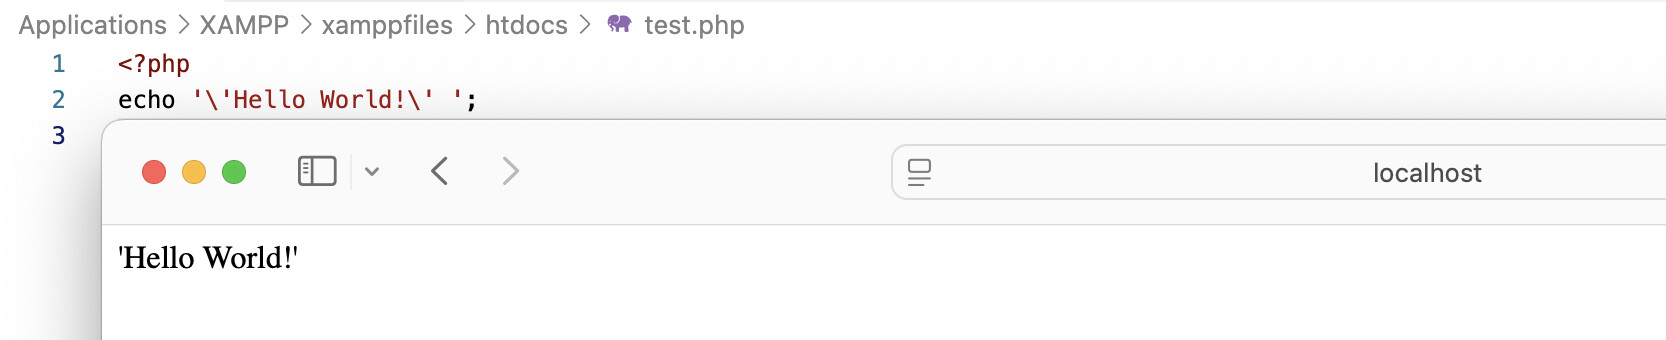
It’s also possible to combine single and double quotation marks:
<?php
echo " 'Hello World!' ";But not like this:
<?php
echo ' 'Hello World!' ';The spaces between the quotation marks were added in the examples for readability.
Concatenation operators
If you want to output multiple variables at the same time within a PHP script, you could do it the way you’ve learned so far:
<?php
$author1 = "John Doe";
$author2 = "Max Mustermann";
echo "<h1>Hello World!</h1>
<p>This dynamic web page was created by $author1 and $author2.</p>";Simply include both variables directly within the string enclosed in double quotation marks, along with the rest of the text to be displayed. PHP automatically recognises variables by the dollar sign ($) and replaces them with their corresponding values.
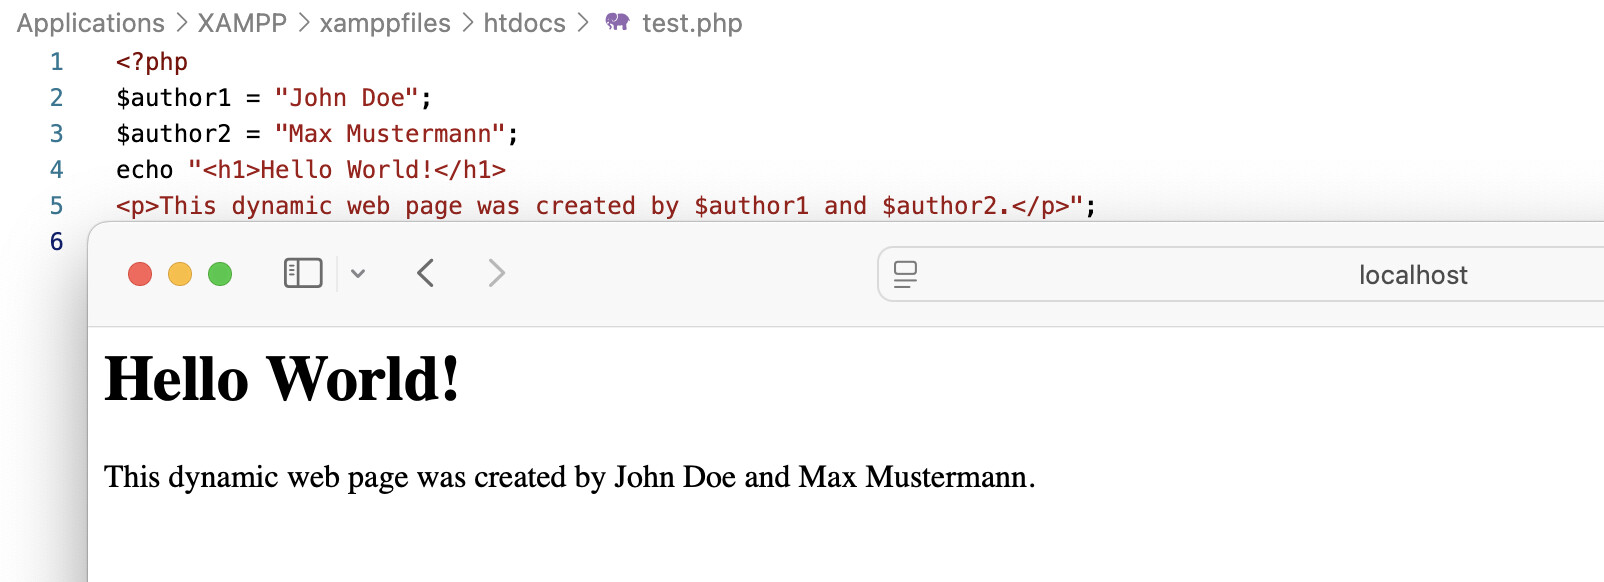
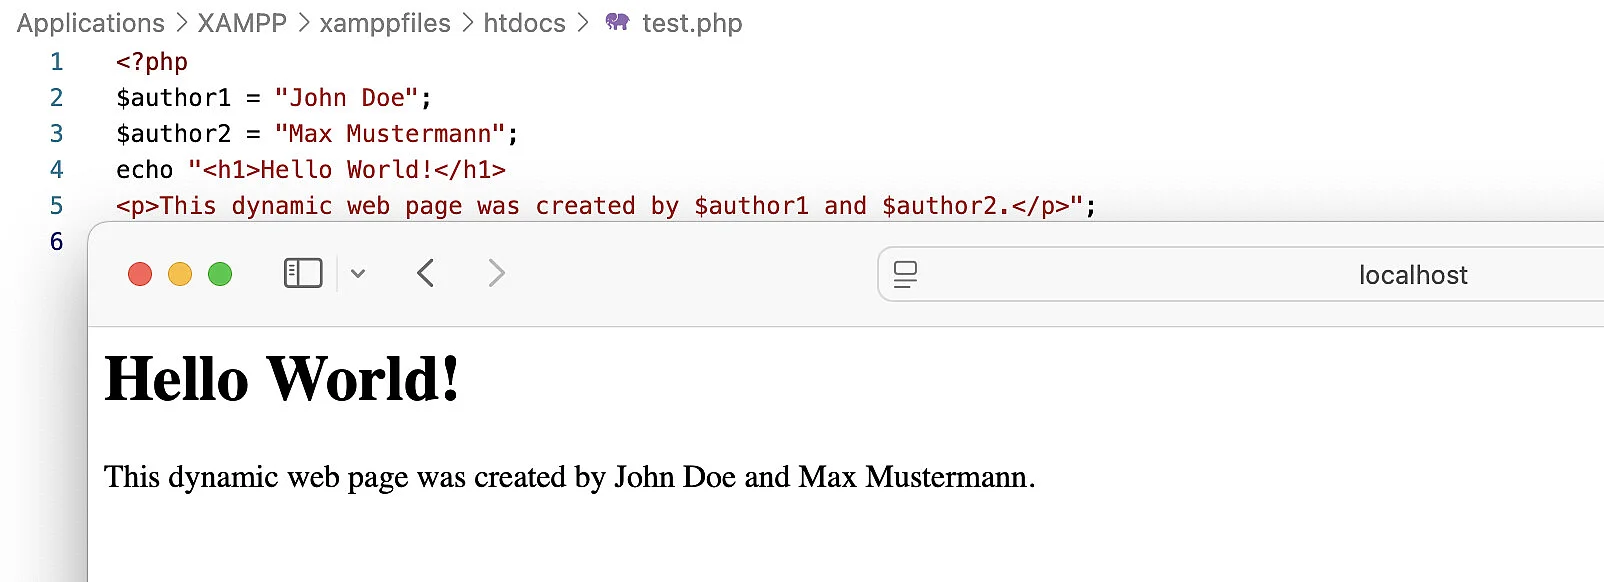
Among developers, however, this approach is generally considered poor practice. The common guideline is that variables should not be embedded directly within a string. One reason is that many programming languages require this separation. More importantly, PHP itself recommends separating strings and variables, especially in function calls or when working with more complex expressions. For the sake of consistency and clarity, it is therefore advisable to apply this separation even in simple text output, even if it is not strictly required in such cases.
When working with variables, we’re always dealing with multiple elements that need to be concatenated for output. In PHP, the concatenation operator (.) is used for this purpose.
A cleaner version of the example shown above would therefore look as follows:
<?php
$author1 = "John Doe";
$author2 = "Max Mustermann";
echo '<h1>Hello World!</h1>
<p>This dynamic web page was created by ' . $author1 . ' and ' . $author2 . '.</p>';So we’re dealing with three strings and two variables that are concatenated into a single character sequence.
| String1 | Variable1 | String2 | Variable2 | String3 | ||||
|---|---|---|---|---|---|---|---|---|
| ’<h1>Hello World!</h1><p>This dynamic web page was created by ’ | . | $author1 |
. | ’ and ’ | . | $author2 |
. | ‘.</p>’ |
Note that the concatenation operator joins strings or variables without adding spaces automatically. If a space is required, it must be included explicitly within the string inside the quotation marks, as shown in the example.
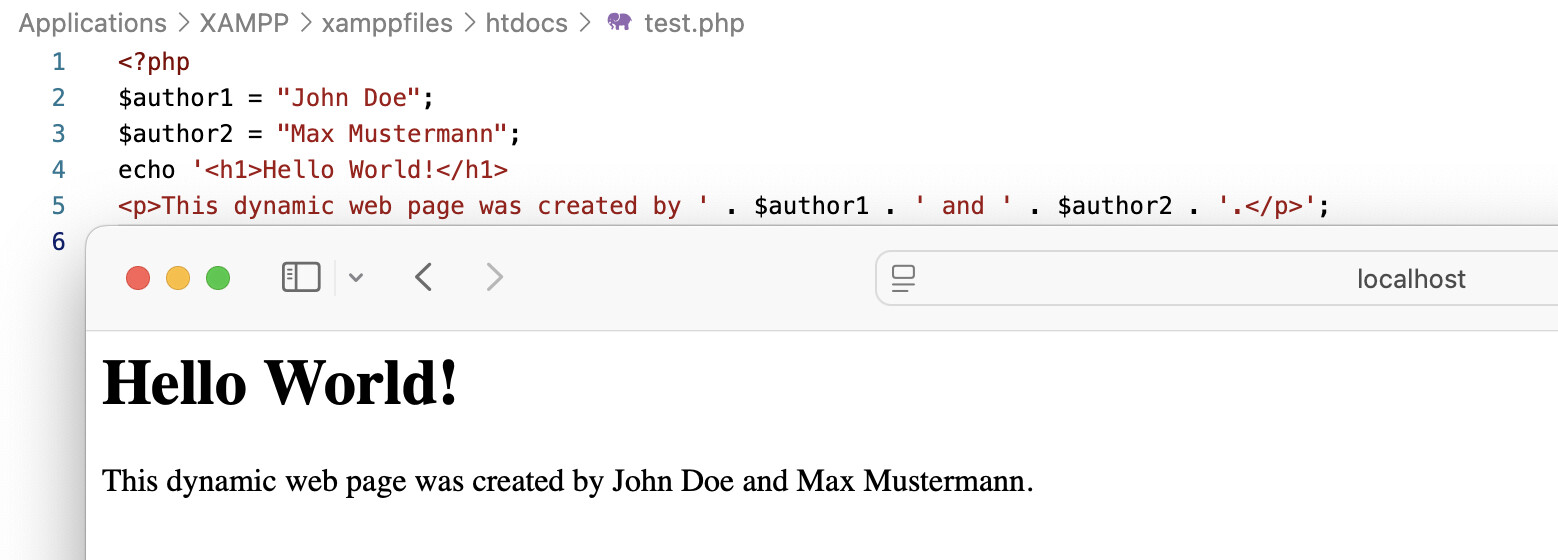
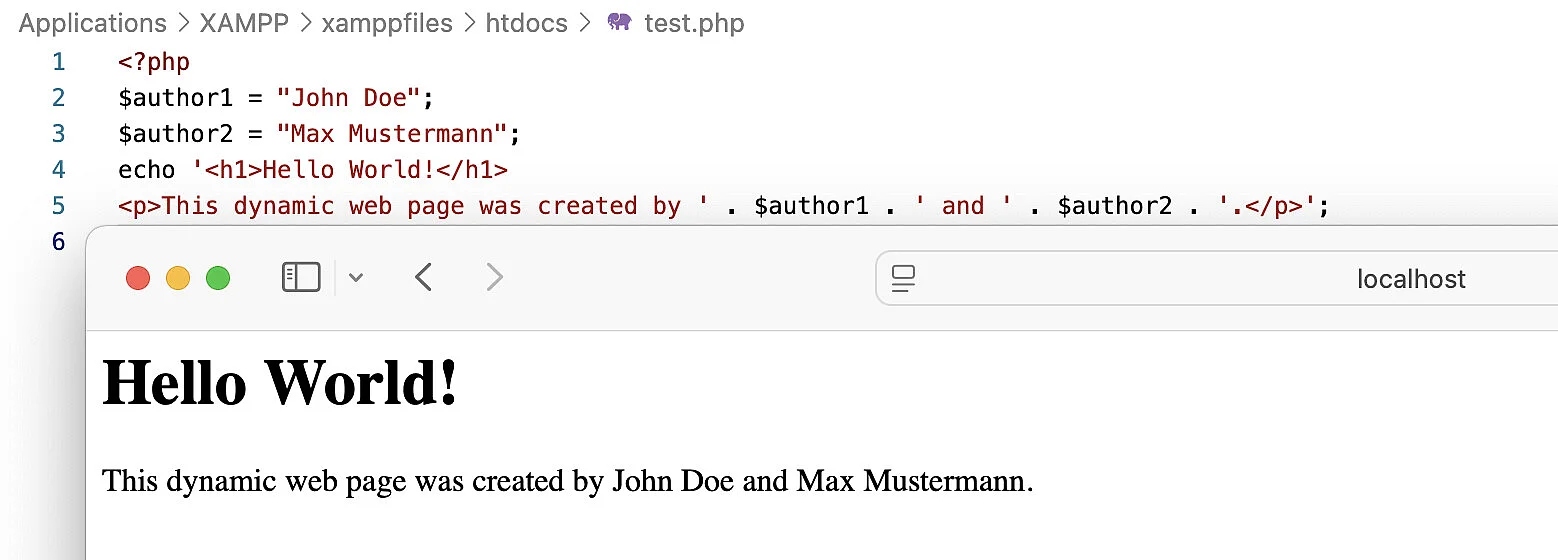
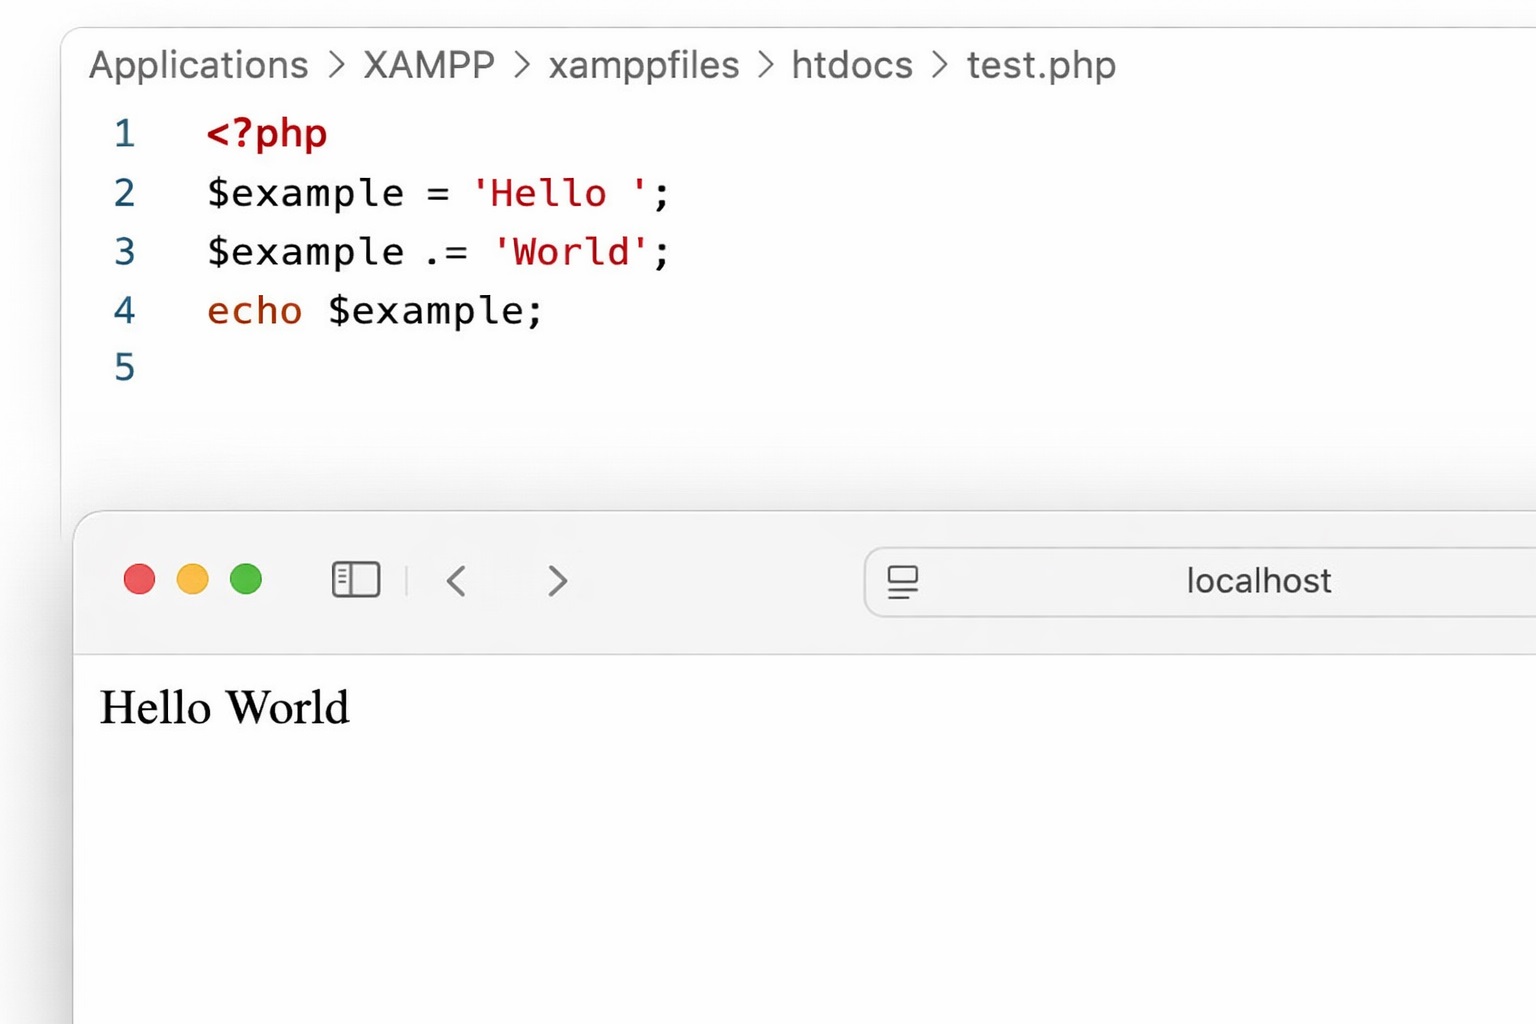
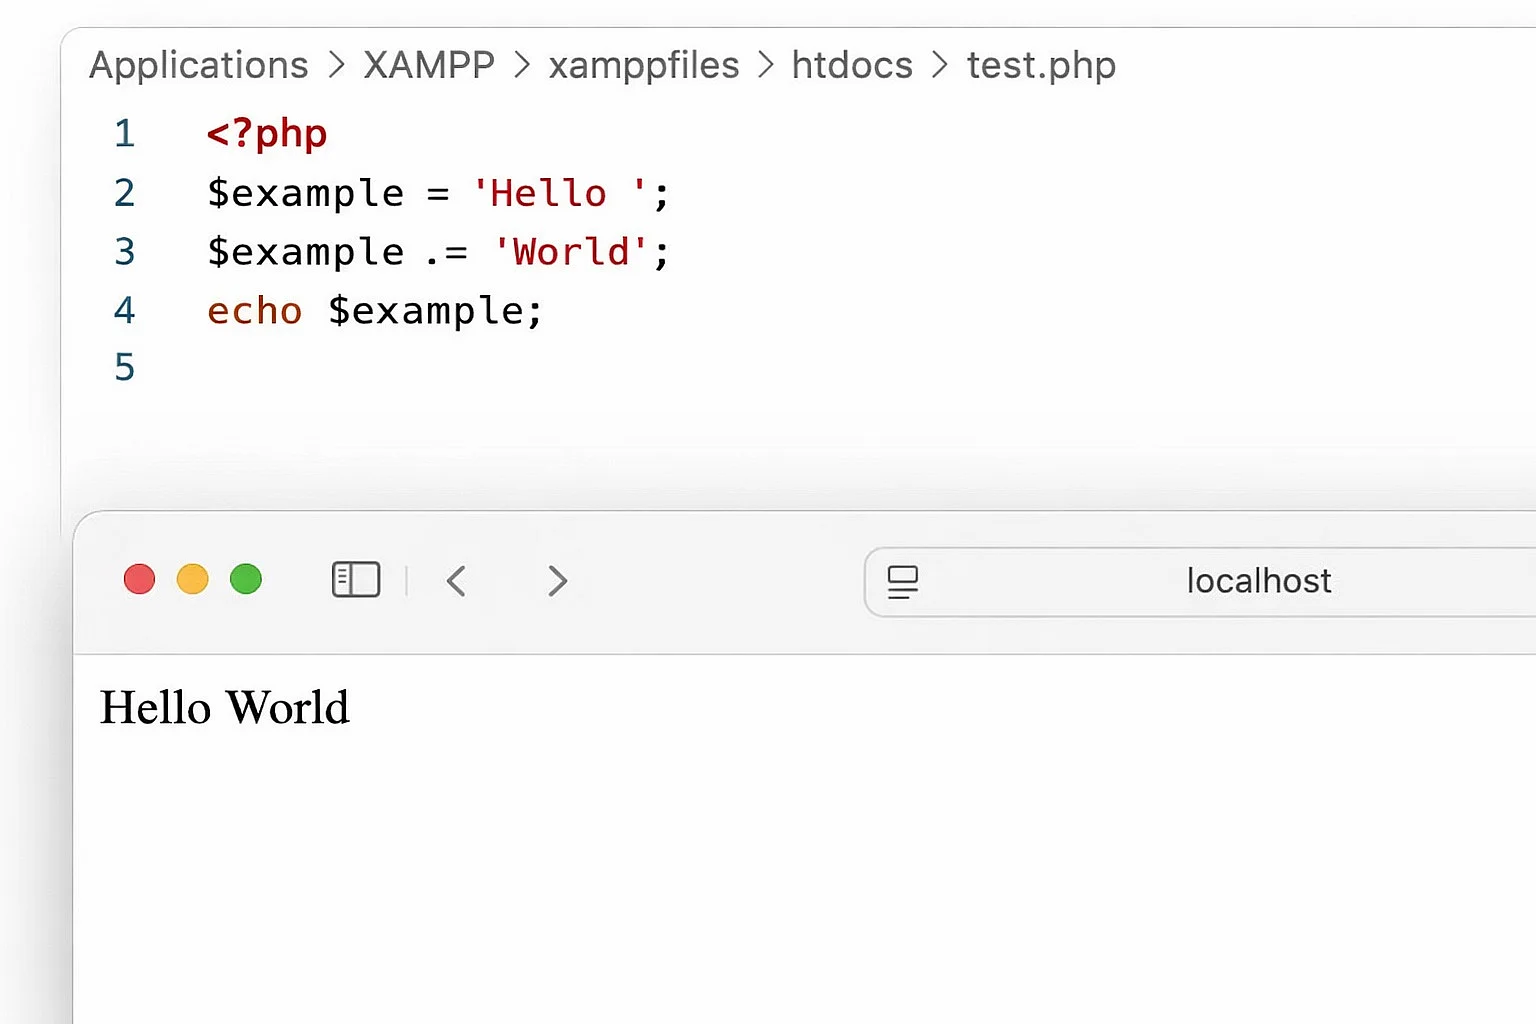
Developers use the concatenation operator not only to combine strings and variables for text output, but also to extend variables. The following example shows how this works:
<?php
$example = 'Hello ';
$example .= 'World';
echo $example;To extend the value of a variable, redefine it using the concatenation operator directly before the equals sign. This is the commonly used shorthand notation for $example = $example . 'World';.
PHP appends the new value to the previously defined one. If you want a space between the two values, include it at the end of the first string, as shown in the example.
Embedding PHP in HTML
The PHP interpreter is fundamentally only concerned with code that is located between an opening and a closing PHP tag (with the latter being optional for pure PHP):
<?php [This area is parsed by the PHP interpreter] ?>
All other parts of the document are ignored by the interpreter and passed to the web server unchanged. PHP code can therefore be freely integrated into HTML documents, for example to create templates for a content management system. Make sure that HTML documents containing PHP code are saved with the .php extension. Otherwise, the file will not be processed by the PHP interpreter but delivered directly to the browser, causing the source code to appear as plain text on the website.
You can think of the PHP interpreter as the web server’s lazy coworker who only starts working when explicitly asked, for example through an opening PHP tag.
If you want to combine HTML and PHP, write your HTML page as usual using the standard document structure and save it with the .php file extension:
<!DOCTYPE html>
<html lang="en">
<head>
<meta charset="utf-8">
<title>My first PHP page</title>
</head>
<body>
<h1>Hello World</h1>
<p>What is the current time and date?</p>
</body>
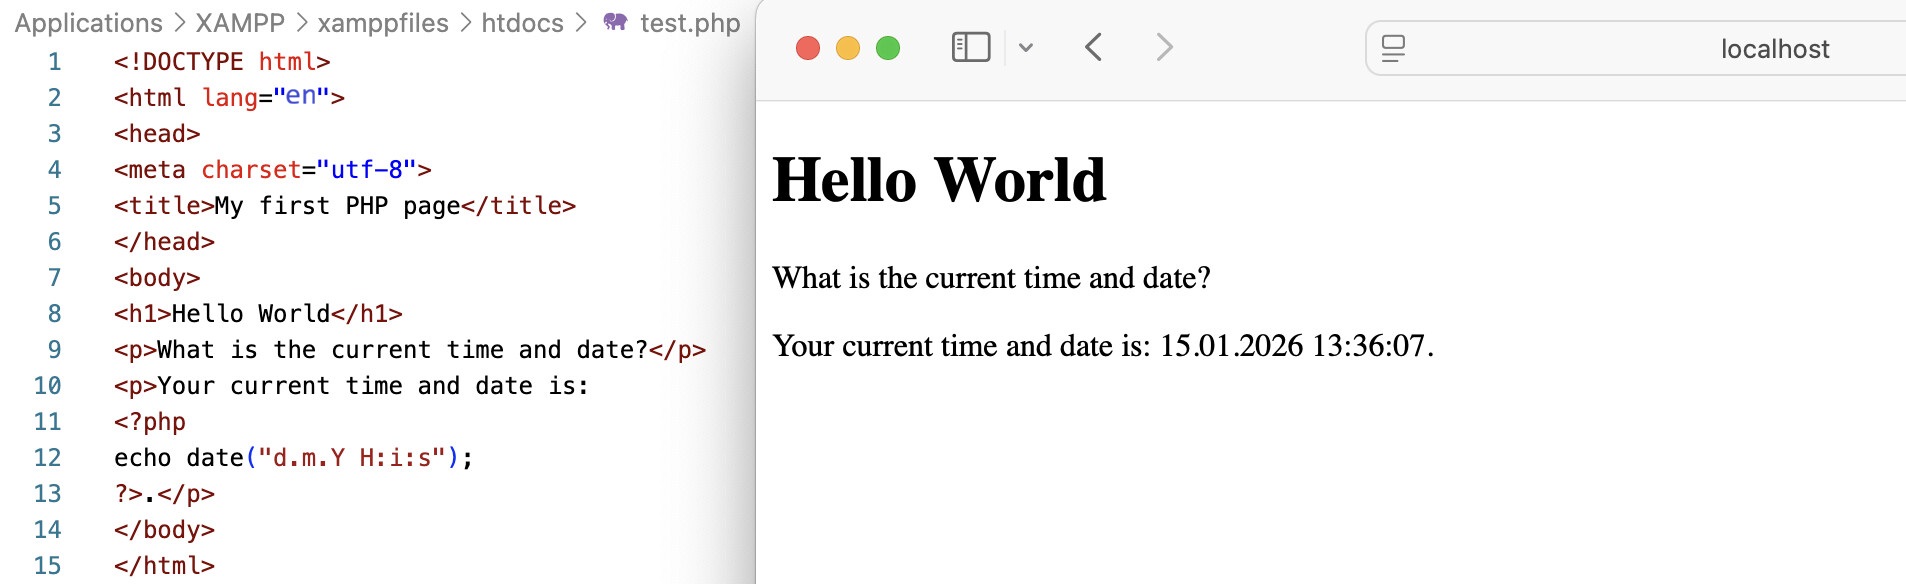
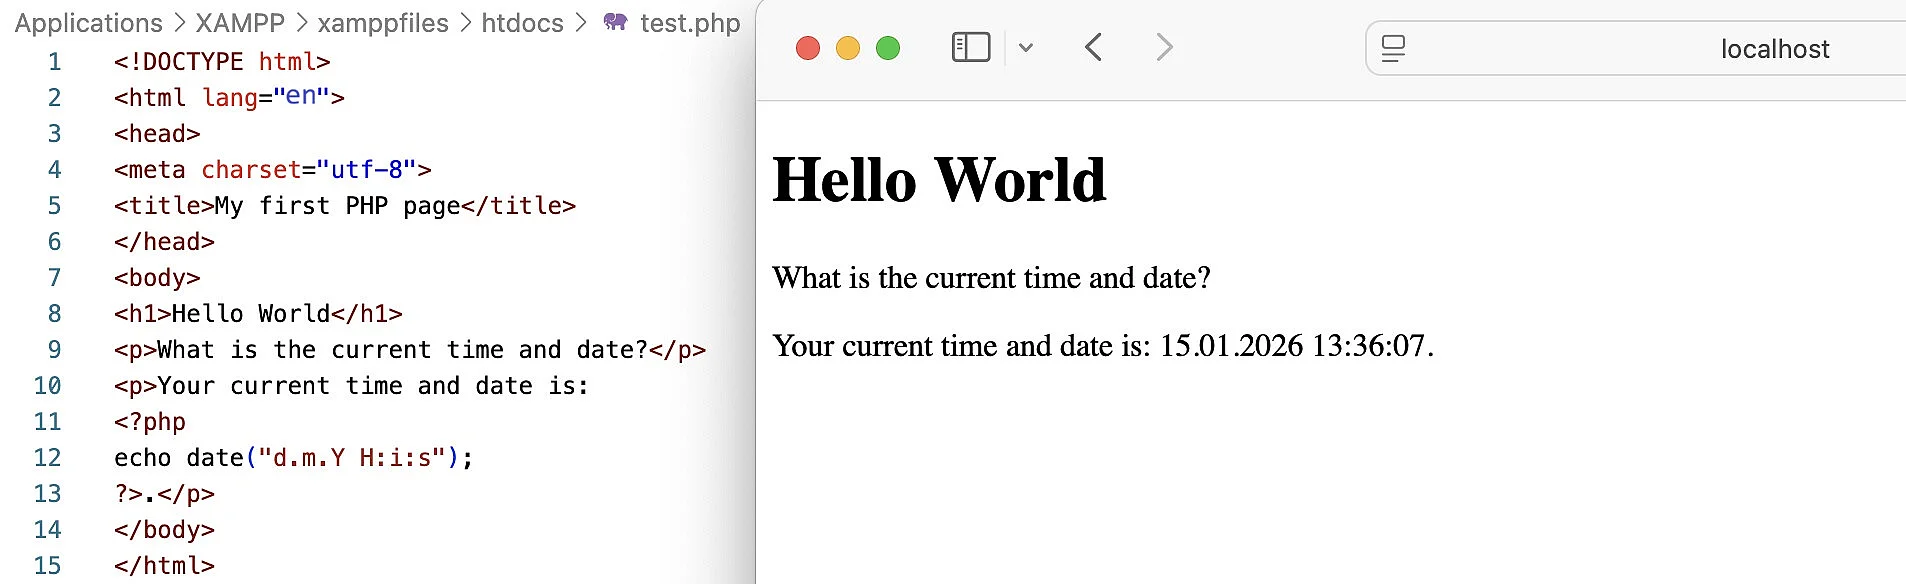
</html>Now add a PHP script to your HTML document. Make sure that all the program code is located within the PHP tags.
<!DOCTYPE html>
<html lang="en">
<head>
<meta charset="utf-8">
<title>My first PHP page</title>
</head>
<body>
<h1>Hello World</h1>
<p>What is the current time and date?</p>
<p>Your current time and date is:
<?php
echo date("d.m.Y H:i:s");
?>.</p>
</body>
</html>In the example, we combined the language construct echo with the PHP function date() to output the current date and time as text on the server side. The function’s parameter specifies the desired format as a string:
"d.m.Y H:i:s" (day.month.year hour:minute:second)
When the file is accessed in a web browser, the PHP interpreter executes the script and embeds the current time as text into the HTML document. The web server then sends the generated output to the browser, where it is displayed as a webpage.
The PHP comment function
Like HTML, PHP code can also be commented out. Comments in the source code are ignored by the PHP interpreter as long as they follow the correct syntax. PHP offers three different ways to write comments.
To comment out an entire line and exclude it from execution, use the hash symbol (#) or two forward slashes (//). The following example demonstrates both methods:
<?php
## This is a single line comment
echo '<h1>Hello World!</h1>
<p>This is my first PHP page.</p>';
// This is also a single-line comment!Text editors and IDEs with syntax highlighting usually display comments in a different colour. Sections marked as comments within the PHP script never reach the browser, unlike HTML comments, because they are ignored by the PHP interpreter during execution.
You can also insert comments that span multiple lines. To do this, begin the comment block with a slash followed by an asterisk (/*) and end it with an asterisk followed by a slash (*/).
<?php
/*
This is a multiple-lines comment block
that spans over multiple
lines
*/
echo '<h1>Hello World!</h1>
<p>This is my first PHP page.</p>';Comments marked in this way are also not parsed and therefore do not appear on the website.
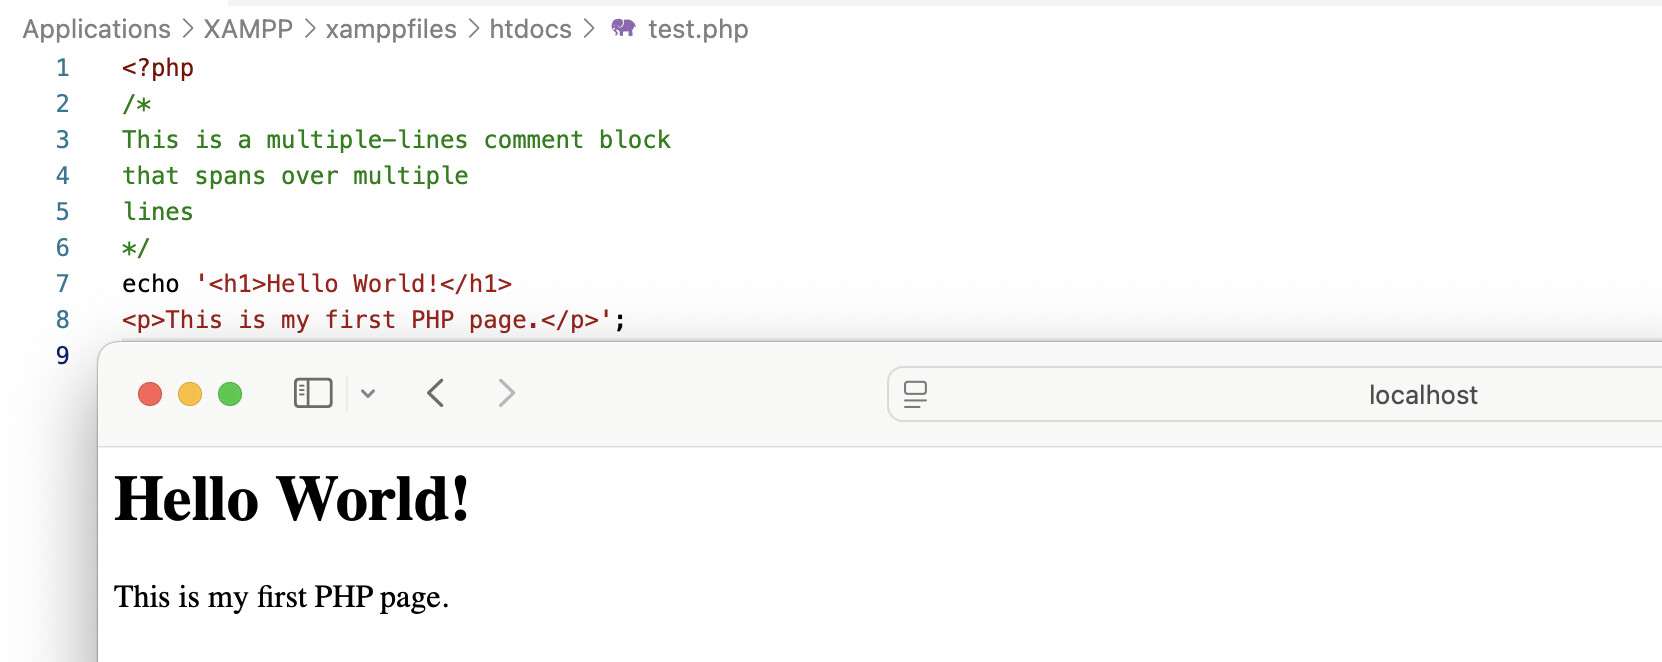
Programmers use comments to structure the source code of their scripts, leave notes for later edits, or add internal information such as the author or the date of creation. Comments are optional and should be used sparingly to ensure good readability of the source code.
Calculating with variables
As part of this PHP tutorial, you have already worked with variables. So far, these variables have mainly been assigned string values, that is, sequences of characters. Now we will look at variables that store integers or floating-point numbers (floats).
When variables contain numeric values, PHP allows you to perform calculations with them. Let’s begin with a simple addition of two integers:
<?php
$number1 = 237;
$number2 = 148;
$result = $number1 + $number2;
echo "Result: " . $result;First, we assign the integers 237 and 148 to the variables $number1 and $number2 and then define a variable called $result. This variable is meant to store the sum of the two variables. To do this, we use the arithmetic operator + (plus). Finally, we output the result of the addition as text using the language construct echo. Note that you do not need quotation marks when assigning numeric values to variables.
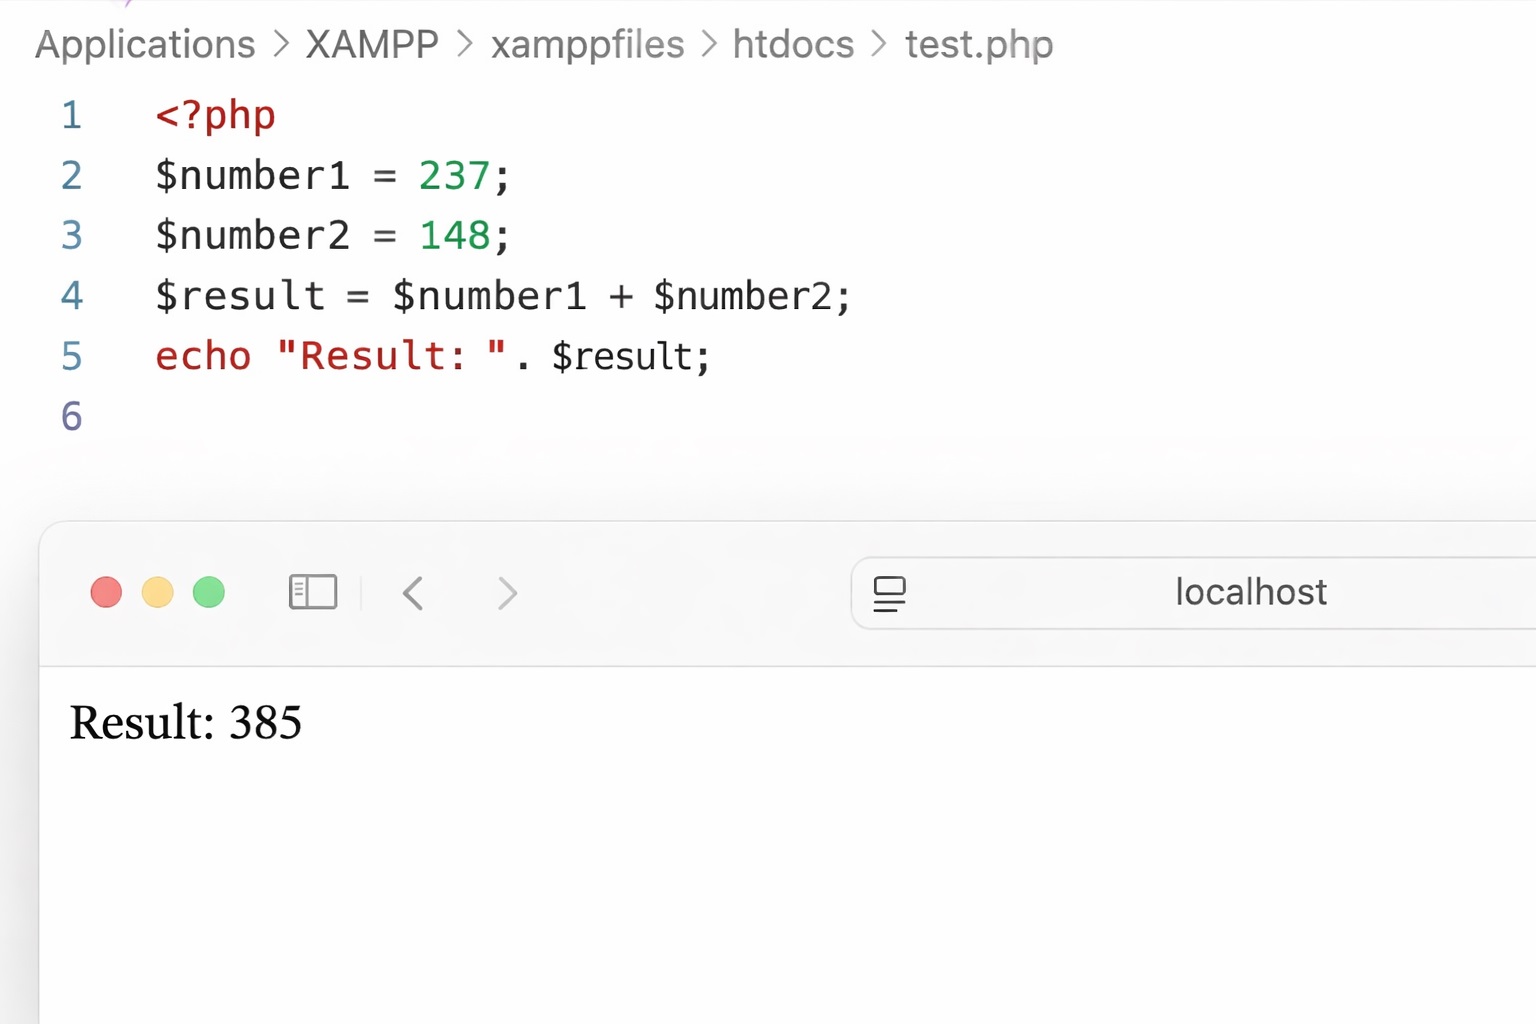
The following code example shows a selection of mathematical calculations that can be performed server-side with PHP. The PHP operators used largely correspond to the standardised mathematical symbols.
| Arithmetic operator | Operation | Result |
|---|---|---|
$number1 + $number2 |
Addition | Sum of $number1 and $number2 |
$number1 - $number2 |
Subtraction | Difference of $number1 and $number2 |
$number1 * $number2 |
Multiplication | Product of $number1 and $number2 |
$number1 / $number2 |
Division | Quotient of $number1 and $number2 |
$number1 ** $number2 |
Exponentiation | $number2-th power of $number1 |
<?php
$number1 = 10;
$number2 = 5;
$addition = $number1 + $number2; // Addition
$subtraction = $number1 - $number2; // Subtraction
$multiplication = $number1 * $number2; // Multiplication
$division = $number1 / $number2; // Division
$exponentiation = $number1 ** $number2; // Exponentiation

echo "Result of addition: " . $addition ."<br />";
echo "Result of subtraction: " . $subtraction . "<br />";
echo "Result of multiplication: " . $multiplication . "<br />";
echo "Result of division: " . $division . "<br />";
echo "5th power of 10 (10^5): " . $exponentiation . "<br />";
echo "Square root of 81: " . sqrt(81) . "<br />";The output looks as follows:
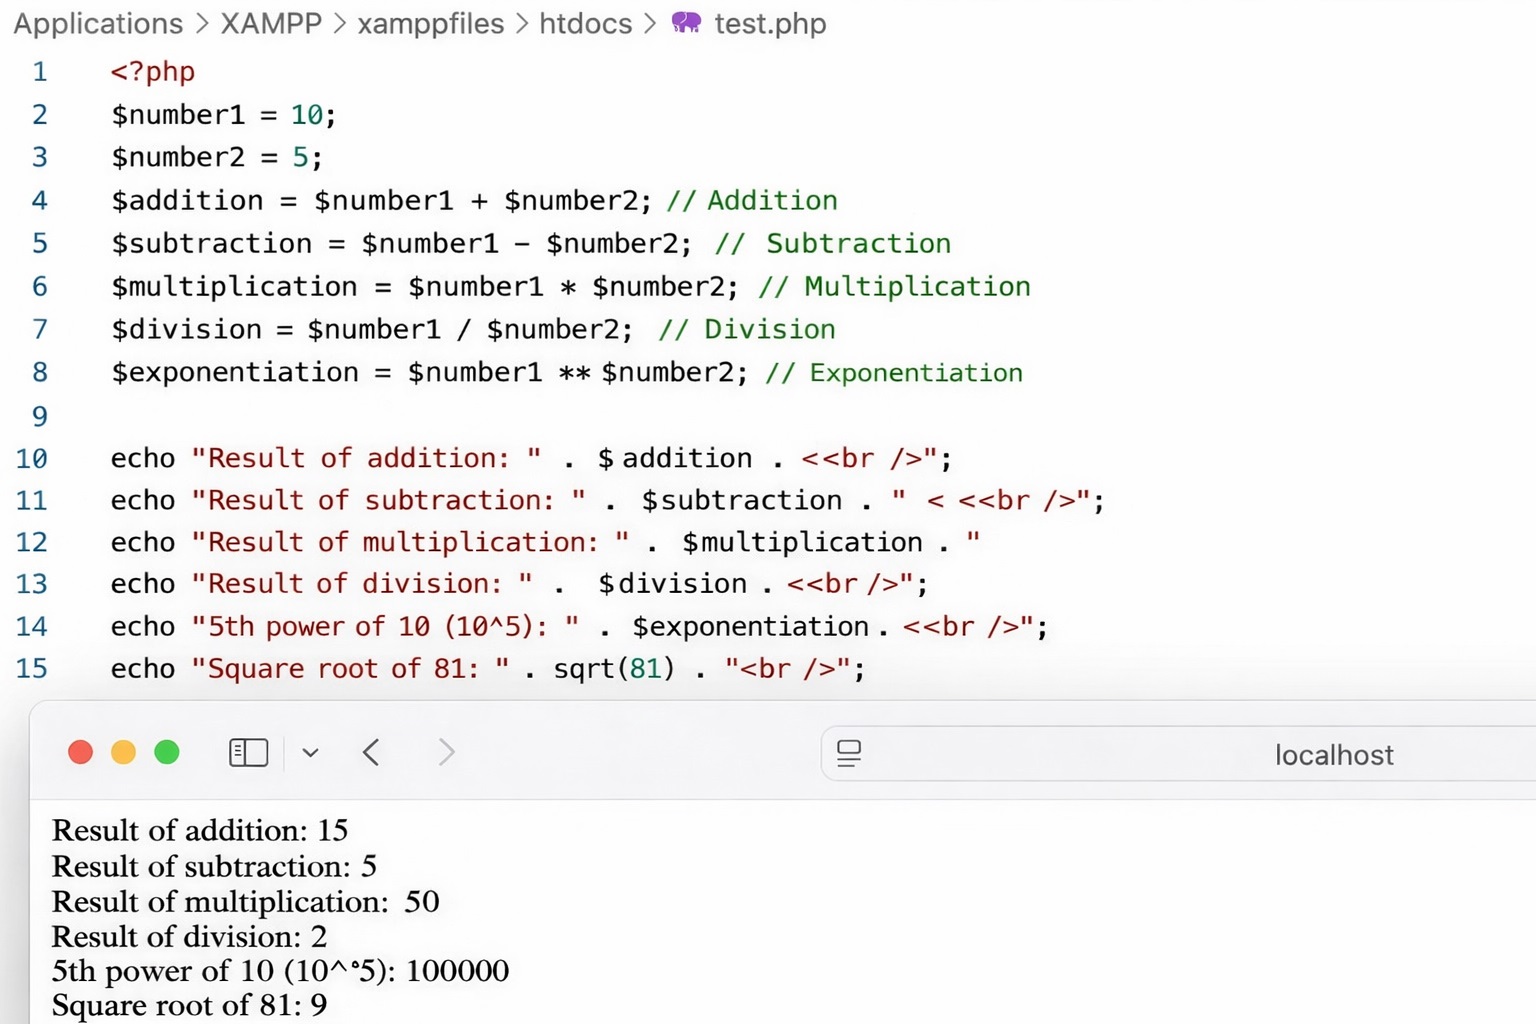
For complex calculations, you can combine the various arithmetic operations in a single script:
<?php
$number1 = 10;
$number2 = 5;
$result = 2 * $number1 + 5 * $number2 - 3 * sqrt(81);
echo "Result: " . $result;The PHP interpreter determines the values of the variables and calculates:
2 * 10 + 5 * 5 - 3 * √81 = 20 + 25 - 27 = 18
The sqrt() function calculates the square root of the value passed in brackets. The standard rules of operator precedence apply, meaning that multiplication and division are performed before addition and subtraction. The echo statement then outputs the result as a string in the browser.
Expressions enclosed in brackets are also evaluated first in PHP. In the following example, we are working with floating-point numbers:
<?php
$number1 = 2.5;
$number2 = 3.7;
$result = 2 * ($number1 + 5) * ($number2 - 3) * sqrt(81);
echo "Result: " . $result;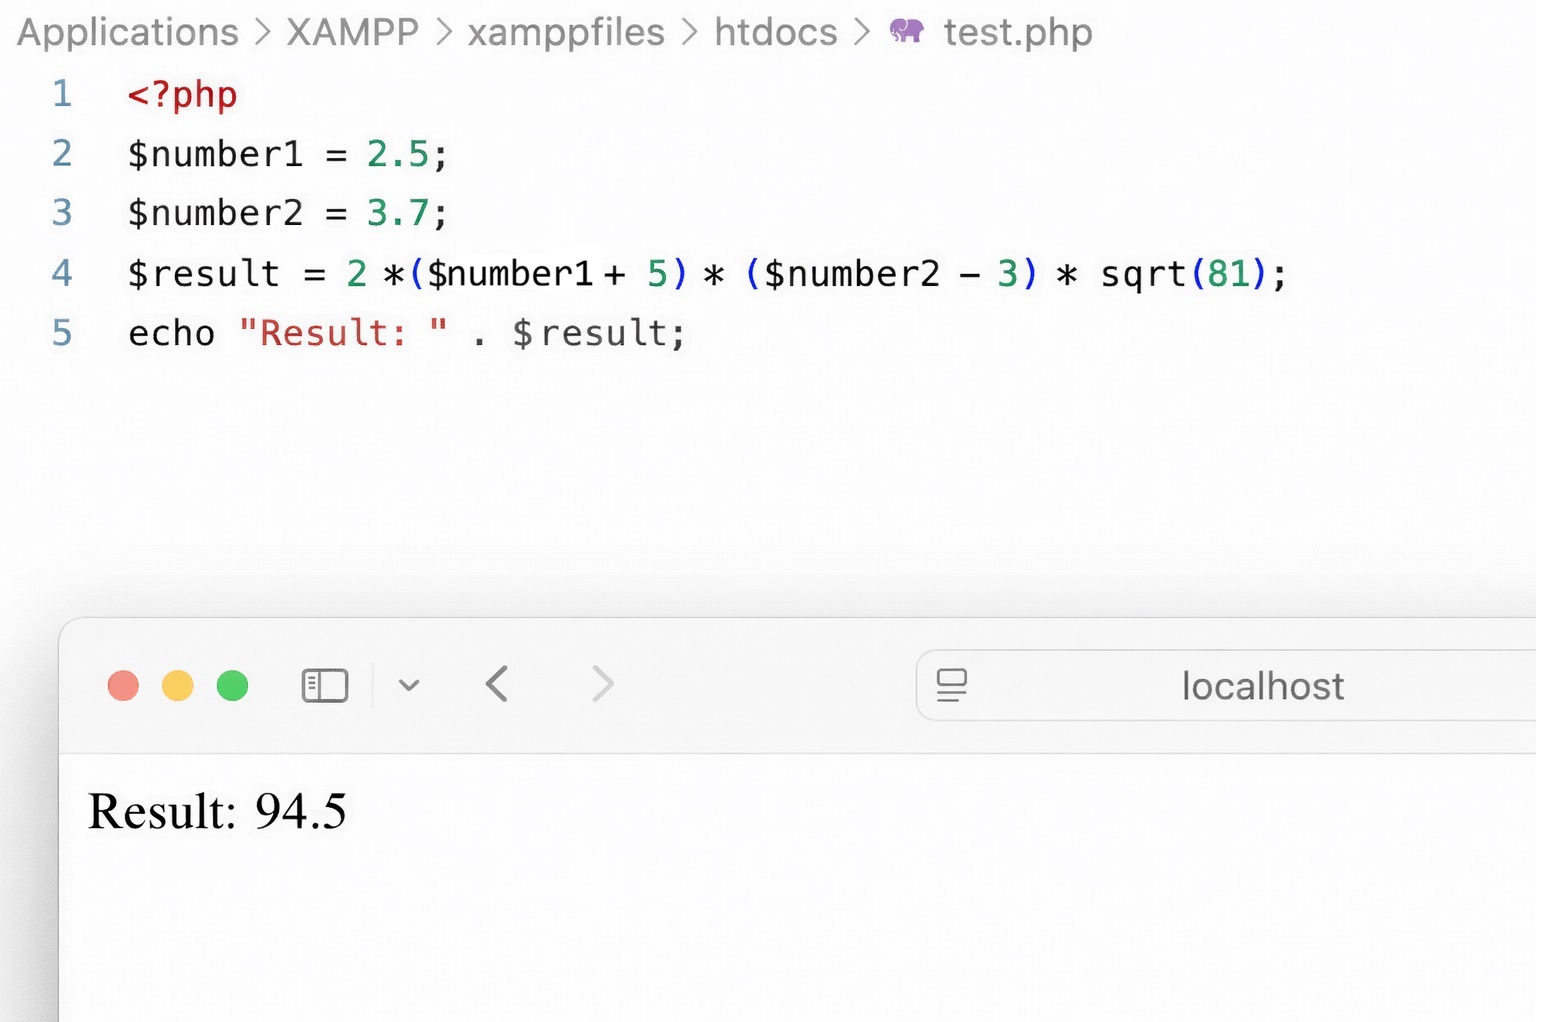
Like most common programming languages, PHP also supports operators to increase or decrease numeric values by 1. A distinction is made between the pre-increment operator, the pre-decrement operator, the post-increment operator, and the post-decrement operator.
| Operation | Operator | Result |
|---|---|---|
| Pre-increment | ++$number |
The ++ operator increments the value of the variable $number. The value is increased by 1 and the new value of $number is returned. |
| Pre-decrement | --$number |
The -- operator decrements the value of the variable $number. The value is reduced by 1 and the new value of $number is returned. |
| Post-increment | $number++ |
The current value of $number is returned first and then increased by 1. |
| Post-decrement | $number-- |
The current value of $number is returned first and then decreased by 1. |
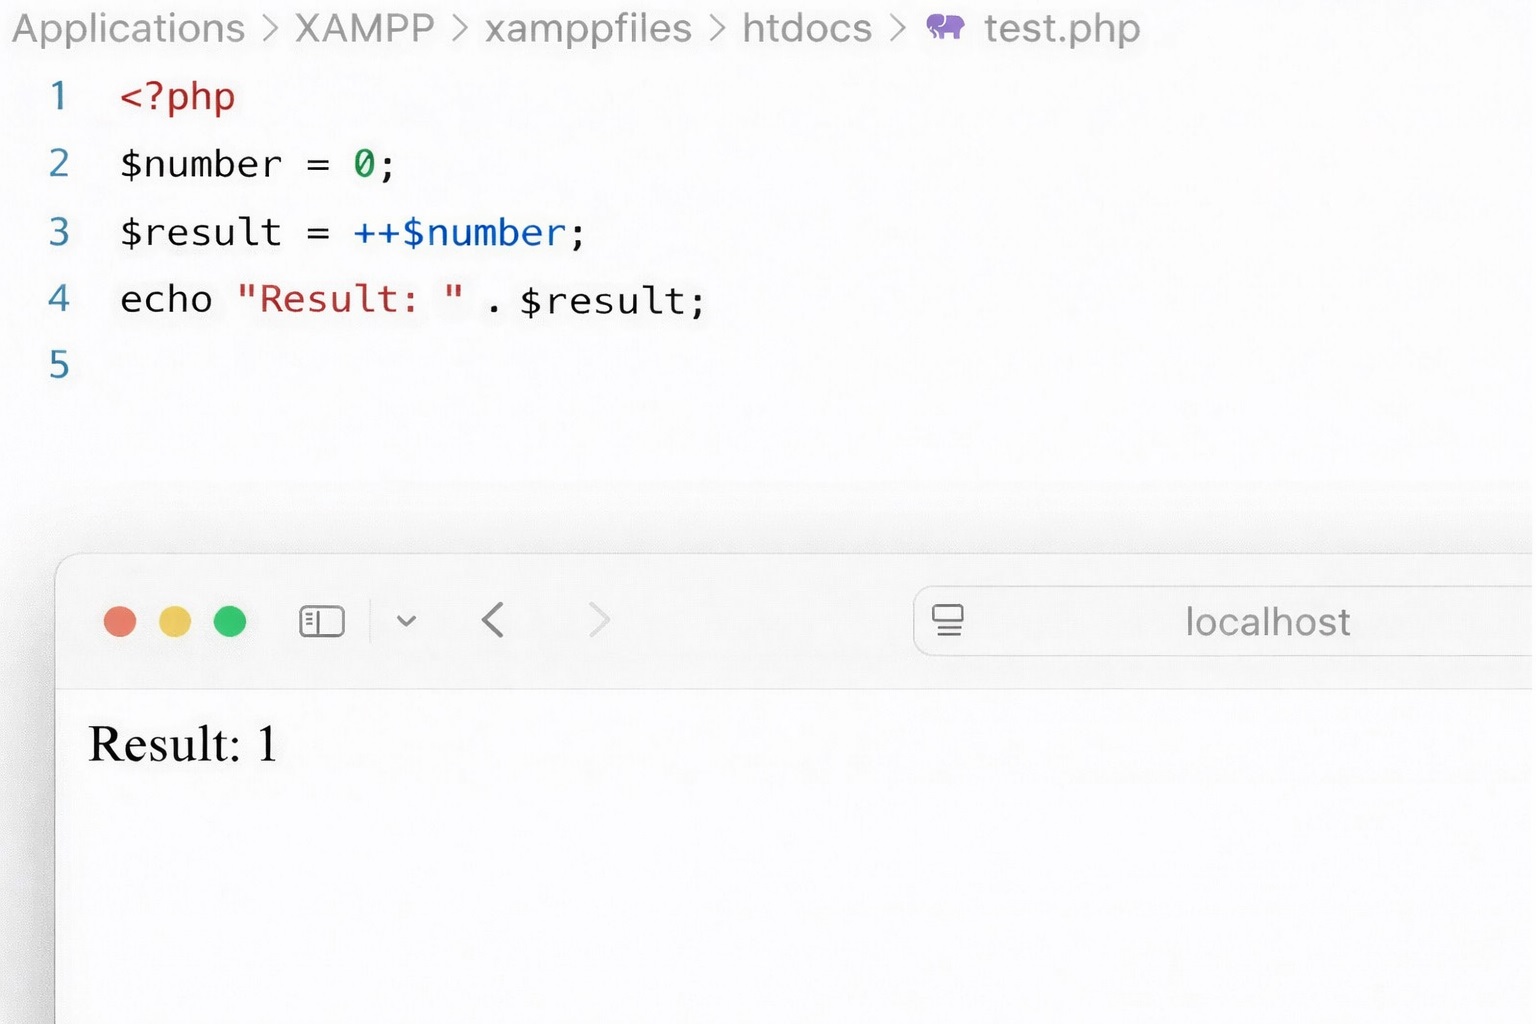
Using pre-incrementation as an example, we demonstrate arithmetic operations with the increment and decrement operators. In the following script, the value of the variable $number is increased by 1, the updated value is stored in $result, and then output as a string:
<?php
$number = 0;
$result = ++$number;
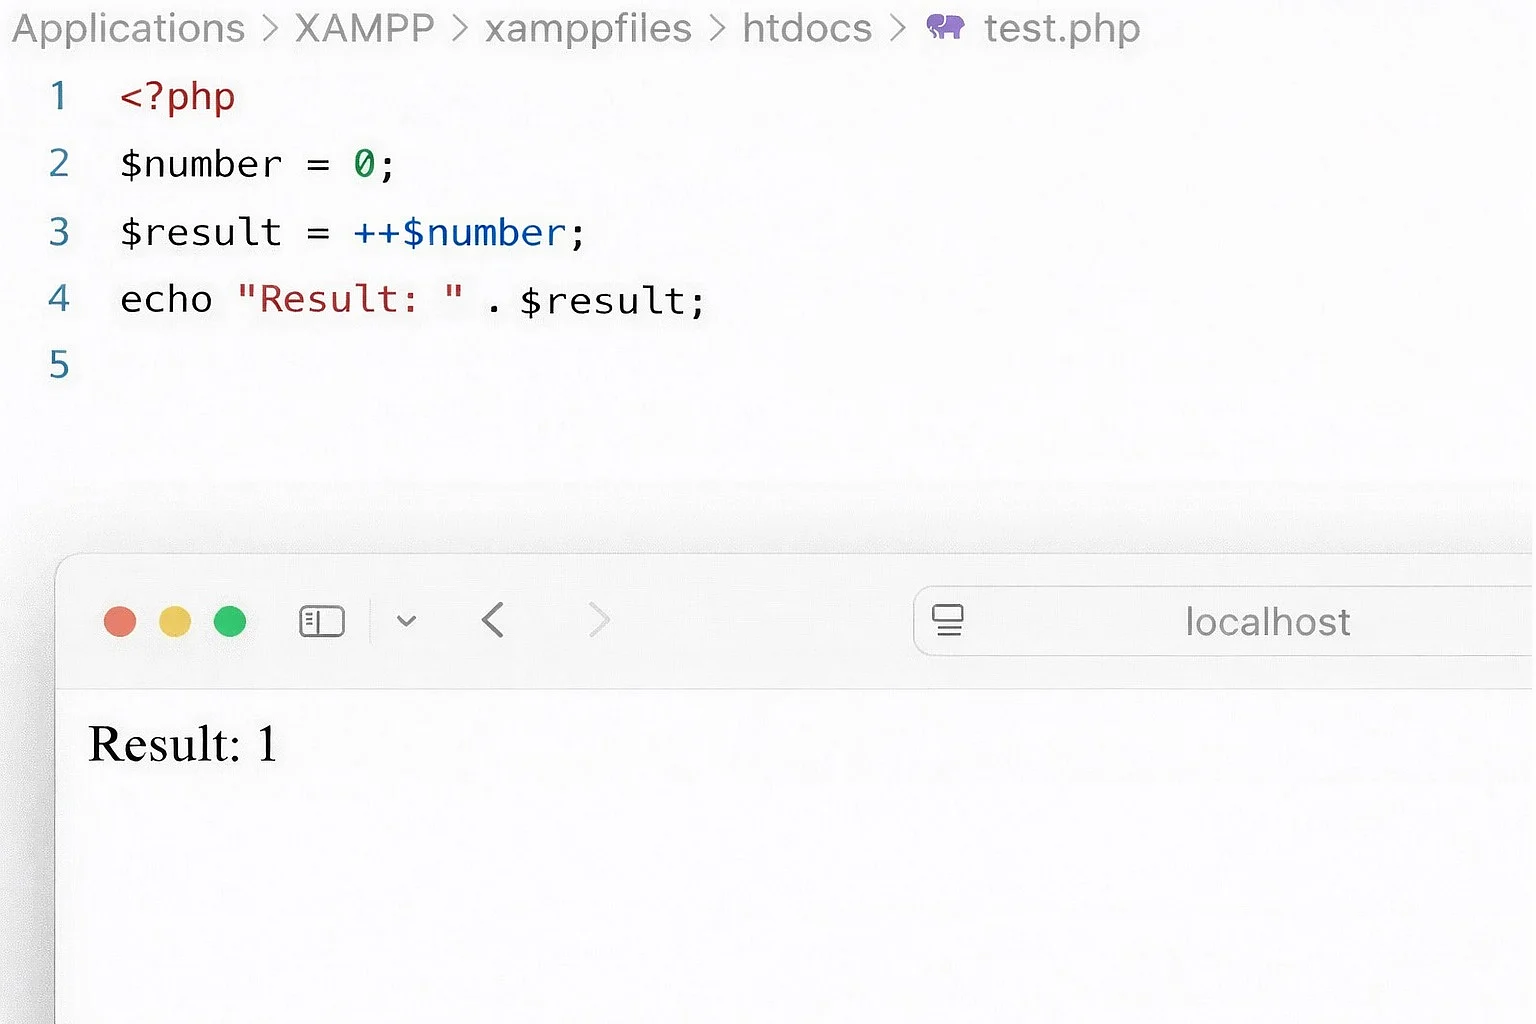
echo "Result: " . $result;If you increase the value 0 by 1, you get the result 1.
To calculate the pre-decrement of the variable $number, we use the same script but replace the pre-increment operator (++) with the pre-decrement operator (--):
<?php
$number = 0;
$result = --$number;
echo "Result: " . $result;We decrement the value 0 stored in the variable $number, resulting in -1.
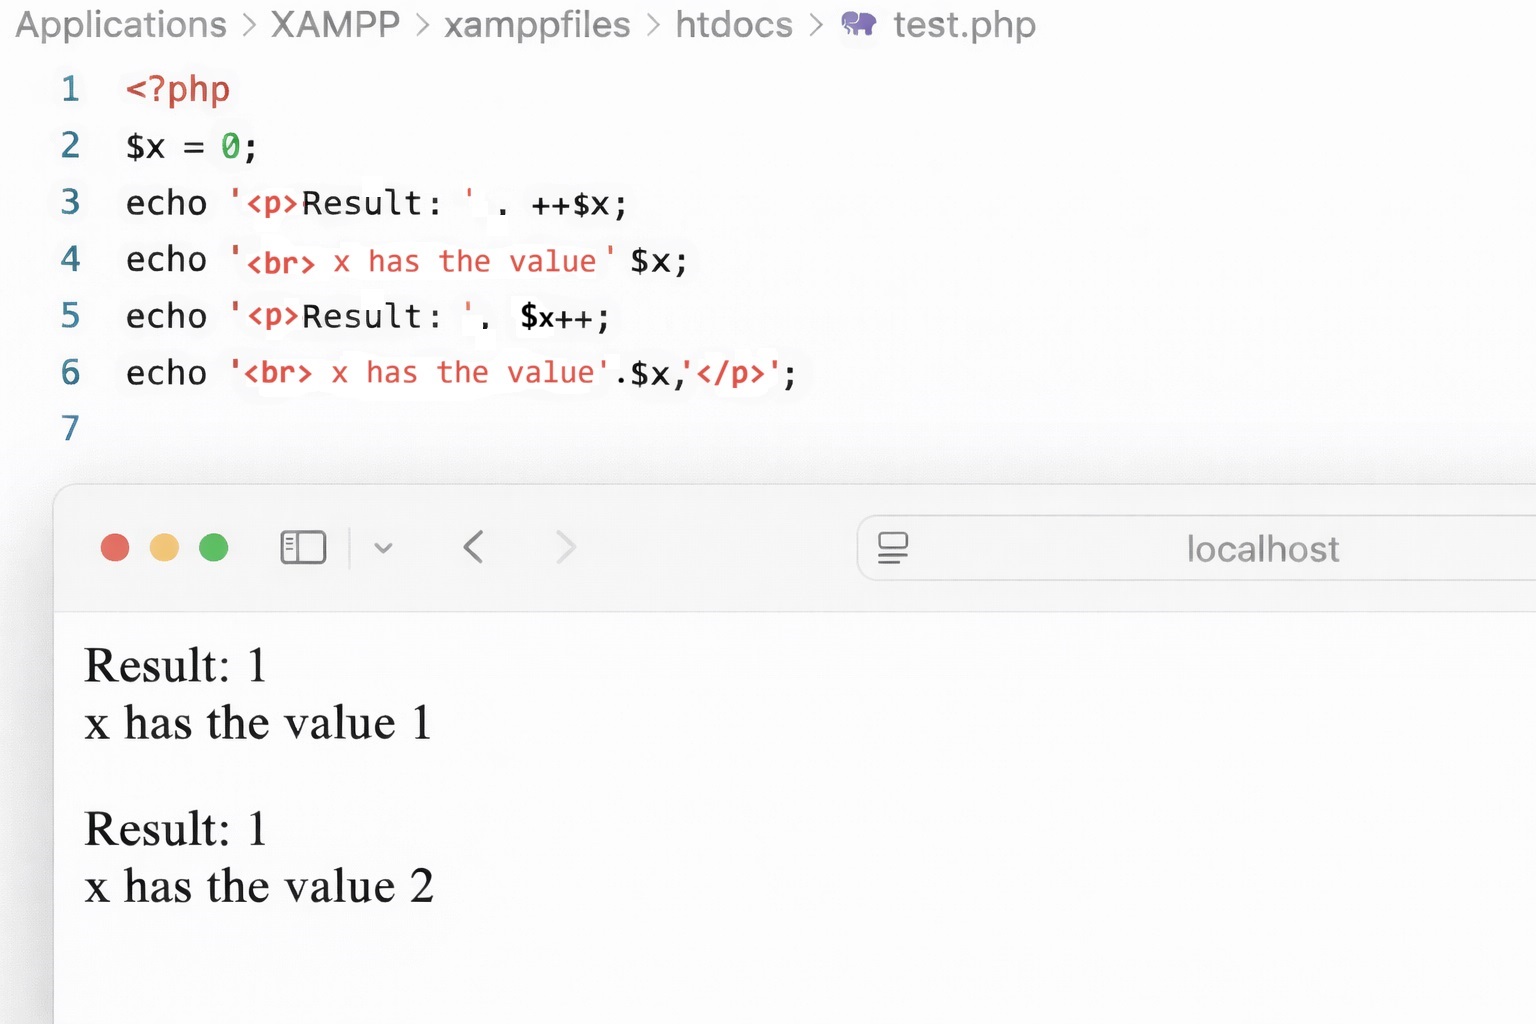
An increase before and after the output (pre- vs. post-…) of a value can be illustrated with the following script:
<?php
$x = 0;
echo '<p>Result: ' . ++$x;
echo '<br>x has the value ' . $x;
echo '<p>Result: ' . $x++;
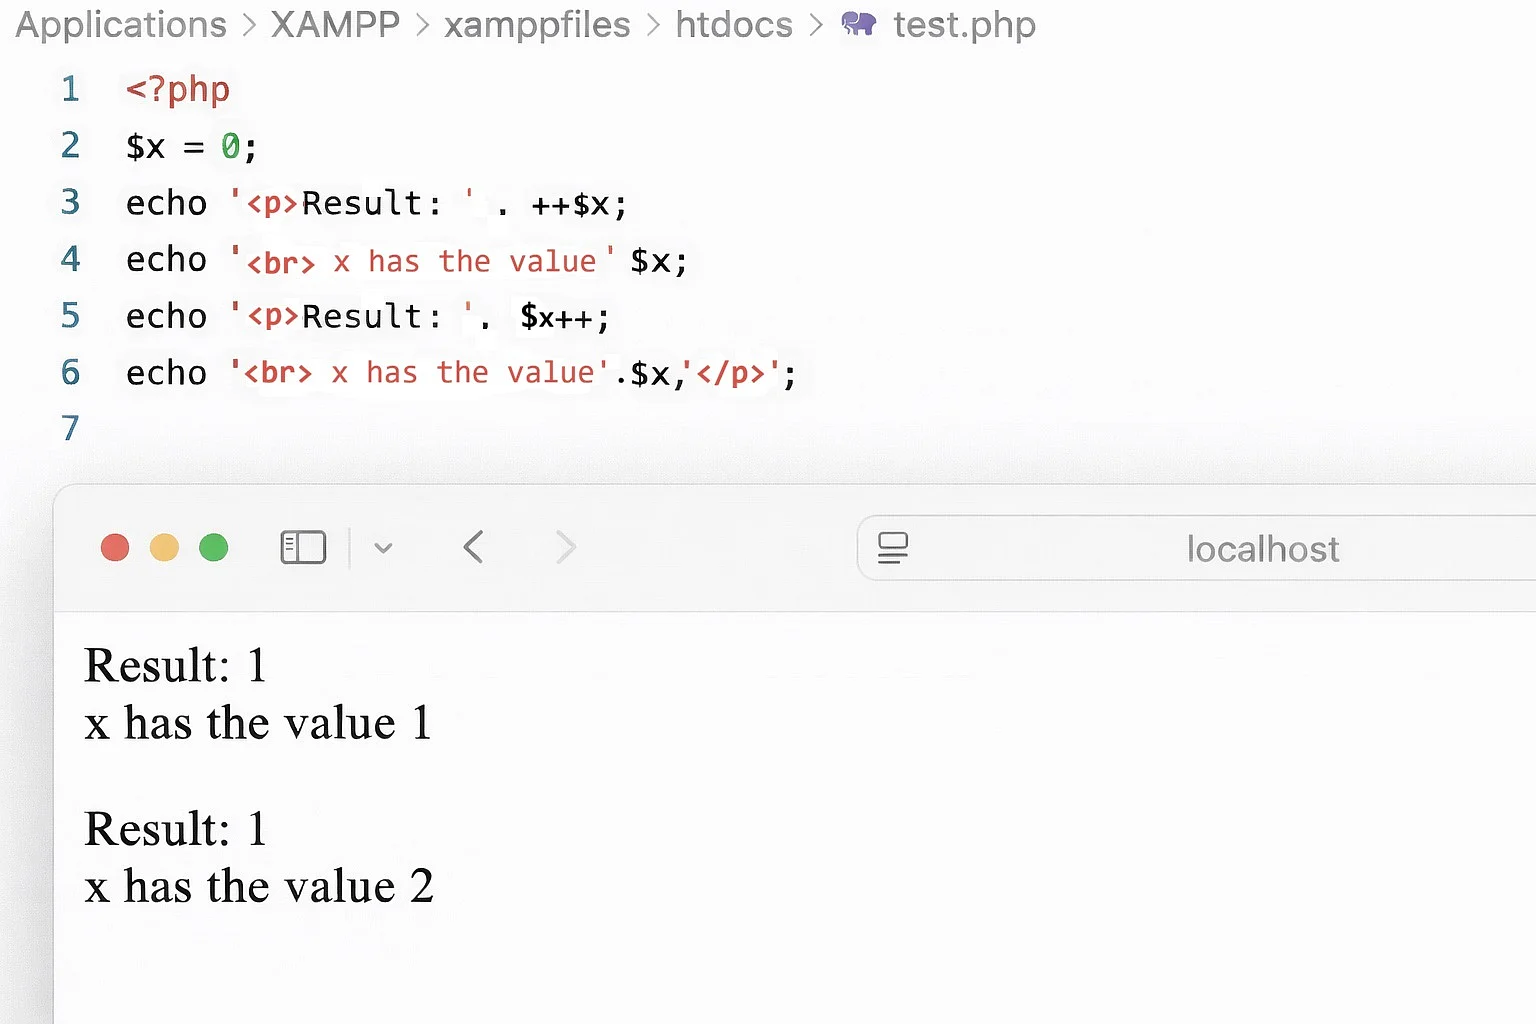
echo '<br>x has the value ' . $x, '</p>';In both cases we get the same result. With pre-incrementation, the value of x is increased before the output in line 3, and with post-incrementation, it is increased after the output in line 5.
How to work with scalar and union types
PHP makes it possible to assign scalar types to variables, function parameters, and return values. These include, among others, int, float, string, and bool. By specifying the type explicitly, you define what kind of values a function expects and returns. This improves code readability and helps detect common errors at an early stage.
<?php
declare(strict_types=1);

function hi(string $name): string {
return "Hello " . $name;
}In this example, the custom hi() function expects a string as a parameter and also returns a string. If another data type is passed, PHP reports an error. In some cases, however, a function should accept multiple data types. PHP offers union types for this purpose. They allow you to specify several possible types separated by the pipe character |:
<?php
declare(strict_types=1);

function formatId(int|string $id): string {
return "ID: " . $id;
}The formatId() function in this example accepts both integers and strings as parameters. Other data types are not permitted. Union types therefore allow function signatures to remain flexible while still enforcing clear type constraints.
- AI-generated templates, optimised for mobile
- Smart marketing tools to grow your business
- 24/7 premium support with your own consultant
How to use the superglobals $_GET and $_POST
You have now learned the PHP basics, understand how to work with variables, can concatenate them, and perform calculations. Now we’ll show you why variables are a central concept when programming scripts.
An important function of scripting languages is the ability to evaluate user input and transfer the values to another script. For data transfer, PHP relies on the superglobals $_GET and $_POST, which are predefined system variables that are available in all scopes. As associative arrays (data fields), $_GET and $_POST store a set of variables as strings in a single variable.
PHP arrays can be compared to a cabinet with multiple drawers. Each drawer allows you to store data. To remember what is stored in which drawer, you label them with a variable name. Depending on the type of array, this label can be either an index or a key. In indexed arrays, each drawer receives a numeric index, while in associative arrays the drawers are labelled with a key in the form of a string.
The superglobals $_GET and $_POST contain collections of variables organised as keys. These keys allow you to access the values associated with them. This concept will become clearer when we look at the $_GET and $_POST superglobals in more detail.
Transferring data via $_GET
The $_GET superglobal represents an array of variables that are passed to a PHP script using a URL.
If you occasionally browse weblogs, online shops, or internet forums, you may have noticed the unusual structure of some URLs. A common pattern looks like this:
http://hostname/folder/filename.php?variablename=variablevalue
For a weblog, this pattern could appear as follows:
http://www.example-blog.com/index.php?id=1
This type of URL is relatively easy to interpret. On a web server with the domain example-blog.com, a file named index.php is responsible for generating a dynamic web page. The file typically contains HTML and PHP code, as well as references to external template files and stylesheets—in short, everything required to display the page.
The part after the question mark (?) indicates that the page is likely dynamic: id=1. This segment is known as an HTTP query string. It contains a variable (id) and a value (1) connected by an equals sign (=). URL parameters like these are commonly used to generate dynamic pages, retrieve content from a database, or load the appropriate template.
Dynamic web pages make it possible to separate content from presentation. While ‘index.php’ contains all the information about the structure of the website, it still has to be filled with content. This content is usually stored in a database and can be retrieved using the parameters in the HTTP query string. In our example, the URL passes the parameter id=1 to ‘index.php’. This determines which content is read from the database and loaded into ‘index.php’. In a weblog, this is usually the ID of a specific article. In a forum, this could be used to retrieve a specific post, and in an online store, a specific product.
If a URL contains more than one parameter, they are joined with an ampersand (&).
www.example-blog.com/index.php?page=article&id=1
To demonstrate how $_GET works with a code example, a database is not required. In the following script, the $_GET superglobal reads the values of the variables firstname and lastname from an HTTP query string and assigns them to the PHP variables $variable1 and $variable2:
<?php

$variable1 = $_GET['firstname'];
$variable2 = $_GET['lastname'];

echo "Hello " . $variable1 . " " . $variable2 . "!";The script is called using the following URL:
localhost/hello.php?firstname=John&lastname=Doe
In this case, the parameters firstname=John and lastname=Doe are passed to the script. As in the previous examples, the values are output using the echo language construct.
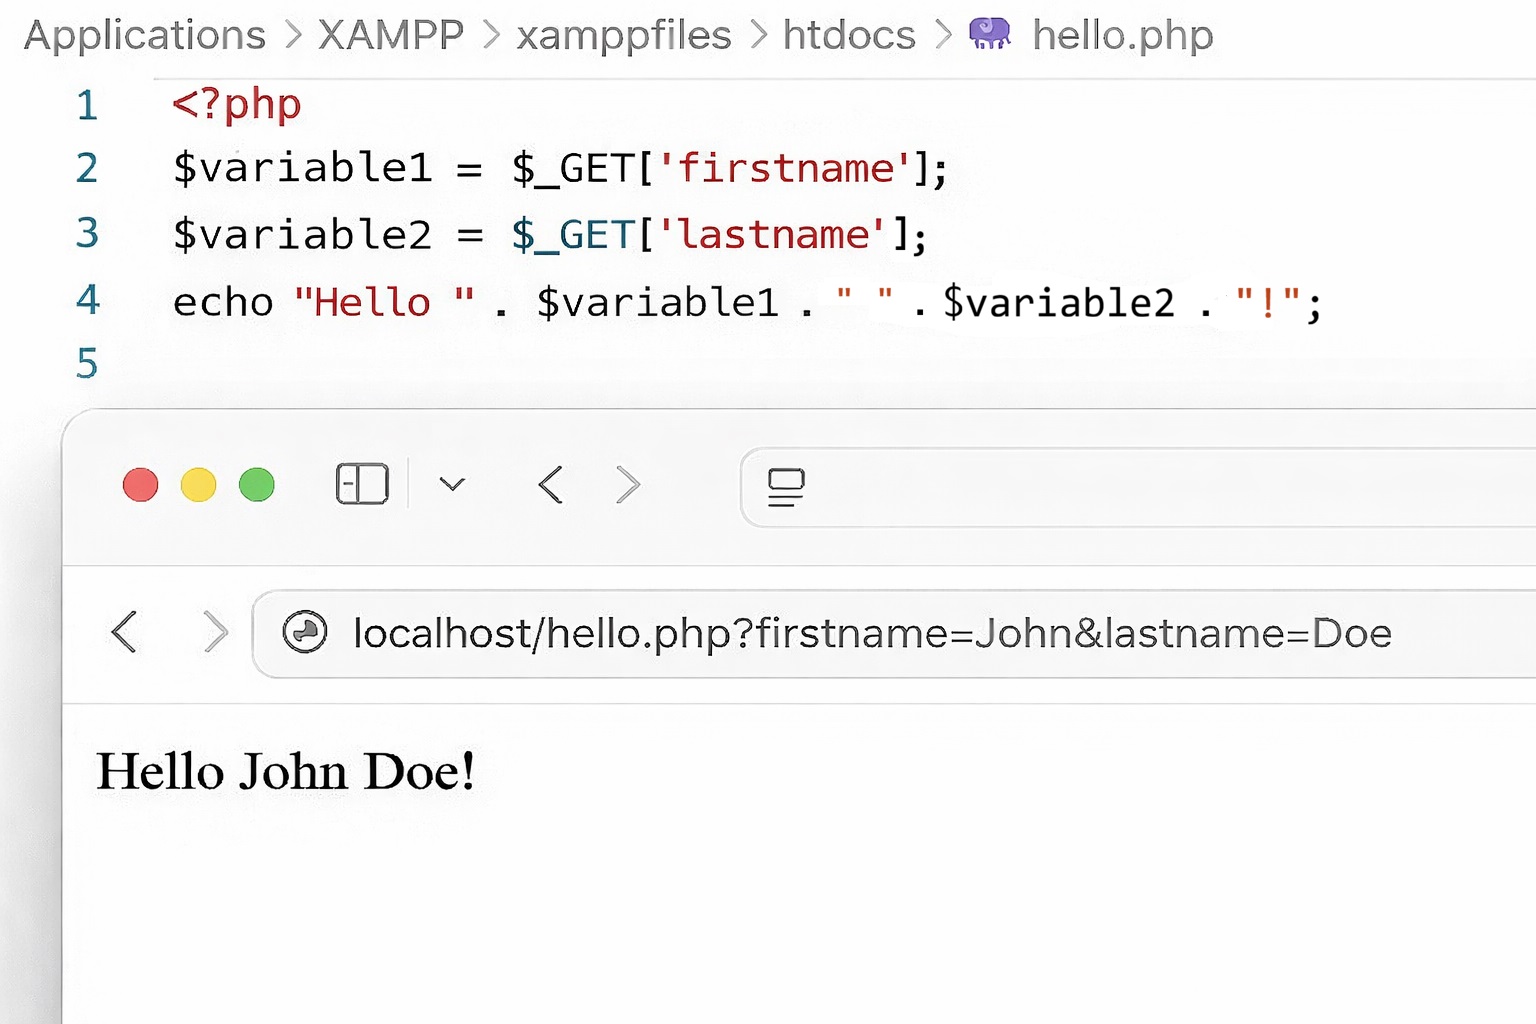
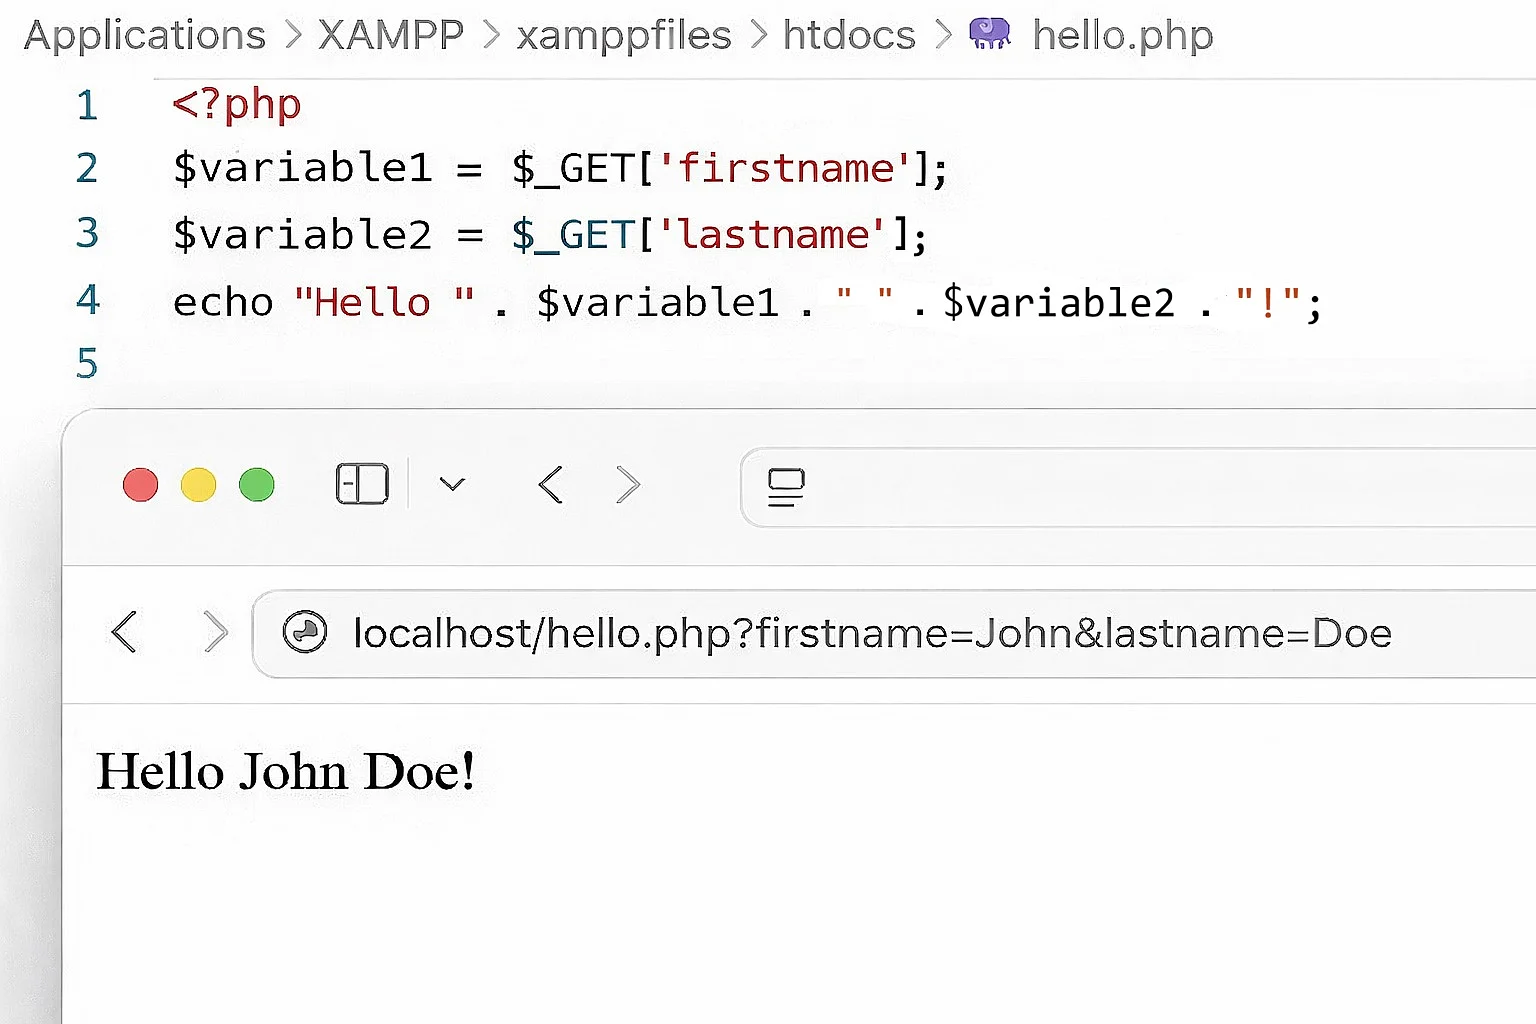
Passing data via $_GET means that the transferred data appears in the address bar. This allows anyone to see which parameters are being passed at any time. One advantage of this method is that variables can be included directly in hyperlinks. Users can also save URLs containing the HTTP query string as bookmarks in their browser.
Because GET parameters appear in plain text in the URL, this method is not suitable for transmitting sensitive data, such as information submitted through online forms. In addition, the amount of data that can be transmitted with $_GET is limited by the maximum length of a URL.
These limitations can be avoided by using the POST HTTP method. The data passed this way can be found in the $_POST superglobal.
Passing data via $_POST
The HTTP methods GET and POST differ in how they transfer data. With the GET method, the transmitted data is included as URL parameters. By contrast, data sent with $_POST is transferred in the body of the HTTP request. This approach allows even large amounts of data to be passed from one script to another.
A central use case for the HTTP POST method is the transfer of HTML form data. We’ll demonstrate this using a newsletter sign-up as an example. Create a new PHP file named ‘page1.php’ and add the following block of code:
<form method="post" action="page2.php" >
Please send the newsletter to: <br />
Your first name: <input type="text" name="firstname" /><br />
Your last name: <input type="text" name="lastname" /><br />
Your email address: <input type="text" name="email" /><br />
<input type="submit" value="Submit form" />
</form>The HTML <form> element is used to create forms. Its opening tag contains two attributes, which are method and action. The method attribute defines the transfer method, in this case HTTP POST. The action attribute stores the URL of a script that receives all the data captured via the following input fields. The example shows an HTML form with three input elements (input type="text") and a submit button (input type="submit"). The file ‘page2.php’ is defined as the data recipient.
To illustrate data transfer using $_POST, we’ll use a simple script to process the form data, store the submitted values as PHP variables, and output them as text. Create a file named ‘page2.php’ and insert the following code:
<?php
$firstname = $_POST["firstname"];
$lastname = $_POST["lastname"];
$email = $_POST["email"];
echo "Hello " . $firstname . " " . $lastname . ", <br />
You have registered with the following email address: " . $email . ".";Save both PHP files in the ‘htdocs’ folder of your test server and open ‘page1.php’ in your web browser using the following URL: http://localhost/page1.php. Your browser will now display the interactive web interface of your HTML form.
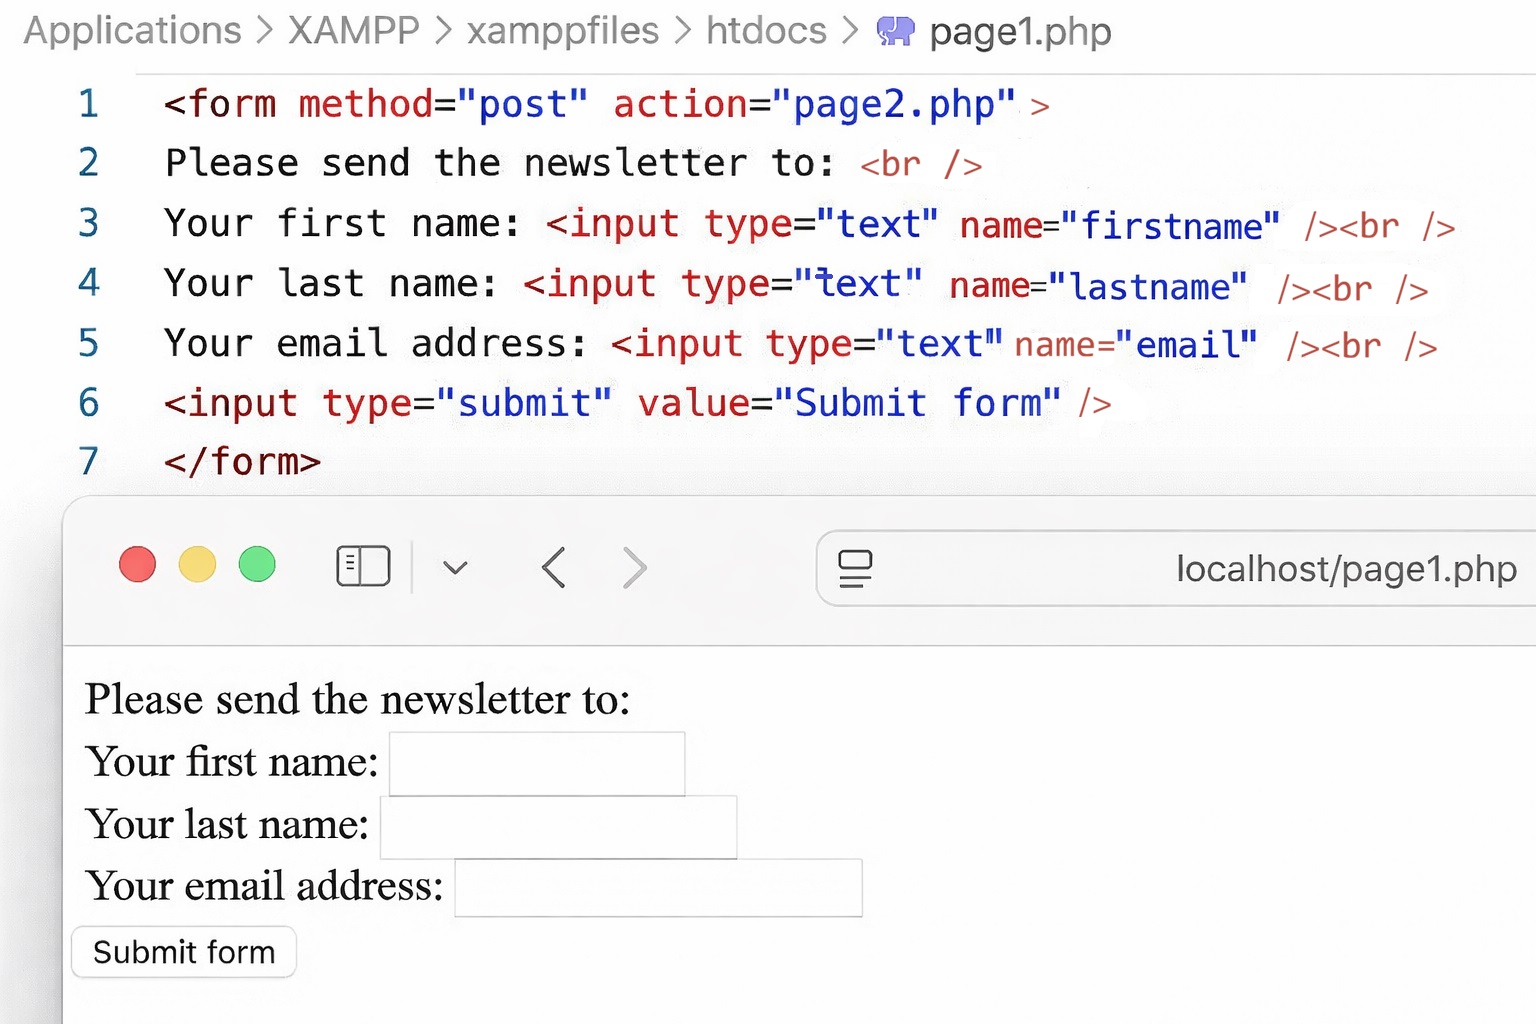
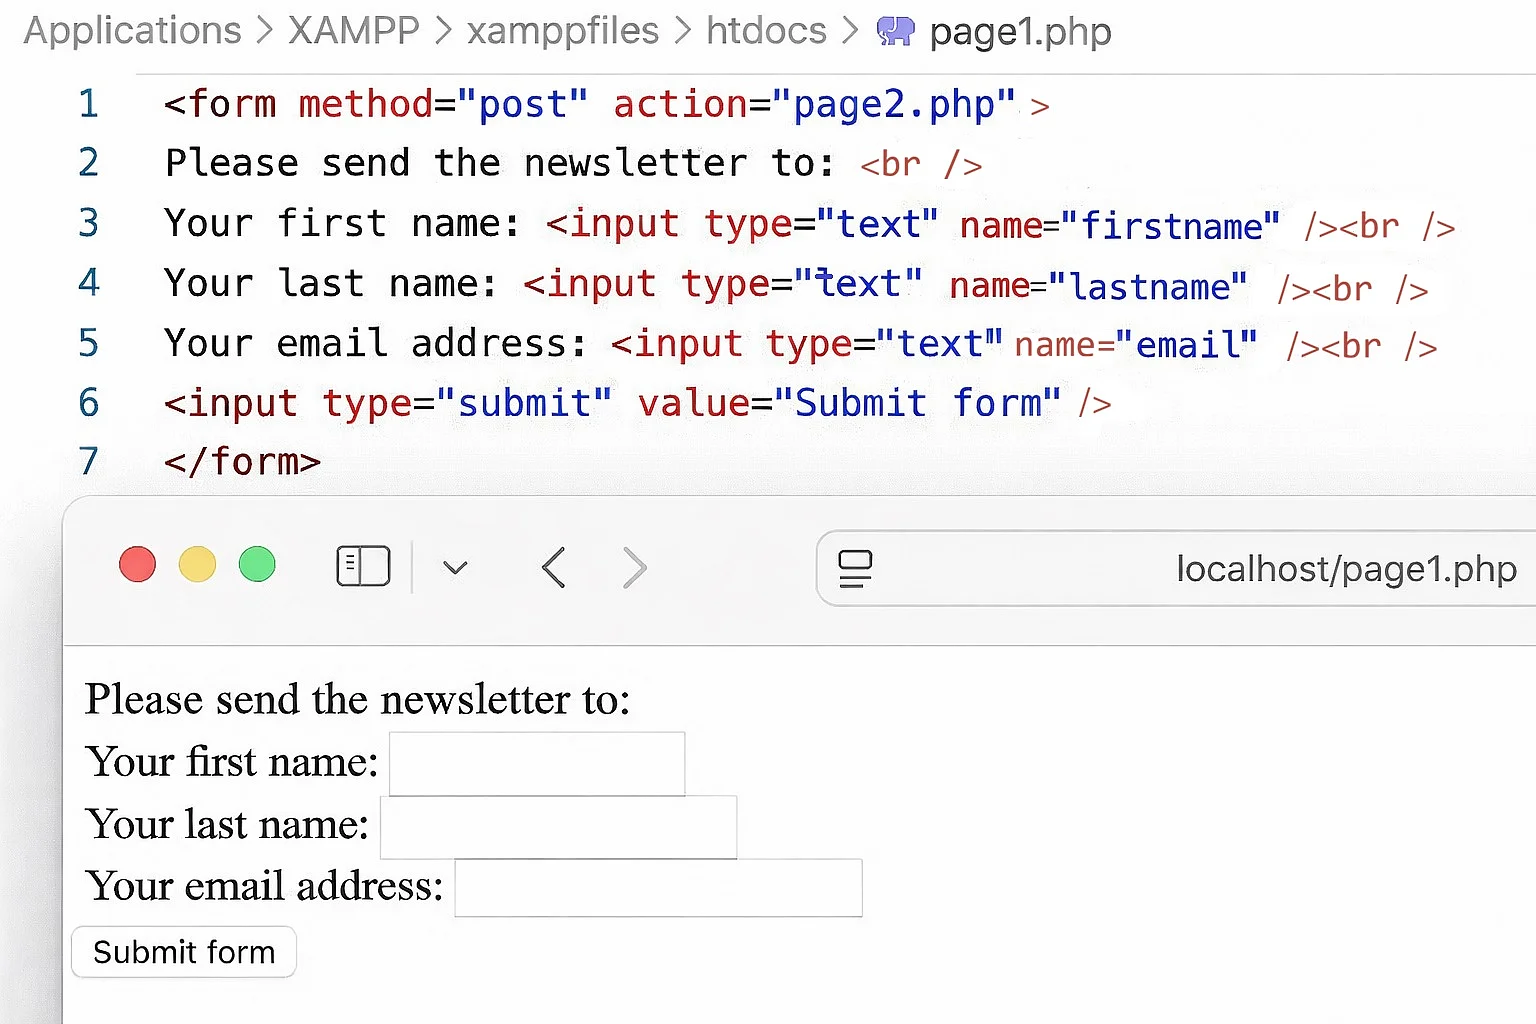
Enter any registration data and click the submit button to transfer the variables from one script to another. After confirming the input on ‘page1.php’, you will be redirected directly to ‘page2.php’. The browser window then displays the result of the script execution based on the submitted data.
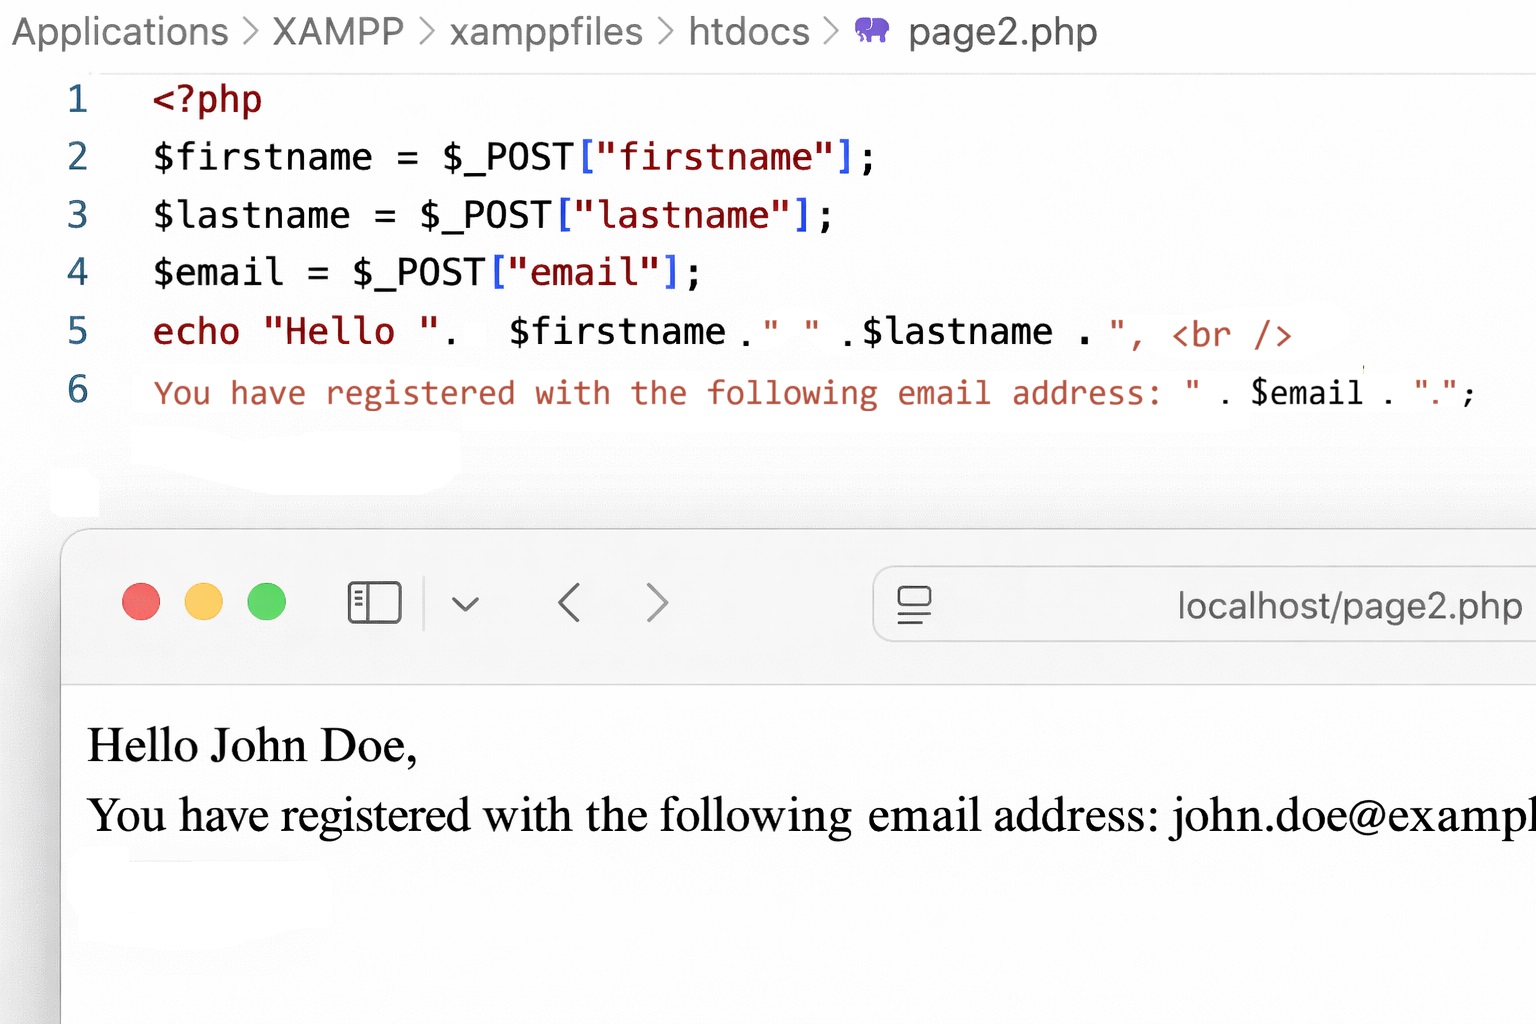
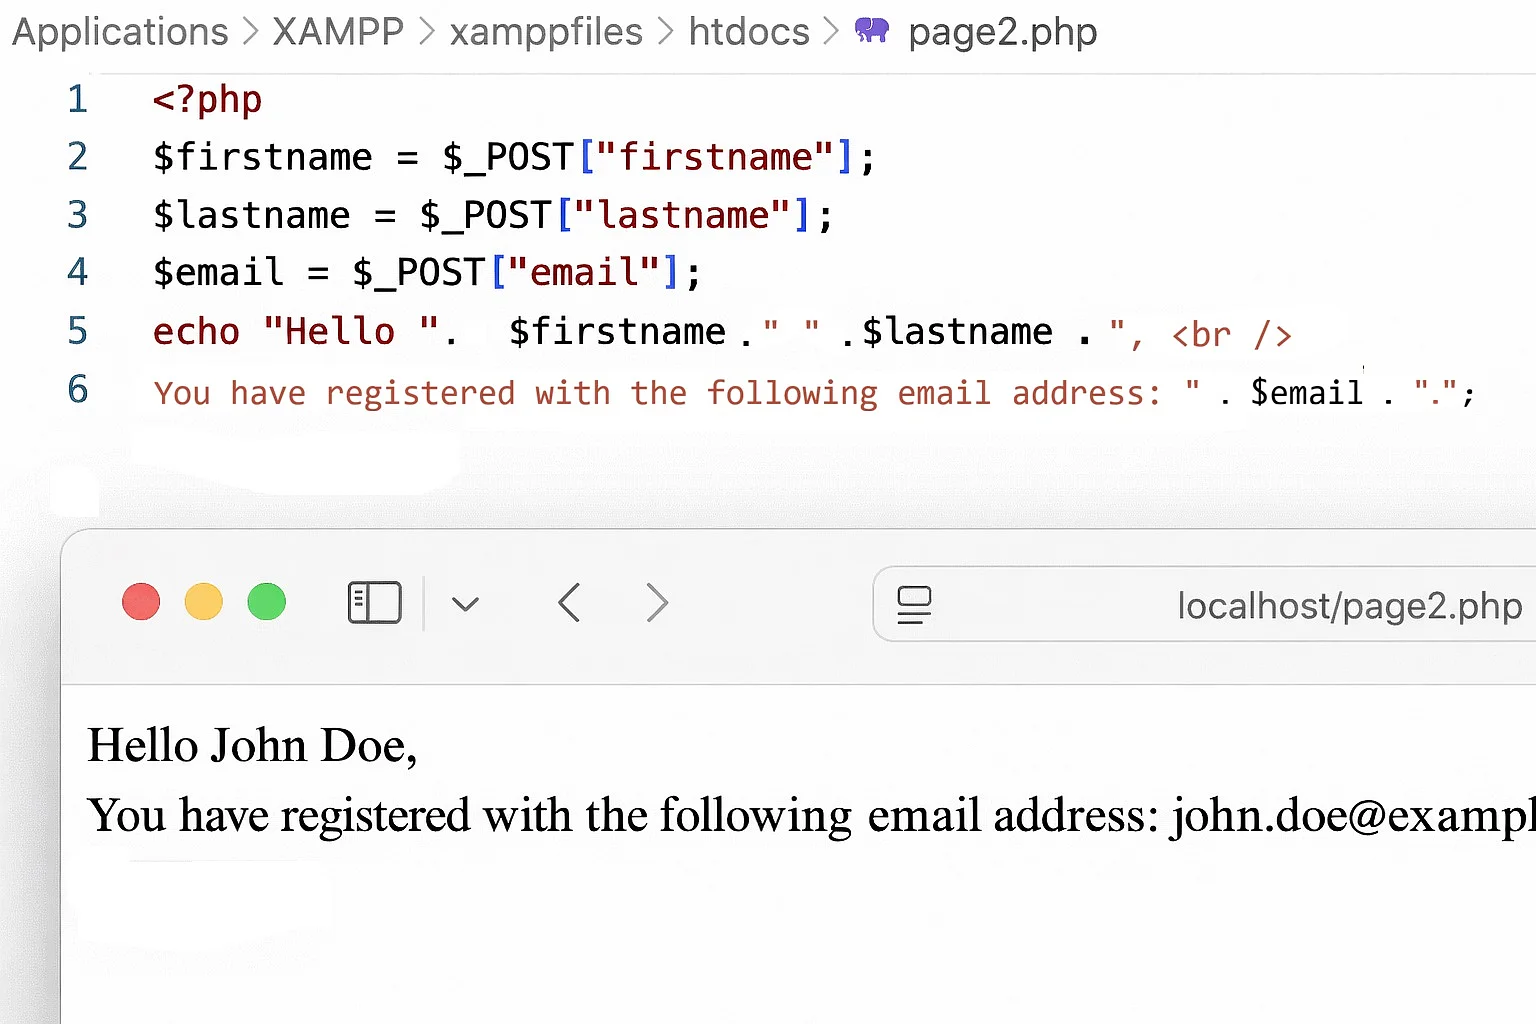
User inputs captured via the input fields in ‘page1.php’ are retrieved by ‘page2.php’ using the following pattern:
$_POST["Name of the input field"]
The line $firstname = $_POST["firstname"] retrieves the input from the form field firstname and stores it in the variable $firstname. The variable $firstname can then be output as a string using echo.
How to use the if construct and PHP comparison operators
So far, we have defined variables, transferred them from one script to the next, and output them as strings. In the next step, you will learn how to tie the execution of code fragments to specific conditions.
The if language construct gives you the ability to write scripts so that statements are only executed when a condition you define is met—for example, when the correct password is entered.
Conditions in PHP are defined using the following basic structure:
<?php
if(expression)
{
statement;
}This can be interpreted as follows. The statement is executed only if the condition in the expression is met. A condition is considered met when the if construct evaluates to TRUE. Otherwise, it evaluates to FALSE, and the statement is skipped.
As a rule, the if construct checks whether the value of a variable matches what has been defined in the condition. This control structure is usually implemented using comparison operators.
Comparison operators
Comparison operators are used when formulating conditions to place two arguments in a logical relationship that can be evaluated as true (TRUE) or false (FALSE). When comparison operators are used in PHP control structures, they are applied to two variables in the expression of an if construct:
if ($a == $b)
{
statement;
}In simple terms, the control structure works as follows. If the variable $a is equal to the variable $b, the statements defined in the statement block are executed.
The PHP comparison operators are based on those of the C programming language and in some cases differ significantly from traditional mathematical notation. The table below provides an overview.
| Comparison operator | Description | Condition |
|---|---|---|
== |
is equal to | The condition is met if $a and $b have the same value. |
=== |
is identical to | The condition is met if $a and $b have the same value and are of the same data type. This can be illustrated with an example where an integer (1) is compared to a string (“1”): 1 == "1" evaluates to TRUE, while 1 === "1" evaluates to FALSE. When checking whether two variables are equal, it is generally recommended to use the comparison operator === (is identical). |
!= |
is not equal to | The condition is met if $a and $b have different values. |
!== |
is not identical to | The condition is met if $a and $b have different values or are of different data types. |
< |
is less than | The condition is met if the value of $a is less than the value of $b. |
> |
is greater than | The condition is met if the value of $a is greater than the value of $b. |
<= |
is less than or equal to | The condition is met if the value of $a is less than the value of $b or if $a and $b have the same value. |
>= |
is greater than or equal to | The condition is met if the value of $a is greater than the value of $b or if $a and $b have the same value. |
The following script demonstrates this control structure. It compares two integers using the comparison operator < (is less than):
<?php
$number1 = 10;
$number2 = 20;

if ($number1 < $number2) {
echo "The condition is met";
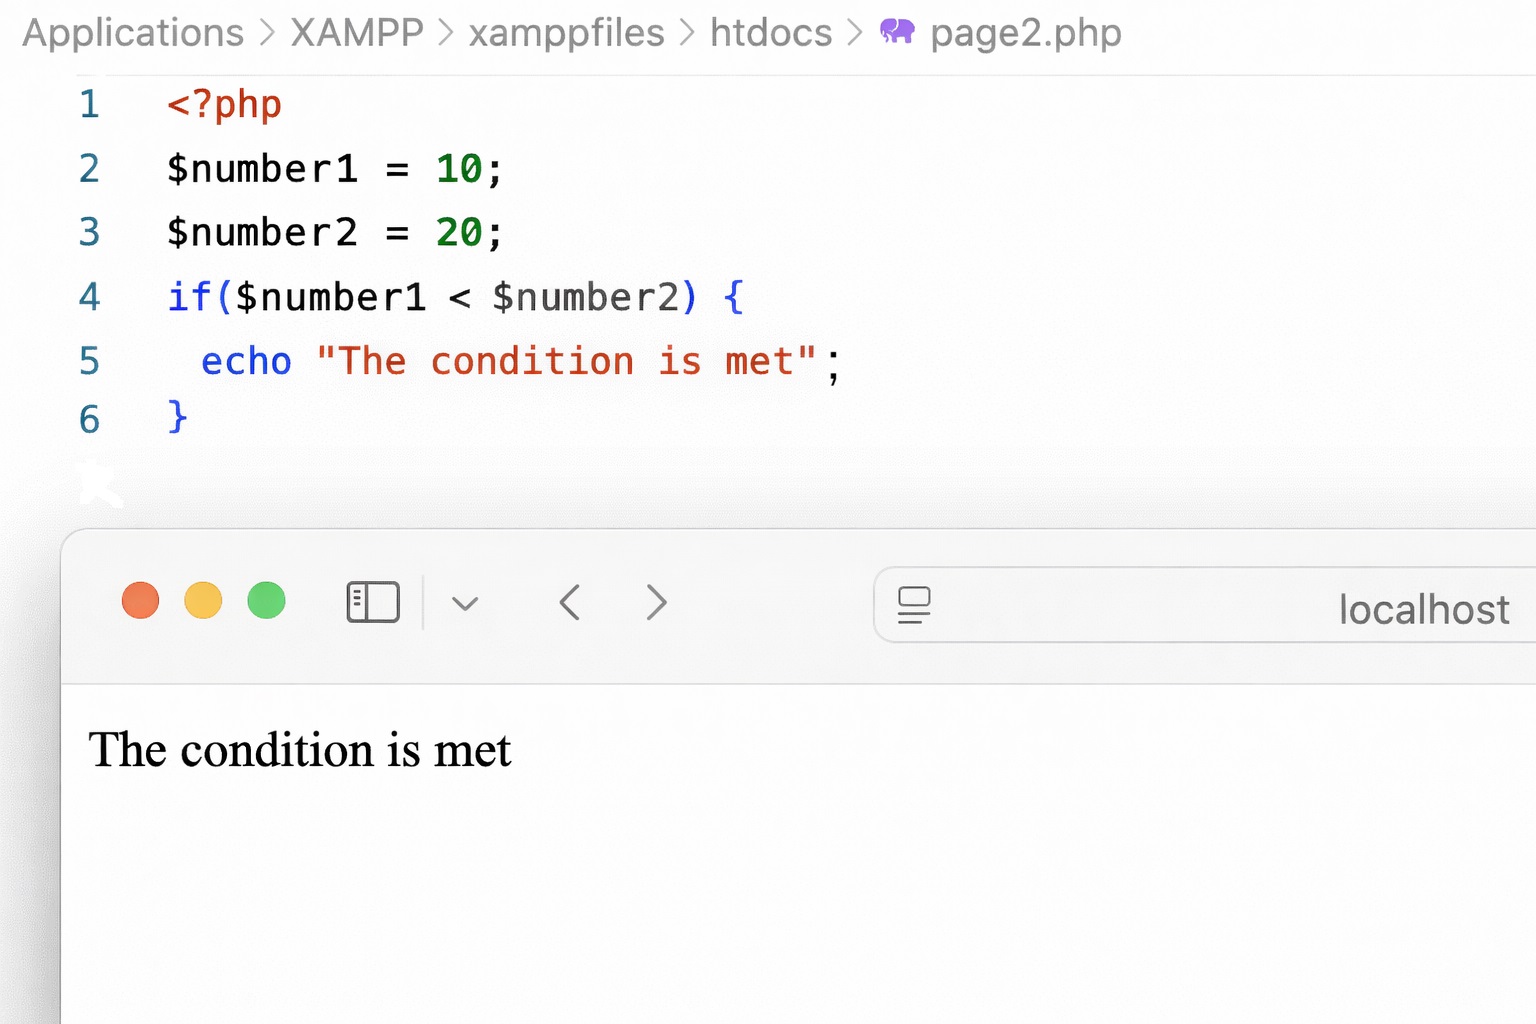
}The variables $number1 and $number2 are defined and assigned the values 10 and 20. A condition is then set. If $number1 is less than $number2, the string defined in the echo statement is output.
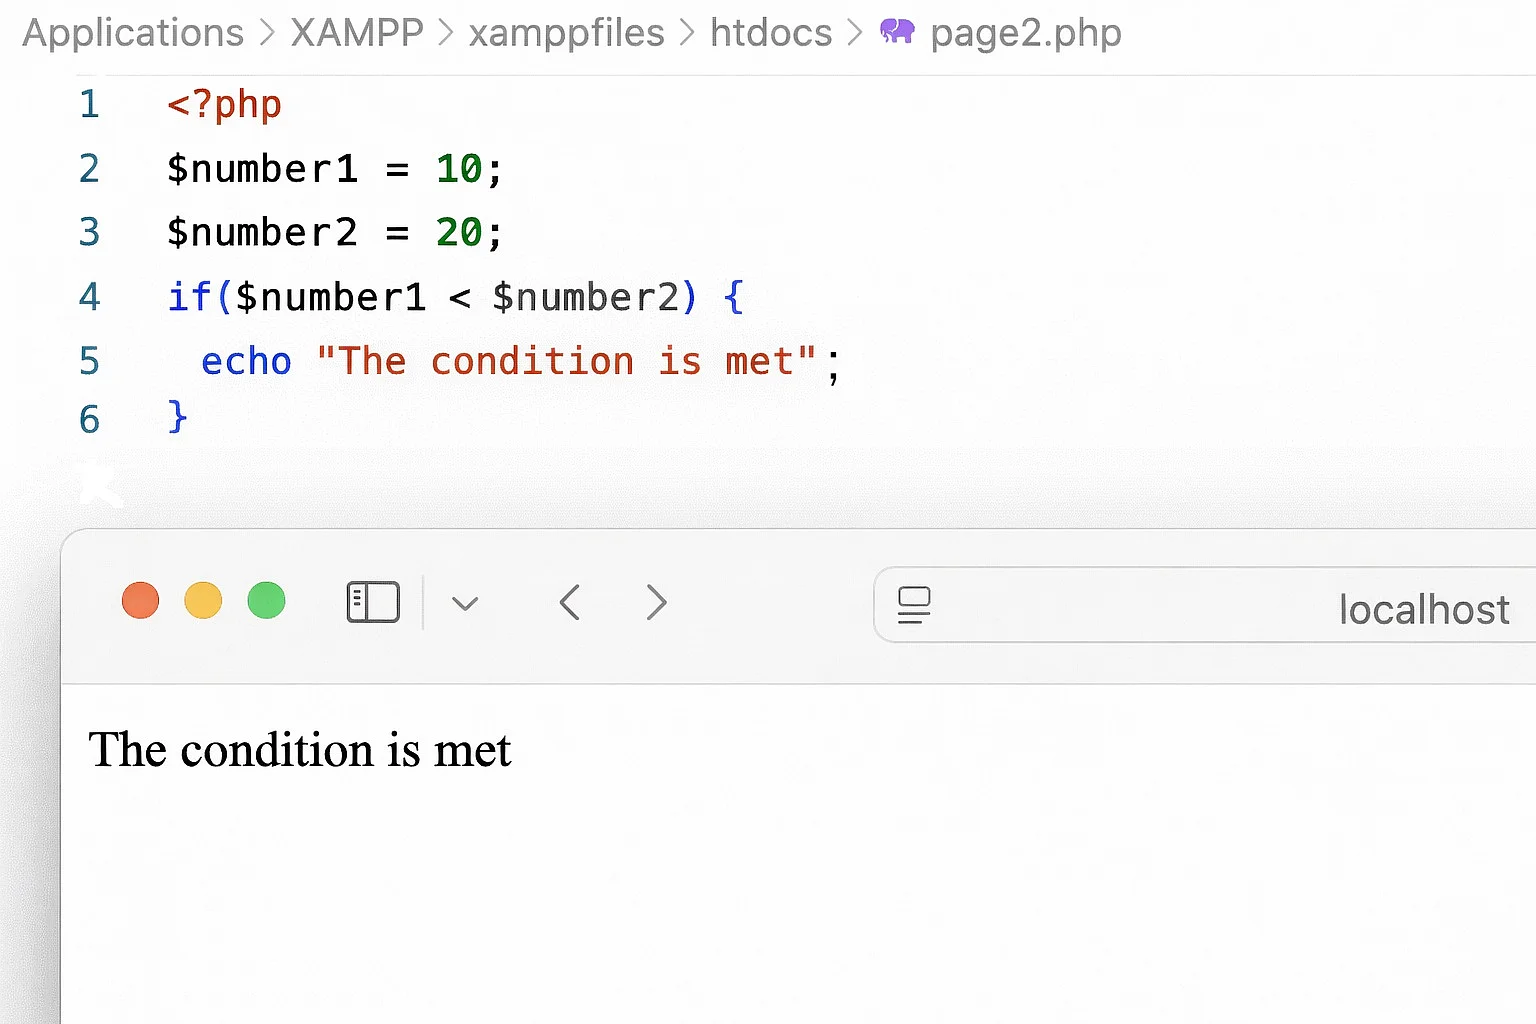
When the script is executed, the result confirms the condition: 10 is less than 20. The if construct therefore evaluates to TRUE, meaning the condition is met.
If you want to define statements that should run when a condition is not met, you can extend the if control structure with the else language construct. This creates an if-else statement in PHP:
<?php
if(Condition a)
{
statement b;
}
else
{
statement c;
}This script also checks whether condition a evaluates to TRUE or FALSE. If condition a is met, statement b is executed. If condition a is not met (FALSE), statement b is skipped and statement c is executed instead.
In the following example, the script is extended with the else construct, and the comparison operator < (is less than) is replaced with == (is equal):
<?php
$number1 = 10;
$number2 = 20;
if($number1 == $number2)
{
echo "The condition is met";
}
else
{
echo "The condition is not met";
}This time, the if construct returns the result FALSE. The value of the variable $number1 is not equal to the value of the variable $number2. The condition is not met. Therefore, the statement listed under if is not executed; instead, the one defined under else is executed.
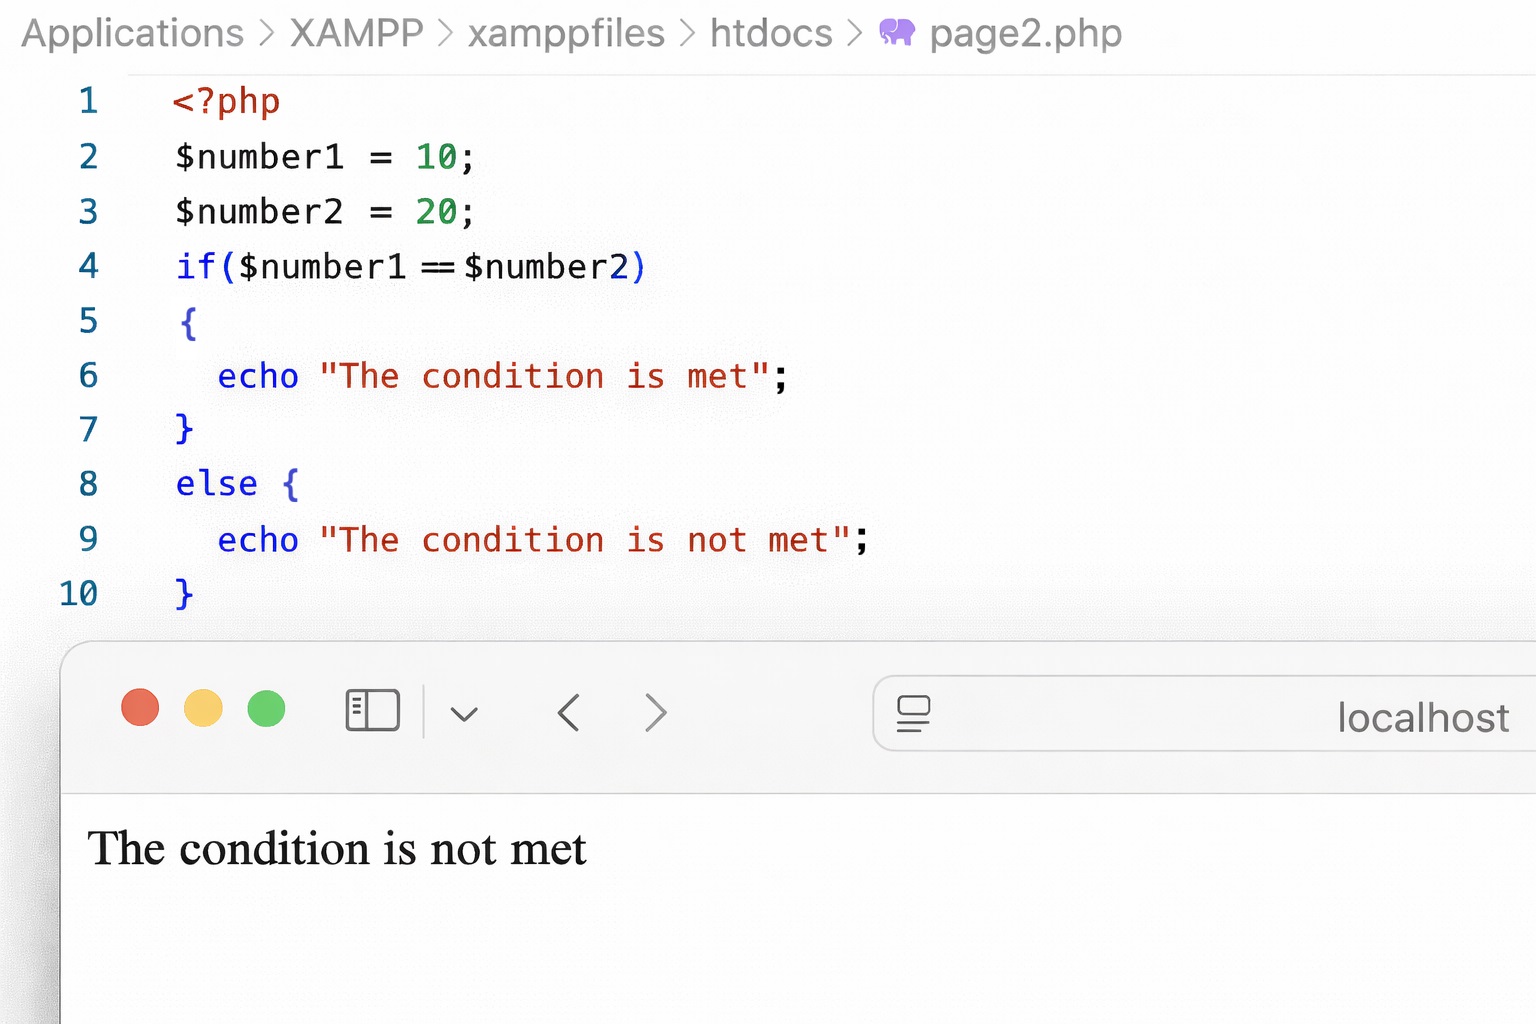
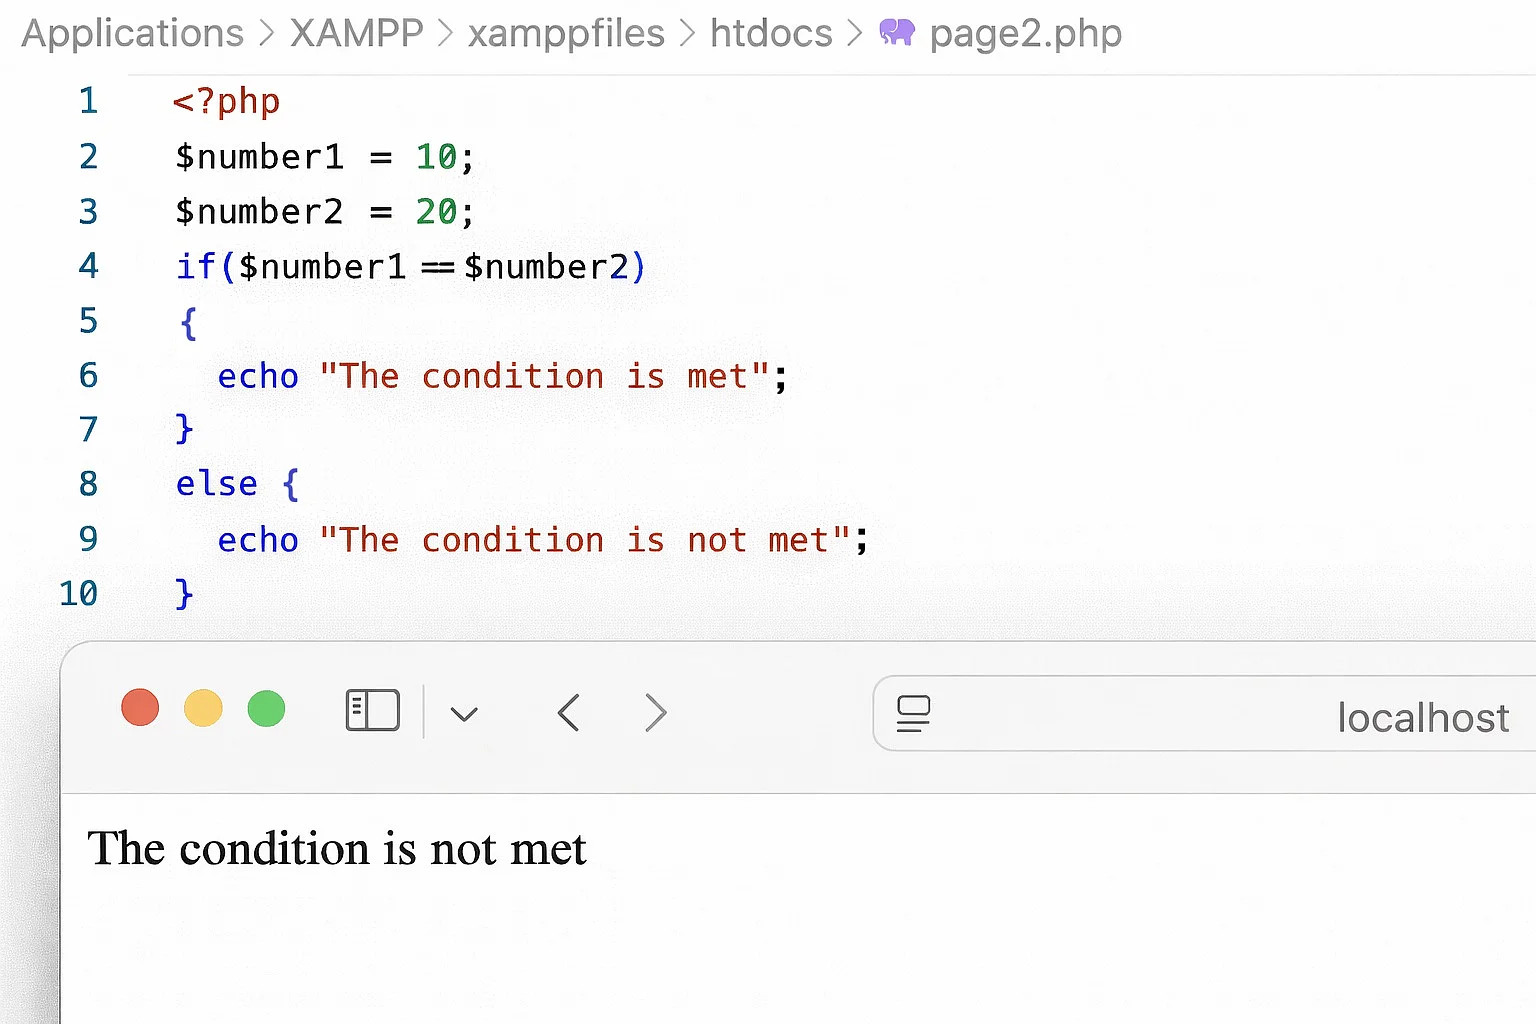
If the execution of a code fragment is to depend on the equality of two values, a double equals sign (==) is used in PHP. The single equals sign (=) is used exclusively for assigning values to variables.
The negation of conditions is done using a leading exclamation mark (!).
<?php
$number1 = 10;
$number2 = 20;

if ($number1 == $number2)
{
echo "The numbers are equal.";
}

if (!($number1 == $number2))
{
echo "The numbers are not equal.";
}The example shows the condition $number1 == $number2 and its negation. !($number1 == $number2) corresponds to ($number1 != $number2).
A practical application of if and else is a password prompt based on an HTML form. To illustrate this, we will again use the PHP files ‘page1.php’ and ‘page2.php’.
Open ‘page1.php’ and insert the following form code:
<form action="page2.php" method="post">
Please enter your password: <input type="password" name="password" />
<input type="submit" value="Submit" />
</form>The structure is the same as the form created earlier. This time, however, only a single input field is required for the password prompt. As before, the user input is sent to the ‘page2.php’ script.
The script is then modified with the following code so that the entered password is compared with a stored password:
<?php
$password = $_POST["password"];
if($password=="qwerty123")
{
echo "The password was correct";
}
else
{
echo "The password was incorrect";
}The code works as follows. In line 2, a value is assigned to the $password variable, which is retrieved using the HTTP POST method. A control structure is then defined. The if construct in line 3 checks whether the value of the $password variable matches the string qwerty123. If this condition is met, the string ‘The password was correct’ is output. If the if statement evaluates to FALSE, the else branch in line 7 is executed and the string ‘The password was incorrect’ is displayed instead.
Next, the ‘page1.php’ script is called using the URL http://localhost/page1.php.
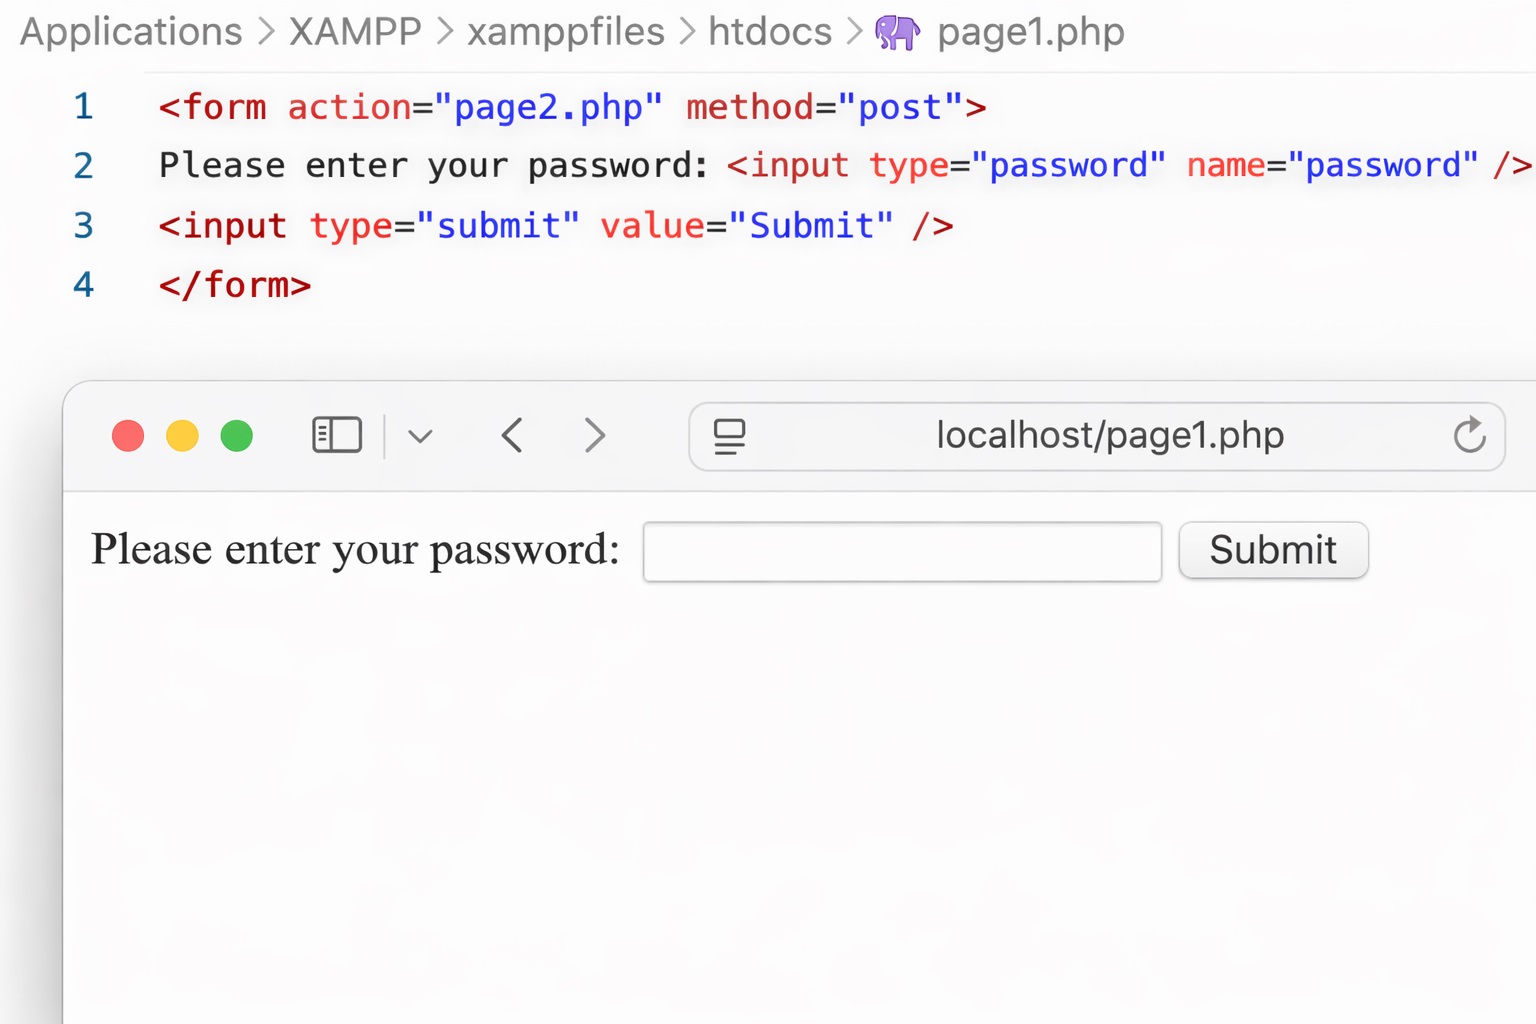
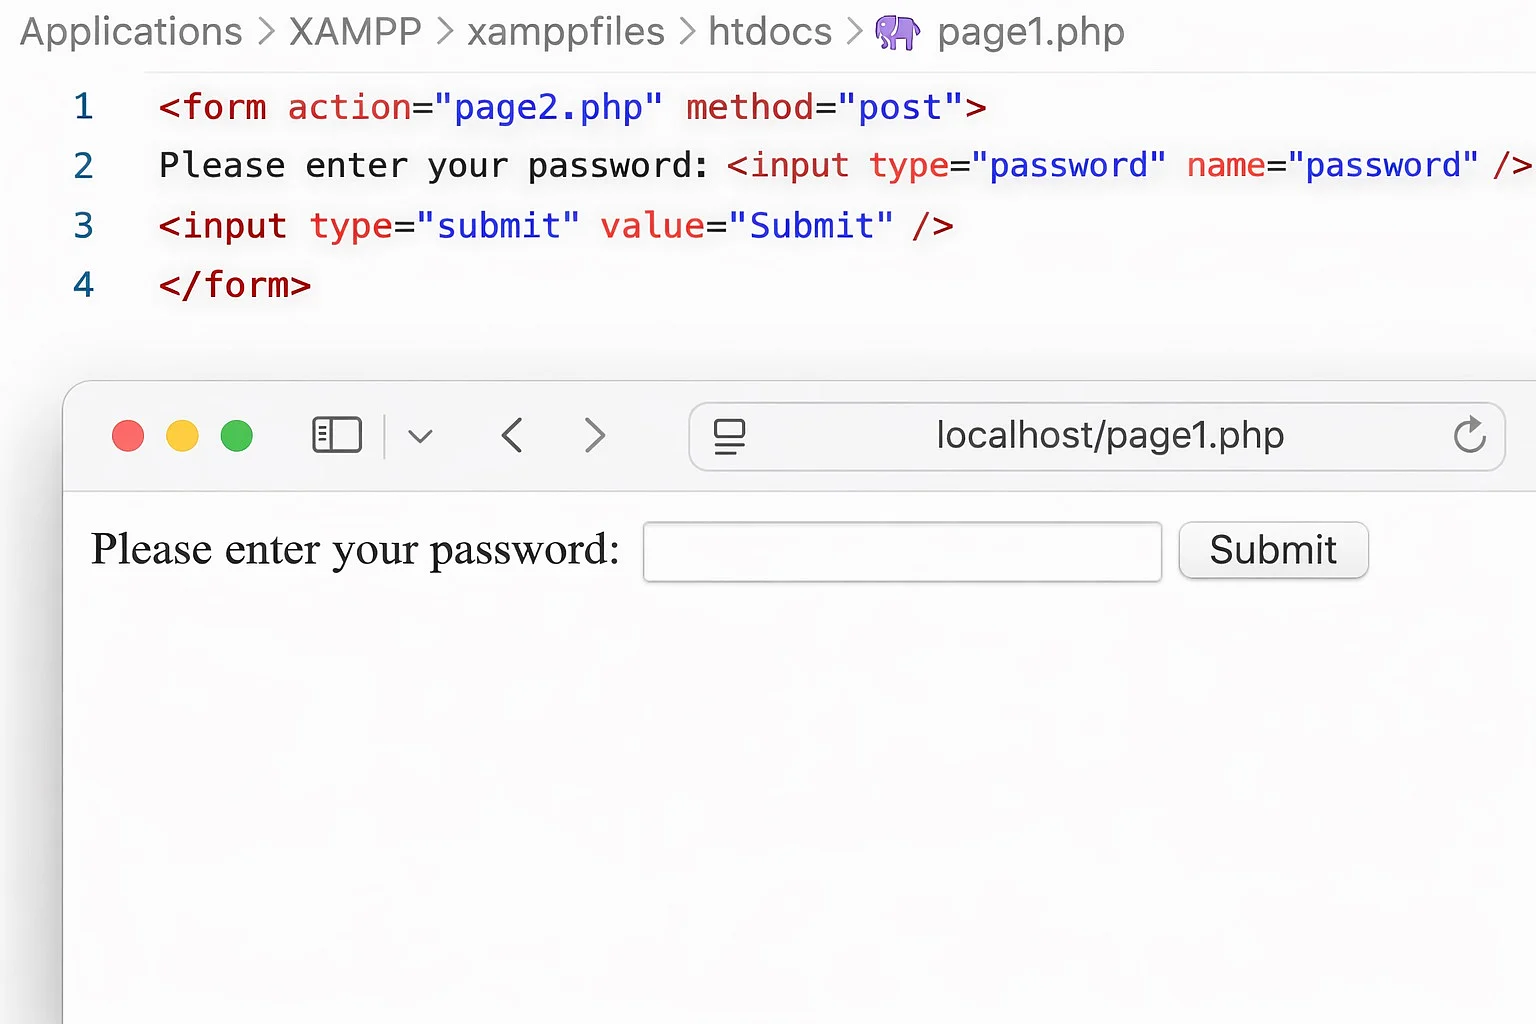
The browser displays the HTML form for the password prompt. After following the prompt, enter the password ‘qwerty123’ defined in the ‘page2.php’ script and click the submit button.
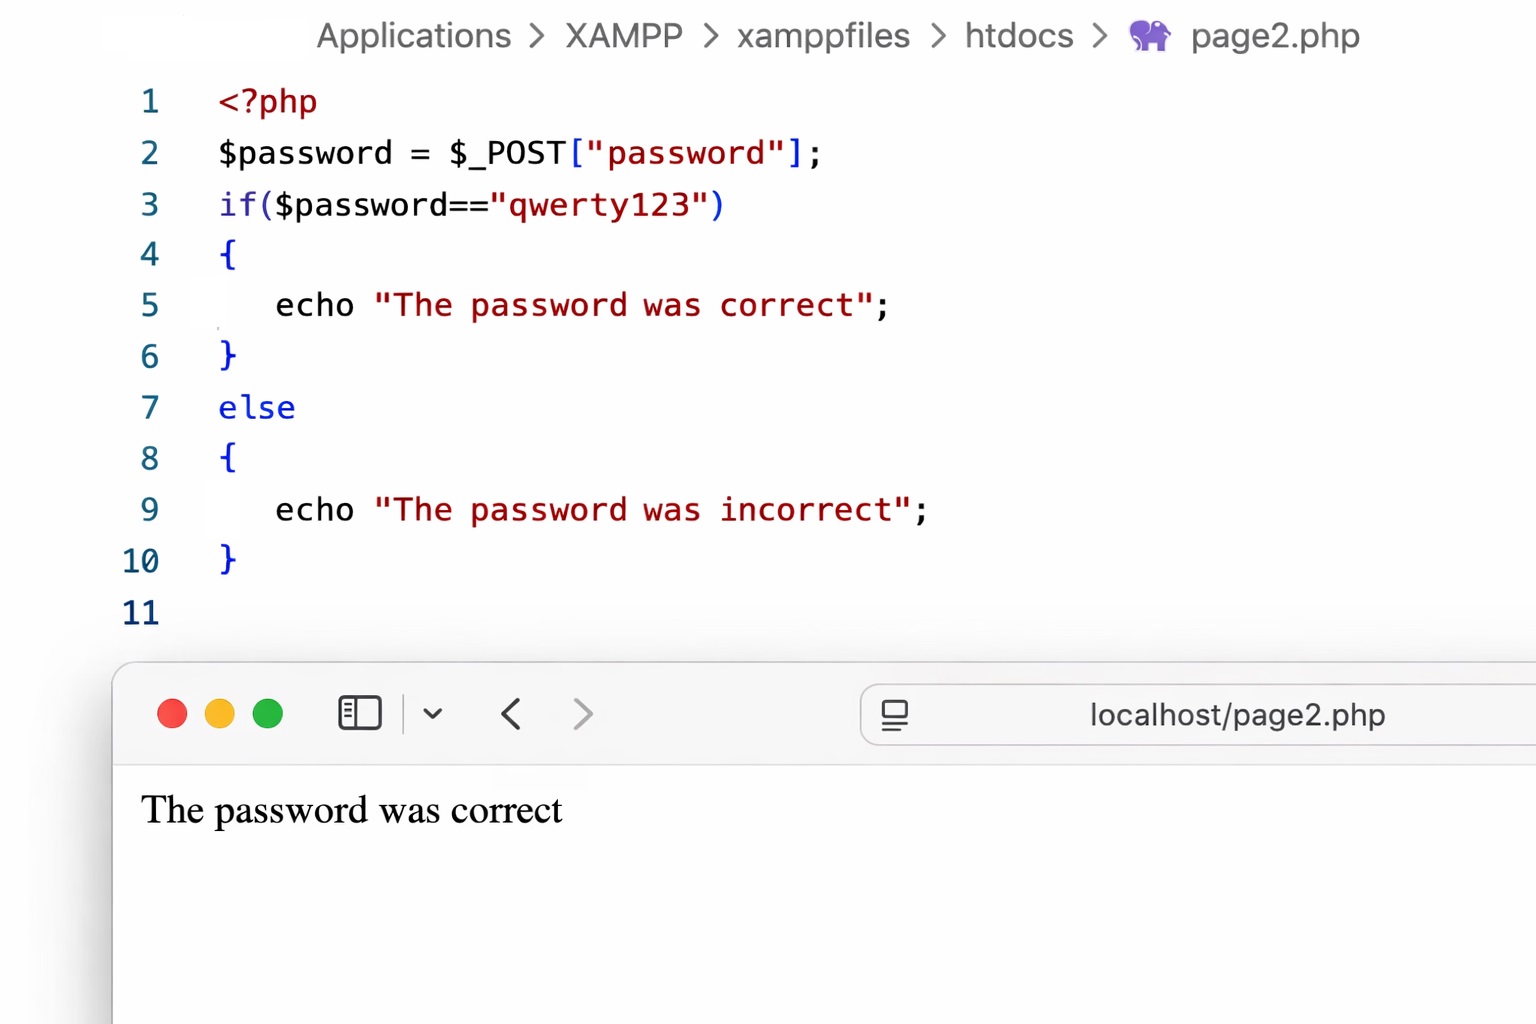
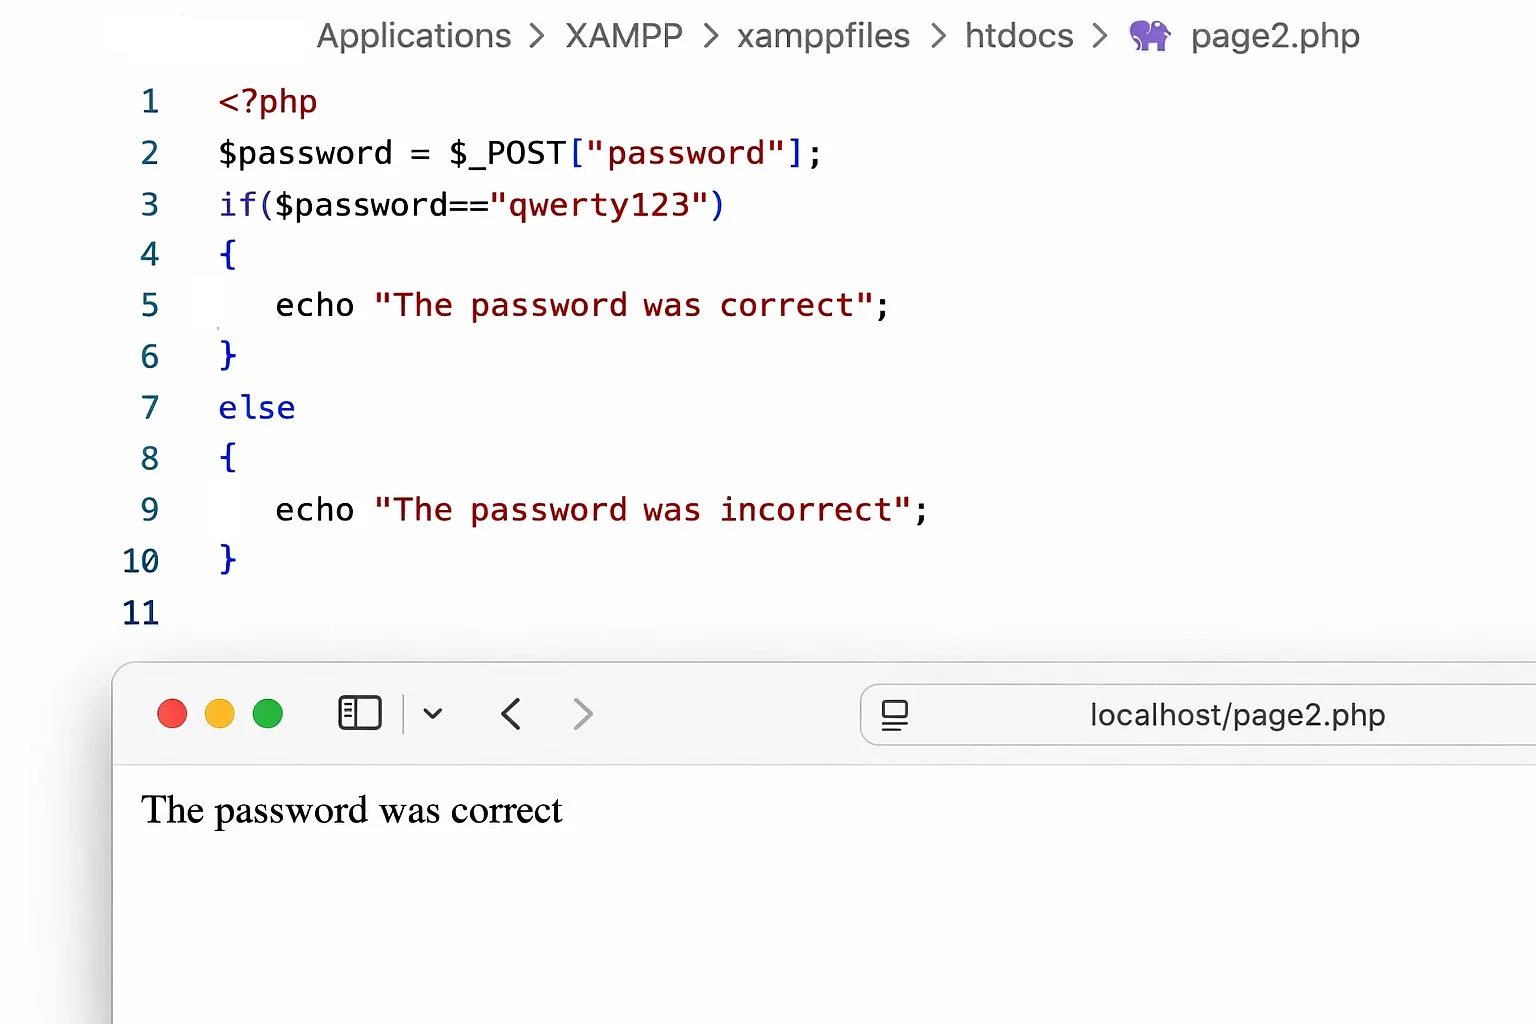
The web browser then automatically redirects to ‘page2.php’. In the background, the if control structure compares the entered value with the stored password. Since qwerty123 == qwerty123 evaluates to TRUE, the script outputs the string ‘The password was correct’. Try entering a different password in the input field to see what happens.
Logical operators
Conditions defined with comparison operators in the expression of an if construct can, if necessary, be combined with additional conditions in the same expression. For this purpose, PHP provides the logical operators AND and OR.
| Tight binding | Weak binding | Description |
|---|---|---|
&& |
AND |
Both conditions connected by the operator must be TRUE. |
|| |
OR |
Only one of the two conditions connected by the operator needs to be TRUE. |
To combine conditions, PHP provides logical operators with both tight and weak binding. If only one of these notations is used, there is usually no noticeable difference. However, when both notations are combined, && and || have a higher precedence than AND and OR. This is similar to operator precedence in mathematics, where multiplication is evaluated before addition, meaning * binds more tightly than +.
A practical example is again the password prompt. In most cases, login credentials consist of a username and a secret password. Access is granted only if both inputs match the data stored in the system.
We open the password prompt form in ‘page1.php’ again and add an additional input field for the username:
<form action="page2.php" method="post">
Username: <input type="text" name="username" /><br />
Password: <input type="password" name="password" /><br />
<input type="submit" value="Submit" />
</form>In the next step, we also need to adjust the control structure of the if construct. To do this, we use the logical operator AND to link the condition for the password prompt with a condition for querying the username.
<?php
$username = $_POST["username"];
$password = $_POST["password"];
if($username=="John Doe" AND $password=="qwerty123")
{
echo "Welcome to the members area " . $username . "!";
}
else
{
echo "Access denied";
}The ‘page2.php’ script now receives the values for username and password and stores them in the variables $username and $password. The expression in the if construct now includes two conditions connected by the logical operator AND. The if statement returns TRUE only if both conditions are met ($username == "John Doe" and $password == "qwerty123").
Since the username is obtained through the username input field, it can be used directly in the text output with echo. After the phrase ‘Welcome to the members area’, the value of the $username variable is displayed. If one of the two conditions is not met, the script outputs the message ‘Access denied’.
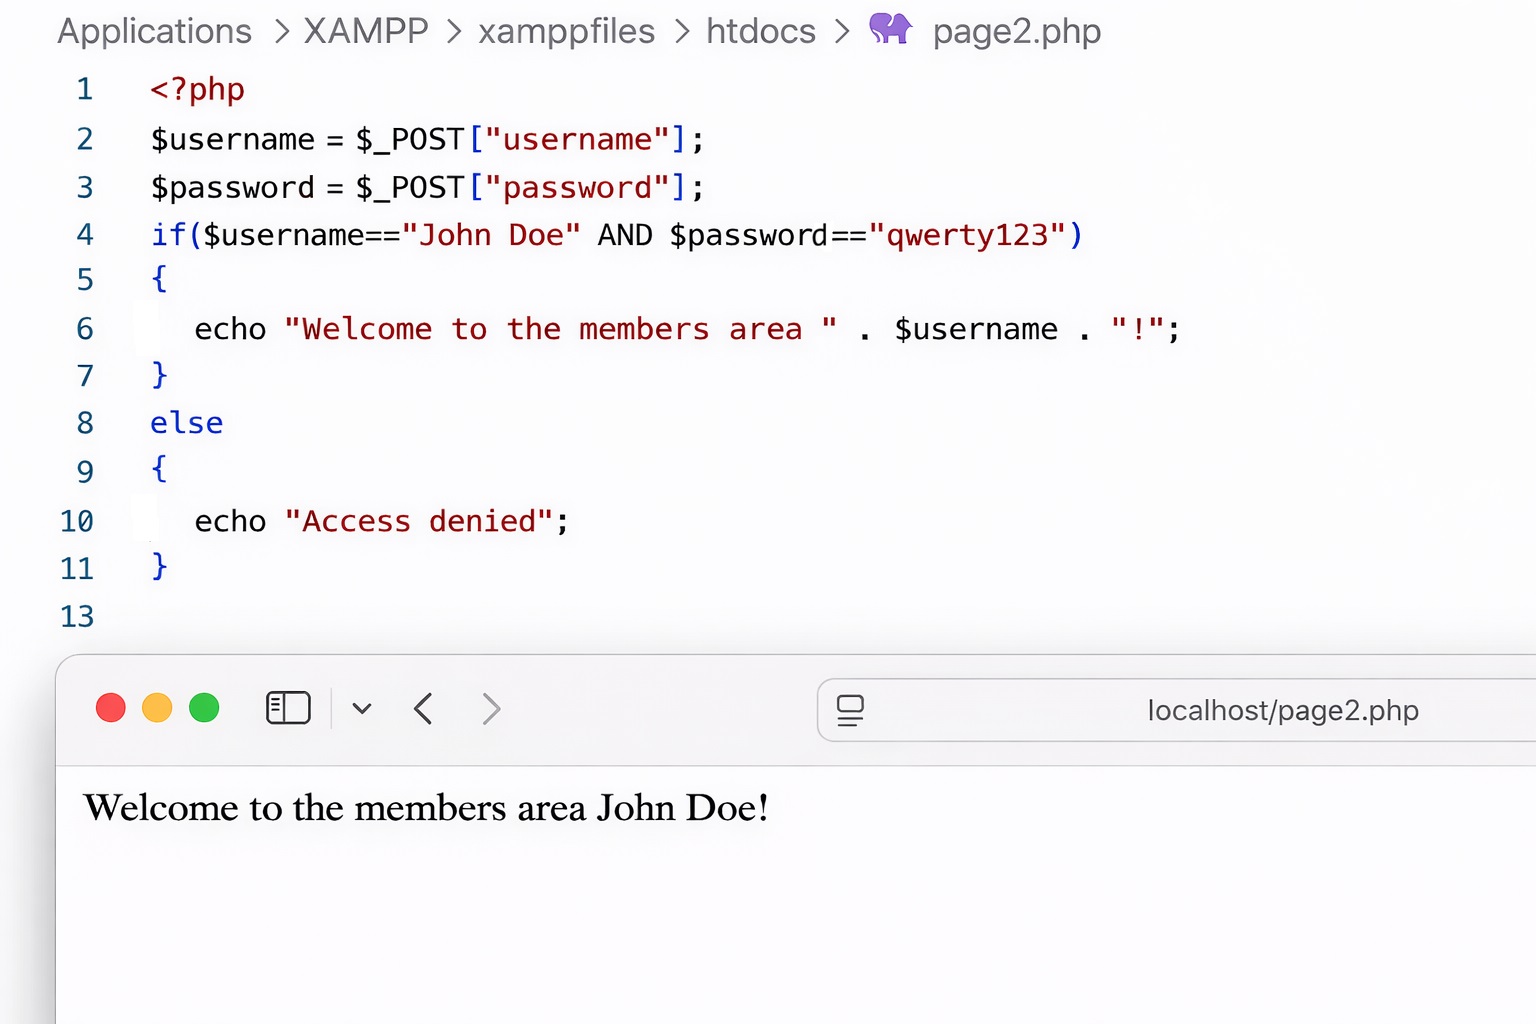
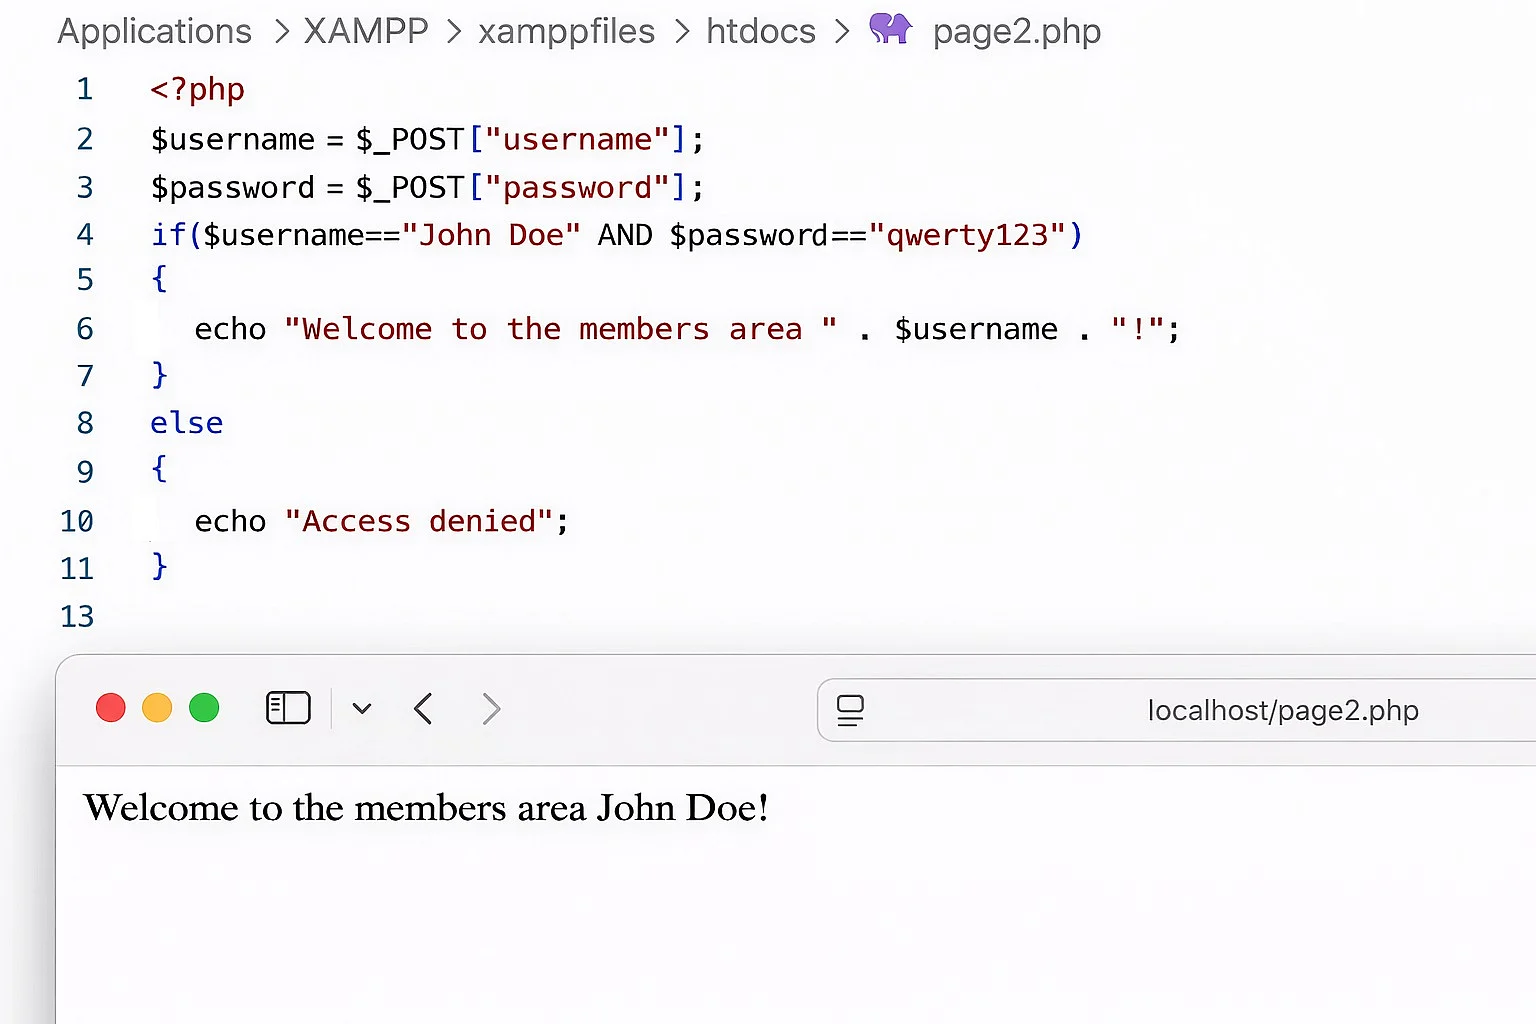
Logical operators can be combined in many ways. As a rule, AND has a higher precedence than OR. Similar to mathematical expressions, brackets can also be used in PHP to control the order in which conditions are evaluated.
Conditions with match
So far, decisions in PHP have been implemented using if and else statements. However, when a single value needs to be checked and different outcomes should occur depending on that value, if statements can quickly become difficult to read. For such cases, PHP provides the match statement.
<?php
$status = 404;
echo match ($status) {
200 => "OK",
404 => "Not found",
default => "Unknown status",
};In this example, the value of the $status variable is evaluated. If it is 200, the match expression returns the text ‘OK’. If the value is 404, the result is ‘Not found’. If none of the specified values match, the default case applies and the result ‘Unknown status’ is returned.
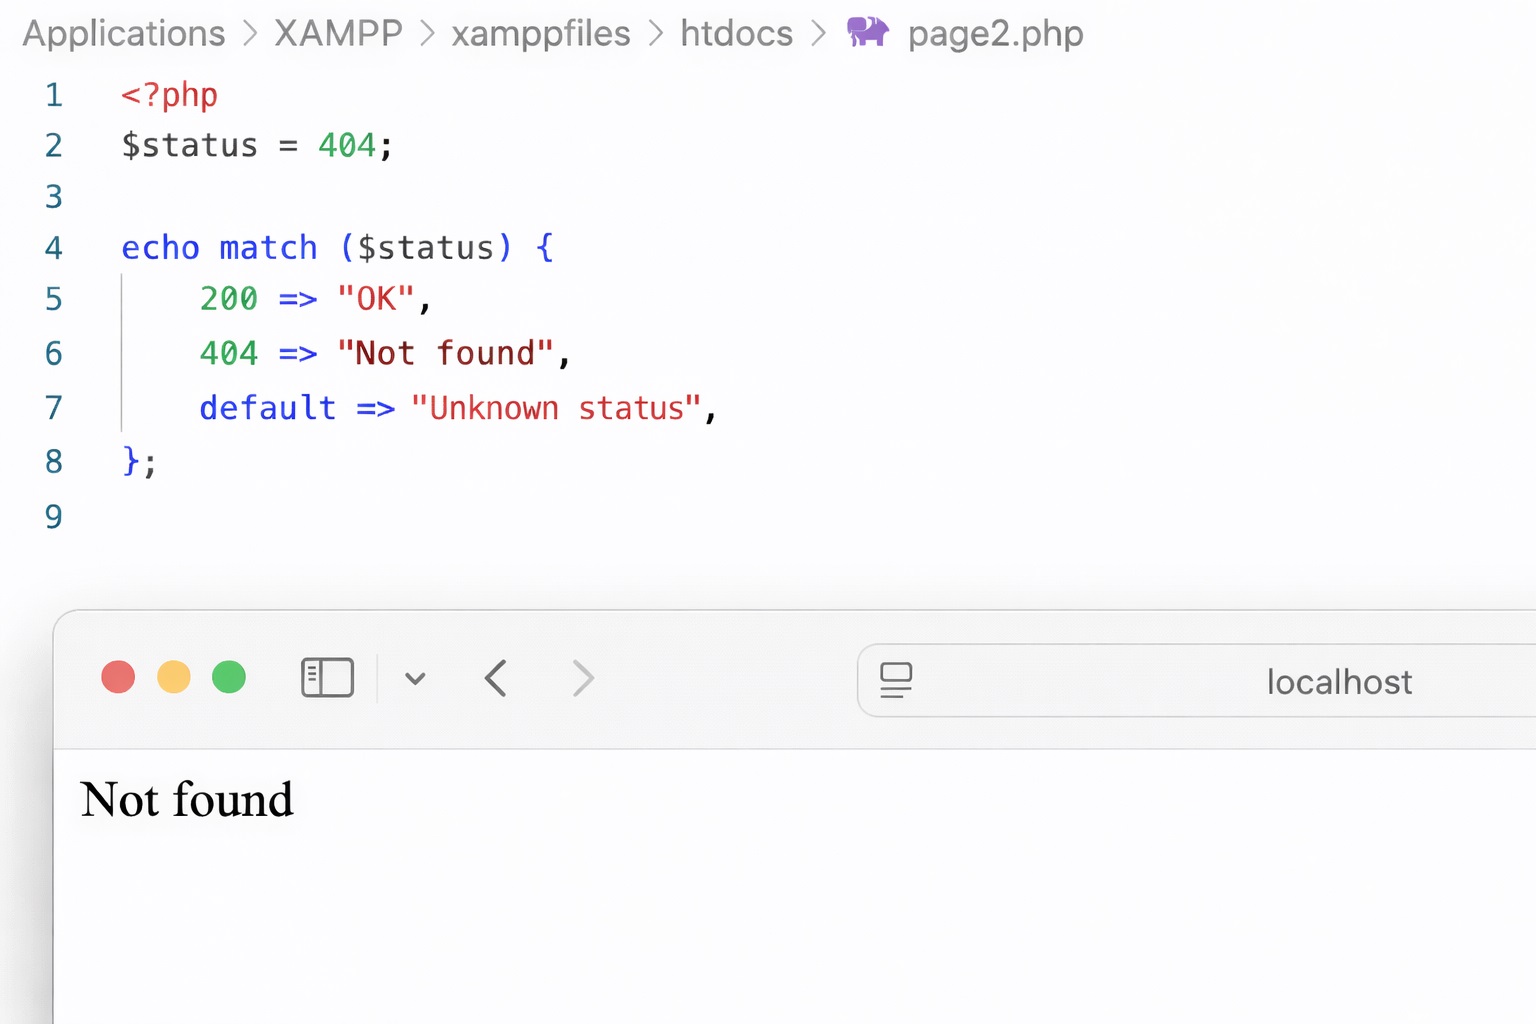
The most important difference from if-else is that match directly returns a value that can be assigned to a variable. This eliminates the need to write assignments multiple times within individual conditions, and the code stays shorter, clearer, and easier to understand.
How to use loops (while, for)
Sometimes a script needs to run a specific section of code several times before the rest of the program code is executed. Programming languages use the concept of loops for this — also called PHP loops. There are three types of loops:
whileloopsdo-whileloopsforloops
while loops
The while loop is the simplest type of loop available in PHP. The basic structure follows this pattern:
while (condition)
{
loop step and other statements
}The while loop instructs PHP to execute the nested statements as long as the specified condition remains true. At the start of each iteration, the PHP interpreter checks whether the condition is still met. The loop continues to run until the condition is no longer satisfied.
This principle can be demonstrated with a simple counting script:
<?php
$number = 1;
while ($number <= 10) {
echo $number++ . "<br />";
}In the section ‘Calculating with variables’, the concept of incrementing was introduced. In the following script, this concept is used again. This time, however, a post-increment operator increases the value of the integer variable $number by 1 only after the text output via echo in each loop iteration. The condition for the while loop is defined as $number less than or equal to 10. The echo statement is therefore repeated until $number becomes greater than 10.
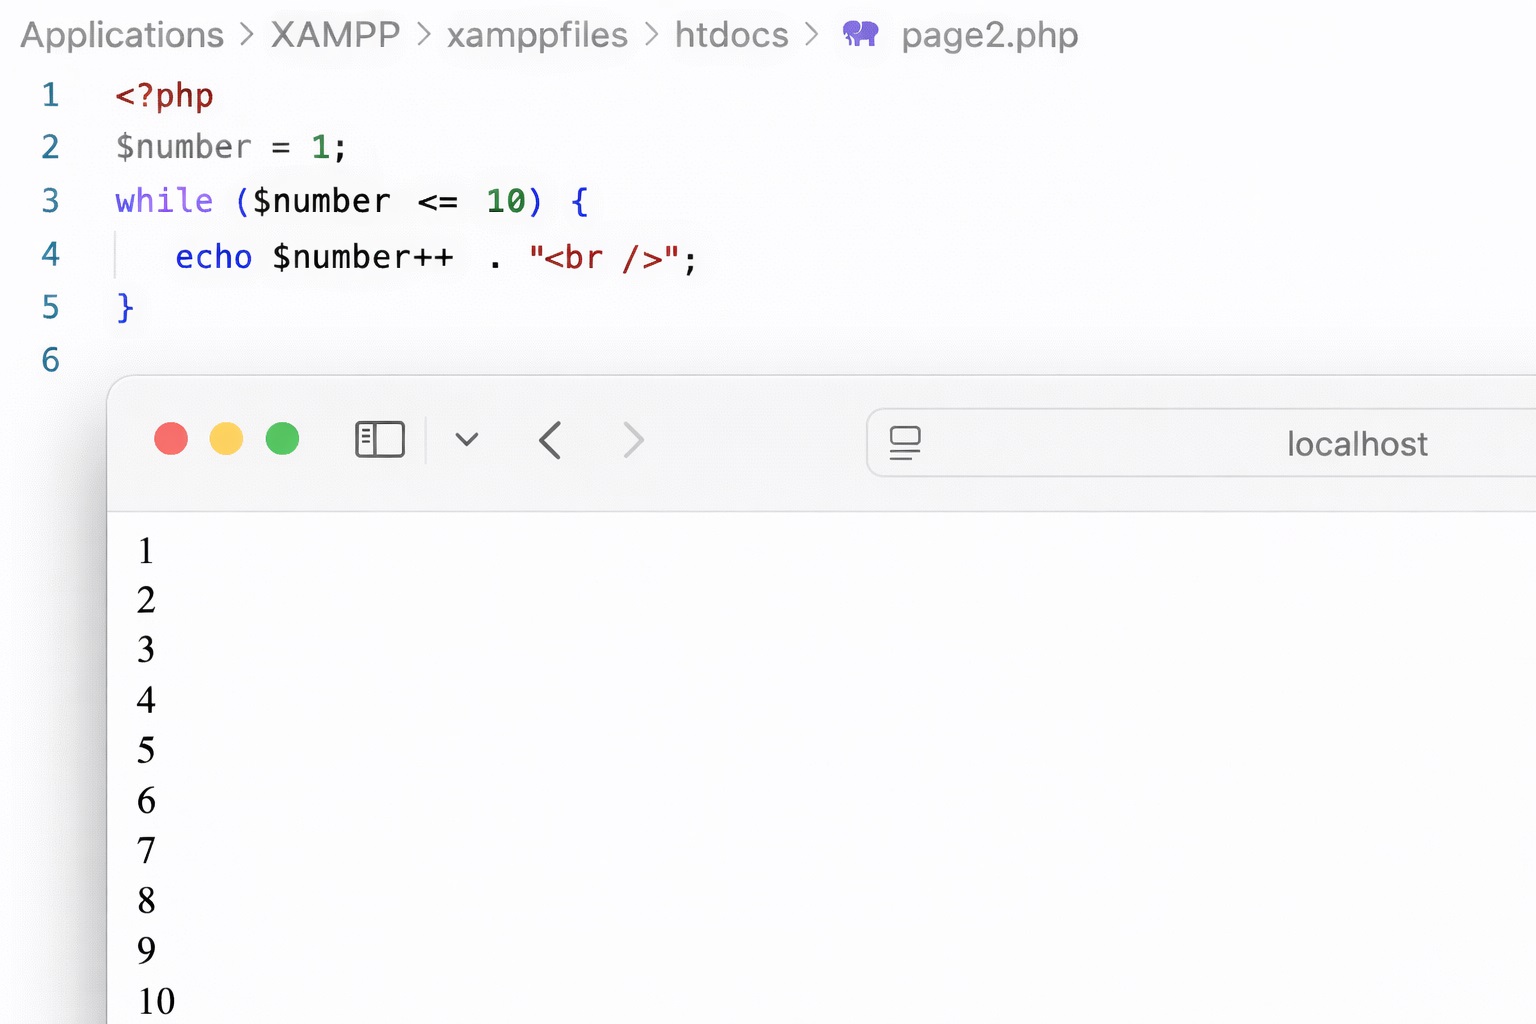
When the script runs, it outputs a string showing the value of the $number variable in each loop iteration before it is incremented. As a result, the script counts from 1 to 10 and stops executing once the while condition is no longer satisfied.
do-while loops
The structure of the do-while loop is similar to that of the while loop. The only difference is that the condition is not checked at the beginning of each loop iteration, but only at the end. The basic pattern of a do-while loop corresponds to the following example:
do {
loop step and other statements
}
while (condition);Written as a do-while loop, the previous script would look like this:
<?php
$number = 1;
do {
echo $number++ . "<br />";
}
while ($number <= 10);The result remains the same in this case. The special feature of the do-while loop is that it is executed at least once, even if the condition is not met in any loop iteration.
for loops
In principle, the for loop in a PHP script has the same functionality as the while loop. Unlike the while loop, however, the initial value, condition, and statement are written on a single line rather than spread across three or more lines. The basic structure of the for loop follows this pattern:
for (initial value; condition; loop step)
statementsThe already familiar example can therefore be written as a for loop in a more compact form:
<?php
for($number = 1; $number <= 10; $number++) {
echo $number . "<br /> ";
}First, the value ‘1’ is assigned to the $number variable. PHP then checks whether the condition $number <= 10 is met. If the condition is true, the loop continues and the statements inside the loop are executed, in this case the echo statement. After that, the loop step is performed. Here it does not matter whether pre-increment or post-increment is used, since the result of this step is not used any further. Once the loop step is completed, the next iteration of the loop begins.
The initial value, the condition, and the loop step are optional elements of a for loop. In theory, even empty loops are possible, although they would not serve a practical purpose.
In principle, PHP scripts can be written using either a for loop or a while loop. However, one advantage of for loops is that the key parameters of the loop are defined in a single place. This makes the loop easier to understand and reduces the risk of accidentally creating an endless loop that continues running until the interpreter’s memory is exhausted. In the previous example, such a situation would occur if the value of the $number variable were not increased.
If a loop should run at least once regardless of the condition, the do-while loop is the appropriate choice.
break and continue
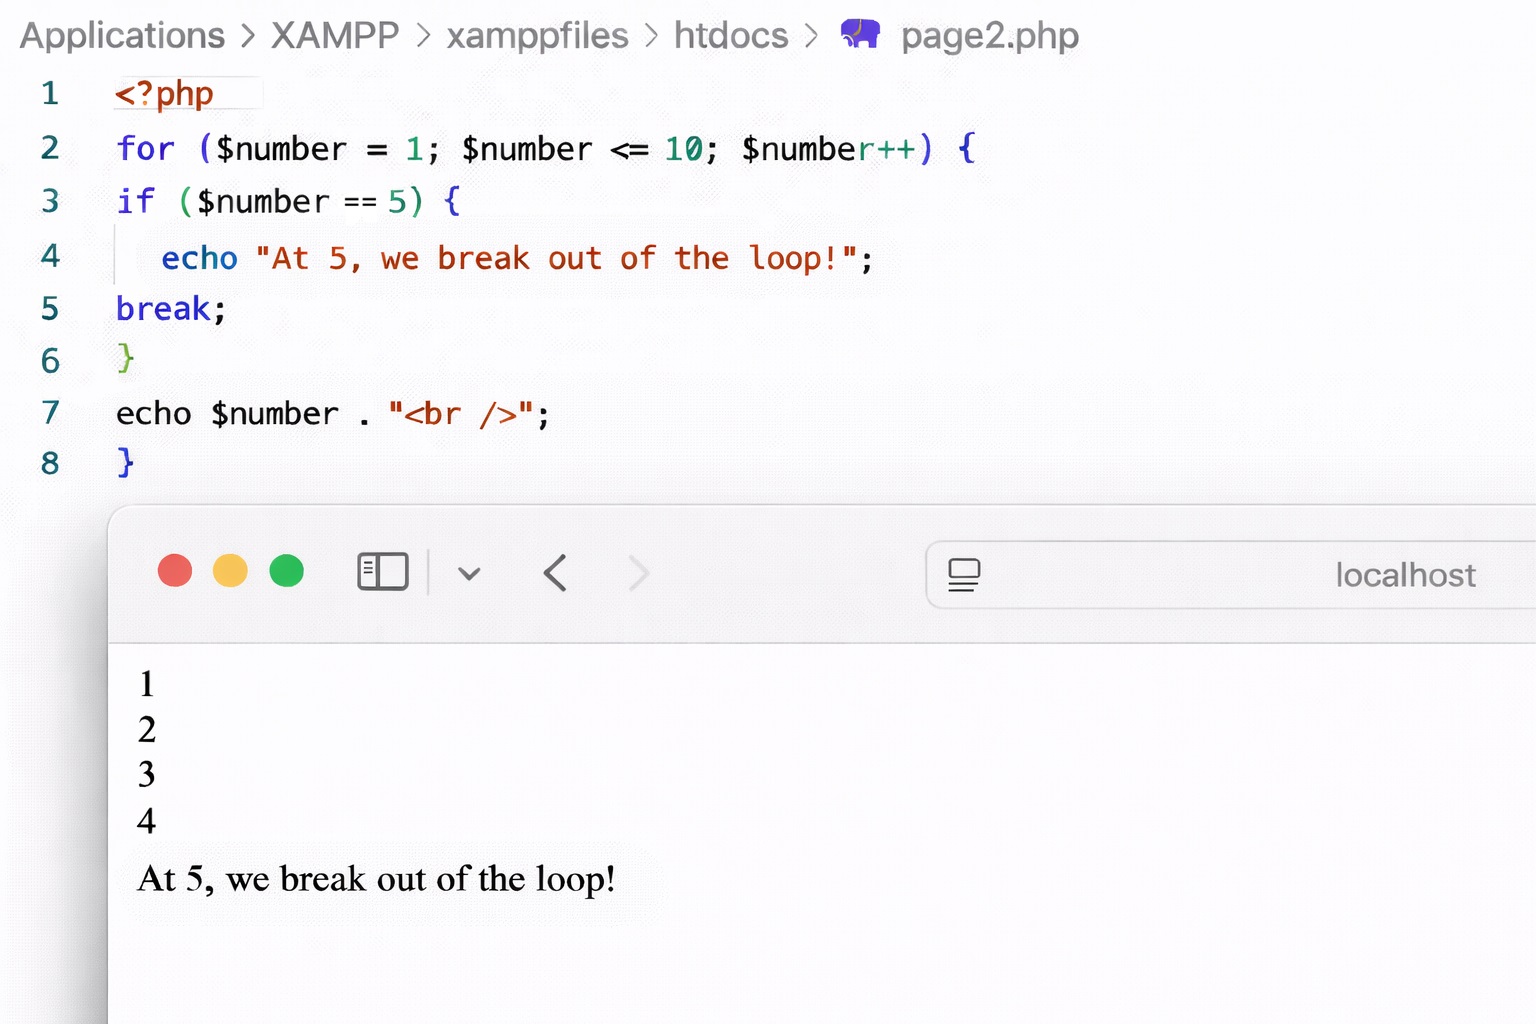
The execution of a while, do-while, or for loop can be controlled using the break and continue statements. Use break to interrupt a loop at any point, and continue to skip a single loop iteration. Both statements are tied to a condition using if. The following example shows our counting script with a break:
<?php
for ($number = 1; $number <= 10; $number++) {
if ($number == 5) {
echo "At 5, we break out of the loop!";
break;
}
echo $number . "<br /> ";
}In the for loop, we defined that the value of the $number variable, starting from an initial value of 1, should be increased by 1 in each loop iteration until the variable reaches the value 10. We now stop this loop early with the break statement as soon as $number reaches the value 5. The echo construct therefore only outputs the numbers 1 through 4.
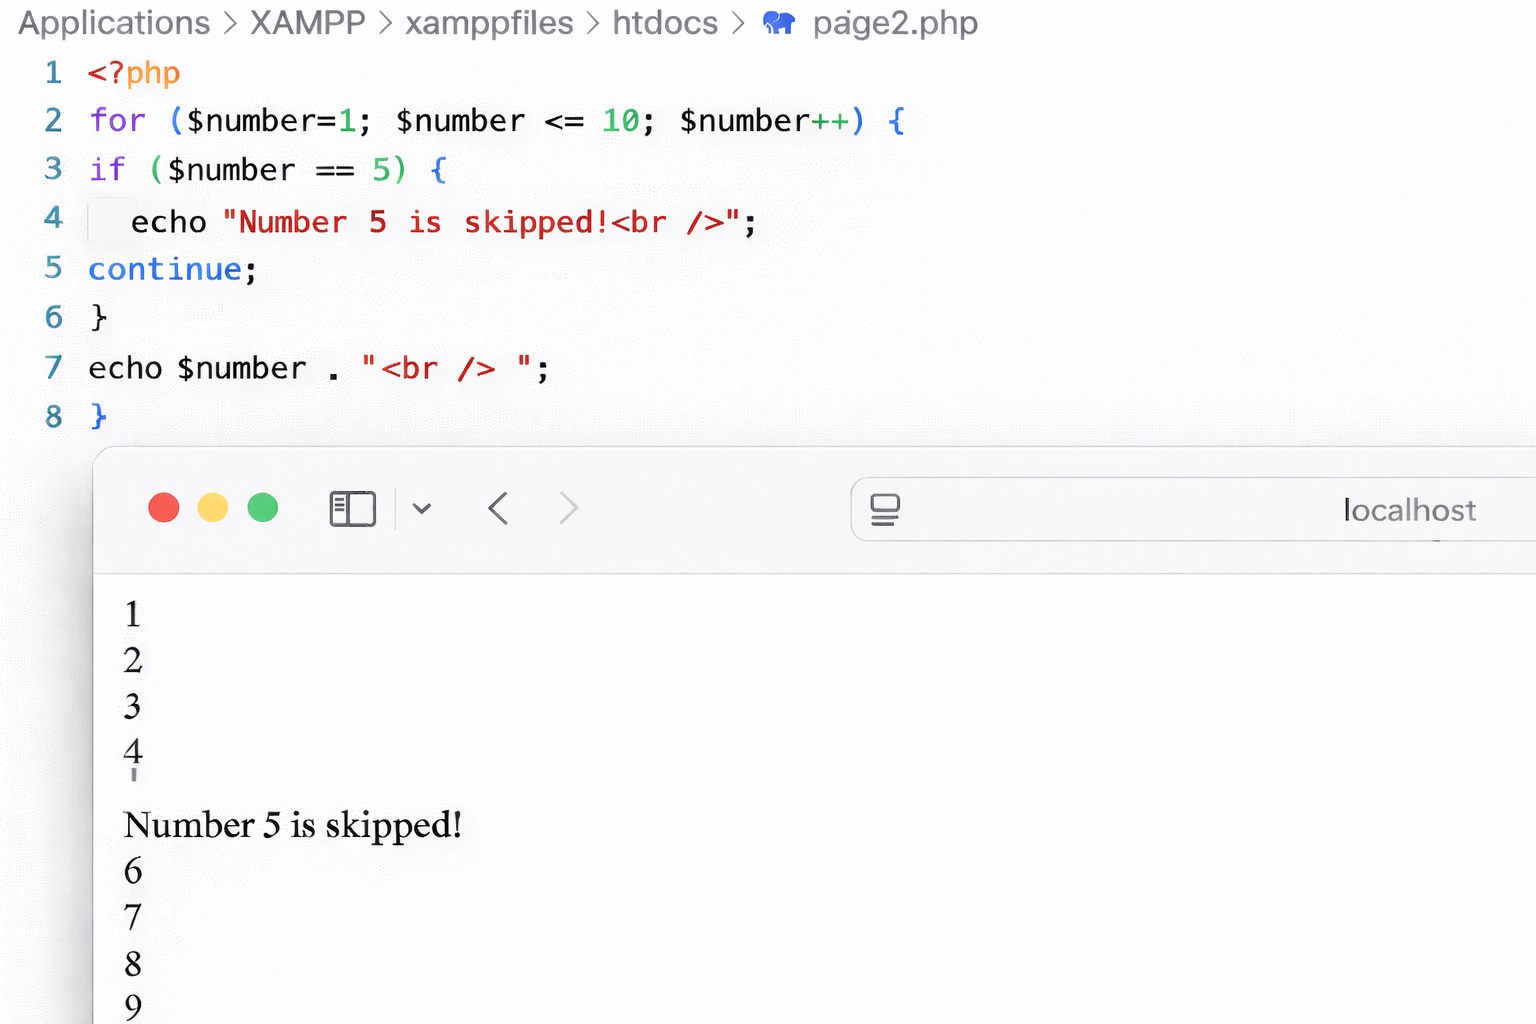
If we only want to skip the output in the fifth iteration, but not stop the entire loop, we replace the break statement with continue:
<?php
for ($number=1; $number <= 10; $number++) {
if ($number == 5) {
echo "Number 5 is skipped!<br />";
continue;
}
echo $number . "<br /> ";
}Instead of the digit 5, PHP outputs the text string ‘Number 5 is skipped!’ defined in the if statement.
How to perform file operations
Dynamic web content is based on separating content from presentation. Scripting languages such as PHP therefore offer various functions that allow content from external data sources to be loaded into central template files. In practice, these data sources are often databases managed with systems like MySQL. It is also possible to include data from files. The following section shows how to read files as a string in a PHP script and how to store text output from a script in files.
Reading files
To read the contents of a file, PHP provides several functions. Two particularly useful ones are file() and file_get_contents(). The file_get_contents() function reads the entire contents of a file into a single string, whereas the file() function stores the contents as an array. Each element of this array represents one line of the file. This makes it easier to output the lines individually when using file().
To demonstrate PHP file operations, we use the text file example.txt, which is placed in the htdocs folder of the test server. The file contains four lines of dummy text:
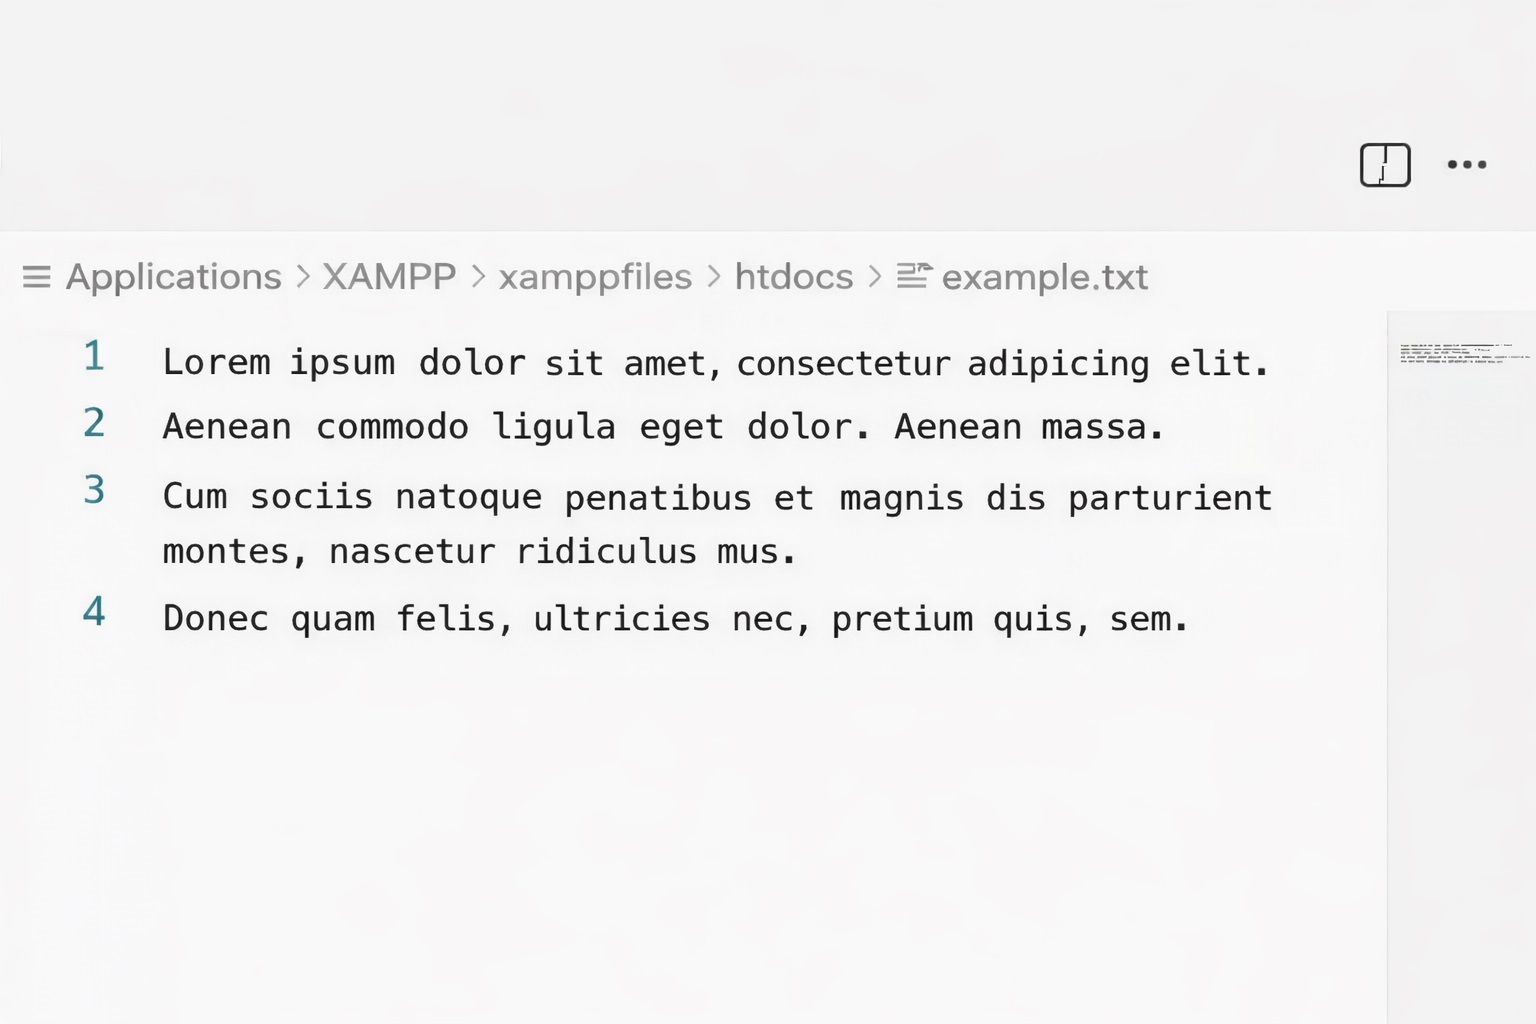
First, we read the entire file as a string. To do this, we have to pass the name of the corresponding file as a parameter to the file_get_contents() function. This is done using the following pattern:
file_get_contents('example.txt')
The string that has been read can now be processed further. For example, it can be assigned to a variable and displayed as text in the web browser:
<?php
$example = file_get_contents('example.txt');
echo $example;In the browser view, we see that the text string is output without paragraphs. The line breaks from the original file are not visible. This is because the web browser interprets the script’s text output as HTML code. Line breaks defined in text editors are lost in the process.
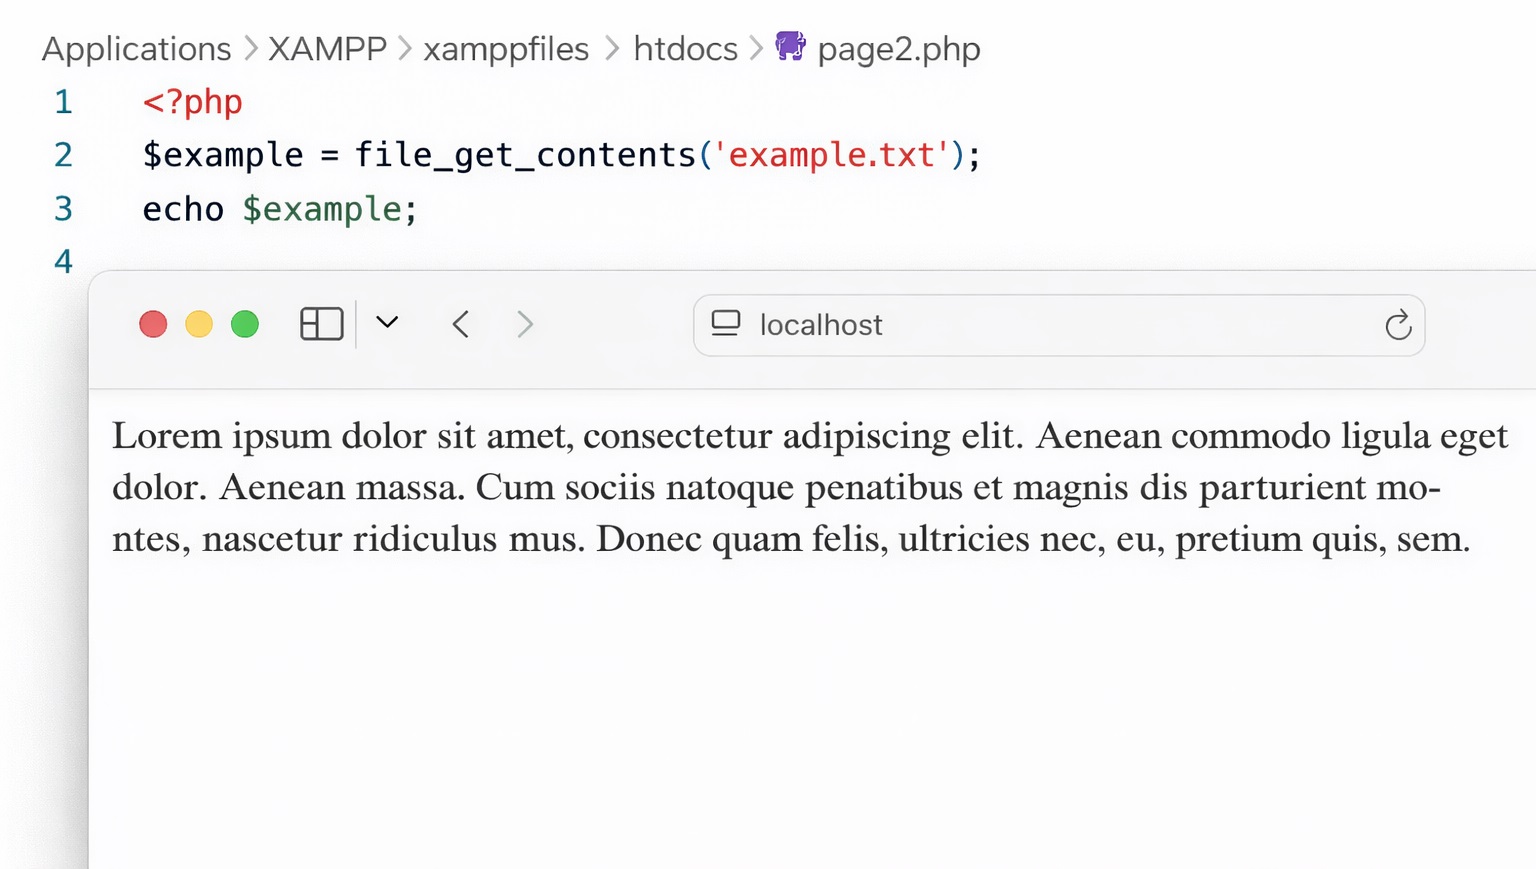
If you want to keep the original structure, you have several options. You can manually add the HTML line break tag (<br>) to the source file using search and replace, wrap the file content in a <pre> tag, assign the CSS property white-space: pre-wrap to the area, or use the nl2br() function to tell PHP to automatically convert line breaks into HTML line breaks. Use the function with the following pattern:
<?php
$example = file_get_contents('example.txt');
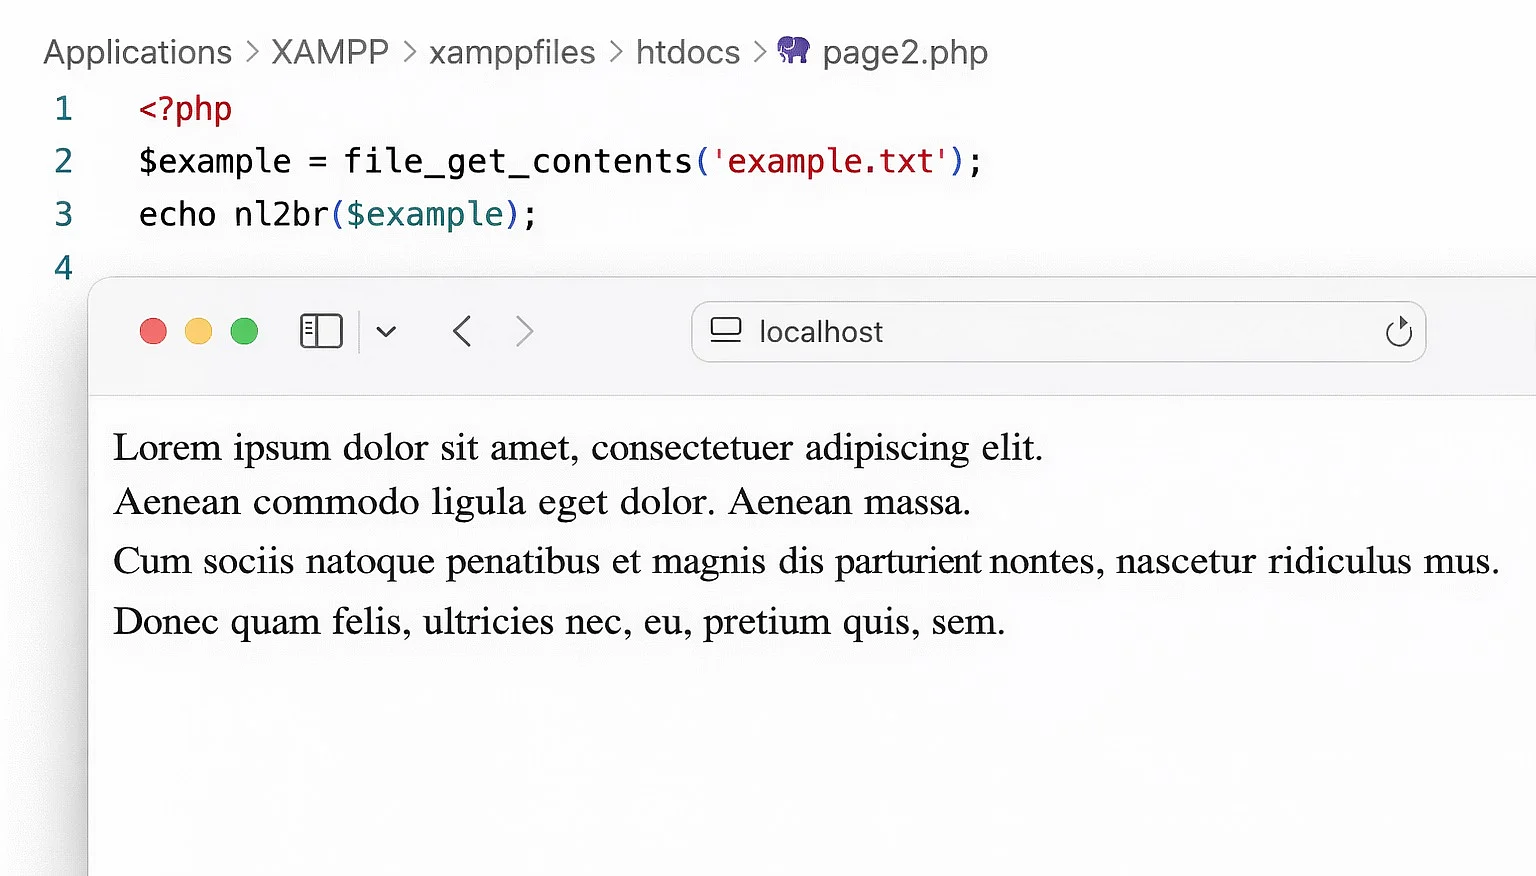
echo nl2br($example);When the echo language construct is used in combination with nl2br(), PHP inserts an HTML line break before every new line.
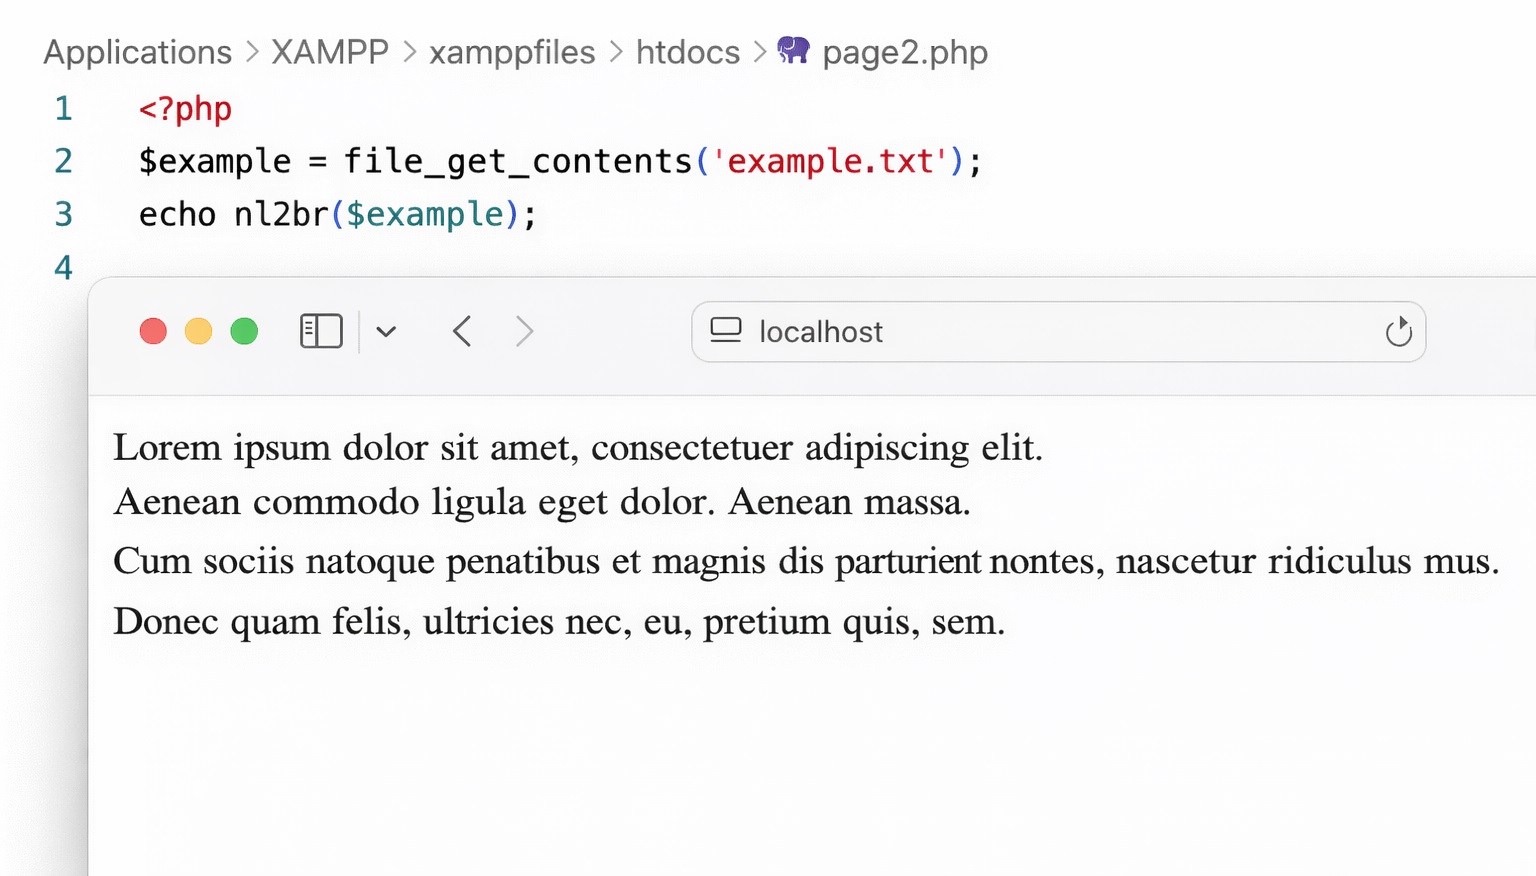
If you want to output the lines of a file individually, the file() function is a good choice. It reads a file, numbers all lines starting with 0, and stores their contents as elements of an array. Applied to our example, this results in the following mapping:
[0] = Lorem ipsum dolor sit amet, consectetuer adipiscing elit
[1] = Aenean commodo ligula eget dolor. Aenean massa.
[2] = Cum sociis natoque penatibus et magnis dis parturient montes, nascetur ridiculus mus.
[3] = Donec quam felis, ultricies nec, pellentesque eu, pretium quis, sem.
To output the respective contents using echo, you only need to specify the desired line number. For example, the following script returns only the first line of the file ‘example.txt’ as output for the browser:
<?php
$example = file("example.txt");
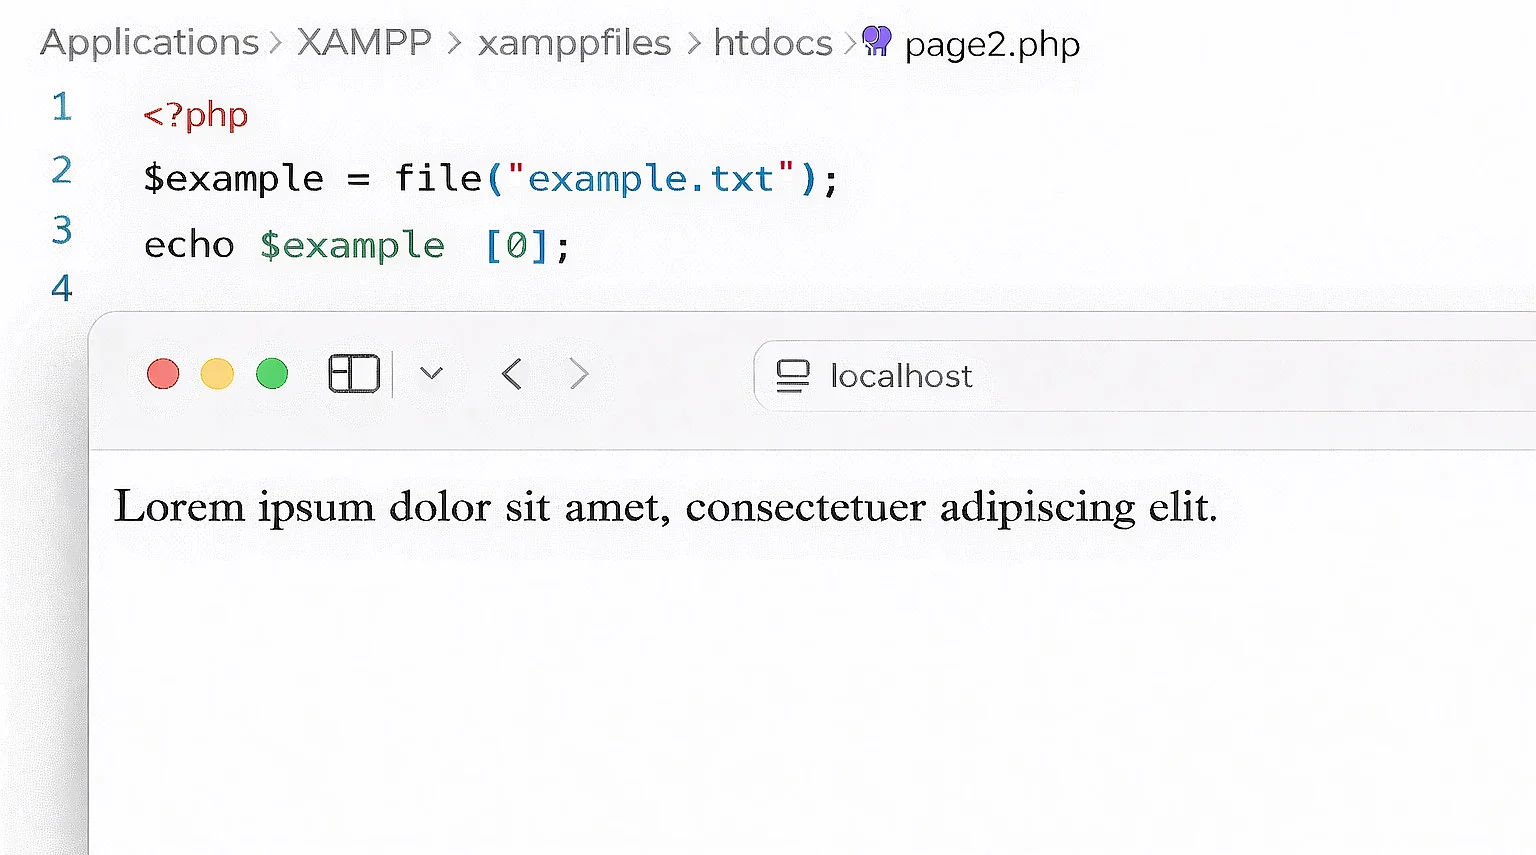
echo $example [0];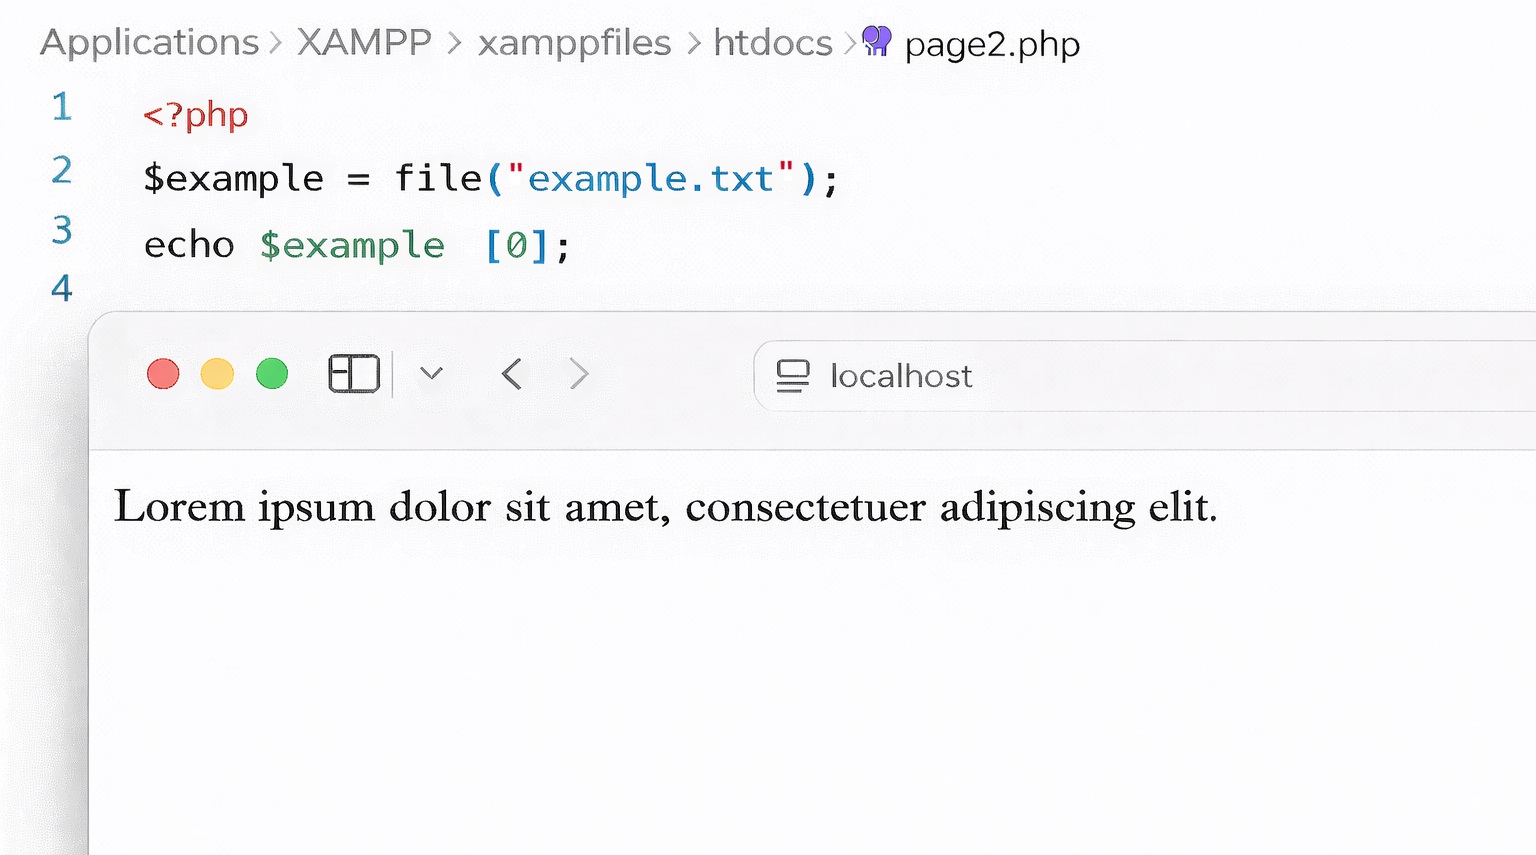
Writing files
PHP can not only read files but also create them and write content to them.
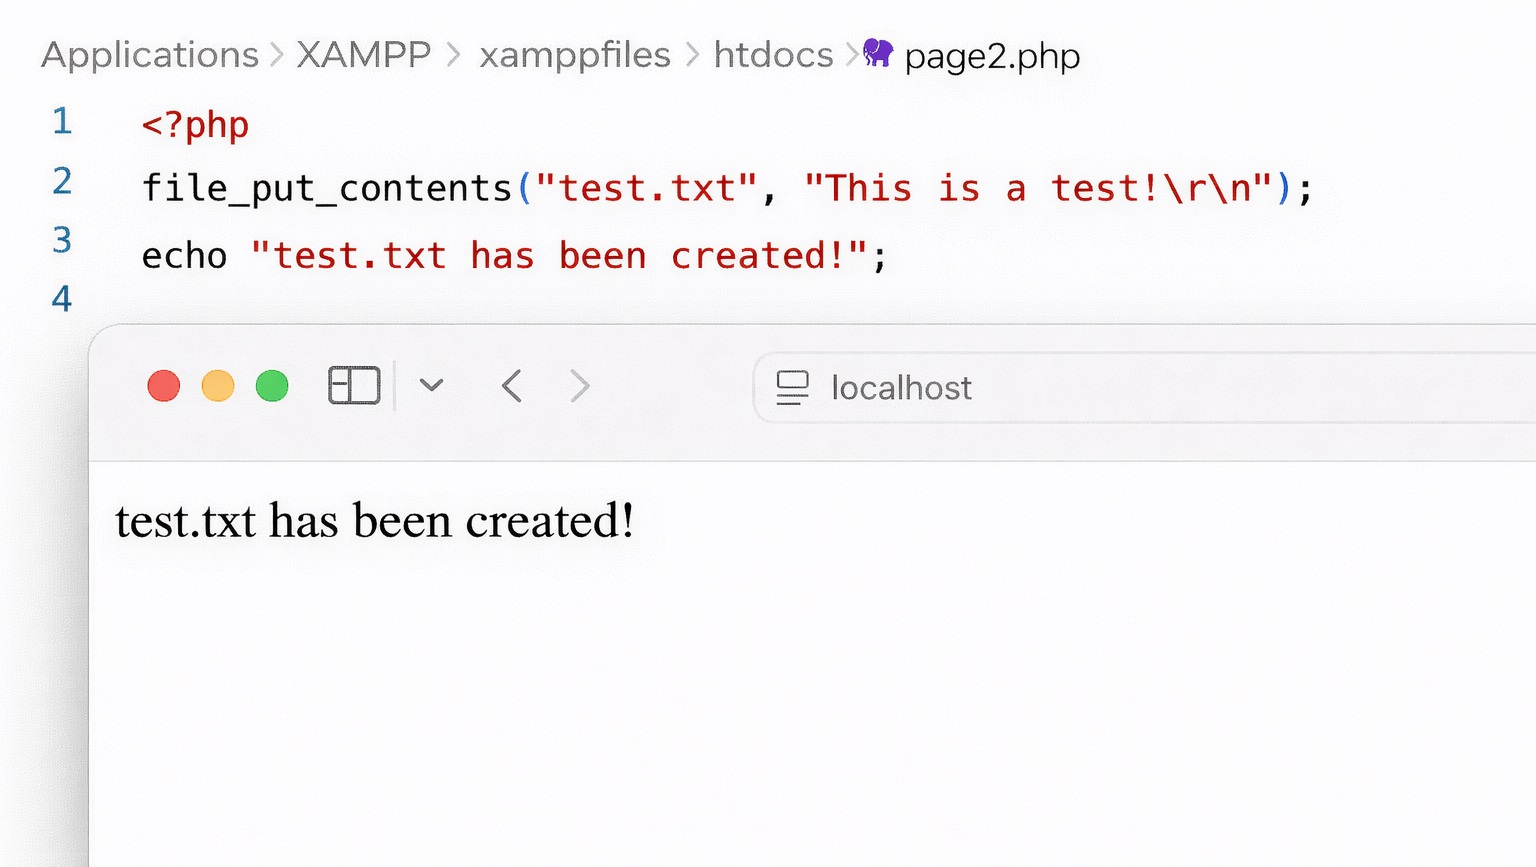
For this purpose, the PHP function file_put_contents() can be used. It expects two parameters: the name of the file to be created or updated and the data to be written, either as a string or an array. The following script creates the file test.txt and writes the string This is a test! to the first line. The addition \r\n inserts a line break in the target file.
<?php
file_put_contents("test.txt", "This is a test! \r\n");
echo "test.txt has been created!";Since file_put_contents doesn’t return any output to the browser, we add an echo statement that tells us which action is being performed.
If there is already a file with the same name in the target folder, it will be overwritten. You can prevent this by setting the FILE_APPEND parameter:
<?php
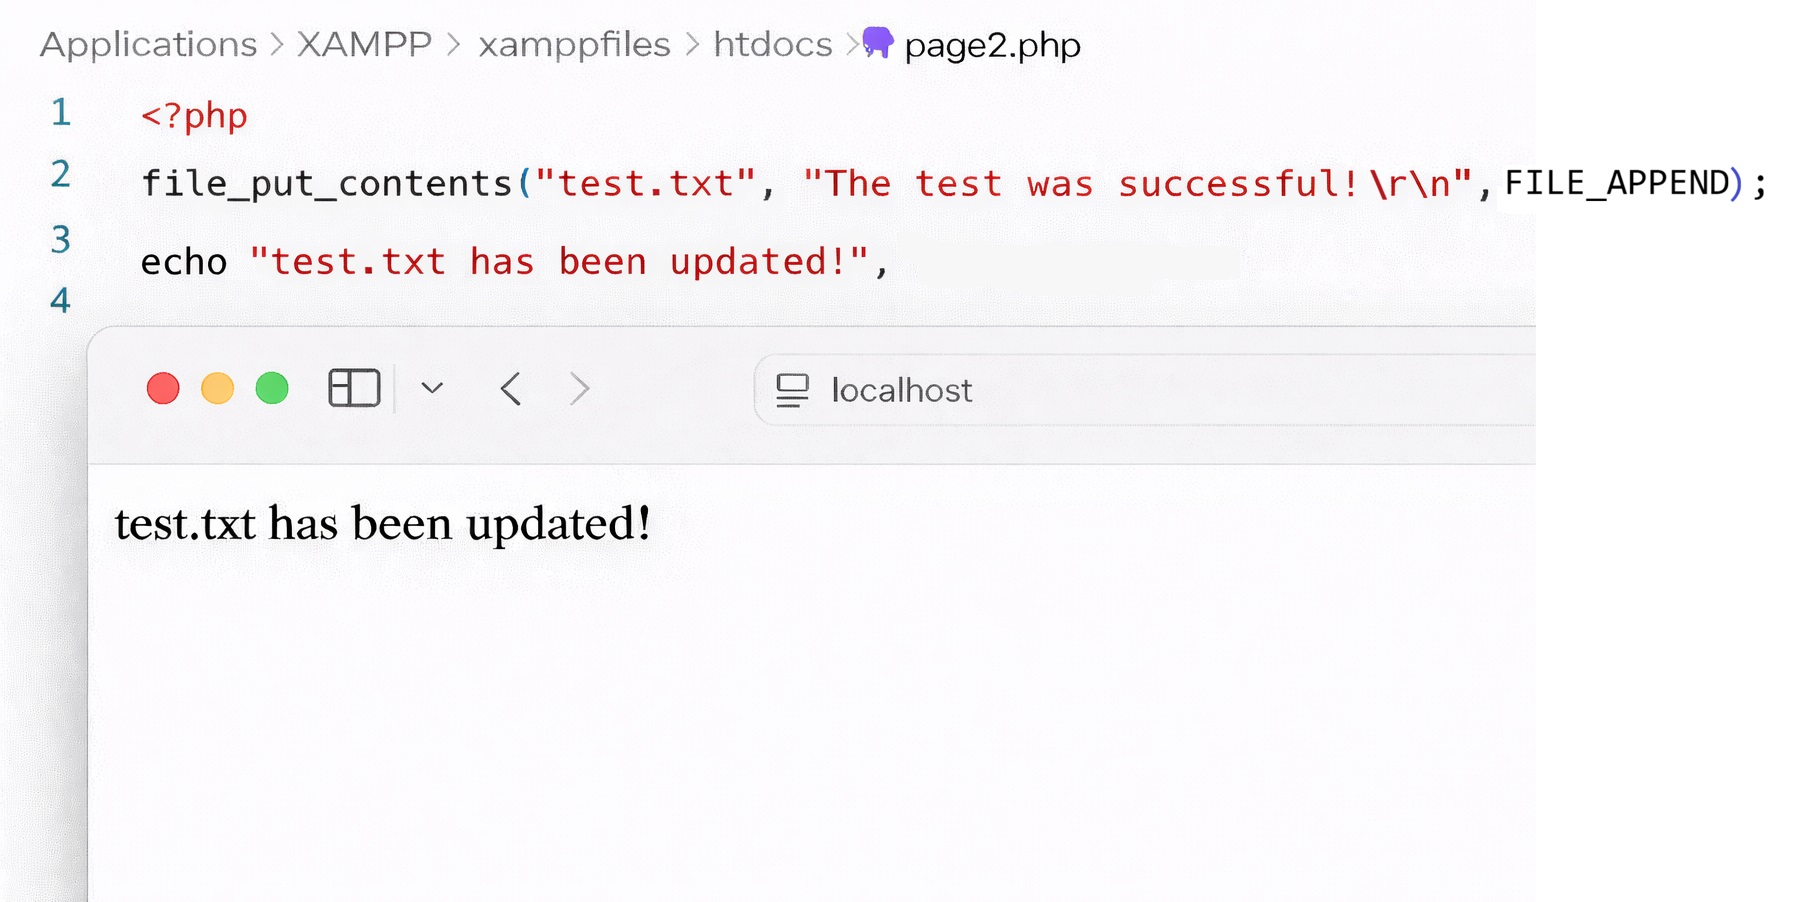
file_put_contents("test.txt","The test was successful! \r\n", FILE_APPEND);
echo "test.txt has been updated!";If the FILE_APPEND parameter is used with file_put_contents(), new content is added to the end of the existing file instead of overwriting it.
What PHP writes to the target file doesn’t necessarily have to be defined in the script. Alternatively, you can transfer content from one file to another. The following script reads the content of example.txt and inserts it into the file test.txt:
<?php
$example = file_get_contents("example.txt");
file_put_contents("test.txt", $example, FILE_APPEND);
echo "test.txt has been updated!";How to program using object-oriented principles
The object-oriented programming (OOP) paradigm is a method for dividing programs into small, manageable building blocks called objects. Each object belongs to a class, which defines the properties and methods it has. Properties are variables that store characteristics of the object, while methods are functions that the object can execute. OOP helps structure code better, make it reusable, and easier to maintain, especially in larger projects.
Classes
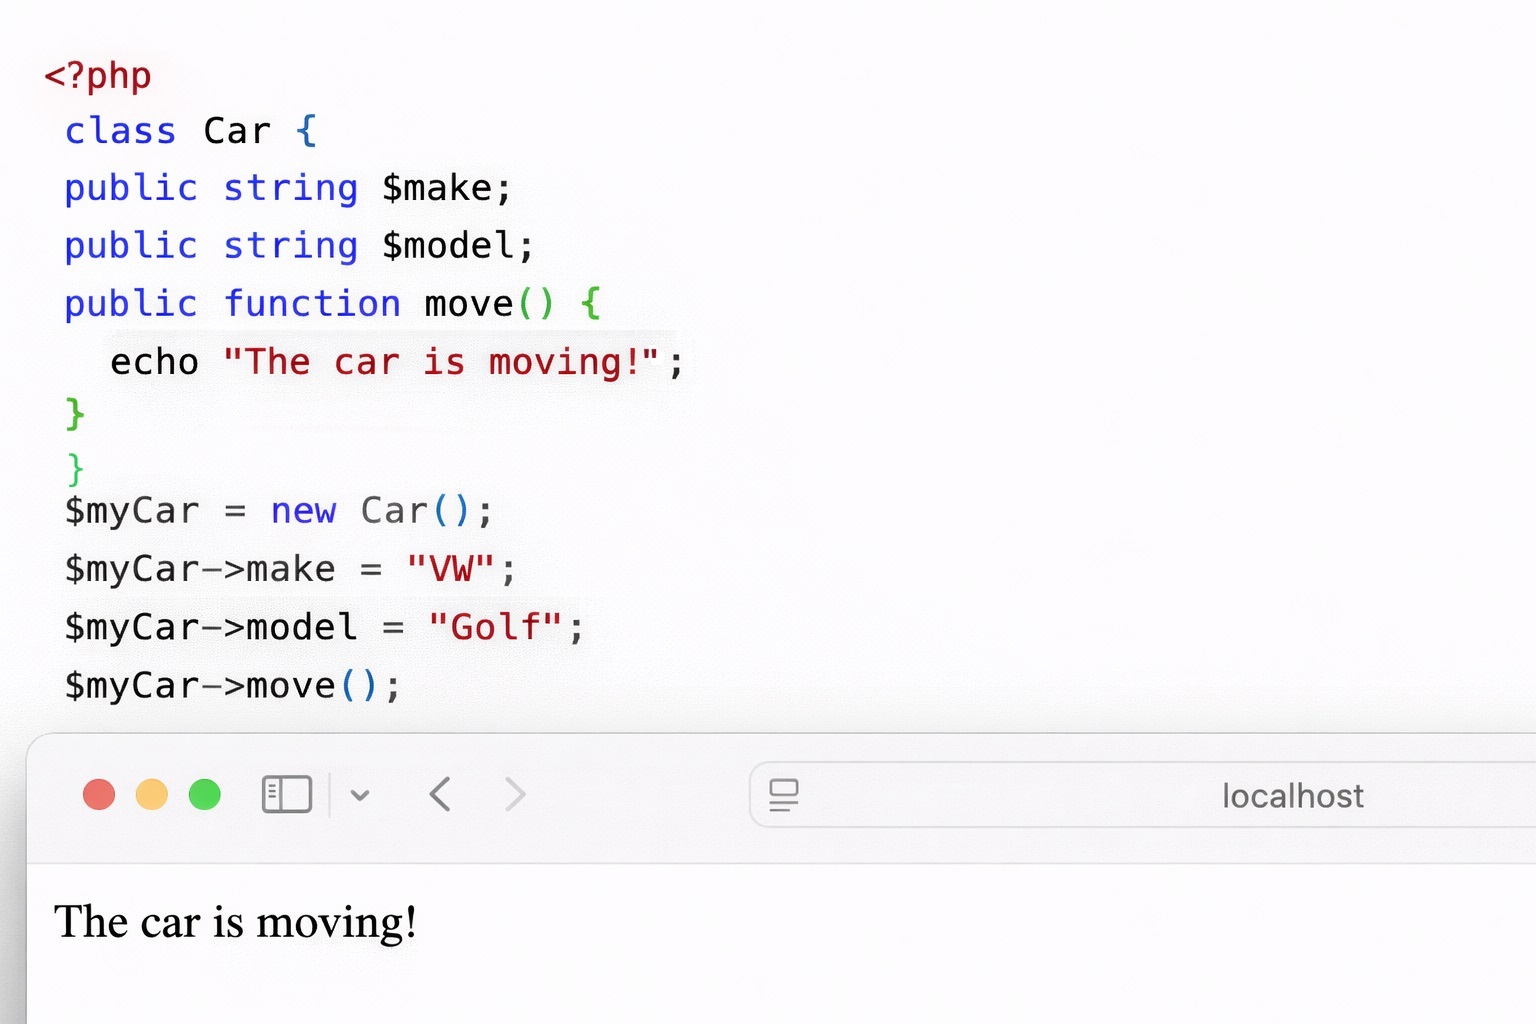
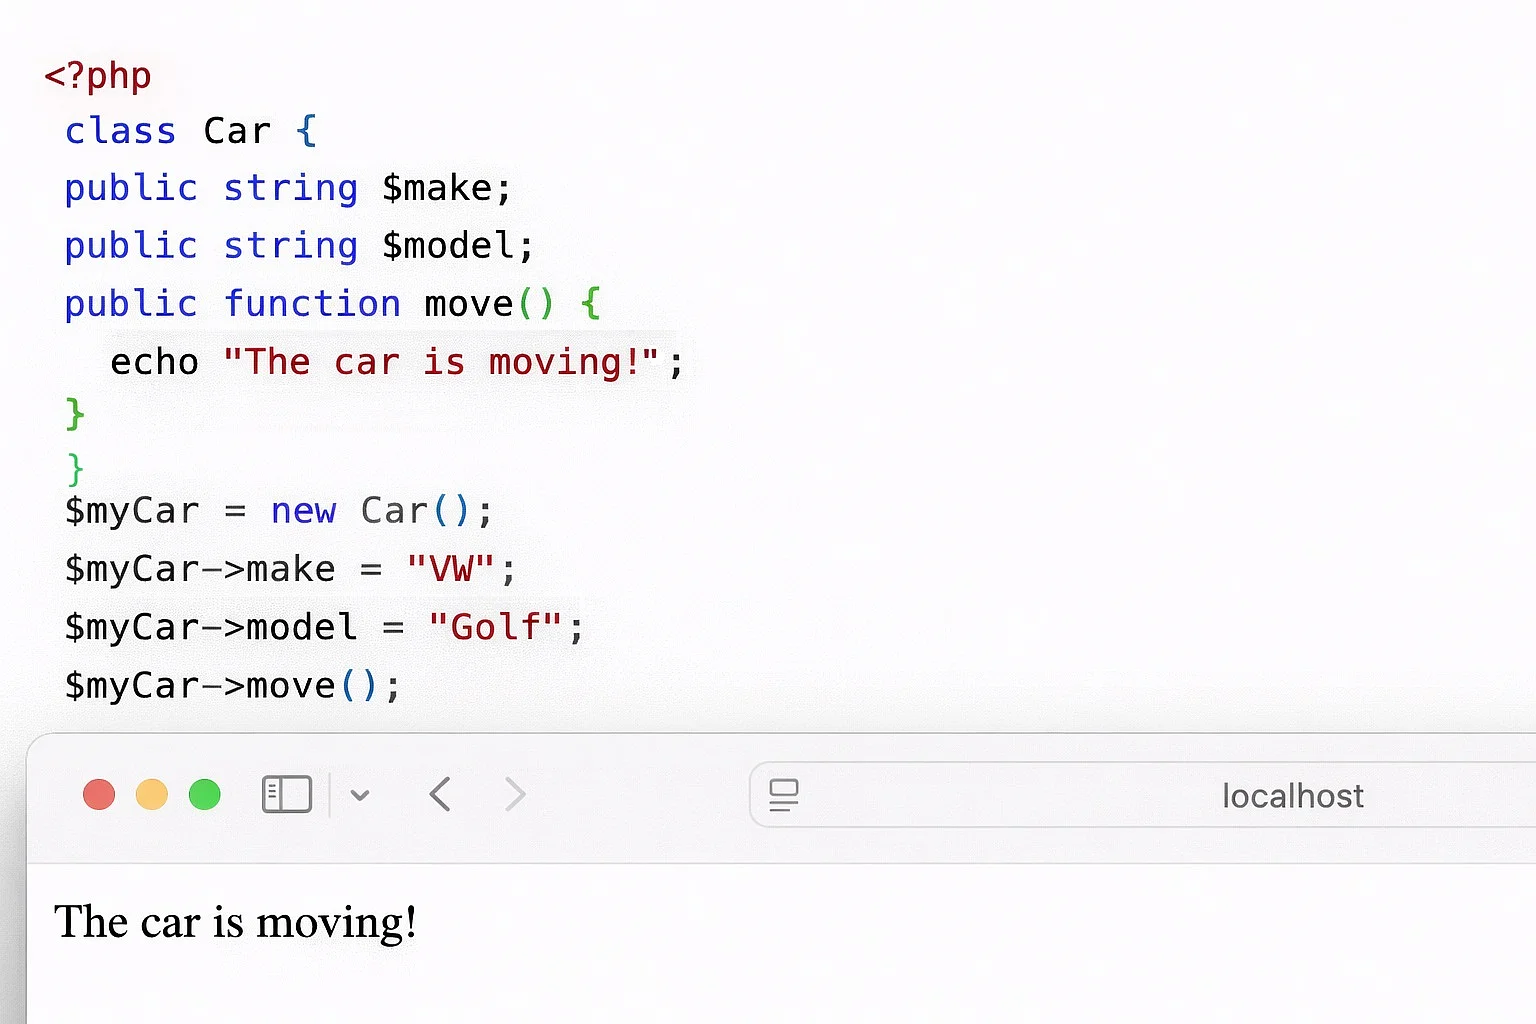
A class is the template for an object. You can think of a class as a blueprint, for example for a car, while an object is the actual car created from that blueprint. It defines which data an object contains and which functions it can perform. In the following example, we see the Car class:
class Car {
public string $make;
public string $model;
public function move () {
echo "The car is moving!";
}
}
$myCar = new Car();
$myCar->make = "VW";
$myCar->model = "Golf";
$myCar->move();In this example, the Car class is defined, which has two properties, $make and $model, as well as a move() method. Then an object of this class is created by assigning the class ‘Car’ to $myCar. With -> we access the properties of the object and set $make to VW and $model to Golf. We then call the move() method, which outputs the text ‘The car is moving!’. The $this keyword would refer to the current object within the method.
Constructor property promotion
Since PHP 8.0, you can define and initialise properties directly in the constructor, the method that is automatically executed when an object of a class is created. This removes the need to declare them separately in the class beforehand, which makes the code shorter and easier to read.
class Product {
public function __construct(
public string $name,
public float $price
) {}
}
$product = new Product("Cup", 12.99);
echo $product->name;
echo $product->price;In this example, the name and price properties are declared directly in the constructor. When the Product object is created, the values ‘Cup’ and ‘12.99’ are passed as arguments. The expressions $product->name and $product->price are then used to access the values that were set automatically. Constructor Property Promotion reduces the amount of code and improves readability.
Interfaces
An interface defines which methods a class must have without specifying their concrete implementation. Classes that implement the interface must define these methods so that different classes can be handled in a consistent way.
<?php
interface Movable {
    public function move();
}

class Car implements Movable {
    public function move() {
        echo "The car is moving!";
    }
}

$myCar = new Car();
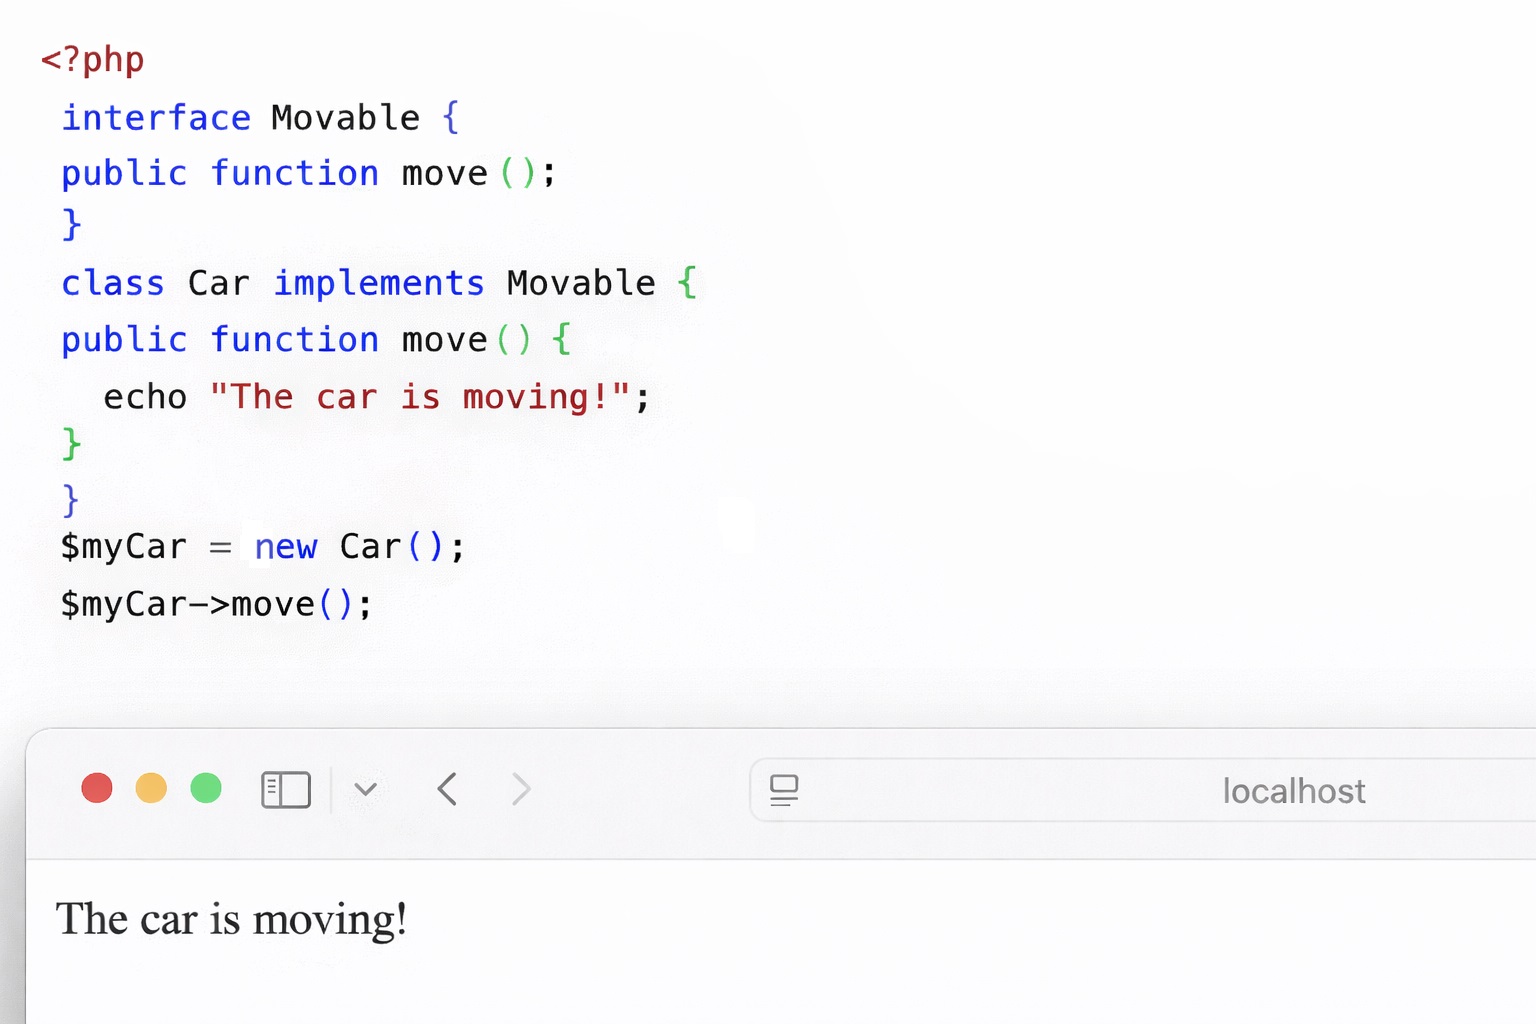
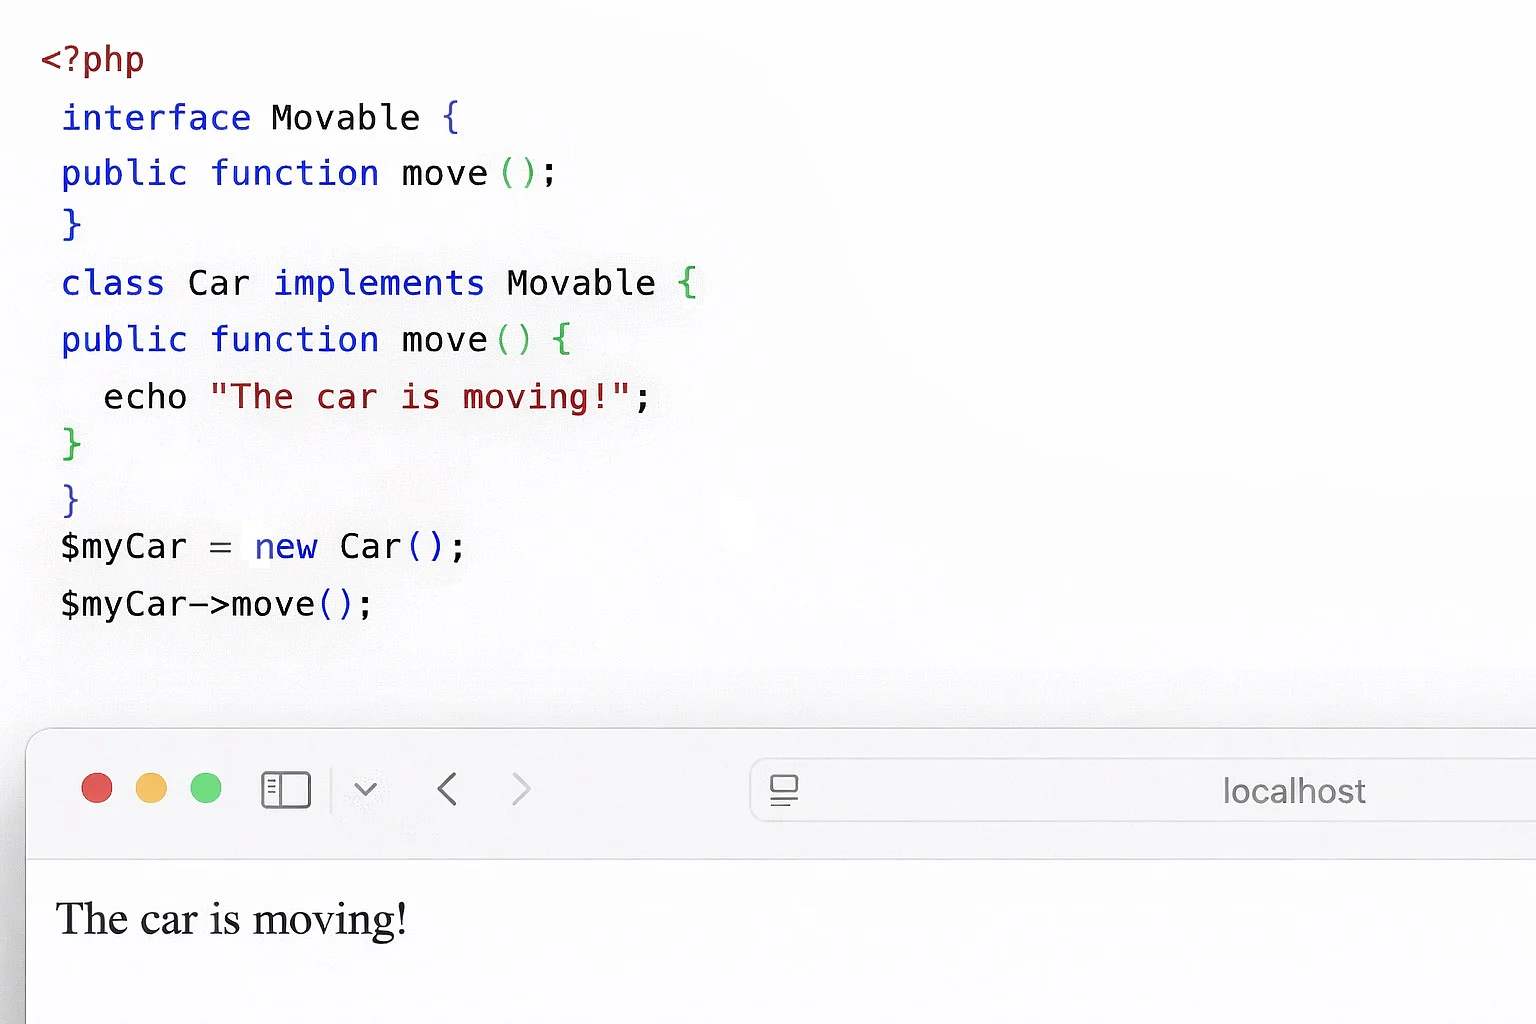
$myCar->move();In this example, the Movable interface specifies that every implementing class must provide a move() method. The Car class implements this interface and defines the method accordingly. An object of the class is then created and the method is called, which outputs the text ‘The car is moving!’.
Intersection types
Intersection types have been available since PHP 8.1. They make it possible for an object to be required to fulfil several interfaces at the same time. This is especially useful when a function needs to ensure that an object has certain capabilities.
interface Loggable {}
function save(JsonSerializable&Loggable $object) {
echo "The object can save JSON data and log information.";
}In this example, objects passed to the save() function must implement both the JsonSerializable and Loggable interfaces. The combination of the two interfaces is represented by &. This guarantees that the function only works with objects that have both characteristics.
Readonly properties
Readonly properties have been available since PHP 8.1. They can only be set once when an object is created and cannot be changed afterwards. This is especially useful for protecting sensitive data from unintentional modifications.
class User {
public function __construct(
public readonly string $name
) {}
}
$user = new User("Max");
echo $user->name;In this example, the name property is defined directly in the constructor and declared as readonly. As a result, the value ‘Max’ cannot be modified after the object has been created. Any attempt to change it later will trigger an error. Readonly properties are useful for values that should remain constant, such as user IDs or configuration settings.
Property hooks
Property hooks have been available since PHP version 8.4 and allow you to execute logic directly when setting or reading a property. This is useful when values should be processed automatically.
class User {
public string $email {
set => strtolower($value);
get => strtoupper($this->email);
}
}
$user = new User();
$user->email = "Test@Example.com";
echo $user->email;In this example, when a value is assigned to the email property, it is automatically converted to lowercase, while reading it automatically returns everything in uppercase. This lets you process data consistently without having to write additional methods.
Asymmetric visibility
With asymmetric visibility, introduced in PHP 8.4, it is possible to define that a property can be read publicly but only modified within the class itself. This helps protect important data from uncontrolled changes.
class Account {
    public private(set) float $balance = 0.0;

    public function deposit(float $amount) {
        $this->balance += $amount;
    }
}

$account = new Account();
$account->deposit(50);
echo $account->balance;In this example, the account balance can be read publicly but may only be modified within the class. The deposit() method enables controlled increases to the balance. Any attempt to change $balance directly results in an error. This approach protects important data while still allowing access through permitted operations.
How to write clean PHP code
As a project grows in size, well-structured and cleanly written code becomes increasingly important. Clean PHP code is easier to read, simpler to maintain, and less prone to errors. PHP applications therefore follow specific conventions and use tools that promote structure, clarity, and security.
Composer and PSR-4 (automatic class loading)
Composer is a key tool in modern PHP development. It is used to manage external libraries and to automatically load PHP classes. Without Composer, classes would have to be included manually using require or include, which can quickly become difficult to manage in larger projects. Composer commonly relies on the PSR-4 autoloading standard. This standard defines how classes are located based on their name and file location. In practice, the name of a class corresponds to the folder structure in which it is stored.
A simple example illustrates this principle. If a User class belongs to the App\Model namespace, the corresponding file is located in the src/Model folder:
<?php
namespace App\Model;
class User {
public function getName() {
return "Max Mustermann";
}
}Thanks to PSR-4, this class can be used anywhere in the project without manually including the file. PHP loads it automatically as soon as it is needed. This makes the code more organised and reduces potential sources of errors.
Using namespaces for clearer code structure
Namespaces help logically group classes and avoid naming conflicts. In small scripts, it’s no problem to simply name classes User or Database. In larger applications, however, multiple classes may share the same name while serving different purposes. Namespaces let you clearly distinguish these classes. For example, there can be a User class for the database and another User class for frontend display without causing conflicts.
The following example shows how a namespace is used:
<?php
namespace App\Service;
class Mailer {
public function send() {
echo "Email has been sent.";
}
}When using the class, the full name including the namespace is used or imported via use. This keeps the code unambiguous and well structured.
Using .env files and .gitignore in your project structure
A clear project structure is an important aspect of clean PHP code. In many PHP projects, the application code is separated from publicly accessible files and configuration data. The PHP source code is often stored in its own directory, while the web server is configured to access only a public folder.
Configuration values such as database credentials or API keys are typically not stored directly in the source code. Instead, .env files are used to keep these values in a central location. This improves security and makes it easier to switch between development and production environments.
A simple example of a .env file might look like this:
DB_HOST=localhost
DB_USER=root
DB_PASSWORD=secretThis file is deliberately not stored in version control. This is handled by the .gitignore file, which specifies which files or folders should be ignored by Git. In .gitignore, the .env file is explicitly excluded so that sensitive data is not accidentally published.
Error handling and logging
Handling errors differs between development and production environments. During development, it makes sense to display PHP error messages directly. This allows problems to be identified and fixed quickly.
In production applications, error messages should not be visible, as they could reveal internal information. Instead, errors are written to log files that are only accessible to developers.
In a development environment, error output can be enabled as follows, for example:
<?php
ini_set('display_errors', 1);
error_reporting(E_ALL);In a production environment, error display is disabled and logging is enabled. PHP then writes any errors that occur to a log file without showing them to website visitors. This keeps the application stable and secure while still providing a clear record of errors.
How to connect to a database with PHP using PDO
To store or retrieve data with PHP, a database is required. In this example, we use MySQL, which is included in XAMPP by default. PHP can communicate securely with the database using PDO (PHP Data Objects). PDO ensures that database commands are executed reliably, and offers prepared statements: placeholders separate the SQL command from the user input so that it is not executed as part of the command.
Creating database and table
First, create a new database named testdb in phpMyAdmin. Inside this database, create a table called users. The table contains three columns. The id column uniquely identifies each user, username stores the user name, and email stores the email address. The following SQL statement creates the table:
CREATE TABLE users (
id INT AUTO_INCREMENT PRIMARY KEY,
username VARCHAR(50) NOT NULL,
email VARCHAR(100) NOT NULL
);Database operations in PHP
Now we create a file called ‘crud.php’ in the XAMPP ‘htdocs’ folder. In this example, we establish a connection to the database and first demonstrate the basic CREATE, READ, UPDATE, and DELETE operations (CRUD):
<?php
// Establish database connection
$host = '127.0.0.1';
$db = 'testdb';
$user = 'root';
$pass = '';
$charset = 'utf8mb4';
$dsn = "mysql:host=$host;dbname=$db;charset=$charset";
$options = [
PDO::ATTR_ERRMODE => PDO::ERRMODE_EXCEPTION, // Make errors visible
PDO::ATTR_DEFAULT_FETCH_MODE => PDO::FETCH_ASSOC, // Data as array
];
try {
$pdo = new PDO($dsn, $user, $pass, $options);
} catch (PDOException $e) {
echo "Connection failed: " . $e->getMessage();
exit;
}

// CREATE: insert new user
$stmt = $pdo->prepare("INSERT INTO users (username, email) VALUES (:username, :email)");
$stmt->execute([
'username' => 'Max Mustermann',
'email' => 'max@example.com'
]);

// READ: fetch all users
$stmt = $pdo->query("SELECT * FROM users");
$users = $stmt->fetchAll();

// Output the user list
echo "<h2>User list</h2>";
foreach ($users as $user) {
echo "ID: " . $user['id'] . " – Name: " . htmlspecialchars($user['username']) . " – E-Mail: " . htmlspecialchars($user['email']) . "<br>";
}

// UPDATE: change a user's email
$stmt = $pdo->prepare("UPDATE users SET email = :email WHERE username = :username");
$stmt->execute([
'email' => 'max.mustermann@example.com',
'username' => 'Max Mustermann'
]);
echo "<p>The email address of Max Mustermann has been updated.</p>";

// DELETE: delete user
$stmt = $pdo->prepare("DELETE FROM users WHERE username = :username");
$stmt->execute([
    'username' => 'Max Mustermann'
]);
?>First, a connection to the database is established using PDO. For this step, the host, database name, username, password, and character set are specified. PDO helps ensure that SQL commands are executed securely and that errors are reported.
We then demonstrate the four basic operations:
CREATE(inserting data): WithINSERT INTO, we insert a new user. The placeholders:usernameand:emailensure that user input is processed securely.READ(reading data): WithSELECT * FROM users, we retrieve all existing records. UsingfetchAll(), we store the results in an array and output them in a clear, organised list.UPDATE(modifying data): WithUPDATE, we can change a user’s email address. Again, we use placeholders to safely insert the values.DELETE(deleting data): WithDELETE FROM users WHERE username = :username, we remove a specific user from the database. The:usernameplaceholder ensures that the input is processed securely, preventing attackers from tampering with the database. This lets us delete individual records without affecting the entire table.
How to secure user input and data processing
Whenever PHP processes user input, a security risk can arise. Visitors may manipulate form fields, submit unexpected data, or deliberately attempt to misuse an application. For this reason, PHP provides various functions that help validate, process, and store input securely.
Storing data securely in databases with prepared statements
One of the most common security vulnerabilities in PHP applications occurs when working with databases. If user input is inserted directly into SQL queries, a so-called SQL injection may occur. In this case, attackers insert their own SQL code into the query.
Prepared statements prevent this problem by strictly separating SQL code from user data. PHP provides the PDO database interface for this purpose.
<?php
$stmt = $pdo->prepare("SELECT * FROM users WHERE username = :username");
$stmt->execute([
'username' => $username
]);The code prepares a database query that searches the users table for all users whose username matches a specific value. Instead of writing the username directly into the SQL command, the :username placeholder is used, which is only filled with an actual value when the query is executed. This way, PHP separates the SQL code from the user data and prevents input from manipulating the command.
Securing output with output escaping
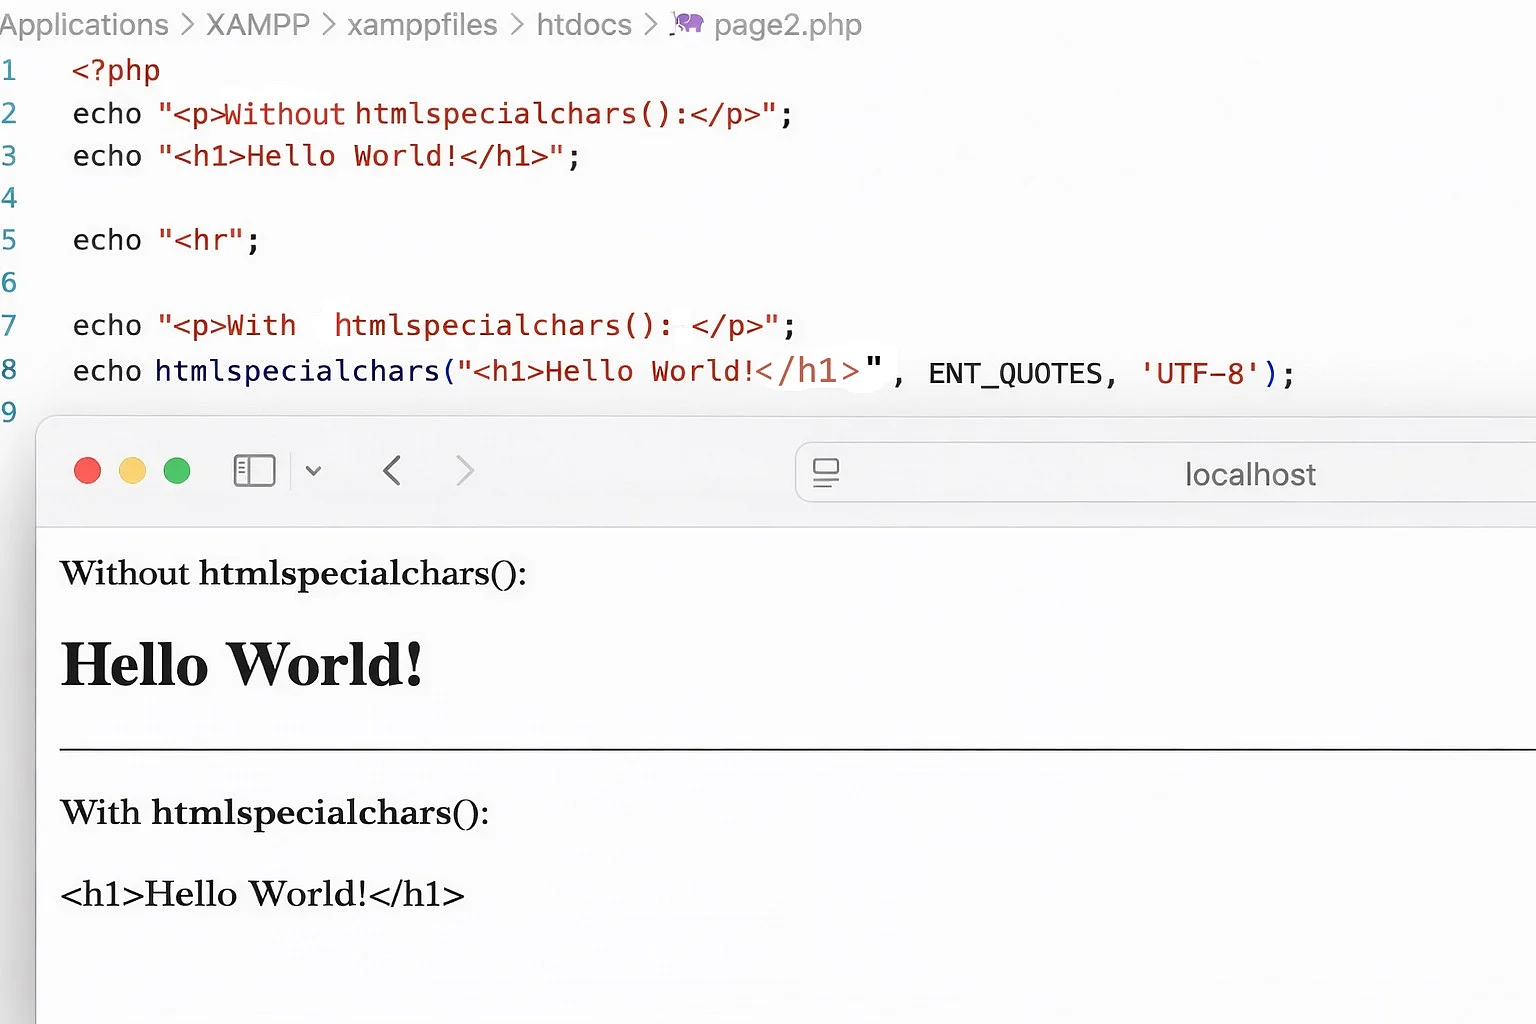
Not only storing data but also displaying it can pose risks. If user input is shown in the browser without filtering, cross-site scripting (XSS) can occur. In such cases, malicious code may be executed in other users’ browsers. To prevent this, output must be escaped. In PHP, this is typically done with the htmlspecialchars() function so that the text is displayed but not interpreted as code.
<?php
echo htmlspecialchars("<h1>Hello World!</h1>", ENT_QUOTES, 'UTF-8');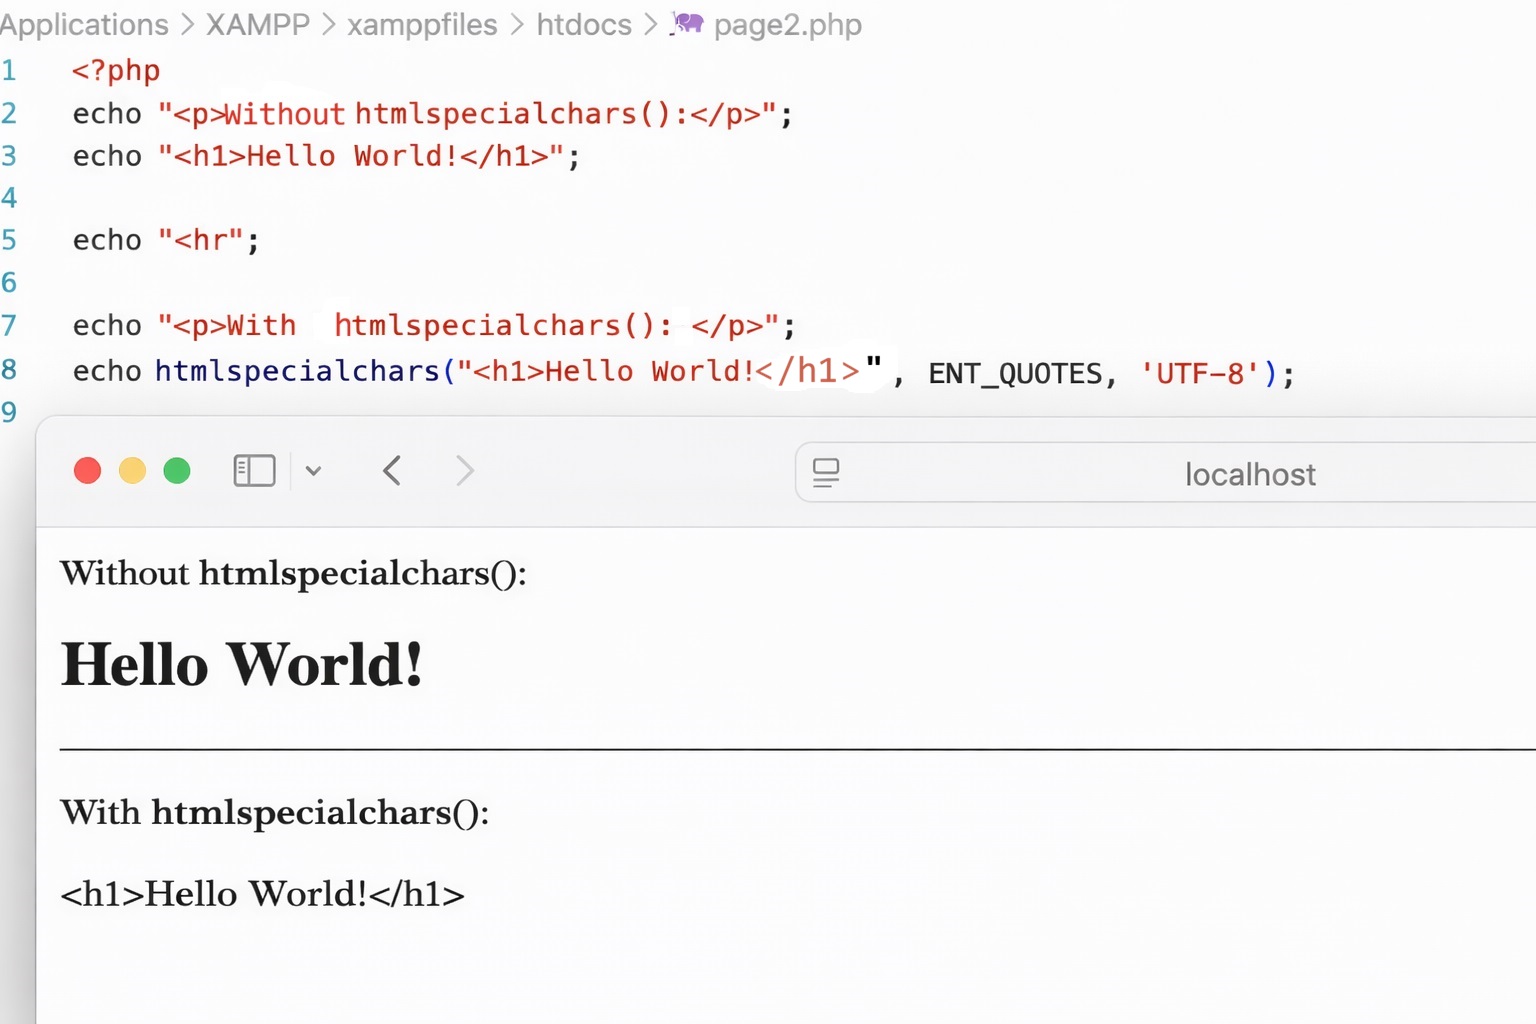
Filtering user input with filter_input()
PHP provides filter_input() as a way to validate and sanitise user input as it is read. This makes it possible to detect invalid or unwanted values at an early stage. A simple example is reading an email address:
<?php
$email = filter_input(INPUT_POST, 'email', FILTER_VALIDATE_EMAIL);If the input is not a valid email address, the false value is returned by the function. If the field was not submitted at all, the result is null. Therefore, check for both cases. This way, the code can respond in a targeted manner before further processing the data.
Storing passwords securely with password_hash()
Passwords should never be stored in plain text. Simple encryption is also not sufficient. For this purpose, PHP provides the password_hash() function, which securely hashes passwords.
<?php
$hash = password_hash($password, PASSWORD_DEFAULT);During a later login, the entered password can be verified using the password_verify() function:
<?php
if (password_verify($password, $hash)) {
echo "Login successful";
}The original password is never visible again. Even if a database leak occurs, the passwords remain protected.
Preventing form manipulation with CSRF tokens
When working with forms, there is a risk that they may be submitted without the user’s knowledge. To prevent this, CSRF tokens are used. These are random strings that are generated each time the form is loaded.
<?php
$_SESSION['token'] = bin2hex(random_bytes(32));This line generates a random security code that is difficult to guess and stores it in the user’s current session. The random_bytes(32) function creates 32 random bytes, meaning raw data that is not directly readable. The bin2hex() function then converts this raw data into a readable string of letters and numbers. The generated value is stored in $_SESSION['token'] and later used to verify whether a form actually originates from the same session.
File uploads with validation
File uploads are also particularly sensitive and can introduce security risks, since external files are uploaded to the server. Therefore, the file type and file size should always be checked.
A simple example of a file size check might look like this:
<?php
if ($_FILES['upload']['size'] > 1000000) {
echo "File is too big.";
}The code checks the size of the uploaded file and compares it with a defined maximum value of 1,000,000 bytes. If the file exceeds this limit, an error message is displayed and the upload can be rejected. This prevents files that are too large from being stored on the server. In addition, it is important to verify that the file is actually of the expected type, such as an image. Files should never be stored on the server as executable without proper validation.