How to install a Let's Encrypt SSL certificate on a cloud server with Plesk

Let’s Encrypt is a free, automated SSL certification authority. Using Let’s Encrypt is a quick and free way to get an SSL certificate for your website. With Plesk, you can create and deploy a Let’s Encrypt SSL certificate in just a few clicks.
Prerequisites
- A cloud server with Plesk Onyx (any operating system): This tutorial uses the Power User view. You can change the Plesk view by clicking on ‘Change View’ at the bottom of the left column.
- Firewall access: If you have a firewall, you need to allow access on port 443 to enable secure HTTPS traffic to and from your server.
For all cloud servers with Plesk, administrative functions such as adding an SSL certificate should always be performed through the Plesk interface.
How to create and install a Let’s Encrypt SSL certificate
Go to the Domains tab in your Plesk interface.
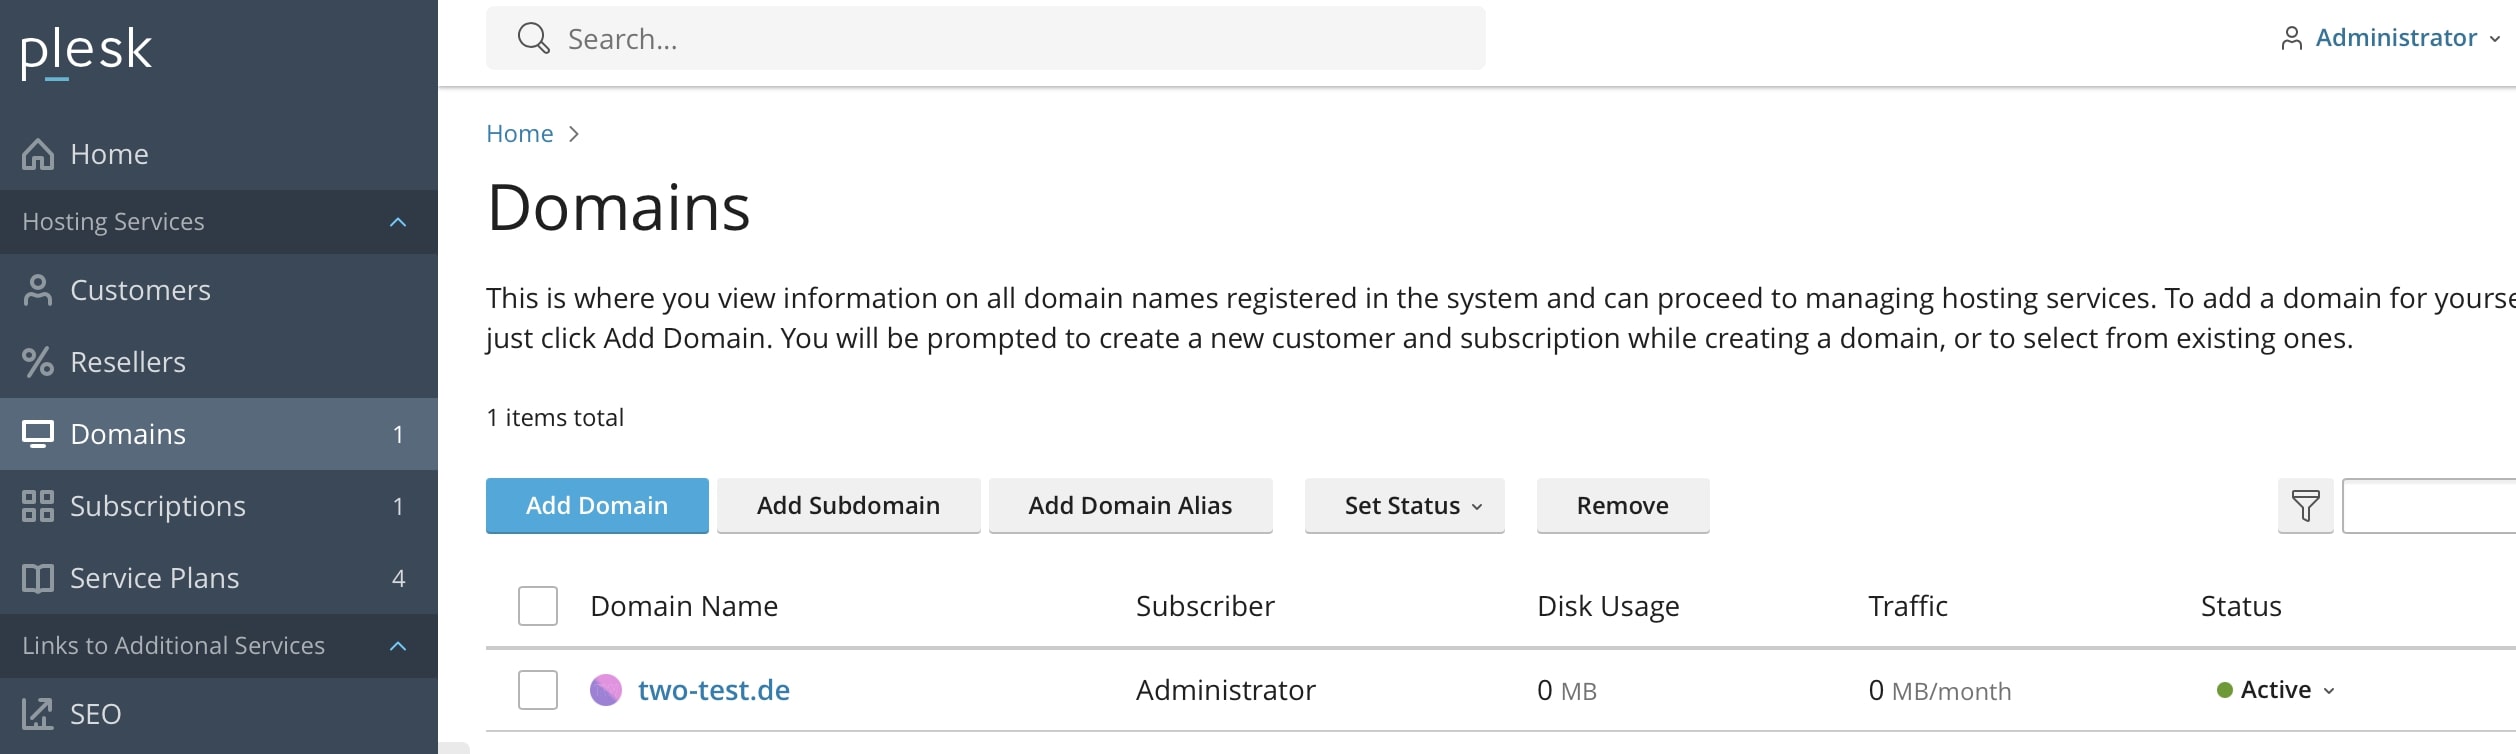
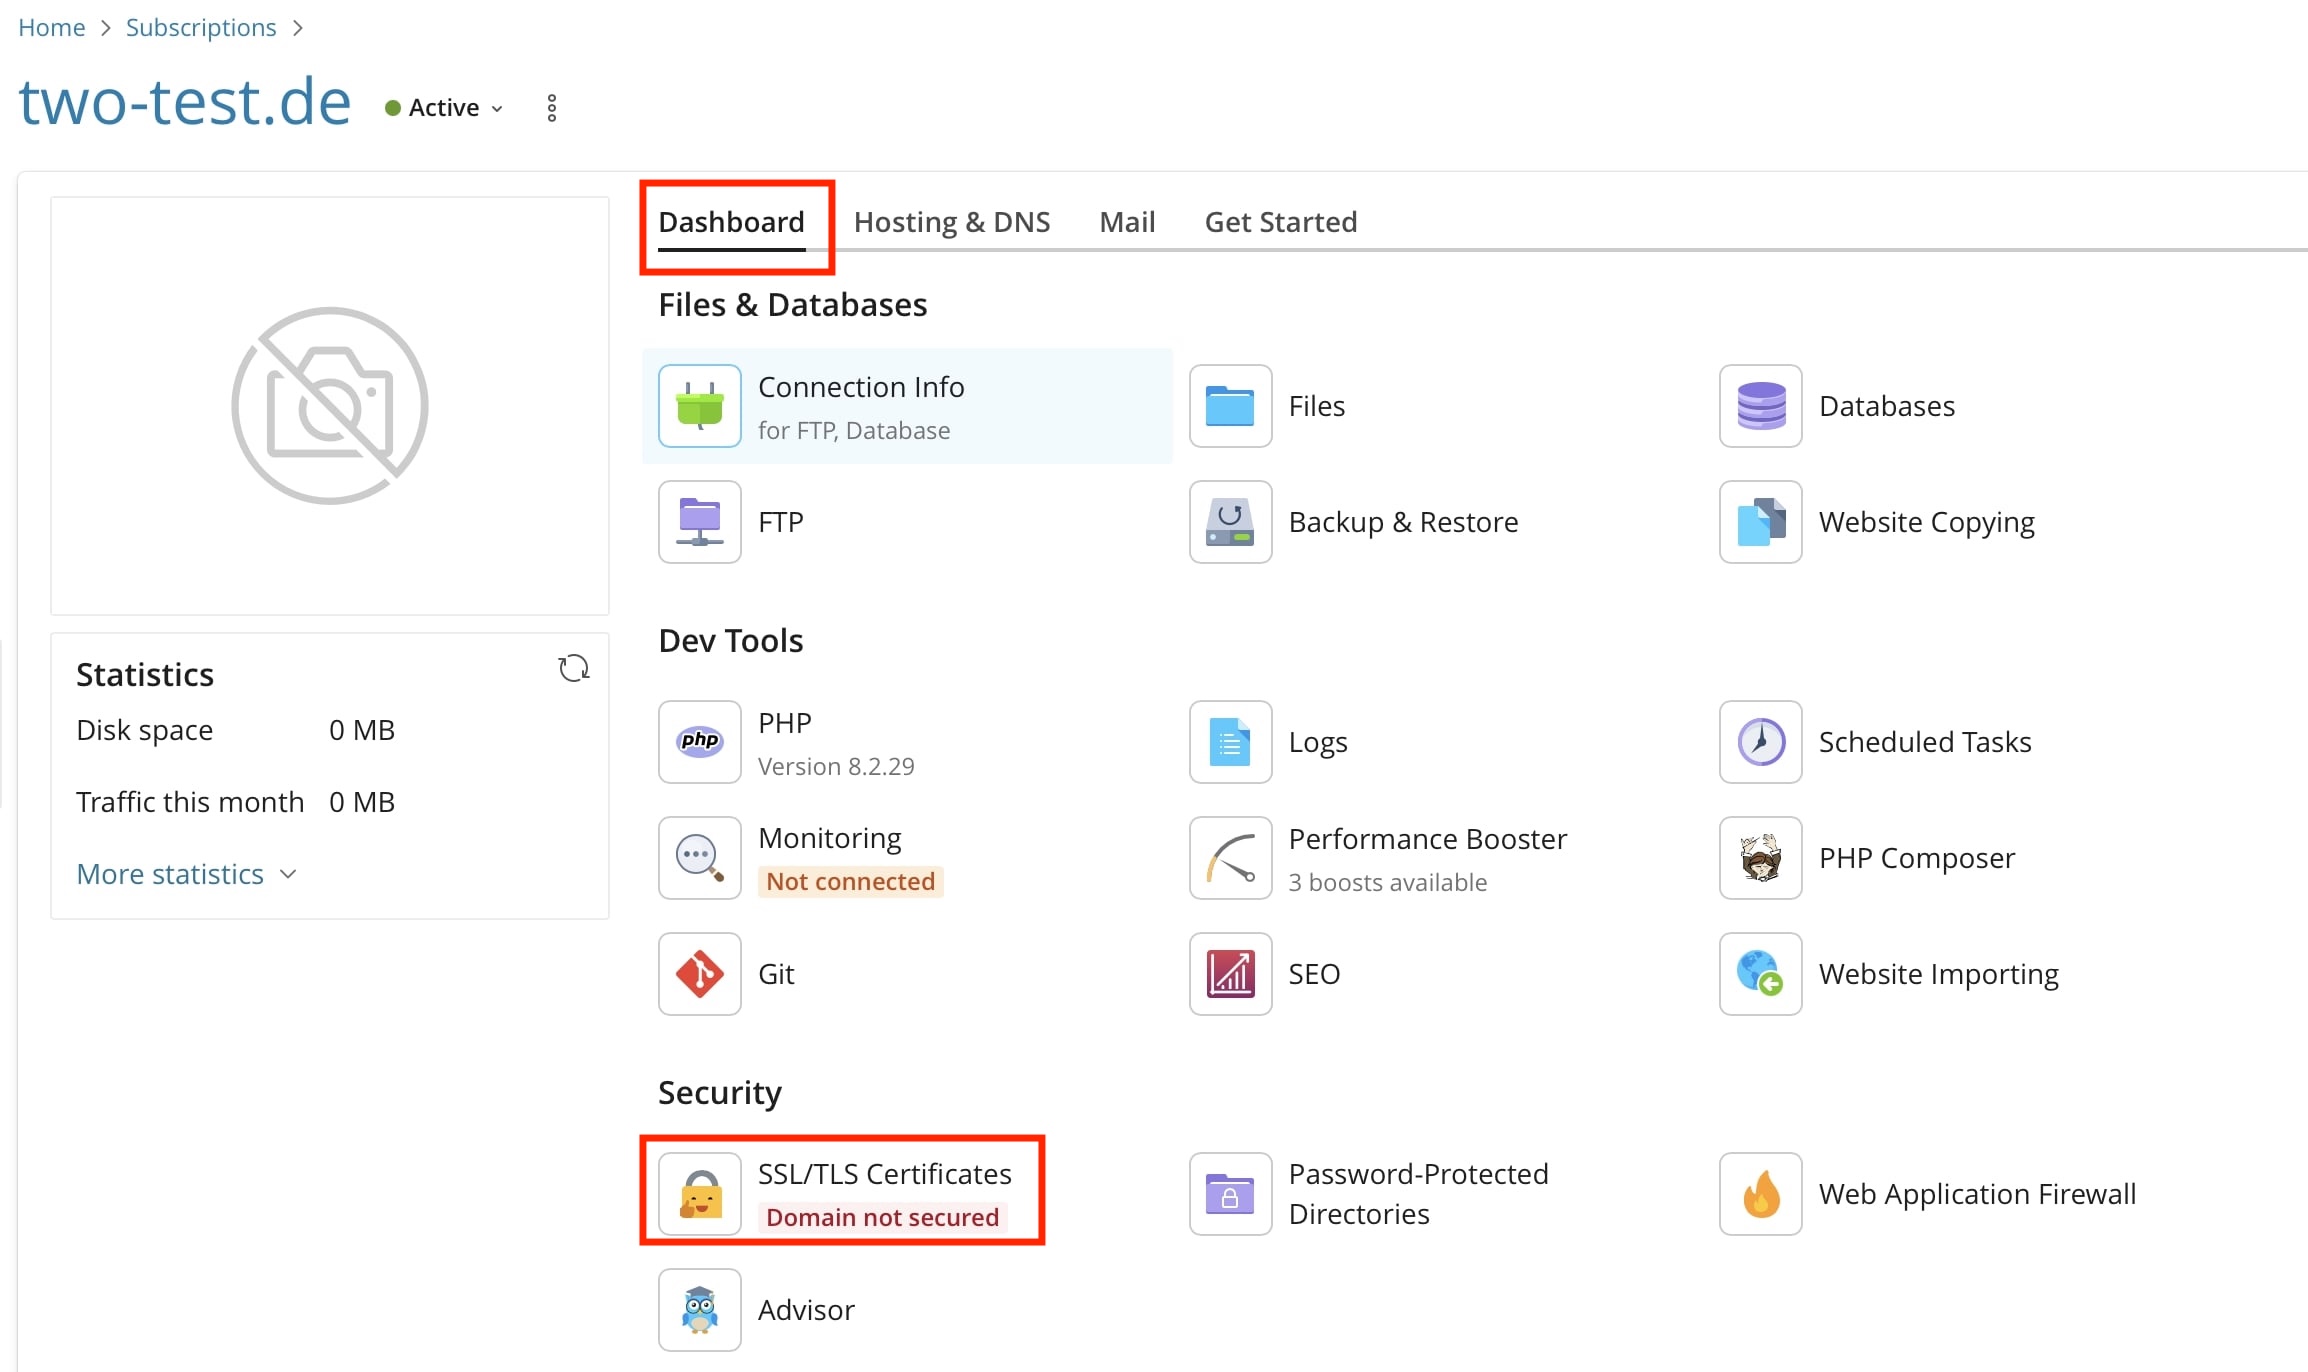
Select your domain and click on the Dashboard tab. Here you can now choose the ‘SSL/TLS Certificates’ option.
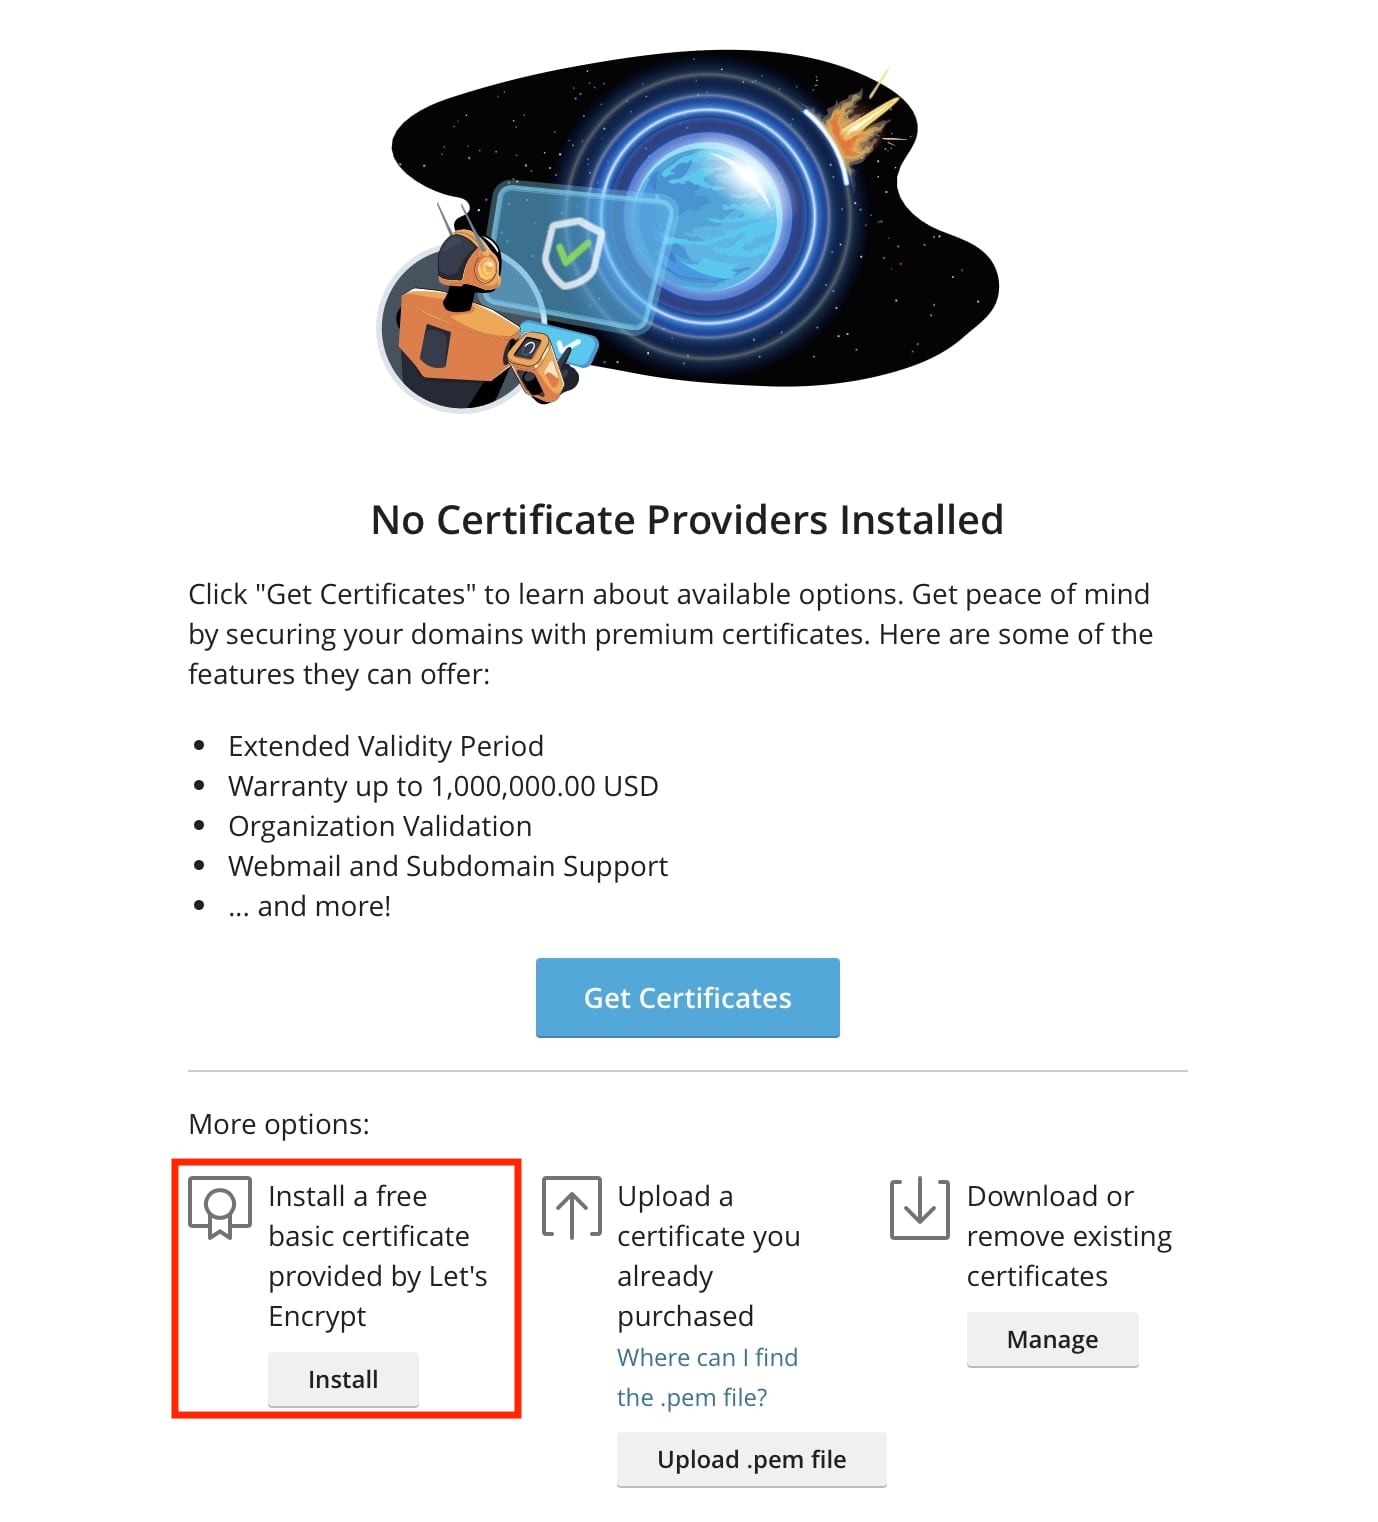
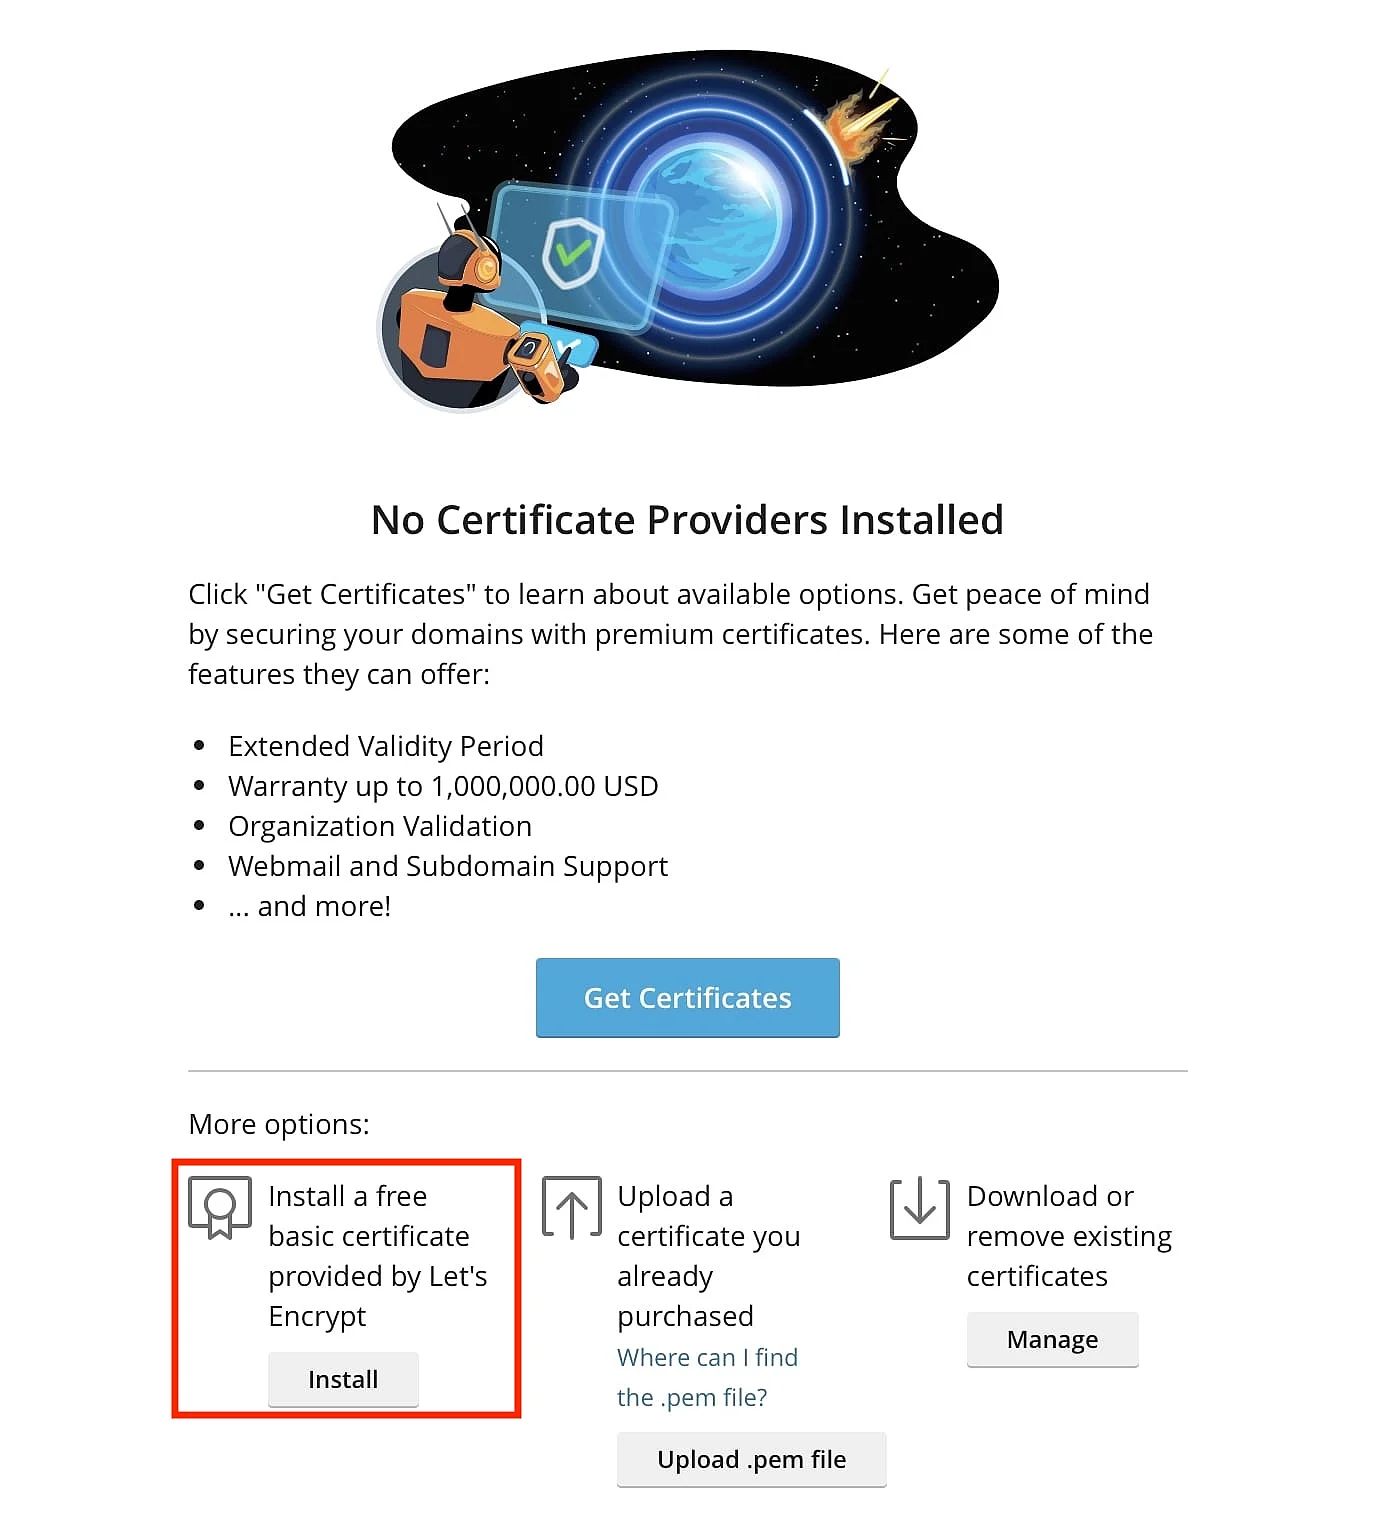
Click on Let’s Encrypt for the website you want to secure.
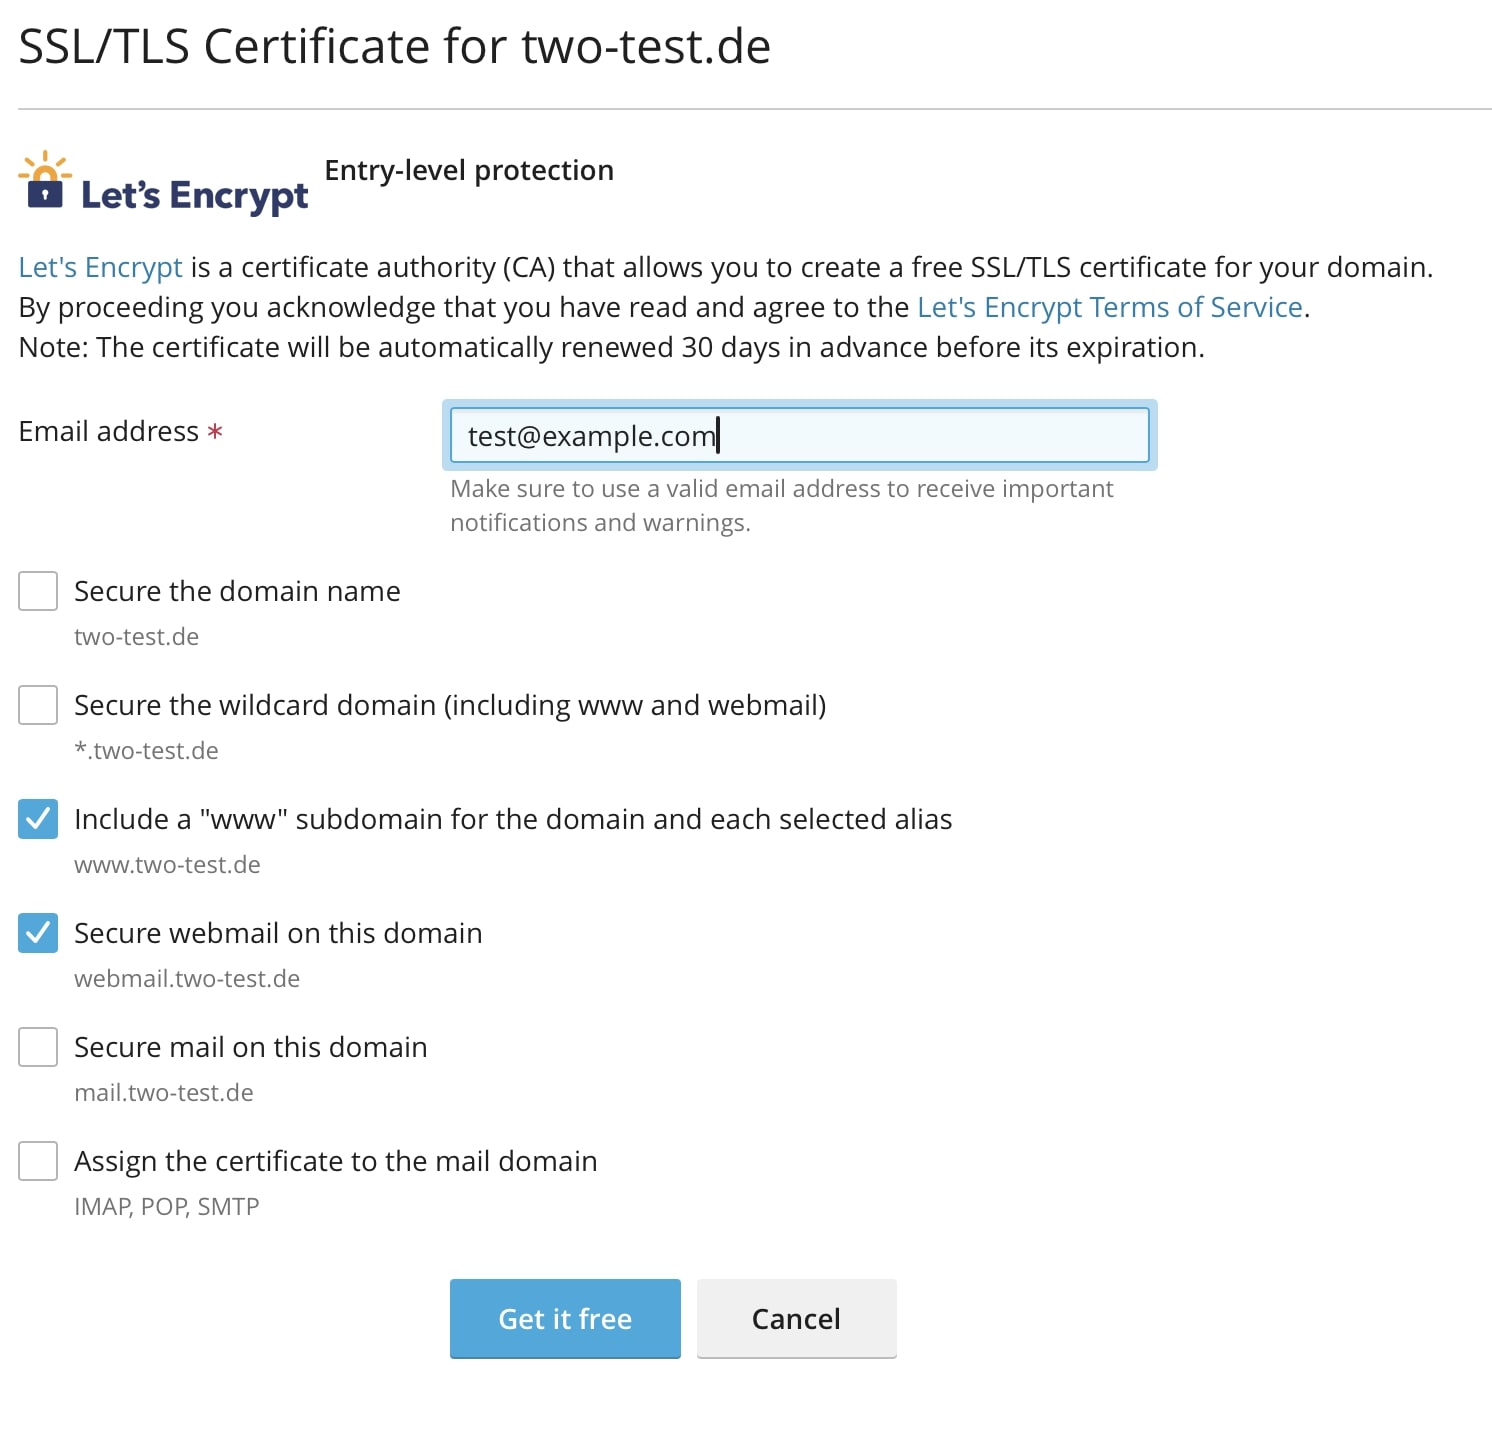
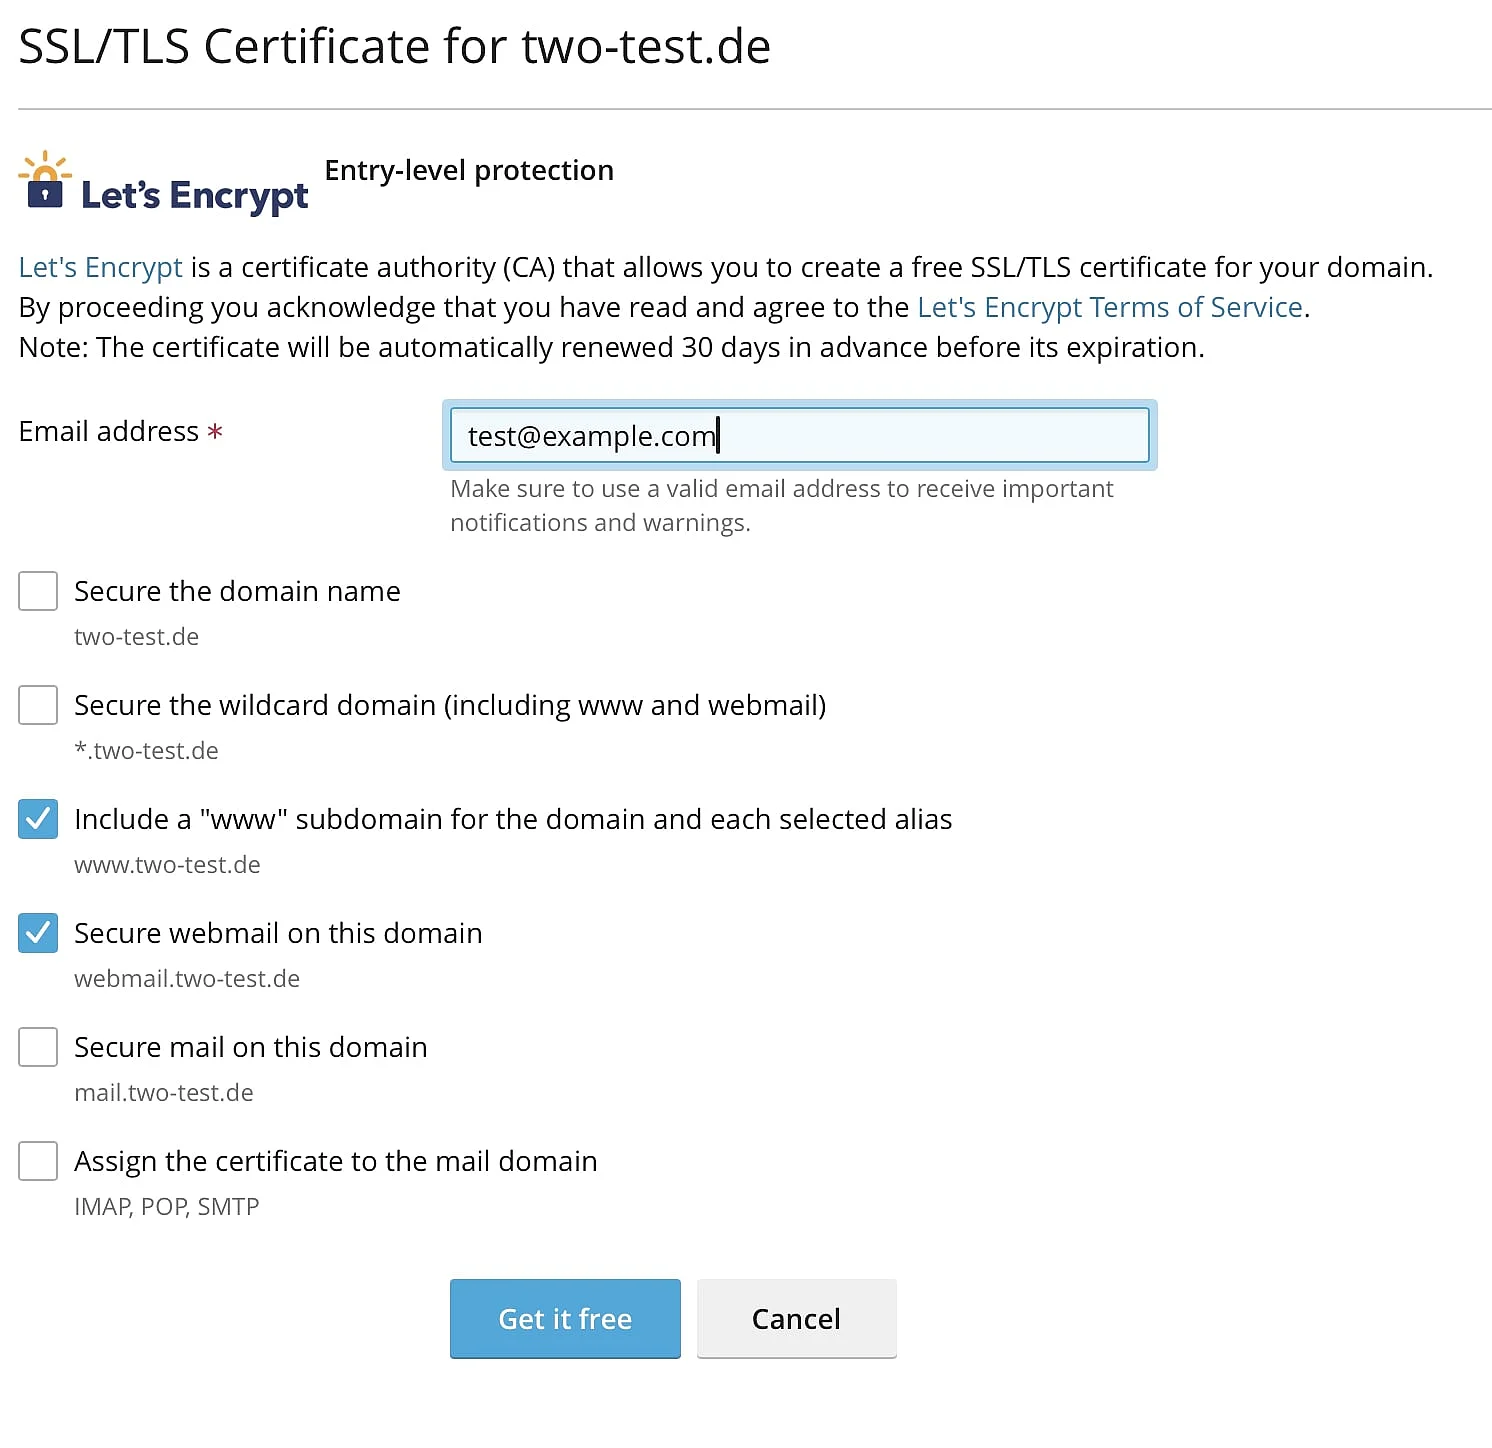
Enter your email address and select the options for www and webmail (if applicable). Then, click on ‘Get it free’.
After the installation process is completed, you can access an SSL-secured version of your website at https://domainname.com.
Let’s Encrypt certificates are only valid for 90 days. Plesk automatically renews the certificate every month.