Setting Up POP3 Accounts with Outlook for Microsoft 365 (Mac)
This article explains how to set up a POP3 account in Outlook for Microsoft 365 on your Apple Mac.
Requirements
- You have already created an email address.
- You have your email login details (email address and password)
- An autodiscover record has been created in the DNS settings of your domain. This is typically done by default for domains registered with IONOS.
Choose which step-by-step guide you want to follow:
This is the first time I've used Outlook for Microsoft 365 on Mac.
or
I have previously set up a profile in Outlook for Mac and now I want to set up an additional POP3 account.
Initial Setup of Outlook for Microsoft 365 on Mac (POP3)
Open Outlook for Microsoft 365.
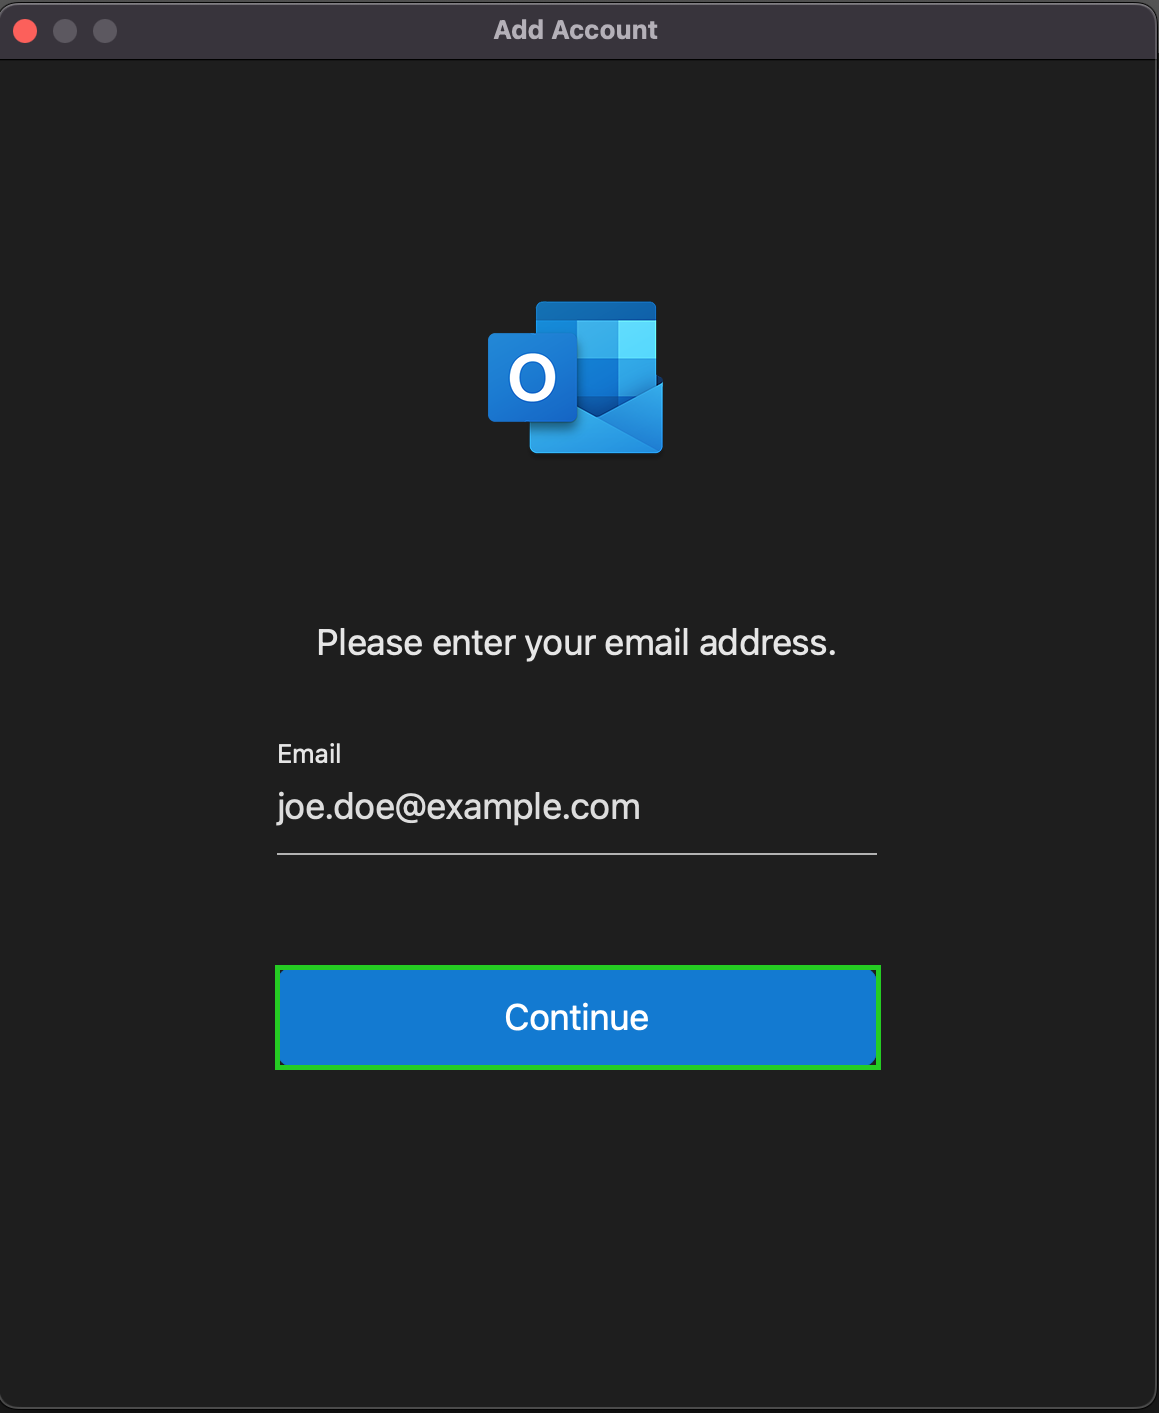
When you open Outlook for Microsoft 365 for the first time after successful installation, the Add Account window appears. Enter your email address and click Continue.
In the window that opens, click Not IMAP? If you do not see this window, proceed to the next step.

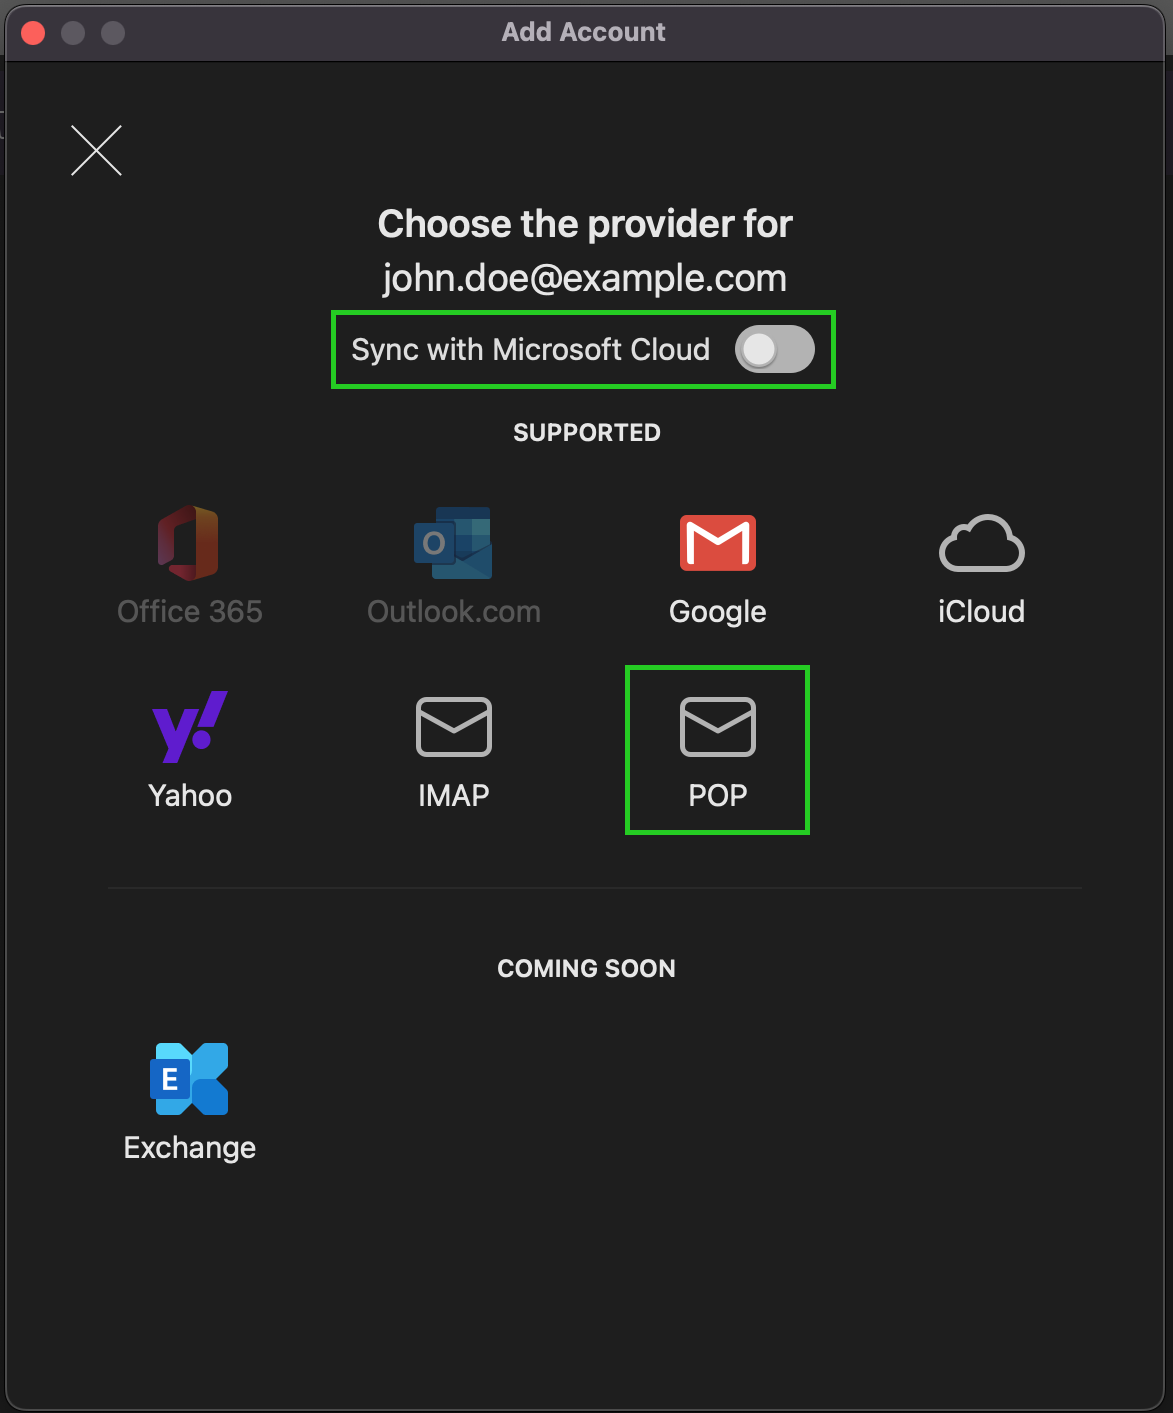
When you see the Choose the provider for [YOUR EMAIL ADDRESS], uncheck the Sync with Microsoft Cloud option and click POP.
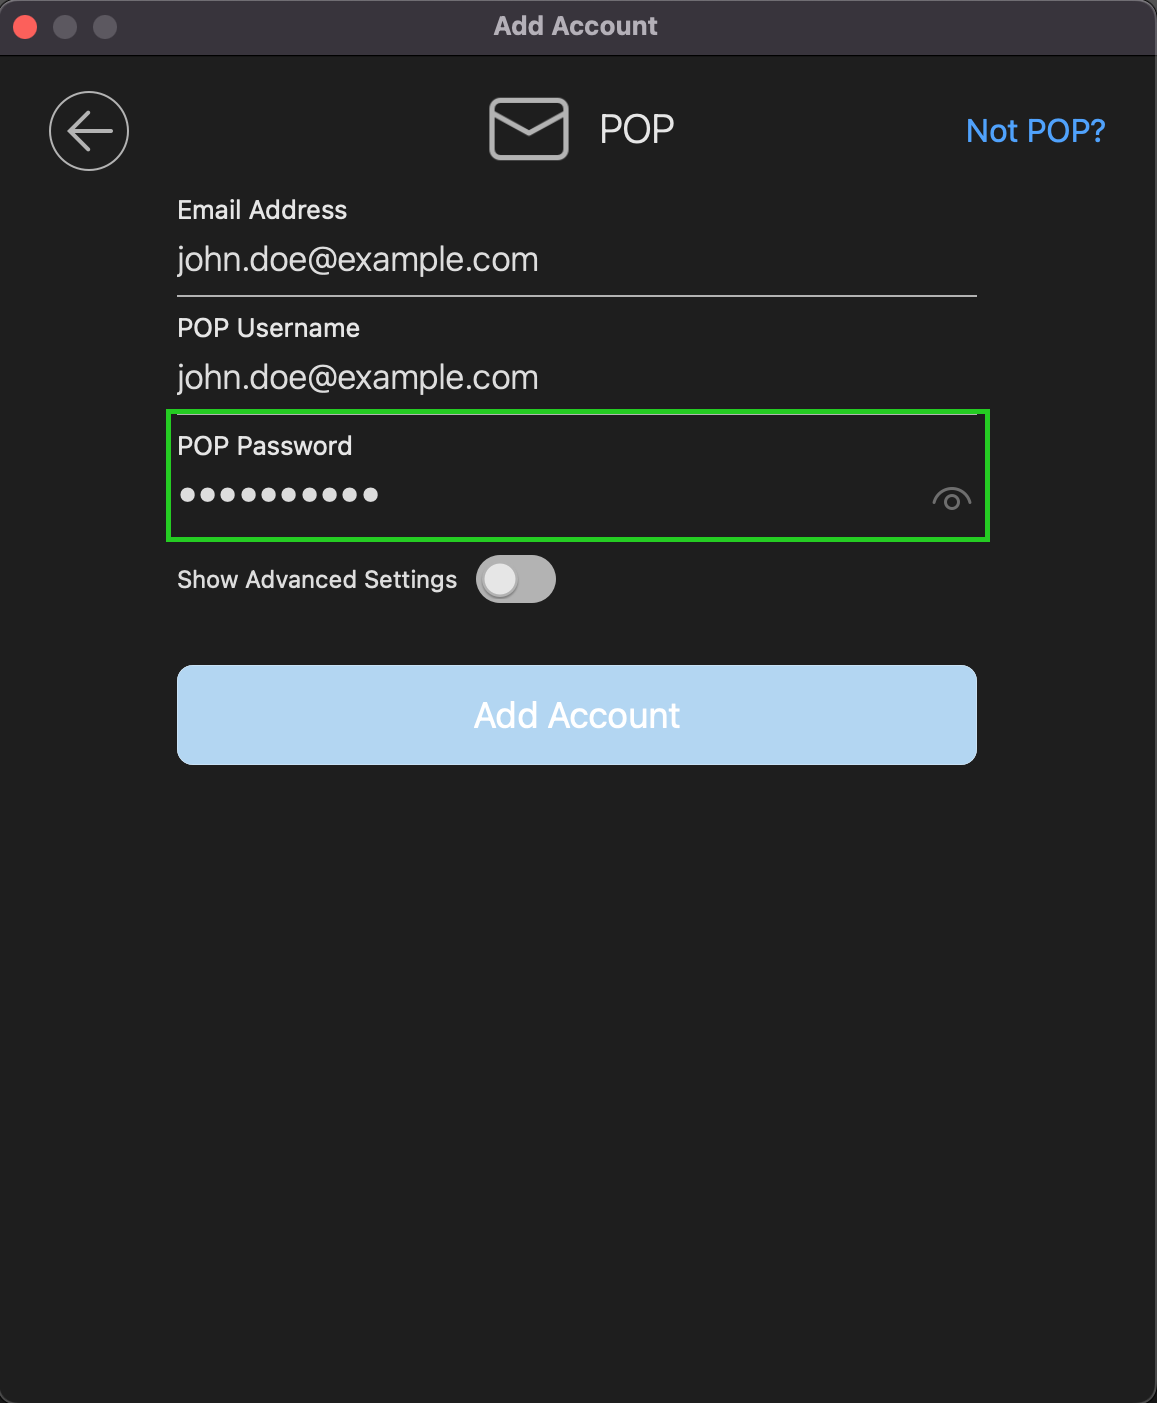
In the POP Password field, enter the password for your email address.
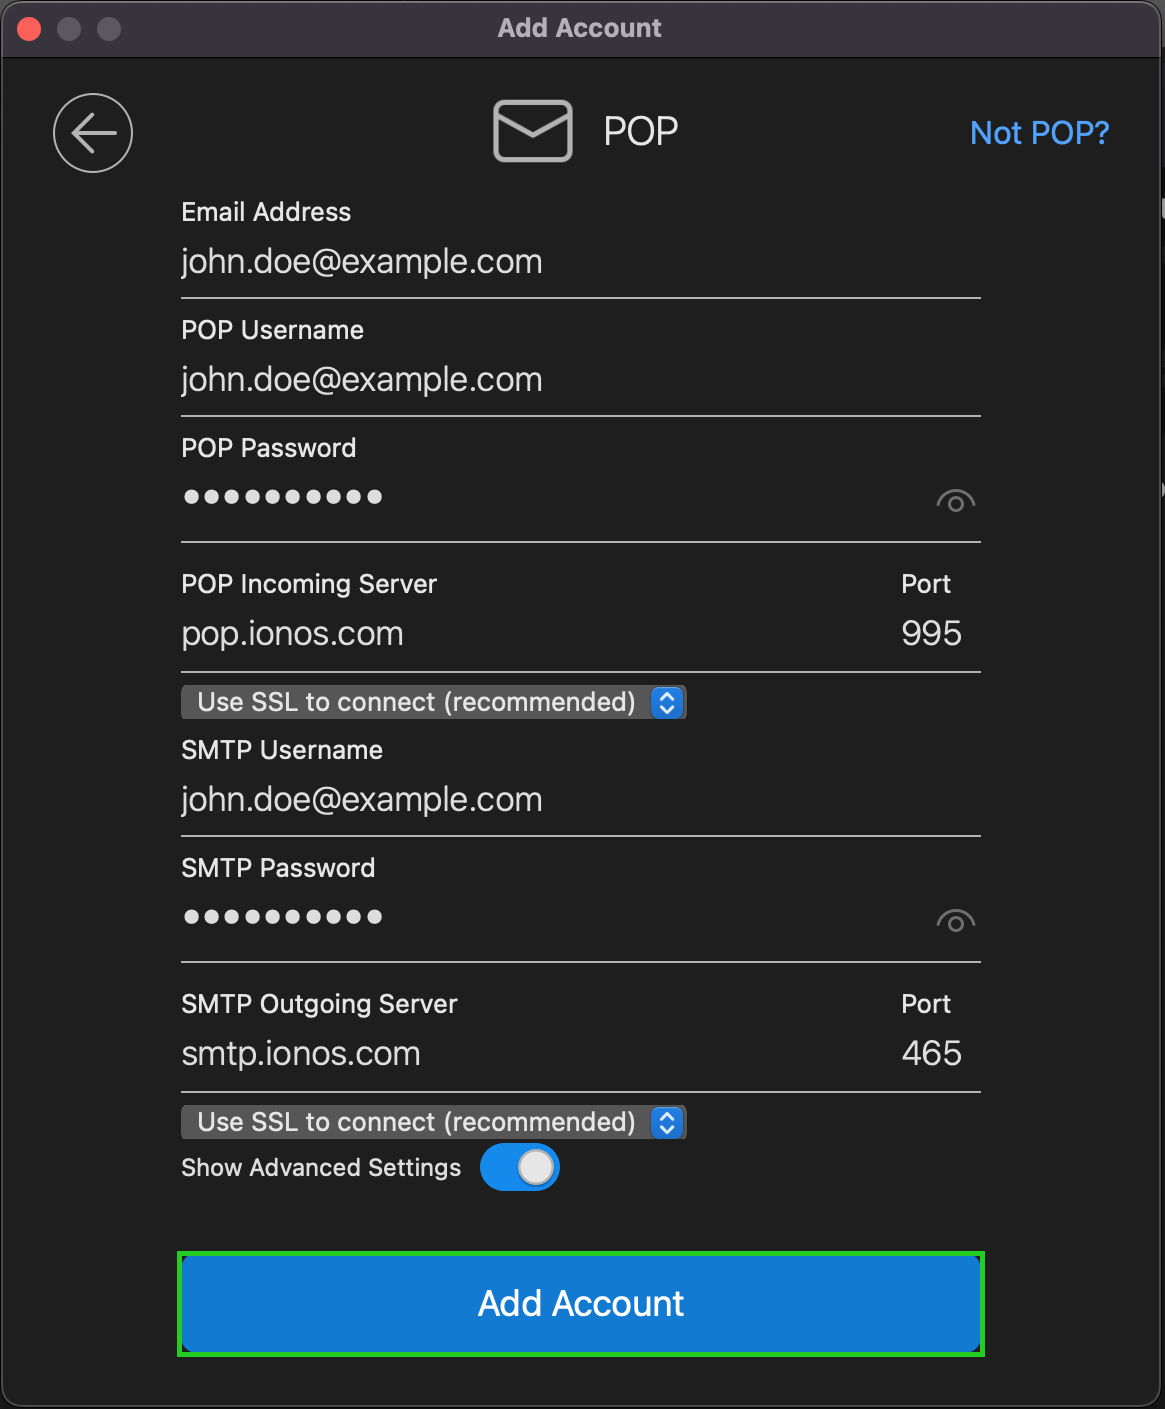
Enable the Show advanced settings option.

In the POP Incoming Server field, enter the following server: pop.ionos.com
Make sure that port 995 and the Use SSL to connect (recommended) option are set for this server.
In the SMTP Username field, type your email address.
In the SMTP Password field, type the password for your email address.
In the SMTP Outgoing Server field, enter the following server: smtp.ionos.com
Make sure that port 465 and the Use SSL to connect (recommended) option are set for this server.
Click Add account.
If you haven't set up an email account in Outlook for Mac yet, you'll see the Microsoft Respects Your Privacy window. In this case, follow the next steps (14-16).
If you have already set up an email account before and deleted it, the POP account has been added window is displayed. In this case, click Done to complete the account setup.
Click Continue. The Getting Better Together window will open.
Select whether or not you want to send optional Office data to Microsoft and click Accept.
The account is now added. Close the Add Account window.
Setting Up an Additional POP3 Account in Outlook for Microsoft 365 on Mac
The following explains how to set up an POP3 email account in Outlook for Microsoft 365 on Mac in addition to an existing email account.
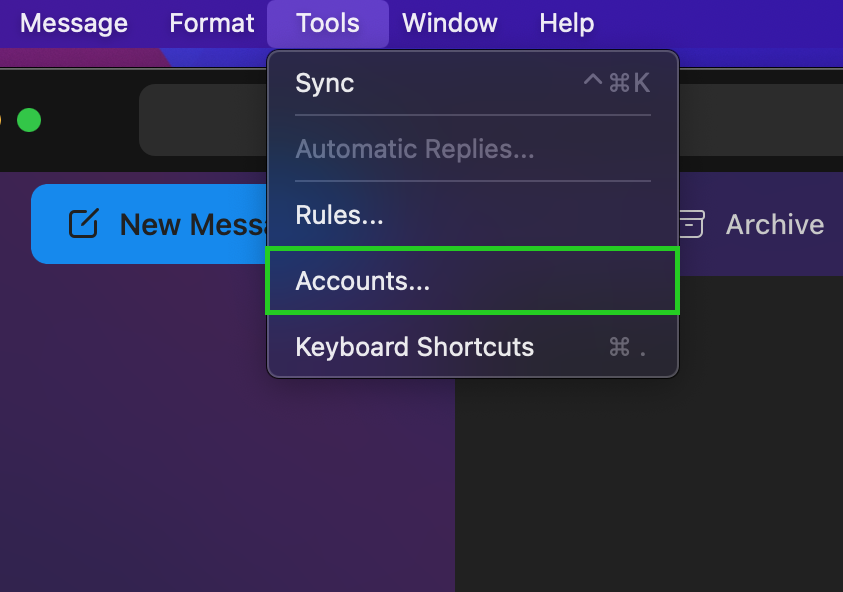
Open Outlook for Microsoft 365.
Click Tools > Accounts... in the menu bar.
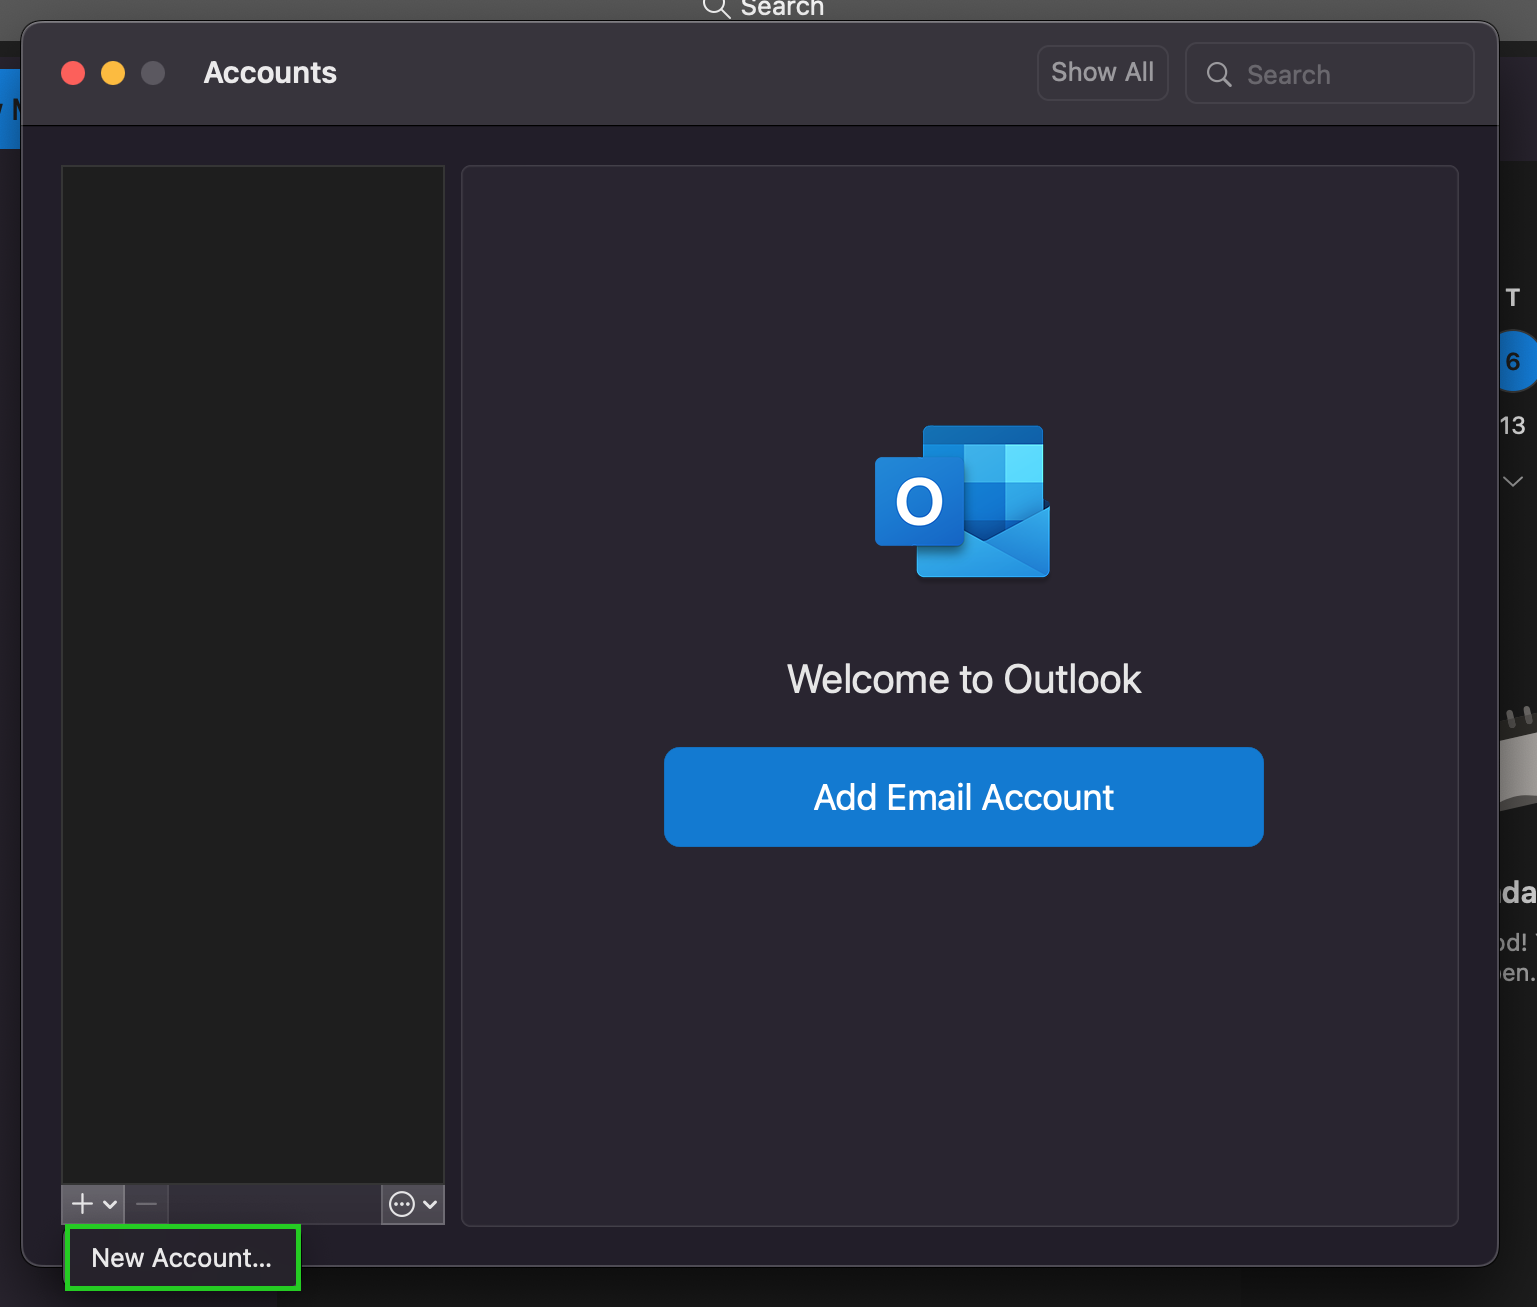
In the Accounts window, click the plus icon at the bottom left.
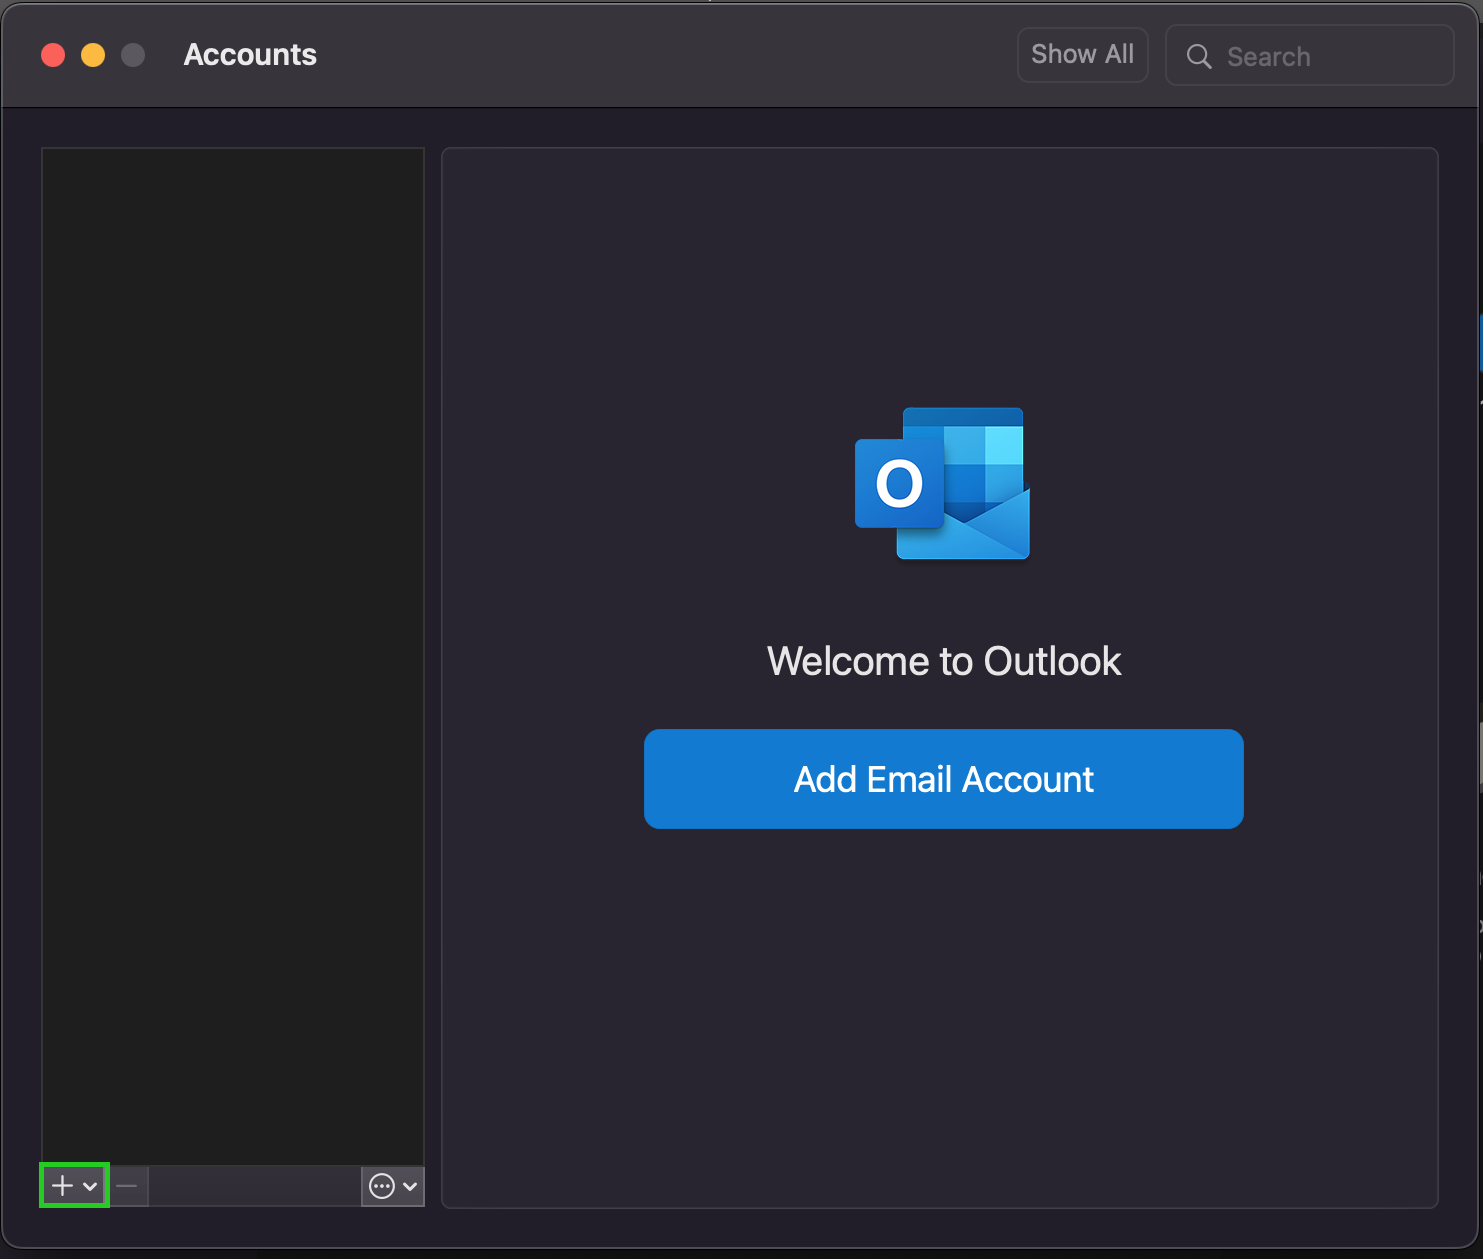
Click New Account.
Enter your email address and click Continue.
If you are presented with the Choose the provider for [YOUR EMAIL ADDRESS] window, uncheck the Sync with Microsoft Cloud option and click POP. Otherwise, proceed to the next step.
In the POP Password field, enter the password for your email address.
Enable the Show advanced settings option.
In the POP Incoming Server field, enter the following server: pop.ionos.com
Make sure that port 995 and the Use SSL to connect (recommended) option are set for this server.
In the SMTP Username field, type your email address.
In the SMTP Password field, type the password for your email address.
In the SMTP Outgoing Server field, enter the following server: smtp.ionos.com
Make sure that port 465 and the Use SSL to connect (recommended) option are set for this server.
Click Add account.
The account is now set up.
Click Done.