How can you change your Twitch name?

You can change the Twitch name that users use to find your channel in just a few steps via your profile settings. Keep in mind that your channel URL will also change along with the name. Our step-by-step guide shows you how to do it.
Key Takeaways
You can change your Twitch name and the channel URL that goes with it both on PC and in the mobile app via your profile settings.
- In the app, tap your profile picture and select ‘Edit Profile’ to change your username or display name.
- On PC, go to ‘Settings’, open the ‘Profile’ tab, and click the pencil icon.
- You can change your username only once every 60 days; the old name stays blocked for six months.
- Update all links after the change, since your channel URL changes.
Quick guide: How to change your Twitch name
On your mobile phone
- In your Twitch app, tap your profile picture at the bottom right, then tap ‘Edit Profile’ at the top right.
- There you can change your username including the channel URL, or only the display name (without changing the URL).
On your PC
- Open the Twitch website, click your profile picture at the top right, and then click ‘Settings’.
- The first tab, ‘Profile’, should already be selected. Here, click the pencil icon next to ‘Username’ to change your Twitch name, or click the line below to change your display name.
How to change your Twitch name step by step
If you want to become a streamer on Twitch and grow your channel with Twitch tutorials or game streams, a distinctive name is key. But what if your current Twitch name no longer matches your content? No problem—you can change it. Twitch makes it easy to update your username on mobile or on your PC.
Changing your Twitch name on your phone
Step 1: Open the Twitch app on your phone and log in.
Step 2: Tap your profile picture at the bottom right.
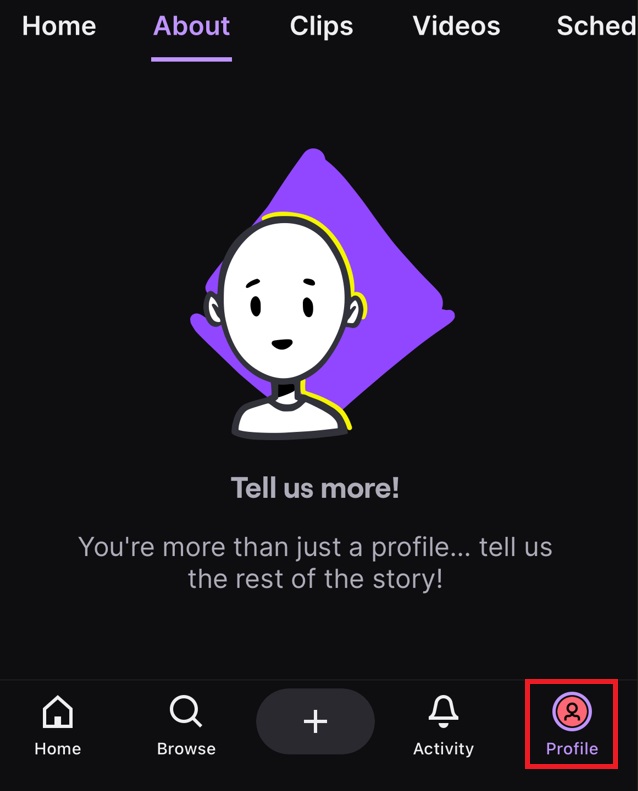
Step 3: Tap ‘Edit Profile’ at the top right.
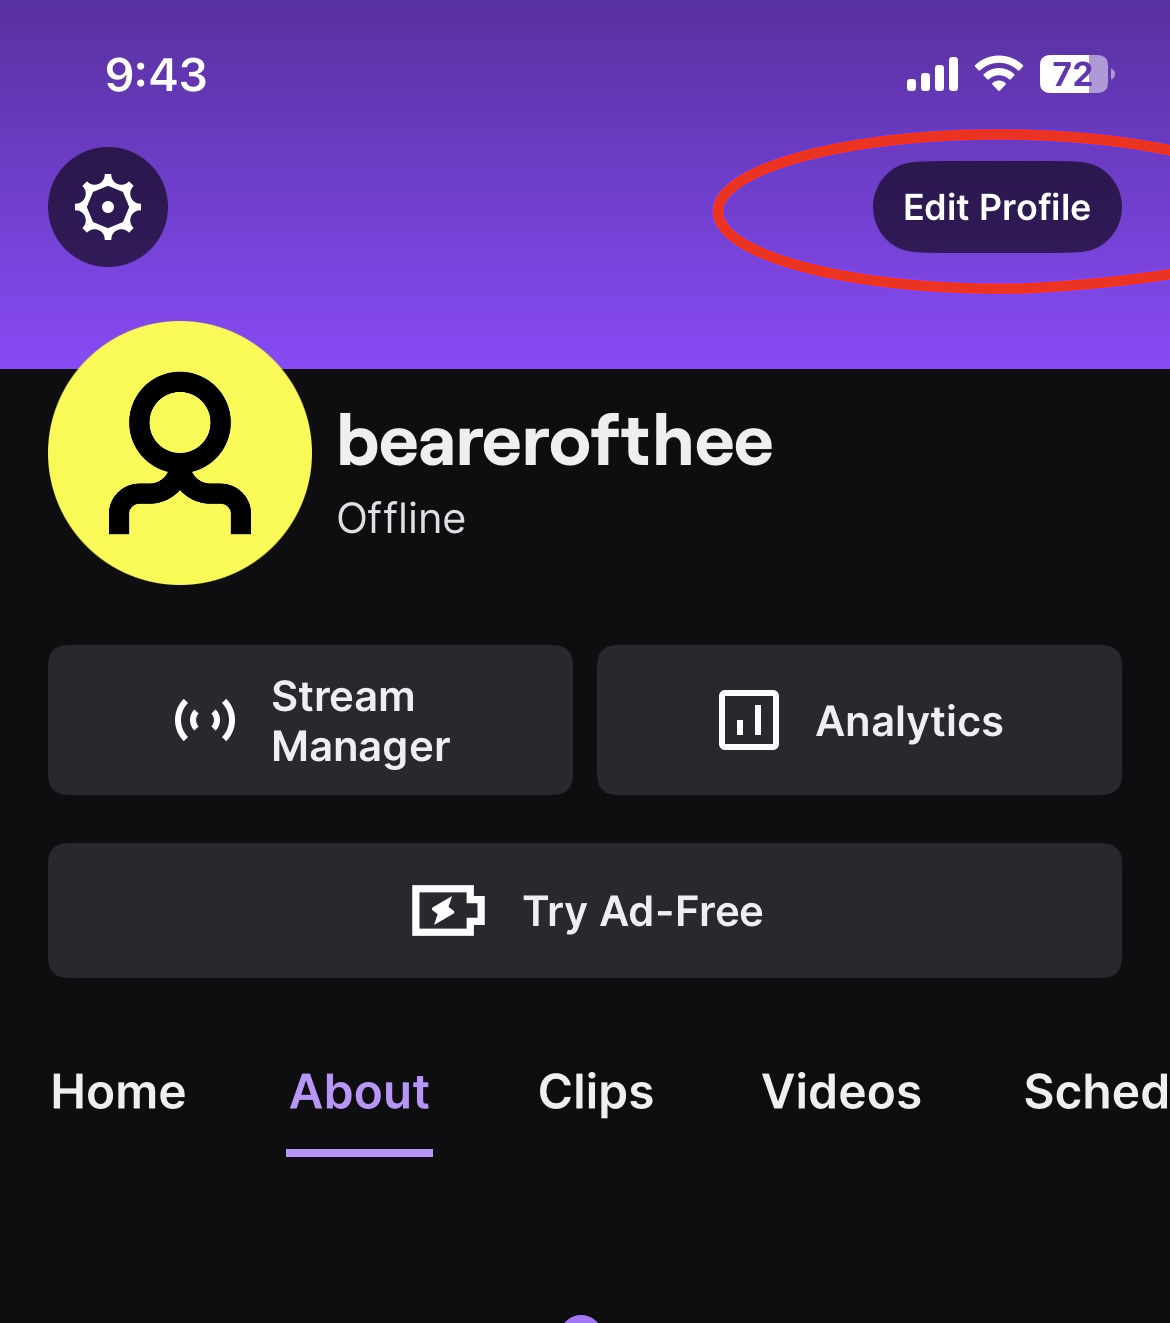
Step 4: Here, depending on your needs, you can change your username including the channel URL, or only details like capitalisation in the name under ‘Display Name’. Changes to the display name are possible at any time and do not affect the URL or the username.
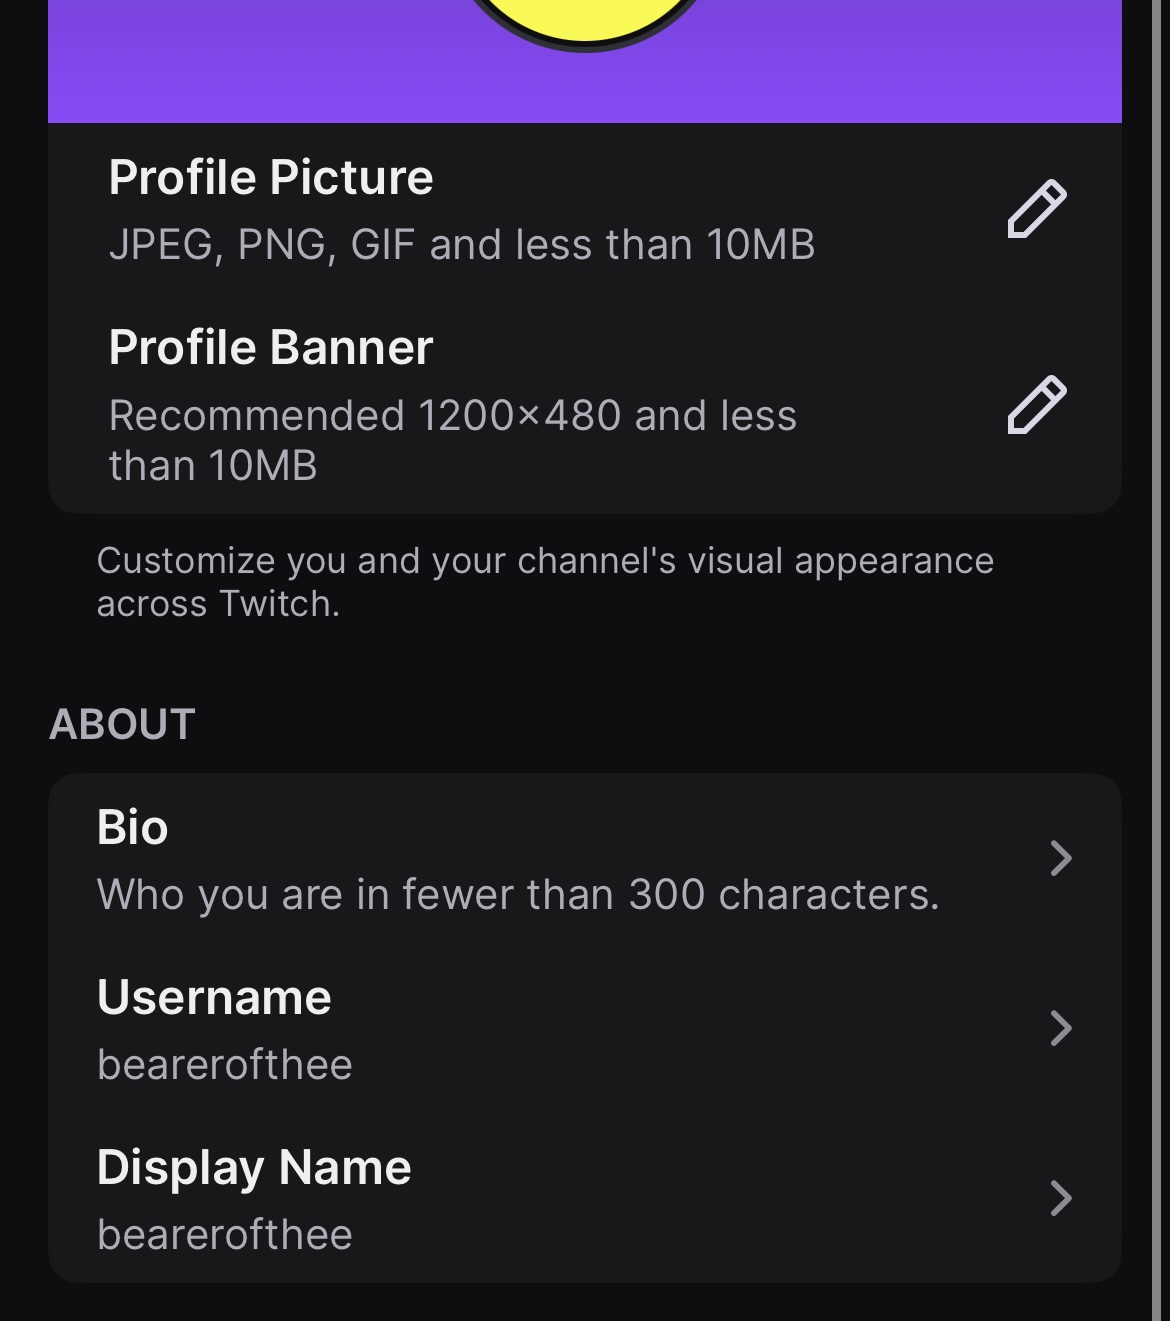
Changing your Twitch name on PC
Step 1: Log in to Twitch, click your profile picture at the top right, and select ‘Settings’.
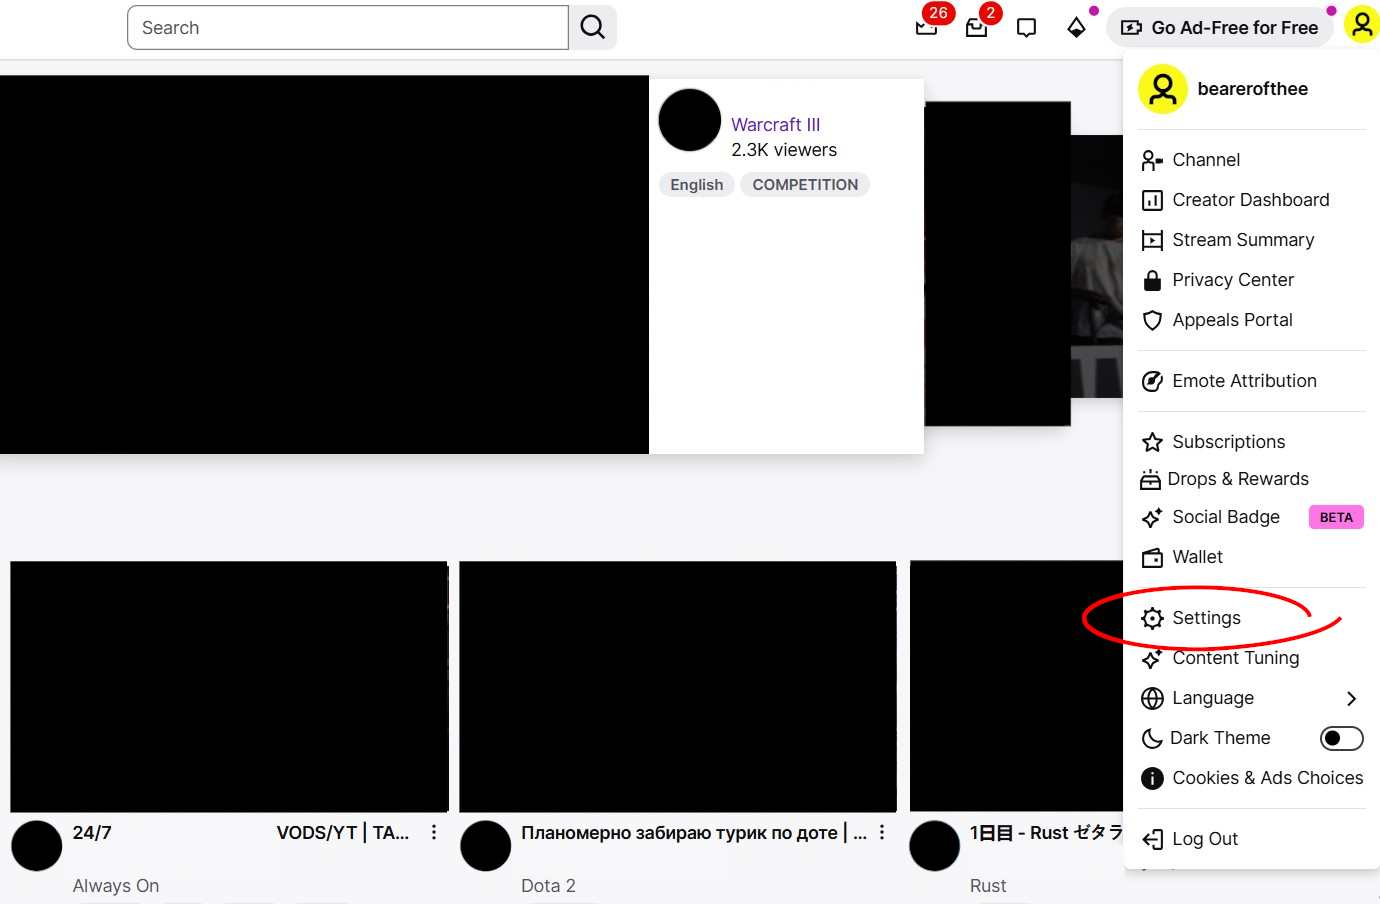
Step 2: In the ‘Settings’ menu, you’ll find your profile settings under the ‘Profile’ tab, which should be open by default. There you can change your Twitch name including the channel URL under ‘Username’. If you only want to adjust details like capitalisation of your current name, go to ‘Display Name’.
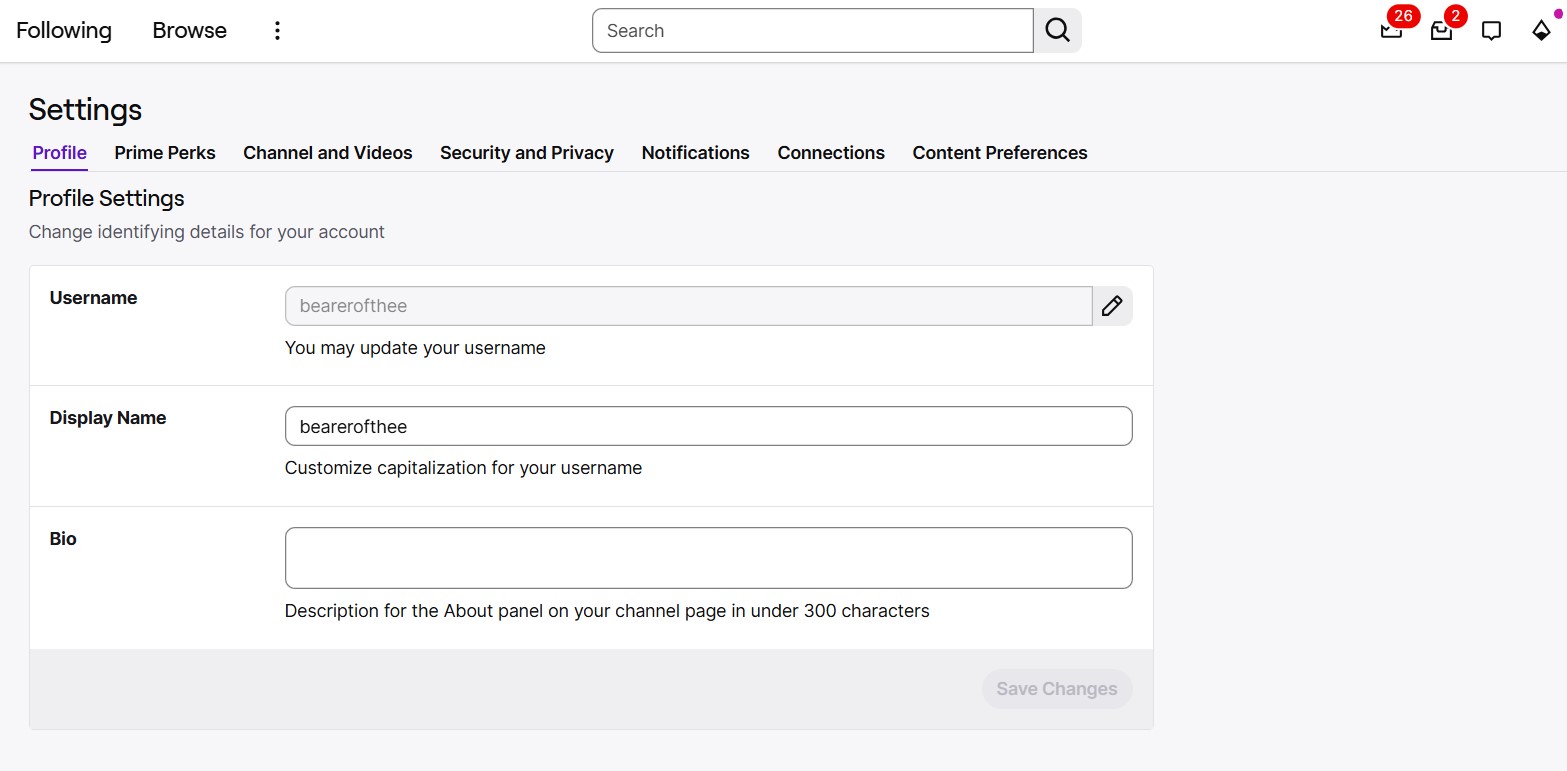
Step 3: Enter your new username in the name change menu and click ‘Update’.
What to keep in mind when changing your name
You can change your Twitch username only once every 60 days, so it’s worth choosing carefully. If you’re not happy with your choice, you’ll need to wait around two months before you can update it again. Your previous username is then reserved for six months and can’t be used during that time—neither by you nor by others. After those six months, it becomes available again, and you’ll need to be the first to claim it if you want it back.
Changing the capitalisation of your name via ‘Display Name’ is different. This does not count as a username change and can be done at any time.
For Twitch Partners, the rules vary slightly. Their old usernames are not released to the public after six months. Instead, they can contact Twitch Support to have a username manually recycled.
Since your Twitch username is also your Twitch channel URL, changing your name also changes your channel’s URL. Make sure to inform your followers and update any links to your Twitch channel on other websites. Because channel statistics can be lost when you change your name, it’s recommended to export your stats before making the change.
Two-factor authentication and security verification
Twitch has long offered two-factor authentication (2FA). This security measure protects your account by requiring a verification code in addition to your password when you log in. You receive this code on your smartphone via SMS or the Authy authenticator app. For streamers, setting it up is mandatory; otherwise, you can’t start any streams.
You can activate Twitch 2FA at any time as follows:
- Open your Twitch settings.
- Open the ‘Security and Privacy’ menu.
- Select ‘Set Up Two-Factor Authentication’.
After activation, every new login attempt from an unknown device or location must be confirmed with an additional prompt. This prevents unauthorised people from accessing your account, even if they know your password.
If you get a new mobile phone or change your number, you can update the 2FA number in the same menu. Twitch also offers additional email verification for new devices or locations to detect and block suspicious logins even faster.