How to install Docker on Ubuntu 24.04 step by step

If you want to install Docker on Ubuntu 24.04, you can set up the container platform quickly using a few terminal commands from the official Docker repository. Docker is one of the most widely used tools for running applications quickly and reliably. Instead of installing software directly on the system, applications run in containers together with all required dependencies.
Step 1: Check system requirements
Before you install Docker on Ubuntu 24.04, a few basic requirements should be met. For Docker Engine, Docker officially supports Ubuntu 24.04 LTS in the 64‑bit version. Several architectures are supported, including amd64 and arm64. Here is an overview of the other requirements:
- User account with sudo privileges: You need sudo privileges to install packages, add repositories, and manage system services.
- Up-to-date system: Having current packages reduces the risk of conflicts with older packages or missing dependencies.
- Stable internet connection: You need an internet connection to download the required packages.
- Memory: You should plan at least 1 to 2 GB of RAM for small container workloads with Docker on Ubuntu 24.04.
Step 2: Find the right server
If you want to install Docker on Ubuntu 24.04 not locally but on a server, the first question is which server type is the right fit. For most projects, two options are especially relevant: VPS and Dedicated Server.
A VPS is a good choice if you want to run small to medium-sized container projects. This is useful, for example, when learning Docker with a Docker tutorial, setting up test environments, deploying web applications, or running individual services such as a web server, a database, or basic monitoring tools. A VPS is typically more affordable, quick to deploy, and sufficient for many common Docker use cases. One key advantage is that you can start with manageable resources, which helps keep the infrastructure simple, especially for beginners.
A dedicated server is the better option if your project has higher demands for performance, isolation, or consistently available resources. This is often the case when multiple Docker containers run in production at the same time, larger databases are involved, many users access the applications, or stable performance is critical. The main advantage of a dedicated server is that the hardware is available exclusively to you, meaning resources are not shared with other instances. This typically results in better performance and more predictable behaviour in demanding scenarios. If you plan to use Docker as a permanent part of your production infrastructure rather than just for testing, this option can be worthwhile in the long term.
Step 3: Update the system
The actual Docker installation is carried out in the terminal. First, update your Ubuntu system to ensure that package lists are up to date and existing software is in a clean state. Use the following commands to perform the update:
sudo apt update
sudo apt upgrade -yThis step is particularly important before a new installation, as it helps avoid many potential issues from the start. After major system updates, it may also be advisable to restart the server.
Step 4: Remove old or conflicting Docker packages
Before installing the official Docker version, you should remove any legacy components. According to Docker, certain packages may conflict with the official ones. Run the command below to remove these packages:
sudo apt remove docker.io docker-doc docker-compose docker-compose-v2 podman-docker containerd runcIf some of these packages are not installed on your system, that is not an issue. Ubuntu will simply report that there was nothing to remove.
Step 5: Install required packages for the repository
So that Ubuntu can safely use the official Docker repository, you need a few helper packages. Among other things, these ensure that certificates can be verified and signature keys are correctly integrated.
sudo apt install ca-certificates curl -yca-certificates is required to verify HTTPS connections. You need curl to download Docker’s signature key. Without these components, the repository cannot be set up properly.
Step 6: Set up the Docker GPG key
Now first create the directory for the key file, and then download the official Docker key.
sudo install -m 0755 -d /etc/apt/keyrings
sudo curl -fsSL https://download.docker.com/linux/ubuntu/gpg -o /etc/apt/keyrings/docker.asc
sudo chmod a+r /etc/apt/keyrings/docker.ascThe GPG key is used to verify the origin of the packages. In simple terms, Ubuntu uses it to check whether the packages actually come from a trusted Docker source. This step is important because it helps protect you from tampered or fake packages.
Step 7: Add the official Docker repository
Now set up the repository using a so-called Deb822 source file. This format is preferred by current Ubuntu versions. To do this, first create the following file:
sudo nano /etc/apt/sources.list.d/docker.sourcesThen insert the following content:
Types: deb
URIs: https://download.docker.com/linux/ubuntu
Suites: noble
Components: stable
Architectures: amd64
Signed-By: /etc/apt/keyrings/docker.asc
Save the file and then update the package lists:
sudo apt updateUbuntu now recognises the Docker repository and makes the corresponding packages available for installation.
Step 8: Install Docker Engine
Now comes the actual installation. On Ubuntu, Docker recommends installing Docker Engine along with the CLI, the container runtime, Buildx, and the Docker Compose plugin.
sudo apt install docker-ce docker-ce-cli containerd.io docker-buildx-plugin docker-compose-plugin -yThis is especially useful for beginners, as it allows you not only to run simple containers but also to manage multi-service applications later using Docker Compose.
Step 9: Check that Docker is running correctly
After installation, the Docker service starts automatically on many systems. However, Docker points out that this can vary depending on your system configuration. So it’s best to check the status right away.
sudo systemctl status dockerIf the service is running, you’ll see output with the status ‘active (running)’:
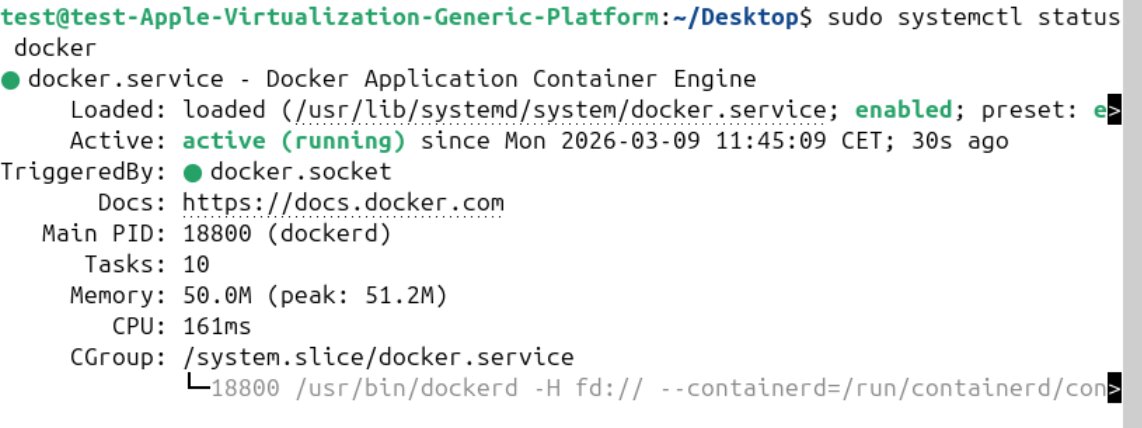
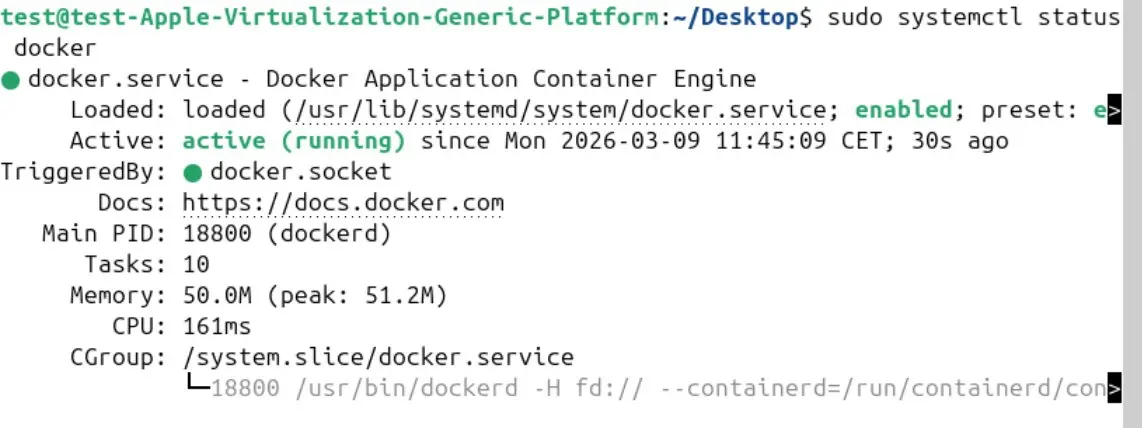
Press q to exit the view. You can also start a test container:
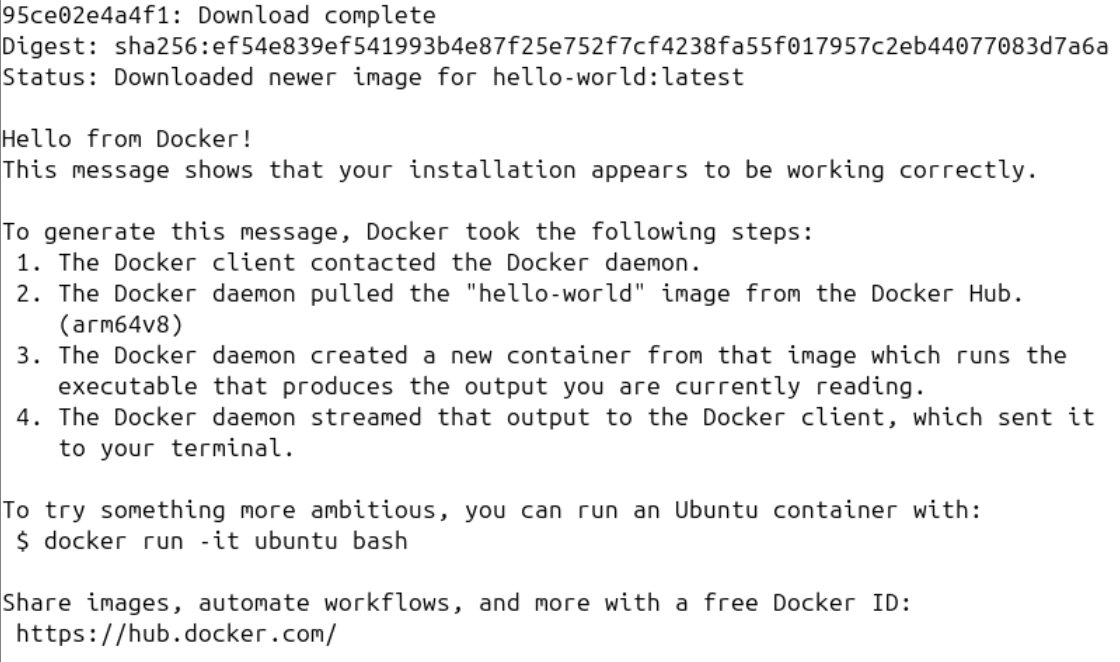
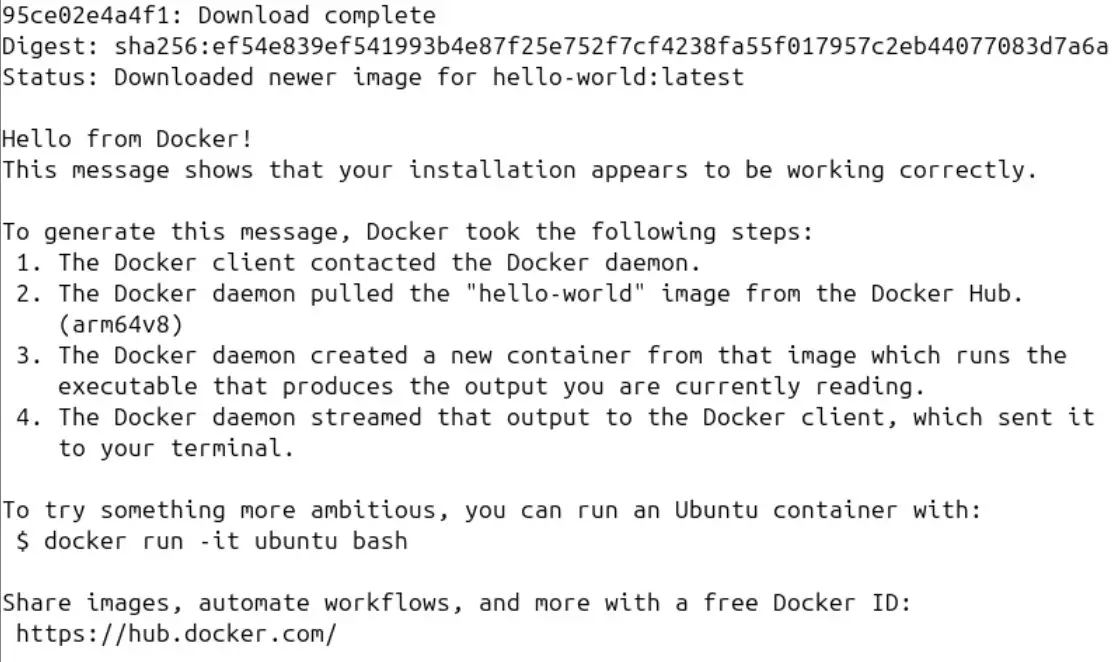
sudo docker run hello-worldIf everything is set up correctly, Docker downloads the test image and starts a small container that outputs a welcome message.
Step 10 (optional): Run Docker without sudo
By default, as a regular user you do not access the Docker daemon directly. That’s why the commands initially start with sudo. You can change this by using a user group called docker. However, note that members of this group receive extensive privileges. First, create the group:
sudo groupadd dockerThen add your user:
sudo usermod -aG docker $USERThen log out and log back in so the group change takes effect. After that, you can run commands such as docker ps or docker run hello-world without using sudo.
For beginners, this option is convenient, but it should be used with care. The Docker documentation explicitly states that the docker group grants root-like permissions. For security reasons, you should only take this step if it is truly necessary.