How to set up a personal Jellyfin server with Docker on Ubuntu

Running your own Jellyfin server is a great way to keep all your films, TV programmes, music and photos in one place and stream them whenever you want. Instead of relying on external streaming services, you stay in full control of your files, user accounts and who can access your content across your devices.
What is Jellyfin?
Jellyfin is an open-source media server that lets you organise and manage your own media collection and stream it to different devices through a browser or app. It supports common media types like films, TV programmes, music, and photos, and includes features like user accounts, metadata, cover art, playback tracking and streaming over your network.
Because Jellyfin server is self-hosted, it runs independently of external providers. You only need an internet connection for things like downloading metadata or enabling remote access. Inside your home network, Jellyfin uses HTTP on port 8096 by default. You can also enable HTTPS if needed. For external access, the official documentation recommends using a reverse proxy with trusted certificates.
Which server requirements do you need for Jellyfin?
Before installing Jellyfin, it’s worth taking a moment to choose the right server setup. It’s not just about how many files you want to store. What really matters is whether your devices can play those files directly or if the server needs to convert them during playback. That conversion process is called transcoding, and it can use a lot of resources. Things like 4K content, HDR-to-SDR tone mapping, or multiple streams at the same time can quickly put pressure on your CPU or GPU.
For typical setups, Jellyfin recommends at least 8 GB of RAM. If you’re running a lean Linux server without a graphical interface, 4 GB may be enough. For hardware acceleration on non-Apple systems, Intel graphics are usually the easiest option to work with and offer solid encoding performance.
Let’s look at a few different scenarios so you can see which setup makes the most sense for your needs.
Individuals and families
If you’re mostly using Jellyfin on your own or with 2 or 3 other people and your files are already in common video formats like MP4 with H.264, a VPS is often all you need. In this setup, the server mainly delivers files instead of converting them every time you press play. A solid starting point is a Linux VPS with at least 4 vCores, 4 GB RAM and around 120 GB of NVMe storage. If you want a bit more breathing room for larger libraries, metadata, or occasional transcoding, 6 vCores, 8 GB RAM, and 240 GB NVMe storage will feel more comfortable.
The biggest advantage here is the cost-to-performance ratio. You get enough power for a personal media server without needing to invest in dedicated hardware right away. This works especially well if your devices can already handle modern formats and rarely need transcoding.
Advanced users
If your media library is growing, you want to manage multiple users, or you’d like more flexibility, cloud servers or Cloud Cubes are a great option. You can start with around 4 vCPUs, 8 GB RAM, and 240 GB of storage. That gives you enough headroom for parallel scans, metadata processing, larger libraries and occasional transcoding.
The main benefit here is flexibility. You can easily scale your setup as your needs change. That’s useful if you want to start small and expand later, for example by adding more users, more libraries, or additional services like a reverse proxy, monitoring, or backup. For advanced users, small teams, or homelab setups, this is often a comfortable middle-ground.
High-performance and 4K setups
If you’re working with a large 4K library, need HDR-to-SDR conversion, or want to support multiple users streaming at the same time, a small VPS will run into performance issues fairly quickly. Jellyfin points out that software-based HDR-to-SDR tone mapping can be extremely CPU-intensive. In these cases, a dedicated or bare metal server makes much more sense. You get dedicated hardware and don’t have to share CPU, RAM, or storage with other users.
For this kind of setup, plan for at least 8 CPU cores, 16 to 32 GB RAM, and fast SSD or NVMe storage. Ideally, you’ll also use an Intel or NVIDIA GPU for hardware transcoding.
Which operating system should you use Debian or Ubuntu?
Both Linux server distributions work well with Jellyfin. That said, Ubuntu Server 24.04 LTS is usually the easier choice if you’re just getting started. Docker officially supports Ubuntu 24.04, and most guides are based on it. Although Debian is also very stable, Ubuntu tends to be a bit more beginner-friendly and helps you avoid some common setup issues.
If your media collection is growing quickly, external storage can be helpful. For beginners, local SSD or NVMe storage is the easiest option. You can also use external storage such as object storage, but you’ll first need to mount it as a file system first, using a mount tool. This is because Jellyfin reads files directly from the file system and doesn’t support object storage as a native source. A good workaround is to use object storage as an archive for older media you don’t need all the time.
How to install a Jellyfin server on Ubuntu using Docker
In this example, we’ll walk you through how to install Jellyfin on Ubuntu Server 24.04 LTS using Docker Engine and the Docker Compose plugin. This approach is especially beginner-friendly because Docker keeps everything nicely separated and makes updates easier to manage.
Step 1: Update your Ubuntu server
Connect to your server via SSH and update your system:
sudo apt update
sudo apt upgrade -yIf needed, restart the server (you will have to log in again after rebooting):
sudo rebootThis step makes sure you’re starting with up-to-date packages, the latest security updates and a clean system. If you’re working with a freshly set up Ubuntu server, this is a good first thing to do.
Step 2: Install Docker on Ubuntu 24.04
Next, install Docker using the official APT repository. First, remove any older or potentially conflicting packages:
sudo apt remove docker.io docker-compose docker-compose-v2 docker-doc podman-docker containerd runc -yThen set up the official Docker repository:
sudo apt update
sudo apt install ca-certificates curl -y
sudo install -m 0755 -d /etc/apt/keyrings
sudo curl -fsSL https://download.docker.com/linux/ubuntu/gpg -o /etc/apt/keyrings/docker.asc
sudo chmod a+r /etc/apt/keyrings/docker.asc
sudo tee /etc/apt/sources.list.d/docker.sources <<EOF
Types: deb
URIs: https://download.docker.com/linux/ubuntu
Suites: $(. /etc/os-release && echo "${UBUNTU_CODENAME:-$VERSION_CODENAME}")
Components: stable
Signed-By: /etc/apt/keyrings/docker.asc
EOF
sudo apt updateNow install Docker Engine, Buildx, and the Compose plugin using:
sudo apt install docker-ce docker-ce-cli containerd.io docker-buildx-plugin docker-compose-plugin -yThen, check Docker is running:
sudo systemctl status dockerYou should see active (running):
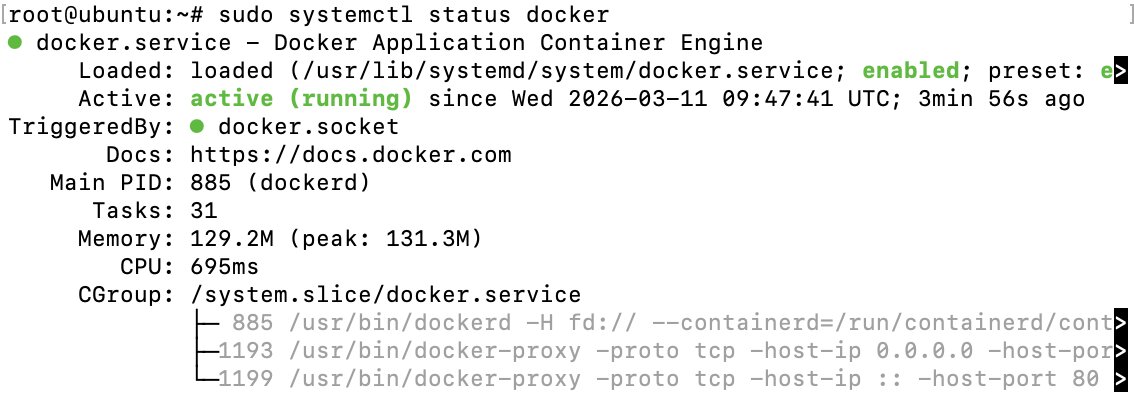
Run a quick test to make sure everything works:
sudo docker run hello-worldThe output should look like this:
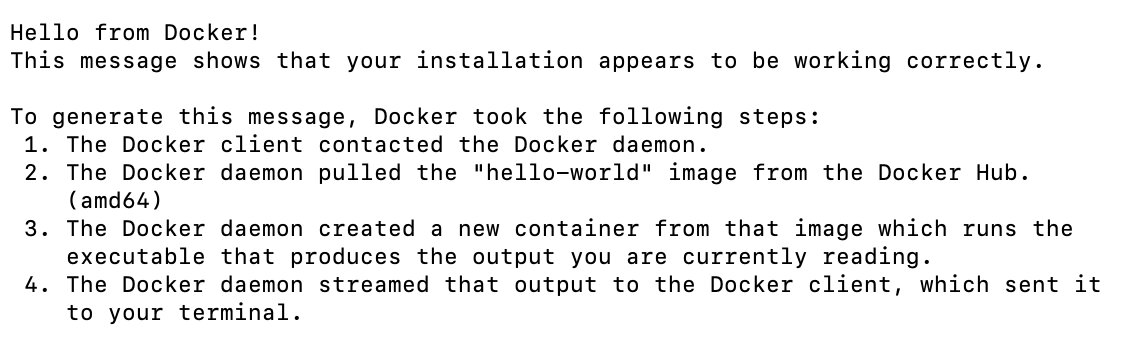
Step 3: Use Docker without sudo
By default, Docker commands require sudo. If you prefer, you can add your user to the docker group:
sudo usermod -aG docker $USER
newgrp dockerThe Docker documentation points out that anyone in the docker group effectively has root-level access. That’s fairly normal on a personal server, but it’s still something to keep in mind. If other users also have access to your server, this can quickly turn into a security issue.
Step 4: Create the folder structure
Now everything’s set up, let’s create the folder structure for your Jellyfin server. To keep things organised, it helps to separate your configuration, cache and media files. Go ahead and create the following folders on your host system (you can structure them differently if you prefer):
mkdir -p ~/jellyfin/config
mkdir -p ~/jellyfin/cache
mkdir -p ~/media/films
mkdir -p ~/media/tvprogrammes
mkdir -p ~/media/music
mkdir -p ~/media/photosconfig is where Jellyfin stores its configuration, users and database. cache is used for temporary data. The media files themselves are stored in separate folders.
Step 5: Determine the user’s UID and GID
Jellyfin can run inside the container using the user and group ID of your Linux user. This makes it easier to handle file permissions. To get both values, run:
idYou’ll see a set of numbers in the output: the UID and GID values. Make a note of them. You’ll need them in the next step for the Compose file.
Step 6: Create the Docker Compose file for Jellyfin
Go to your working directory and create a file called docker-compose.yml. In this example, we’ll use the nano editor, but you can create the file however you like.
mkdir -p ~/jellyfin
cd ~/jellyfin
nano docker-compose.ymlNow paste the following content into the file:
services:
    jellyfin:
        image: jellyfin/jellyfin
        container_name: jellyfin
        user: "1000:1000"
        ports:
            - "8096:8096/tcp"
            - "7359:7359/udp"
        volumes:
            - ./config:/config
            - ./cache:/cache
            - type: bind
                source: /home/YOURUSERNAME/media/films
                target: /media/films
                read_only: true
            - type: bind
                source: /home/YOURUSERNAME/media/tvprogrammes
                target: /media/tvprogrammes
                read_only: true
            - type: bind
                source: /home/YOURUSERNAME/media/music
                target: /media/music
                read_only: true
            - type: bind
                source: /home/YOURUSERNAME/media/photos
                target: /media/photos
                read_only: true
        environment:
            - JELLYFIN_PublishedServerUrl=http://YOUR-SERVER-IP:8096
restart: unless-stoppedThen, update the following values in the file:
- replace
1000:1000with your actual UID:GID from the previous step YOURUSERNAMEwith your Linux usernameYOUR-SERVER-IPwith your server’s IP address
The media folders are mounted as read_only: true. This means Jellyfin server can read your files, but it can’t change them. For a personal media server, that’s both safer and more practical.
Step 7: Start the Jellyfin container
Now you can start the container you just created using Docker Compose. It will run in the background:
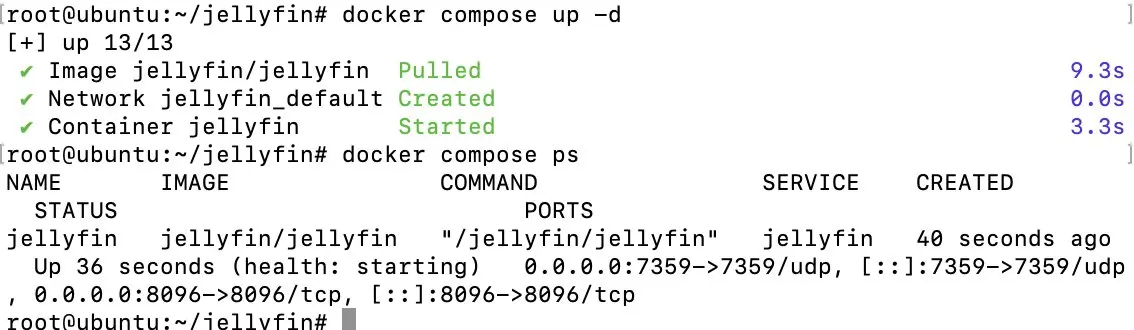
sudo docker compose up -dThen check if the container is up and running:
sudo docker compose ps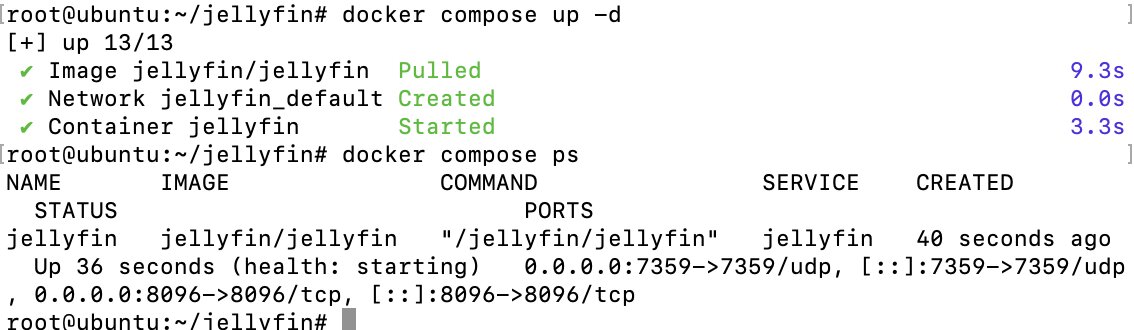
Step 8: Open Jellyfin in your browser
Now open your server’s address in your browser using the default Jellyfin port:
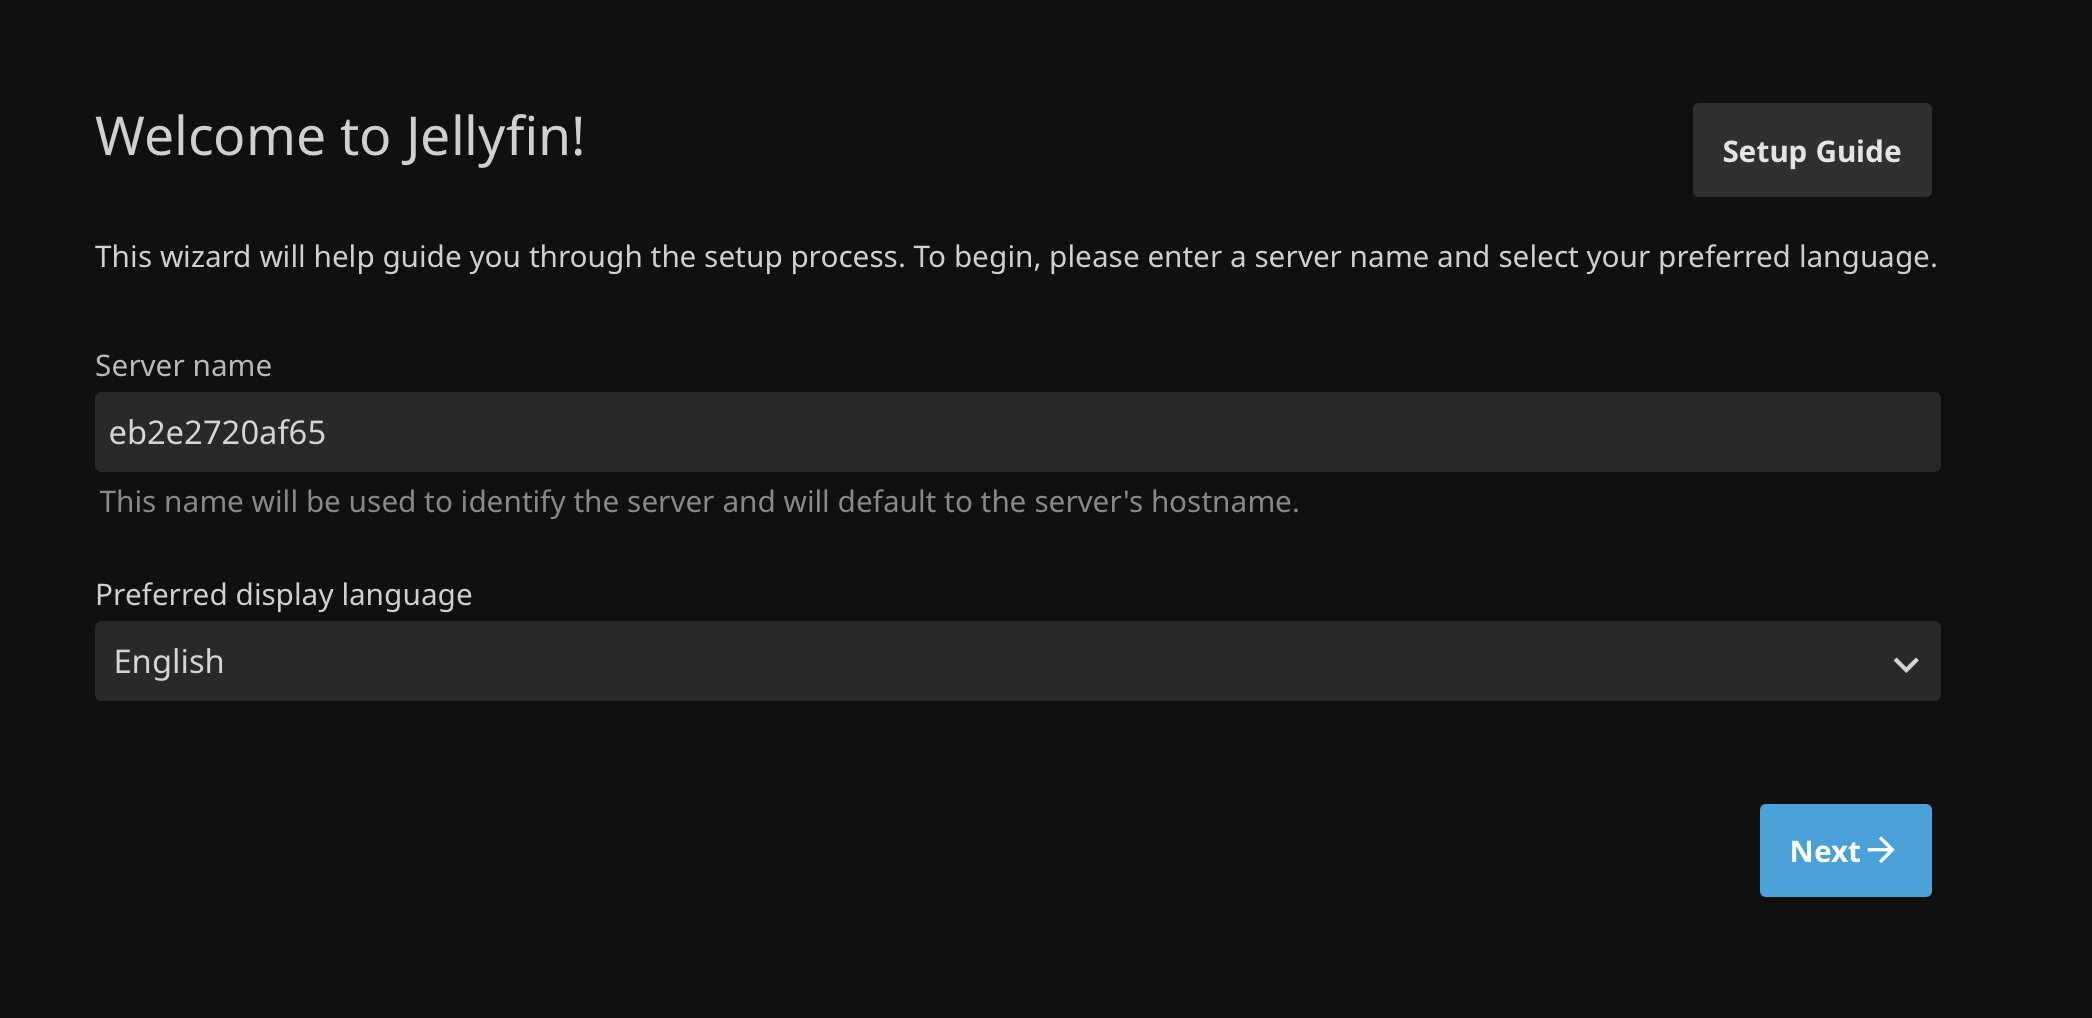
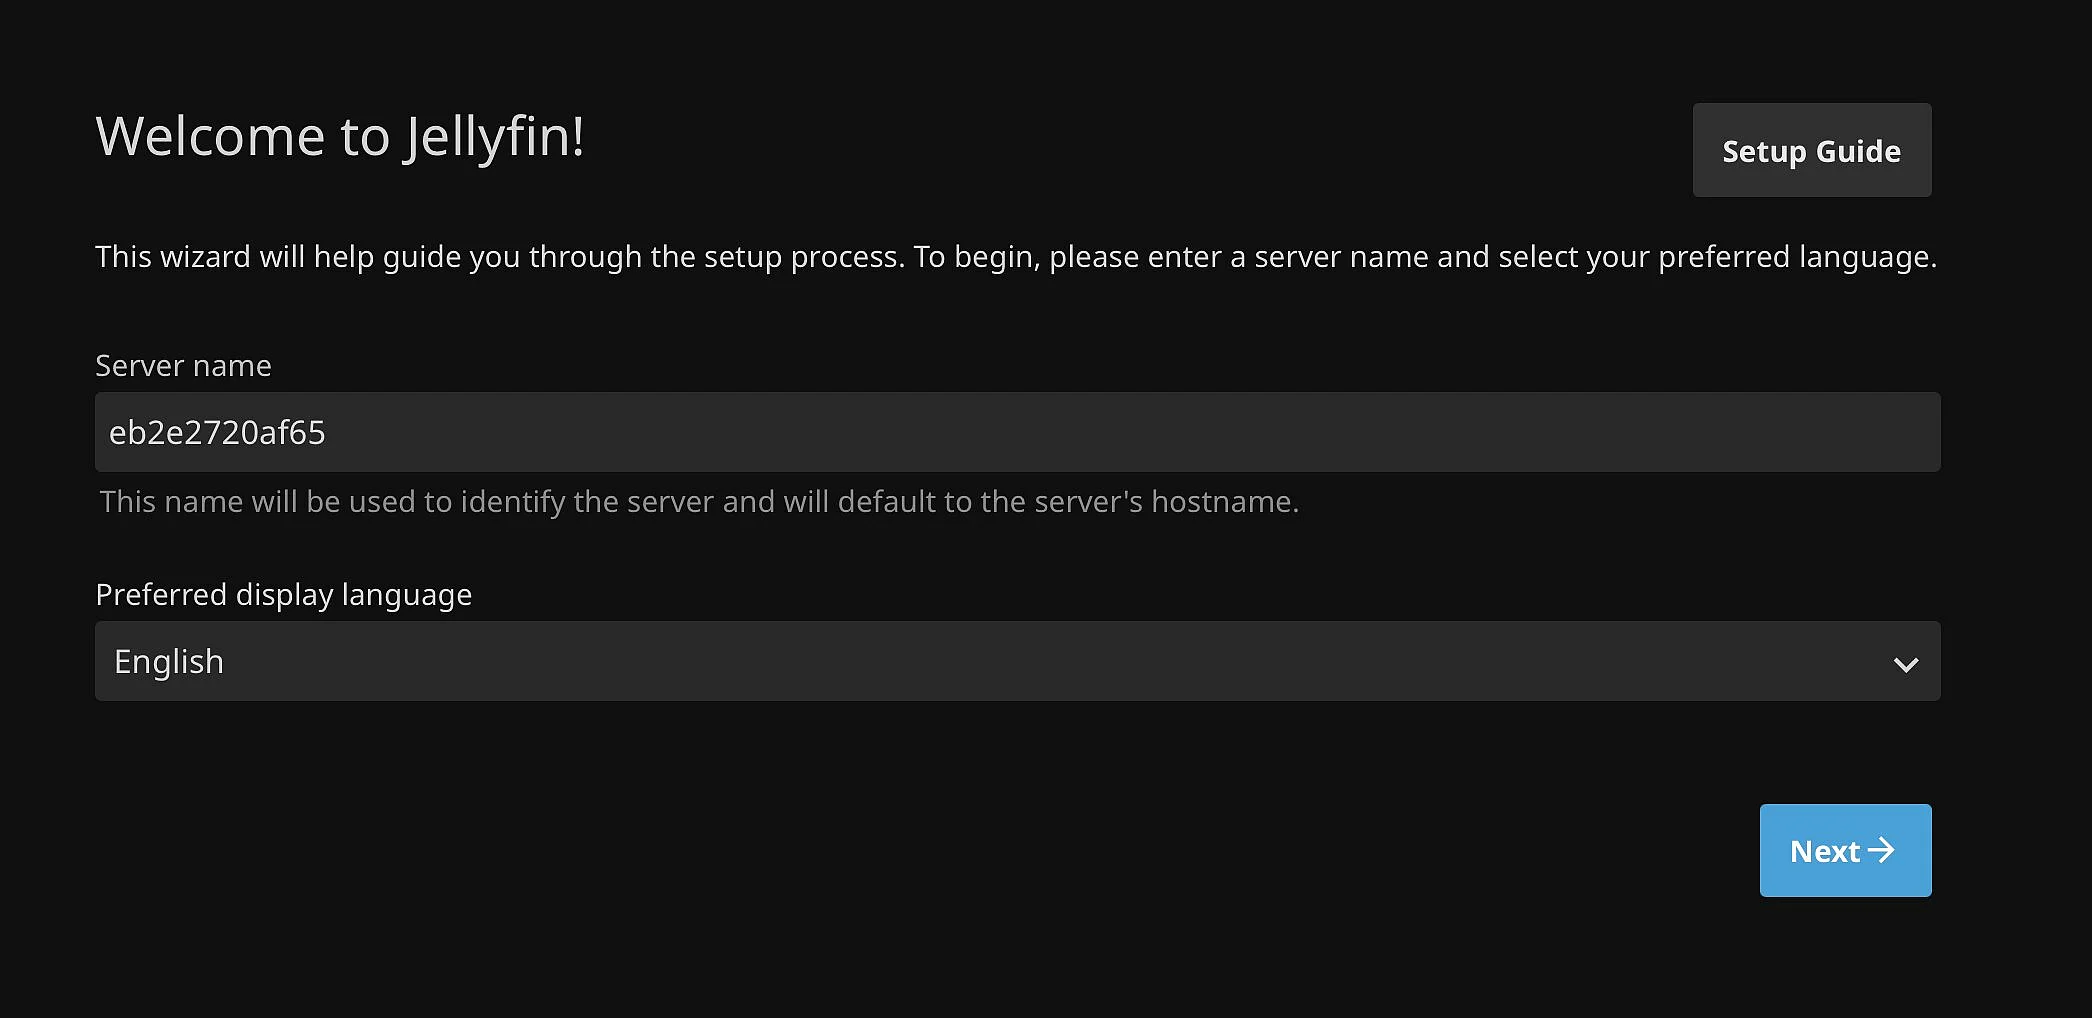
http://SERVER-IP:8096The setup wizard will start automatically in your browser.
If you’re using an IONOS server, you’ll first need to configure the firewall in the Cloud Panel to allow TCP connections on port 8096.
Step 9: Set up Jellyfin using the wizard
Jellyfin will guide you through the basic setup in your browser. Start by choosing your language, then create an admin account with a secure password. After that, set up your libraries. For example, select ‘Films,’ ‘TV programmes,’ ‘Music,’ and ‘Photos’ and point Jellyfish to the folders you mounted in the container, such as /media/films or /media/tvprogrammes, as in our example. Once that’s done, Jellyfin will automatically pull in metadata, cover art and additional data, as long as your server has an internet connection.
Step 10: Keep your media organised
For Jellyfin to recognise your files correctly, your media should be clearly named and well organised. For films, it helps to store each title in its own folder. For TV programme, organise them by series. Music works best when your tags are clean and consistent. The more structured your folders are, the less manual work you’ll have later when it comes to metadata and matching. It’s not something you have to do, but it definitely makes things easier later on.
Keep the following security tips for your Jellyfin server in mind:
- Use HTTPS: If you want to access Jellyfin over the Internet, make sure to secure it with HTTPS. The easiest way to do this is with a reverse proxy and a free TLS certificate.
- Avoid direct internet exposure: Try not to open the Jellyfin port directly on your router. Instead, use a reverse proxy or a VPN.
- Use strong passwords: Set a secure password for the admin account and create separate user accounts for others.
- Keep your system up to date: Regularly update your Ubuntu system, Docker, and the Jellyfin image.
- Mount media folders as read-only: If you’re running Jellyfin in Docker, it’s a good idea to mount your media folders as read-only (
read_only) to avoid accidental changes to your files.
How to connect Jellyfin to a domain
If you want to access Jellyfin through a domain like jellyfin.yourdomain.ie, you’ll need three things:
- A domain or subdomain
- A DNS record that points to your server’s public IP address
- A reverse proxy with HTTPS. Jellyfin specifically recommends Caddy
Step 1: Set the DNS record for the subdomain
Create an A record with your domain provider, for example:
jellyfin.yourdomain.ie -> YOUR-PUBLIC-IPIf you’re using IPv6, you’ll also need to create an AAAA record. For automatic HTTPS with Caddy, the DNS record must already point to your server correctly.
For your Jellyfin server to be accessible over HTTPS later on, ports 80 (HTTP) and 443 (HTTPS) need to be open on your server or in your firewall. The reverse proxy uses these ports to handle incoming requests and issue TLS certificates.
Step 2: Install Caddy
Jellyfin recommends Caddy because it makes setting up HTTPS really straightforward. To install Caddy on Ubuntu, use the official package method and run the following commands:
sudo apt install -y debian-keyring debian-archive-keyring apt-transport-https curl
curl -1sLf 'https://dl.cloudsmith.io/public/caddy/stable/gpg.key' | sudo gpg --dearmor -o /usr/share/keyrings/caddy-stable-archive-keyring.gpg
curl -1sLf 'https://dl.cloudsmith.io/public/caddy/stable/debian.deb.txt' | sudo tee /etc/apt/sources.list.d/caddy-stable.list
sudo chmod o+r /usr/share/keyrings/caddy-stable-archive-keyring.gpg
sudo chmod o+r /etc/apt/sources.list.d/caddy-stable.list
sudo apt update
sudo apt install caddy -yOnce the installation is complete, Caddy starts automatically as a system service.
Step 3: Configure Caddy
Next, update the Caddy configuration. We’ll use nano again here, but any text editor will work as well:
sudo nano /etc/caddy/CaddyfileAdd the following:
jellyfin.yourdomain.ie {
reverse_proxy 127.0.0.1:8096
}
Save the file, then check the configuration:
sudo caddy validate --config /etc/caddy/CaddyfileIf everything looks good, reload Caddy:
sudo systemctl reload caddyStep 4: Bind Jellyfin locally to Caddy only
Once your domain is working, you should update your Compose file so the Jellyfin no longer listens publicly on port 8096. To do this, open ~/jellyfin/docker-compose.yml again and replace the port section with:
ports:
    - "127.0.0.1:8096:8096/tcp"
- "7359:7359/udp"Then restart the container:
sudo docker compose up -dJellyfin will now only be accessible locally, while Caddy handles the secure public connection. Finally, add the proxy as a Known Proxy in Jellyfin’s network settings. This allows Jellyfin to correctly process the headers set by the proxy. You’ll find this option in the web interface under Dashboard → Networking → Known Proxies.