What do you need to host a DayZ server?

By setting up your own DayZ server, you can enjoy the online game with optimal performance and decide who’s allowed to join your world and which mods are used. But what requirements do you need to meet, and how exactly does setting up a personal DayZ server work?
If you want to enjoy the online game with the best possible performance and decide for yourself who can join the game world and which mods can be used in it, you should look into hosting a DayZ server yourself. What are the requirements for this and how exactly does setting up your own DayZ server work?
Host a DayZ server on your own PC or rent a server?
If you want to explore DayZ’s world with friends but don’t have your own server, you’re limited to two options — the official servers, which are public by default, or community servers hosted by other players. In both cases, you have no control over who can join, which mods are active, or when the server is online. You only get that level of freedom by hosting your own DayZ server.
If you have a powerful computer and a strong internet connection, you can install and run a DayZ server on your own machine. The downside is that the moment you shut down the PC or lose connectivity, the online session ends immediately. You should also avoid running the DayZ game client on the same device, which means you’ll need a second computer if you plan to play at the same time.
If you rent a server from a provider to host a DayZ server instead, you won’t have to worry about aspects such as internet connection and availability. The functionality of the hardware is guaranteed, and you can focus entirely on setting up and administering the server.
What are the system requirements for a DayZ server?
The system requirements for your own DayZ server depend on how you intend to set up and use the server. Which mods should be allowed and how many players are in the world at the same time? Developer Bohemia Interactive basically recommends the following minimum setup for a dedicated server:
- Processor: Intel dual-core 2.4 GHz or AMD dual-core Athlon 2.5 GHz
- Memory: at least 6 to 8 GB of RAM
- Storage space: 2.5 gigabytes
Bohemia Interactive also considers SSD storage essential for installing the software and managing server logs. For the operating system, you should use Windows Server. There’s no native Linux support, so hosting a DayZ server on Linux is only possible through workarounds like Wine. Because DayZ’s dedicated server software relies heavily on single-core performance, choosing a CPU with strong single-core capabilities is recommended.
One aspect the development team doesn’t address is the bandwidth requirements of a DayZ server, which are just as important for the gameplay experience as the underlying server hardware. Steam publisher Valve provides a general upload guideline of 53.4 Kbit/s per player for other dedicated applications such as CS:GO servers or Rust servers. For your DayZ instance, however, you should plan for around 80 to 120 Kbit/s per player.
What options do you have for hosting a DayZ server with IONOS?
A strong broadband connection is crucial, and relying on a hosting provider ensures your DayZ server runs at a high level. When you rent resources from IONOS, you benefit from a server broadband connection of up to 1 Gbit/s, no matter which server model you choose.
IONOS server models in comparison
IONOS offers the following three categories of servers:
When you choose a cloud server you get access to virtualised resources. How high the performance of this virtual server environment is, depends on the chosen package, whereby you can increase or decrease the performance at any time. In the cloud server model, you are billed by the minute, so you only pay for the performance that your DayZ server actually uses.
Virtualisation is also the underlying concept of IONOS’s vServer (also known as Virtual Private Server, or VPS for short). Unlike cloud servers, however, you are dealing with fixed performance setups that are available for a fixed monthly amount. If you want to run the DayZ server continuously, you will make significant savings with this model.
The most suitable, but at the same time the most expensive model for anyone who wants to host a DayZ server is a dedicated server. With this server variant, you get fixed hardware setups for a fixed monthly price, which are optimal for hosting individual applications like a dedicated server software thanks to strong single-core power.
IONOS server solutions aren’t just interesting for DayZ fans, the high-quality server hardware also provides the perfect foundation for setting up a free Minecraft server or running your own FS22 server. The various packages are also well suited for setting up your own TeamSpeak server.
Three typical DayZ server scenarios and matching IONOS packages
IONOS offers each of its three server models in multiple packages that vary in price and performance. So when you host a DayZ server with IONOS, you’re not just picking a server type — you’re also selecting a specific combination of CPU power, memory, and storage.
To help you choose, we’ve outlined three typical DayZ server scenarios in the table below and matched them with the suitable packages from each server category.
| Minimum requirements (including operating system) | Recommended vServer | Recommended dedicated server | |
|---|---|---|---|
| DayZ server for 2–5 players (standard map without mods) | 2.4 GHz (min. 3 vCores), 8 GB RAM, 40 GB storage | VPS Windows L or XL | Dedicated Server AR6-32 SSD |
| DayZ server for 6–20 players (custom map/mods) | 2.8 GHz (min. 3 vCores), 12 GB RAM, 60 GB storage | VPS Windows XL | Dedicated Server AR6-32 SSD |
| DayZ server for up to 100 players (custom map/mods) | 3.4 GHz (min. 4 vCores), 16 GB RAM, 100 GB storage | VPS Windows XXL | Dedicated Server AR6-32 SSD |
We have included the resources required for the operating system (in this case, Windows Server 2025). Microsoft specifies the following minimum requirements: a 1.4 GHz 64-bit processor, 2 GB or 4 GB of RAM (without or with a graphical interface), and 32 GB of disk space.
How to host a DayZ server step by step
With the right hardware in place, you can now move on to setting up the server and installing the DayZ server application. In the following tutorial, we’ll guide you through the process step by step, using an IONOS server with Windows Server 2025 as the basis.
Step 1: Establish a connection to the server
The first step is to establish a remote connection to your server so that you can work with the rented resources. As an IONOS customer, you can set up this connection through the Cloud Panel using the device of your choice. To do this, access the Login area and enter your account credentials, go to the ‘Server & Cloud’ section and select the rented hardware on which you would like to host your DayZ server.
In the ‘Features’ section, the Cloud Panel displays key information about your server — including login credentials and a download link for setting up the remote connection. Click the link to begin the configuration.

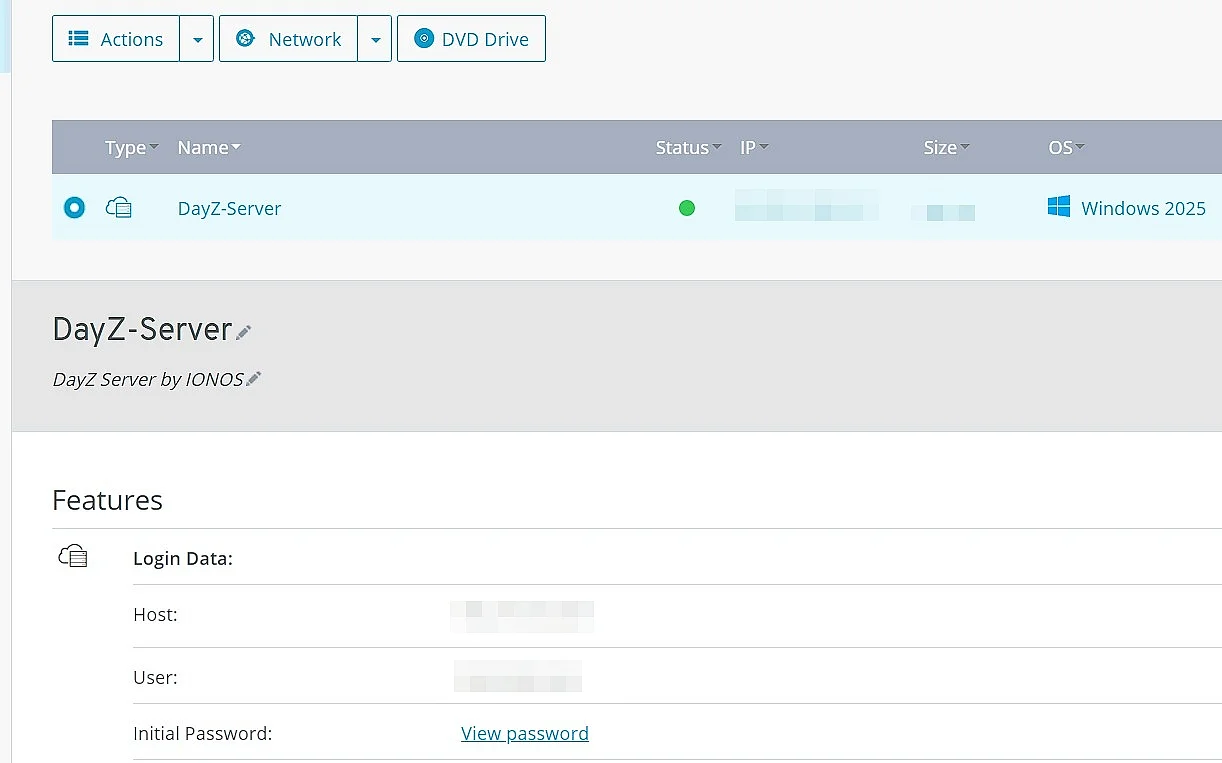
Keep the selected default choice (‘Remote desktop connection’) to open the link and confirm it by clicking ‘OK’. In the following dialog continue by clicking ‘Connect’.
Enter your credentials for the server by pressing ‘More options’ and ‘Use another account’ and typing in the information. If you have not yet changed your login credentials, you will find your ‘Initial Password’ in the credentials listing in the Cloud Panel.
Since your server’s security certificate is not yet trusted, you will receive a security warning the first time you connect. By clicking on ‘Yes’ you can agree to the remote connection in this case.
Step 2: Install SteamCMD
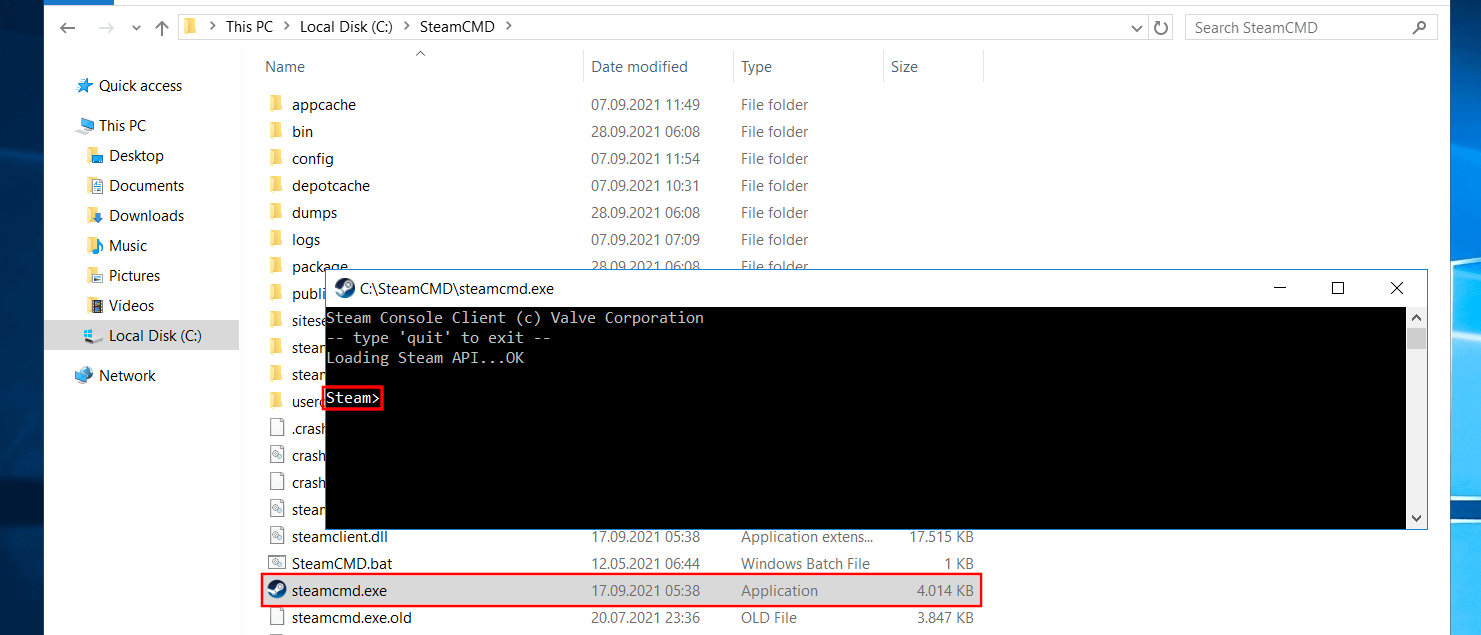
The software for hosting a DayZ server can be obtained and updated via the Steam Console Client or SteamCMD. Installing this tool is therefore next on the agenda. To do this, download the installation files via the following download link and extract them into any directory on your server, such as C:\SteamCMD.
Double-click the extracted steamcmd.exe to run the SteamCMD installation. Once the installation is complete, the Windows Command Prompt will display the Steam> prompt.
Step 3: Install the DayZ Dedicated server
Using the SteamCMD client, you can now obtain and install DayZ’s dedicated server software. For this purpose, first log in to the public Steam servers with your Steam login details:
login usernameIf you have not yet logged in with your Steam account and your device, an authentication check via Steam Guard Code will be performed after logging in to the public Steam servers. You will receive this code by email.
Next, create a directory for the server — for example, the classic C:\dayz-server — by entering and confirming the following command:
force_install_dir C:\dayz-serverUse the app_update command together with the Steam app ID (223350) to download the latest version of the DayZ server software:
app_update 223350 validate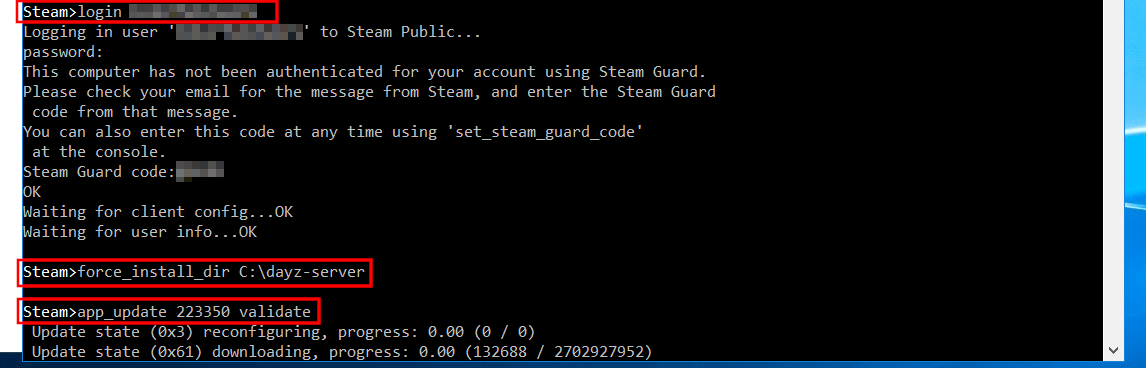
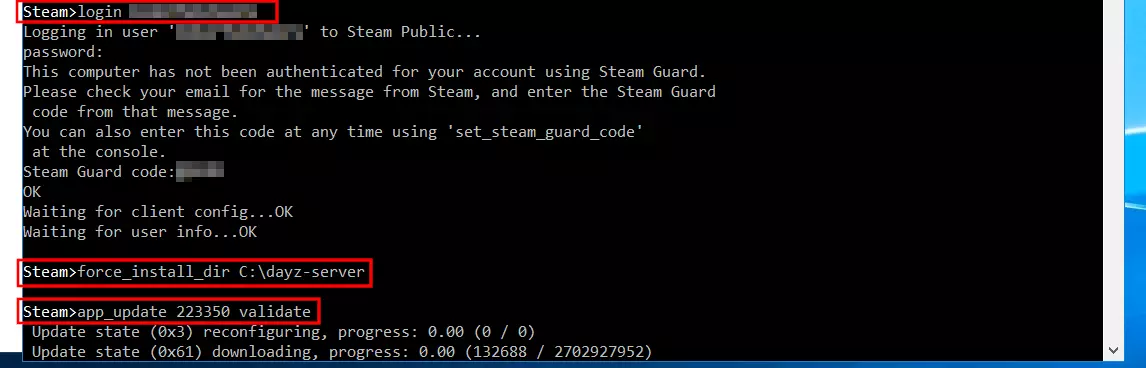
After the installation is complete, log out of the Steam servers by typing quit.
If you want to update the DayZ server software later on, simply use the command app_update 223350.
Step 4: Enable UDP ports
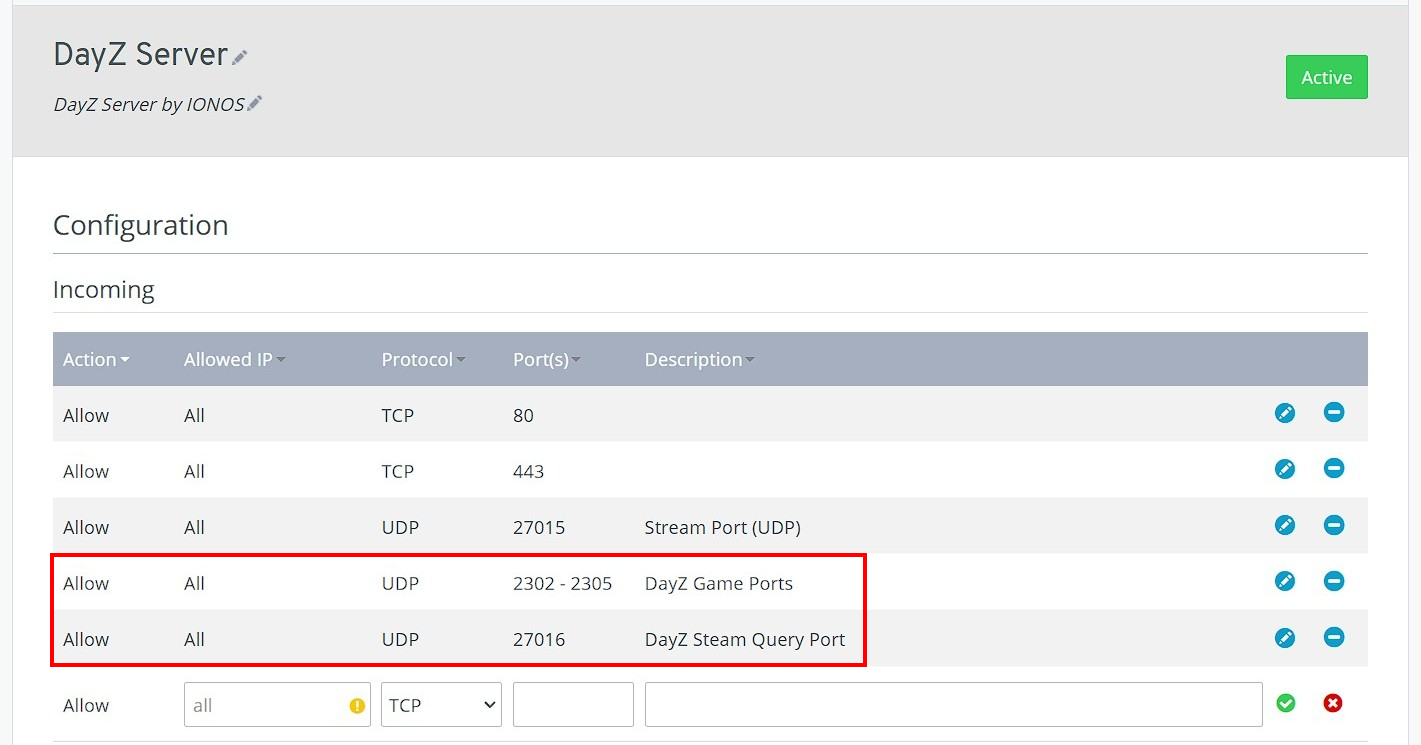
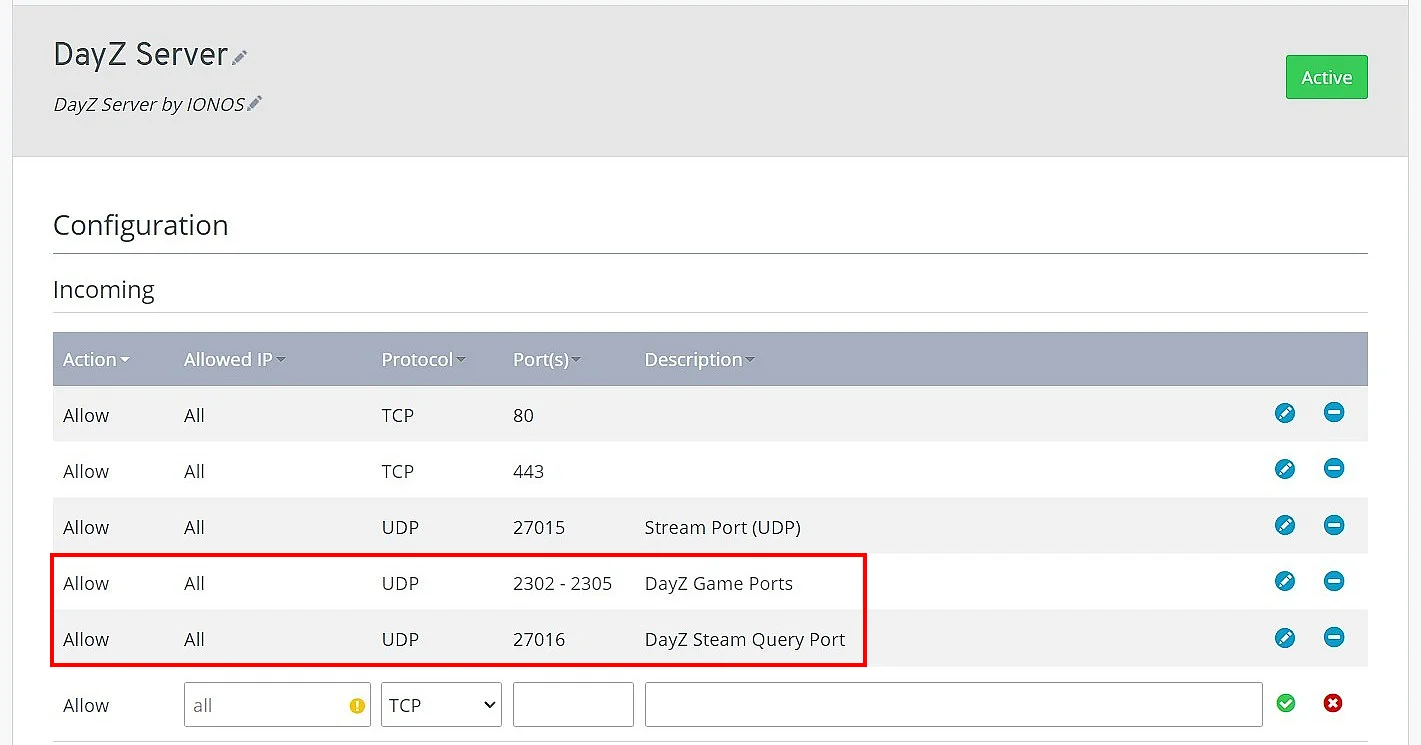
In order for your DayZ server to be found later by your friends or others, or to show up in the community server listing, you must also allow communication through the following ports:
- UDP ports 2302 to 2305 (Game Ports)
- UDP port 27016 (Steam Query Port)
Enabling TCP and UDP ports can be done by IONOS customers via the Cloud Panel, just like configuring the remote connection. So log in again and go to the ‘Server & Cloud’ category. Then, in the left side menu, click on ‘Network’ and ‘Firewall Policies’.
Select your DayZ server or operating system from the list and under ‘Incoming’, create the rules for the ports mentioned according to the following pattern:
- Allowed IP: all (just leave the field blank for this).
- Protocol: UDP
- Port(s): Port number
- Description: individual description of the port release
After you create the rules, it takes a little while for the ports to be enabled. You can track the progress using the small status indicator next to the operating system entry.
Step 5: Launch the DayZ Server
In the directory of your DayZ server, now create a new batch file for launching the server. For this, choose any editor and paste the following minimal setup for a simple DayZ server:
start DayZServer_x64.exe -config=serverDZ.cfg -port=2302 --dologs -adminlog -netlog -freezecheck -profiles=C:\dayz-server\DayZServerprofilesSave your batch file and double-click it to launch the server. The DayZ Console will open automatically and you will be able to follow the server setup process step by step.
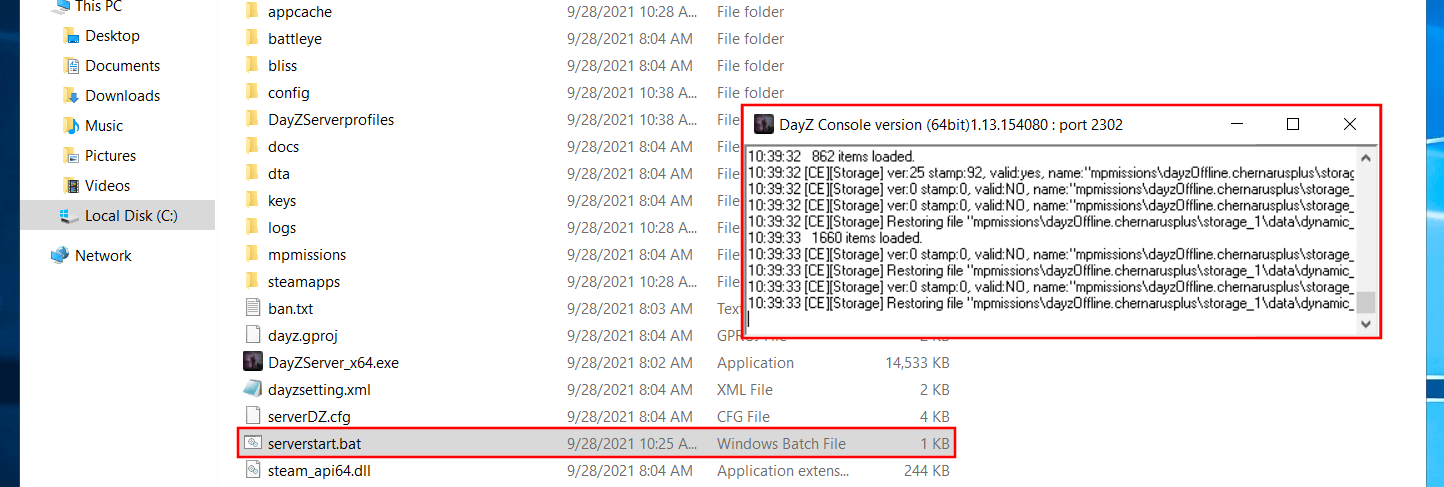
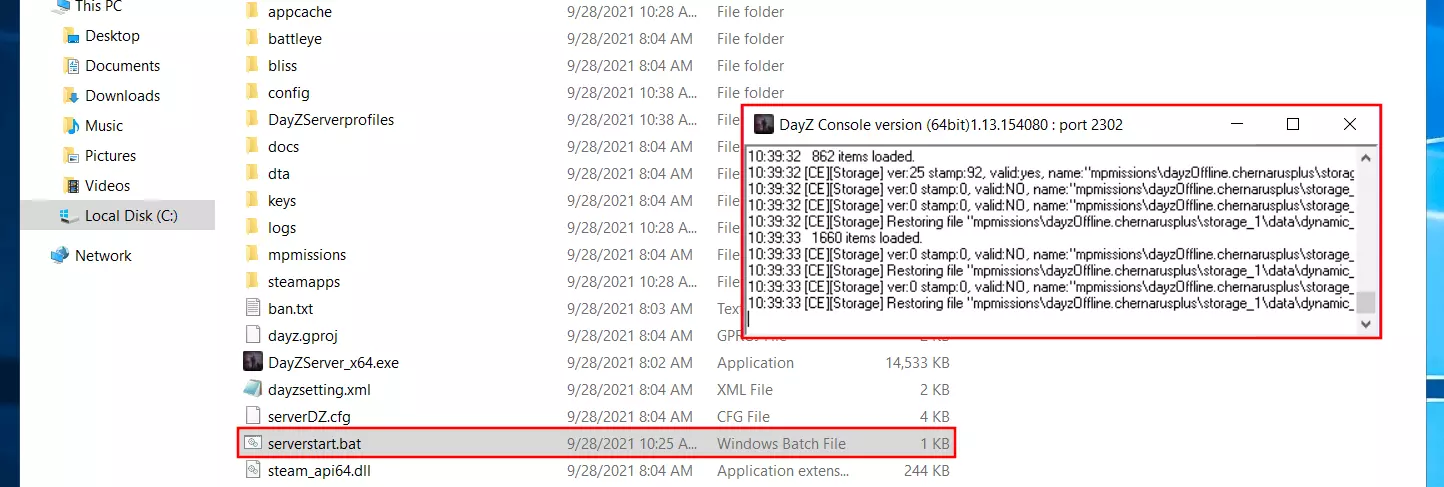
For an exact list of available parameters for the server launch BAT, see the ‘Launch Parameters’ paragraph of the article ‘DayZ: Server Configuration’ in the official community wiki of Bohemia Interactive. It will also tell you what other configuration options you have for your DayZ server.
Step 6: Join the DayZ server you created
Once your DayZ server is hosted and running, you and other players can join the world. To do this, you will need to complete the following steps:
- Launch DayZ from your Steam client.
- Go to the ‘Community’ tab.
- Search for the name or IP address of your server.
- Select your DayZ server and press ‘Play’.
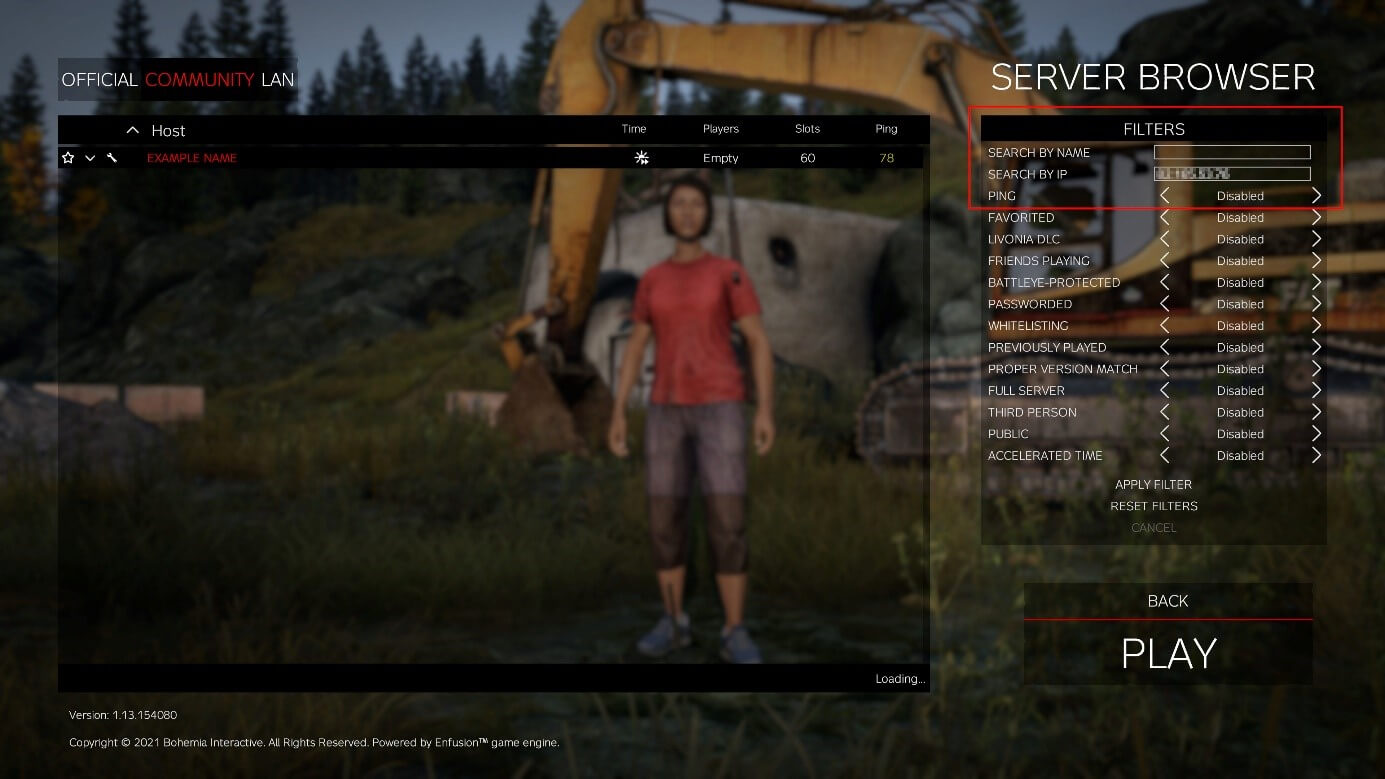
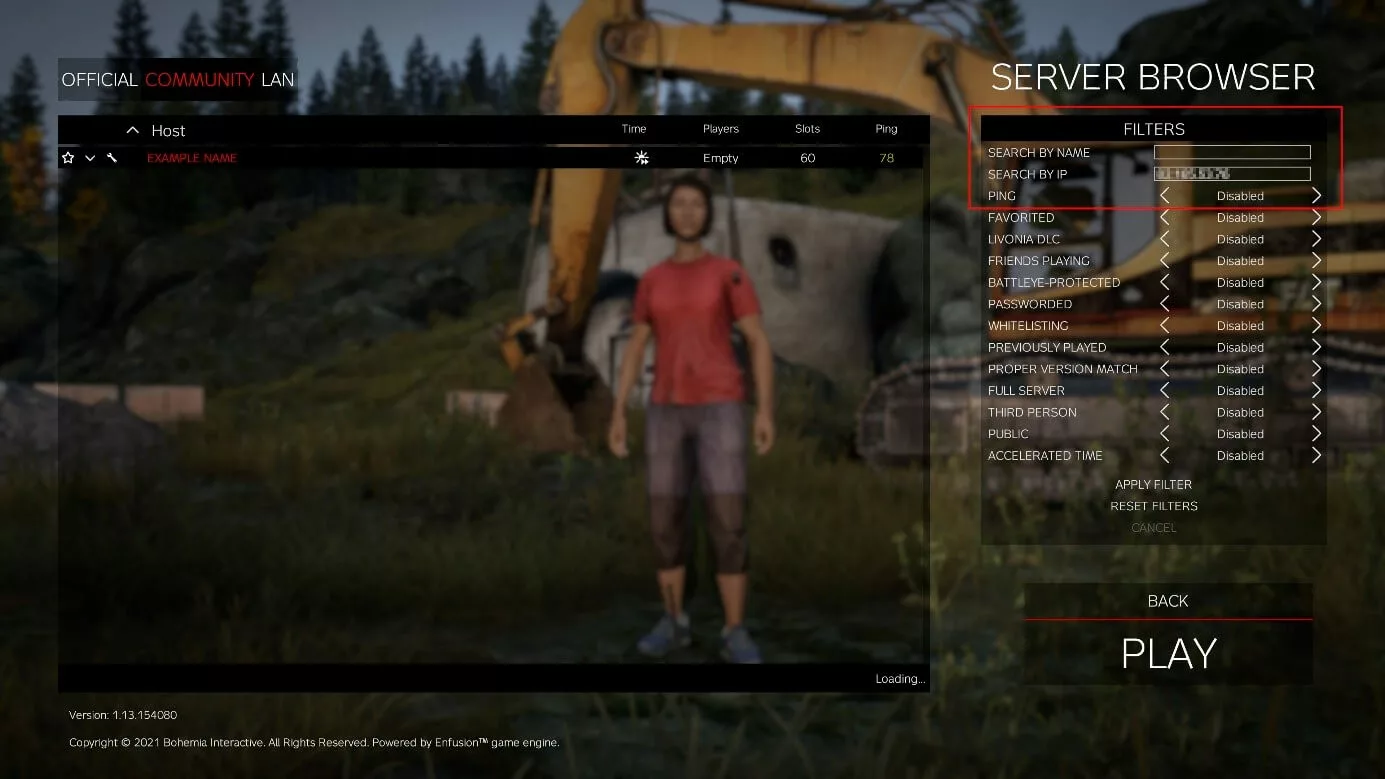
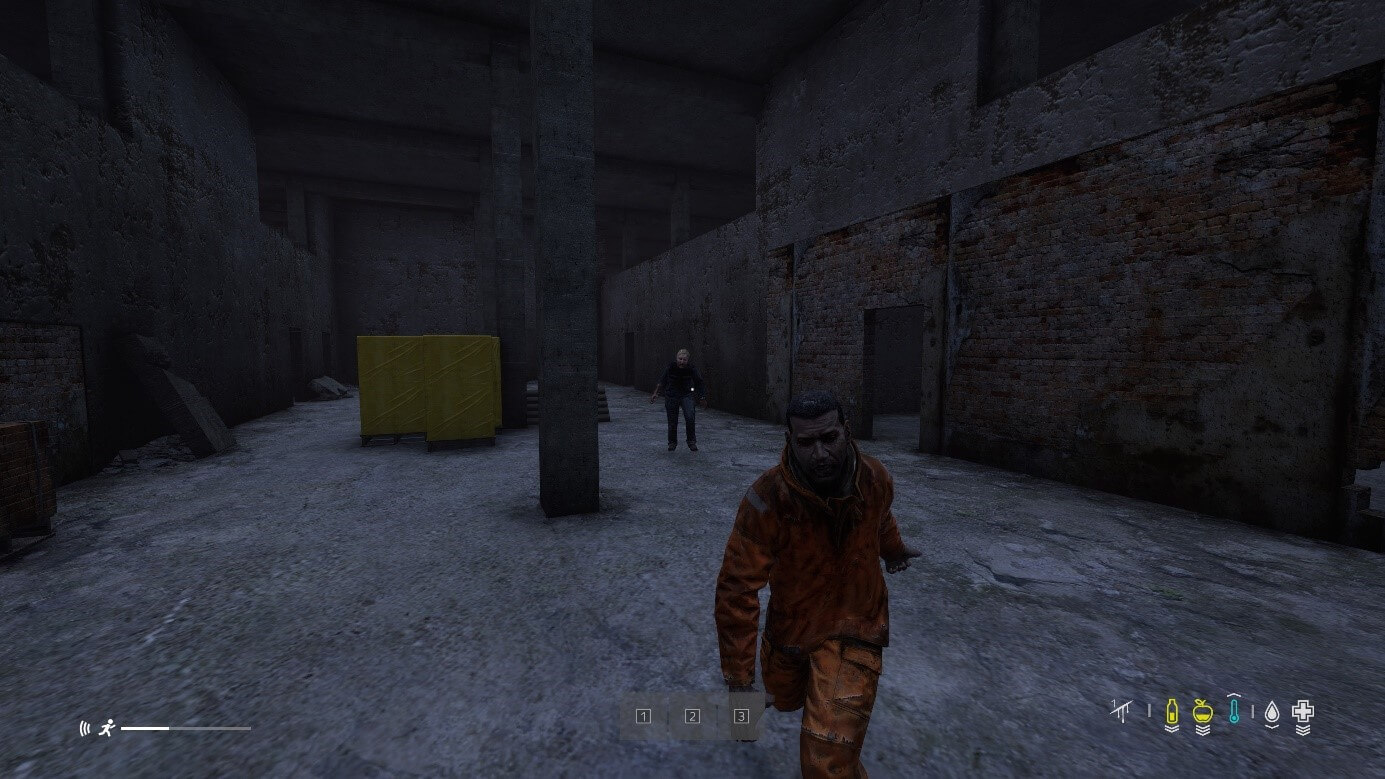
After a short loading time, the adventures on your own DayZ server can finally begin.
Step 7: Register your own domain for the DayZ server
If you want your server to appear under a custom address, you can optionally link it to a domain. For example, register your own .gg domain such as dayz-with-friends.gg to make access even easier for your fellow players.