How to create a Minecraft server on Linux

Setting up a Minecraft server on Linux (in this case, Ubuntu 24.04) is quick and straightforward. Once your hosting hardware is ready, you only need a current Java version and the latest server files for the Java Edition of the game, both of which can be installed easily via the terminal.
Minecraft server on a Linux basis with IONOS hosting options
Many hosting providers—including IONOS—offer server packages that allow you to choose between Windows and Linux as the operating system. If you want to get started easily with a smaller Minecraft server on Linux for just a few players, a vServer or VPS (Virtual Private Server) is a practical choice. For a low fixed monthly fee, you gain access to virtualised hardware resources that can be scaled up or down at any time. A suitable option with sufficient computing power is the VPS M package.
In the table below, you’ll find three specific use cases for a Minecraft server on Linux, including matching IONOS server options.
| Minecraft server scenario | Suitable IONOS package (with Linux as the OS) |
|---|---|
| Small game world for 1–2 players | IONOS VPS Linux M |
| Medium-sized game world for 3–5 players | IONOS VPS Linux L |
| Large game world for 6+ players | IONOS VPS Linux XL |
How to set up a Minecraft server on Linux step by step (Ubuntu 24.04)
If you want to run a Minecraft server on Linux, you have a wide range of options to choose from. Popular distributions such as Debian and Ubuntu are just as suitable as OpenSUSE, Arch Linux, Solus, Gentoo Linux, or other, less commonly used Linux distributions. In the tutorial below, we’ll guide you step by step through the setup of a Minecraft server on Linux, using Ubuntu 24.04 as an example.
Of course, you can also create and set up your own Minecraft server on Windows if you prefer working with the Microsoft operating system.
Step 1: Install additional software components
Connect to your Linux server by setting up a remote desktop connection. Once the connection is established, your first step is to install the additional components required to run a Minecraft server on Linux via the terminal.
First, update the package index of the APT package manager:
sudo apt updateIn the next step, install the minimal OpenJDK Java implementation, which is mandatory for running the Minecraft server application written in Java:
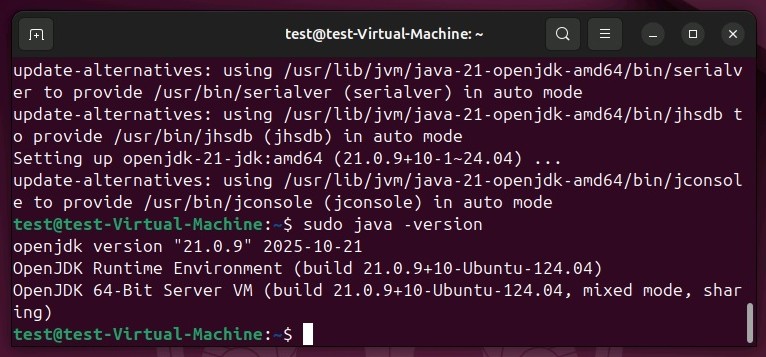
sudo apt-get install openjdk-21-jdkYou can then use the sudo java -version command to check whether the Java kit was installed successfully. If so, the terminal will display the installed version of OpenJDK.
To keep your Minecraft server on Linux running even after you close the terminal, install the screen window manager:
sudo apt install screenStep 2: Open the Minecraft server port
After you have installed the basic components for your Minecraft server on Linux, the next step is to open TCP port 25565. The server application uses this port by default to communicate with clients, which is why a corresponding firewall rule is essential. Use the following command to add the new policy:
sudo ufw allow 25565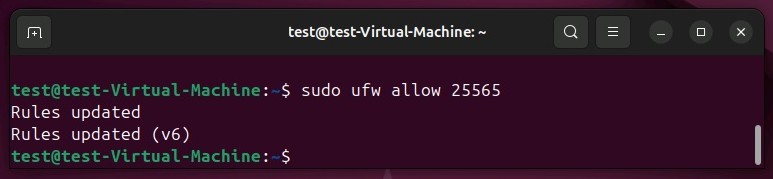
Step 3: Install the Minecraft server application (Java Edition)
You can now download and install the server software for the sandbox game. For the best compatibility, use the Java Edition and make sure you’re running the latest available version.
To do this, open the official download page for Minecraft: Java Edition Server and copy the download link. You can then use wget to download the server files via the terminal:
wget https://piston-data.mojang.com/v1/objects/c8f83c5655308435b3dcf03c06d9fe8740a77469/server.jarThe link shown in the code example is only a placeholder. Replace it with the link you copied from the official website.
Step 4: Run the server application for the first time
Once the server.jar file has been downloaded, you can start the server application at any time. To do this, use the screen window manager installed in the first step and start it with the following command:
screenConfirm that you want to start the session by pressing the spacebar. You will then see the familiar terminal interface, which is now ready to launch the Minecraft server. Run the following command:
sudo java -Xms1G -Xmx2G -jar server.jar noguiThe Minecraft: Java Edition Server is launched without a graphical interface (nogui). During startup, 1 GB is allocated as the initial memory (Xms1G), while the maximum memory usage is limited to 2 GB (Xmx2G). These values can be adjusted as needed.
When you run the command for the first time, you will see the following two error messages at the end of the startup process:
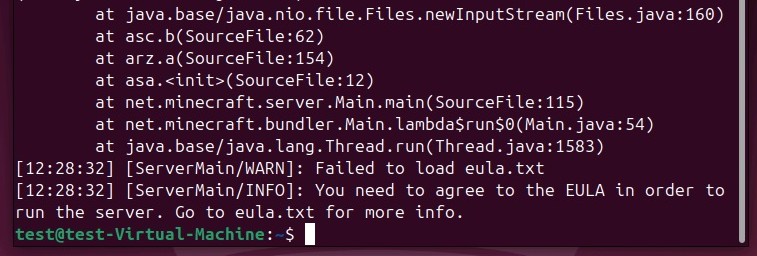
First, the eula.txt file could not be loaded. In addition, the Minecraft server is missing configuration settings that must be defined in the server.properties file by default.
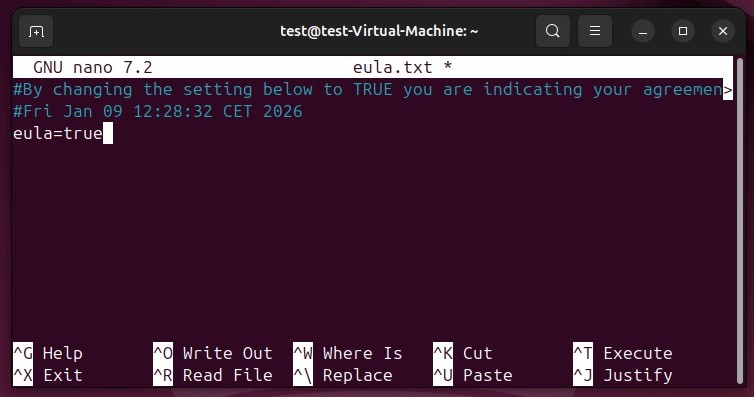
The file used to accept the End User License Agreement (EULA) is then created directly in the current directory. You can open it with the following command:
sudo nano eula.txtYou will find a link to the agreement, which you can copy and open in your browser. After reading the terms, change the entry eula=false to eula=true. Save and close the text file.
Step 5: Configure the server
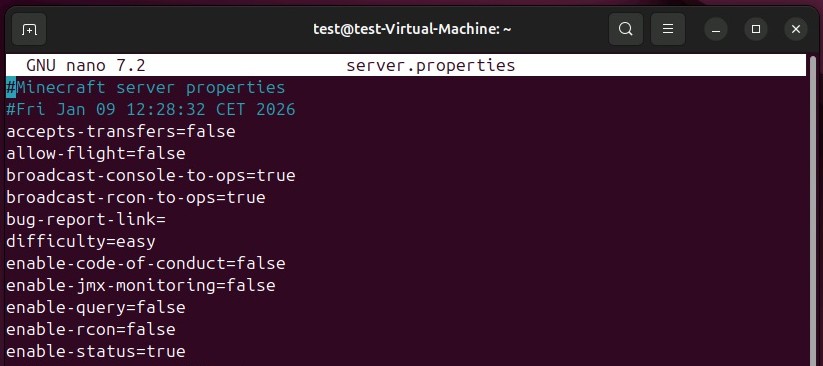
Once you have accepted the licence agreement, you can move on to the configuration file server.properties. This file is also created in the current directory when the server is started for the first time. Open it using the nano text editor:
sudo nano server.propertiesInside the file, you’ll find a basic default configuration that defines settings such as the difficulty level (difficulty) and game mode (gamemode). Adjust these options to suit your needs, then save the file.
Step 6: Start the Minecraft server on Linux
After accepting the EULA and saving your custom server configuration, enter the same command you used in Step 4 to start the Minecraft server on Linux again:
sudo java -Xms1G -Xmx2G -jar server.jar noguiOnce the startup process has completed successfully—which may take a moment—the terminal displays the following message:
[Server thread/INFO]: Done (….s)! For help, type "help"Now type help, and you will get a list of the available server commands.
Step 7: Keep the server session running
Once you have gotten the Minecraft server on Linux up and running, you will of course want it to remain active when you disconnect the remote connection to the server. To make this happen, first leave the screen session using the key combination [Ctrl] + [A] + [D].
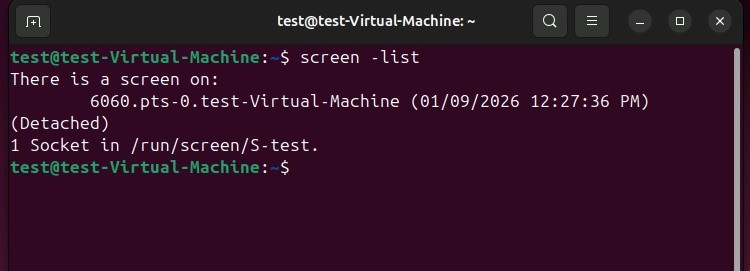
Then run the following command to display all active screen sessions:
screen -listYou will get a list in which you can also find the previously established connection for your Minecraft server, including the preceding session ID. In our case, the ID is ‘6060’:
To keep the session running even after you log off the server, enter the following command in the terminal and replace 6060 with the ID of your screen session:
screen -r 6060You can now close the screen window at any time using the key combination [Ctrl] + [A] + [D] and log off your server without stopping the Minecraft server.
Step 8: Connect to the Minecraft server
Your server is running, and you can now connect to the generated game world at any time. To do this, proceed as follows:
- To do this, start the Minecraft client (Java Edition).
- Select ‘Multiplayer’.
- Click ‘Direct Connection’.
- Enter the IP address of your Minecraft server.
- Finally, click ‘Join Server’.
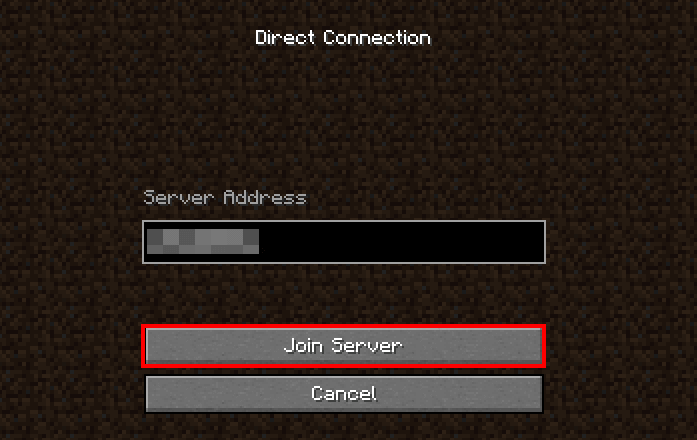
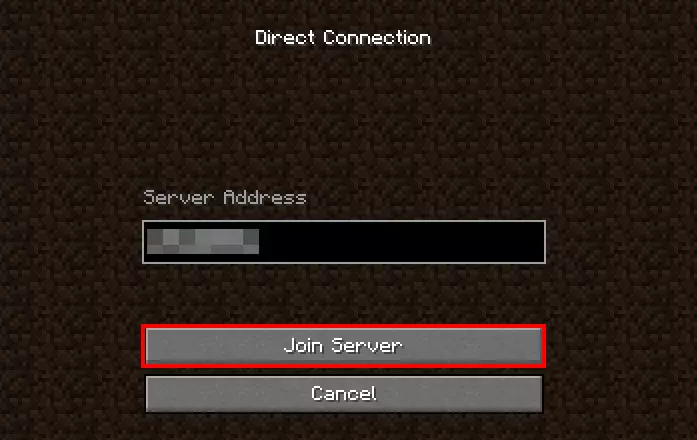
Once the connection is established, you can start playing on your own Minecraft server on Linux.
Make a statement with your own .gg domain and let the games begin.