How to partition a hard drive in Windows 10
It’s not absolutely essential to partition hard drives anymore. Storage devices are now made so that they can be used straight out of the box. However, once you know how it works, partitioning can make it easier to manage your data and increase data security. You’ll need several partitions if you want to install various operating systems on a hard drive. Partitioning is relatively easy with Windows 10. Even less experienced PC users can complete the necessary steps and then enjoy the advantages of an individually configured drive. Follow our step-by-step instructions to partition your hard drive in a few easy clicks.
- Simple registration
- Premium TLDs at great prices
- 24/7 personal consultant included
- Free privacy protection for eligible domains
How to partition your hard drive in Windows 10 – A step-by-step guide
In this tutorial, we assume that you’re using a brand new external hard drive. There shouldn’t be any data on the drive, and there should already be a basic partition labeled “External”. This storage area of about 465 GB will be further divided with a partition.
Opening Disk Management in Windows 10
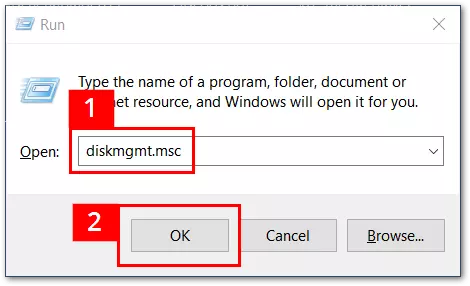
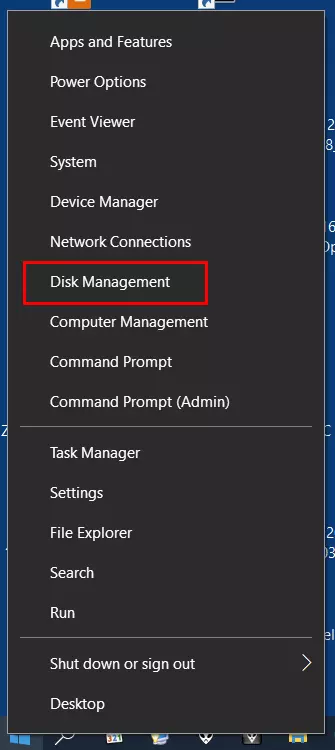
Partitioning a hard drive isn’t particularly difficult. You can easily do it yourself in just a few steps. To start, you’ll need to open Disk Management in Windows 10:
- Press [Win] + [R] simultaneously
- Type “diskmgmt.msc” into the window (Marked 1 on graphic)
- Press [Enter] or click “OK” (Marked 2 on graphic)
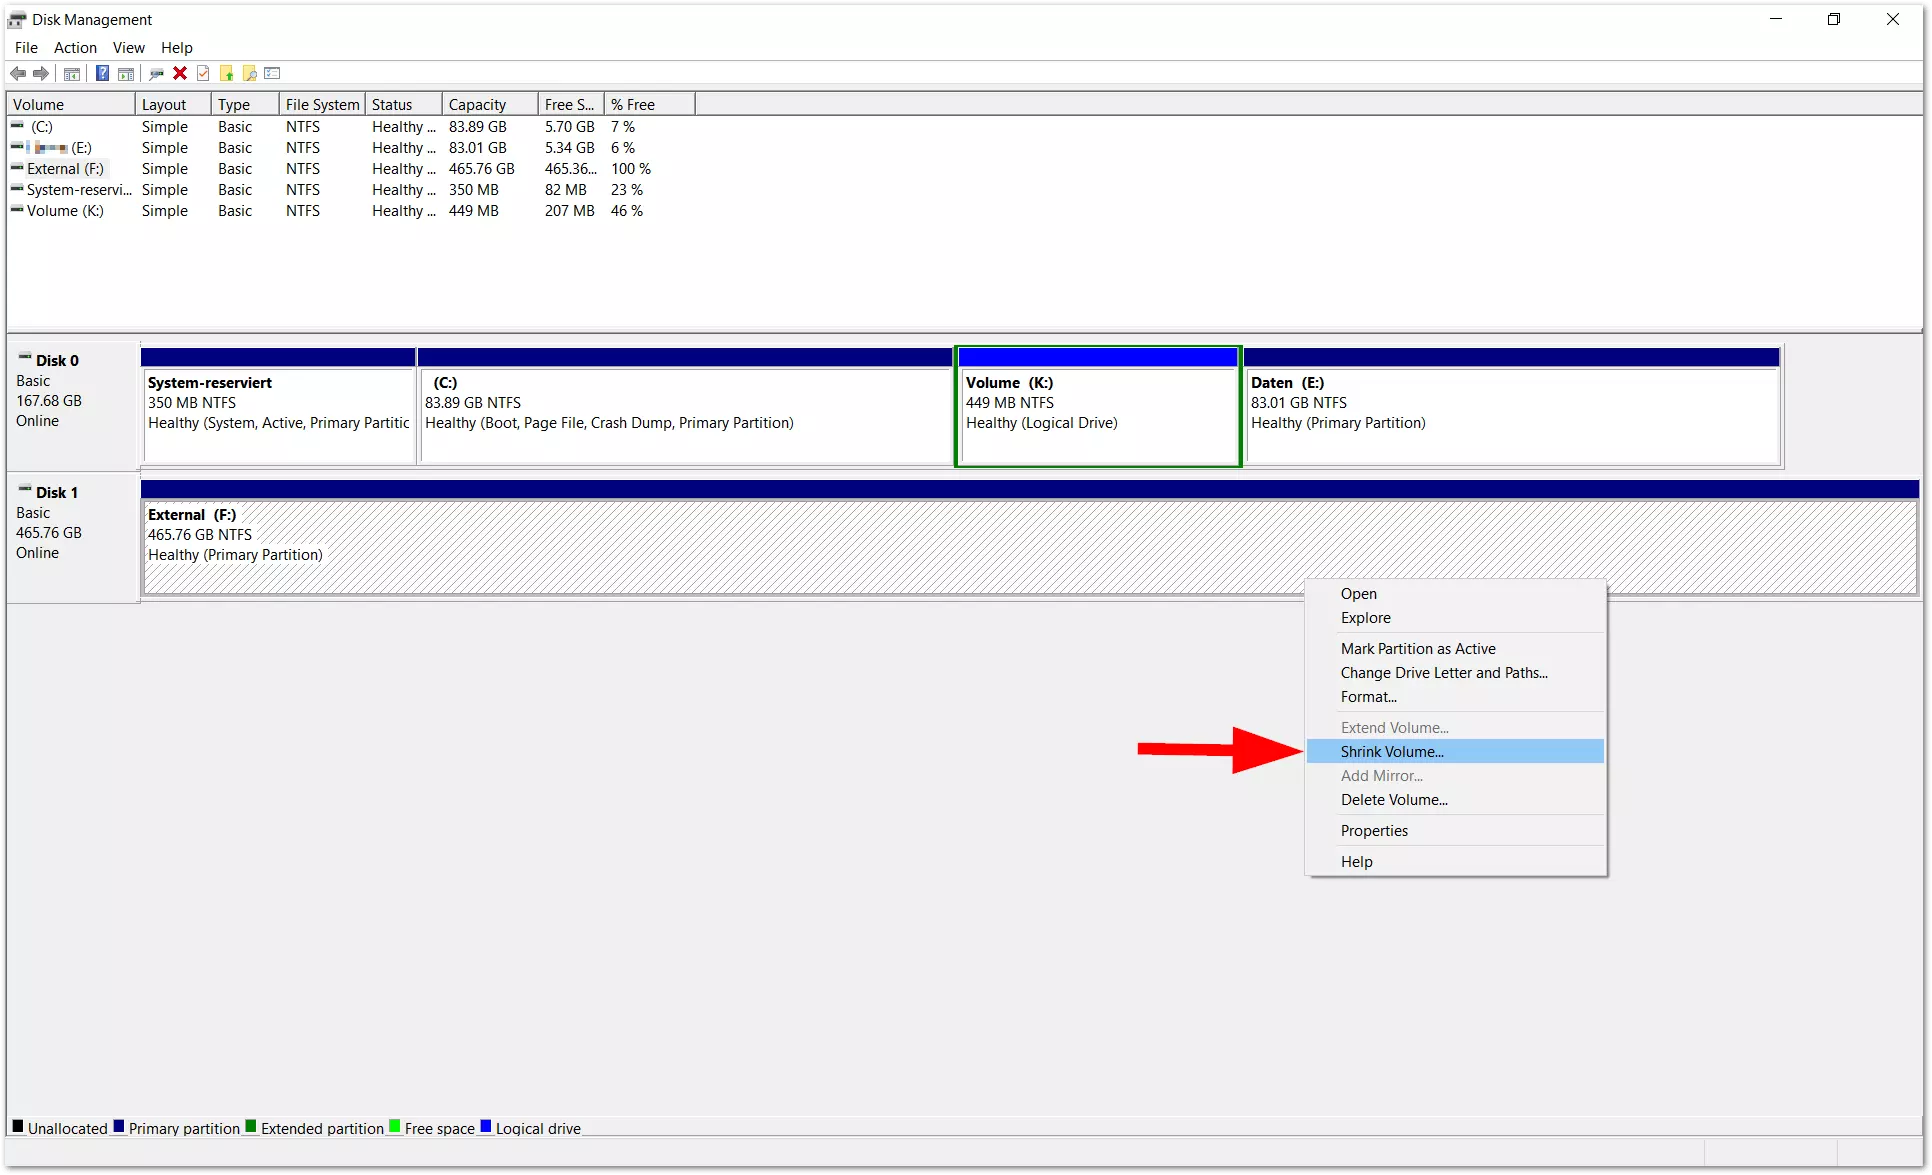
Disk Management will then open, in which all currently connected storage devices are listed. The Windows 10 partition shows up in the internal hierarchy as the first drive (Disk 0), which is typically labeled with “C:”. In addition to the system partition, there are may also be other partitions on the hard drive. Windows will automatically assign a drive letter to them, which can be changed at any time if necessary.
Shrink volume
We want to give the new external hard drive (Disk 1/External) an additional partition for data, which should be around 240 GB (=around 240,000 MB). To make space for the new partition, you’ll want to split the total volume of the disk (in this case around 465 GB) using the menu item “Shrink Volume”. You can get to this menu by right-clicking on Drive 1 (external).
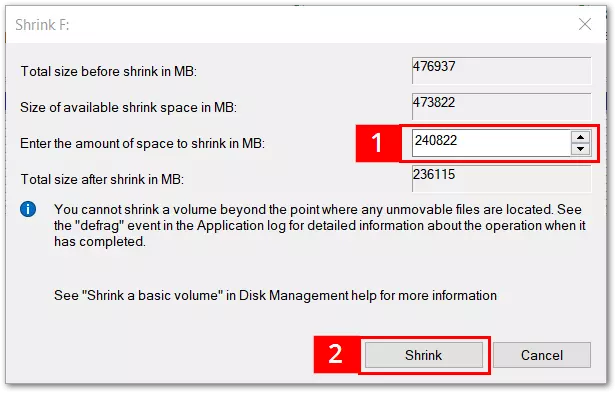
Windows usually shows the maximum amount of available disk space here. If the partition is smaller, this can be defined manually. If the new partition is smaller than suggested by Windows, it will result in unassigned disk space. This can later be assigned (=partitioned).
After you’ve entered your preferred amount of space (see 1), click on the button “Shrink” (see 2). Then the window will close, and Disk Management will show the partition. The final size of the new partition will differ slightly from what you entered in the Shrink window (in this case being around 235,000 MB instead of 236,000).
Create a new simple volume
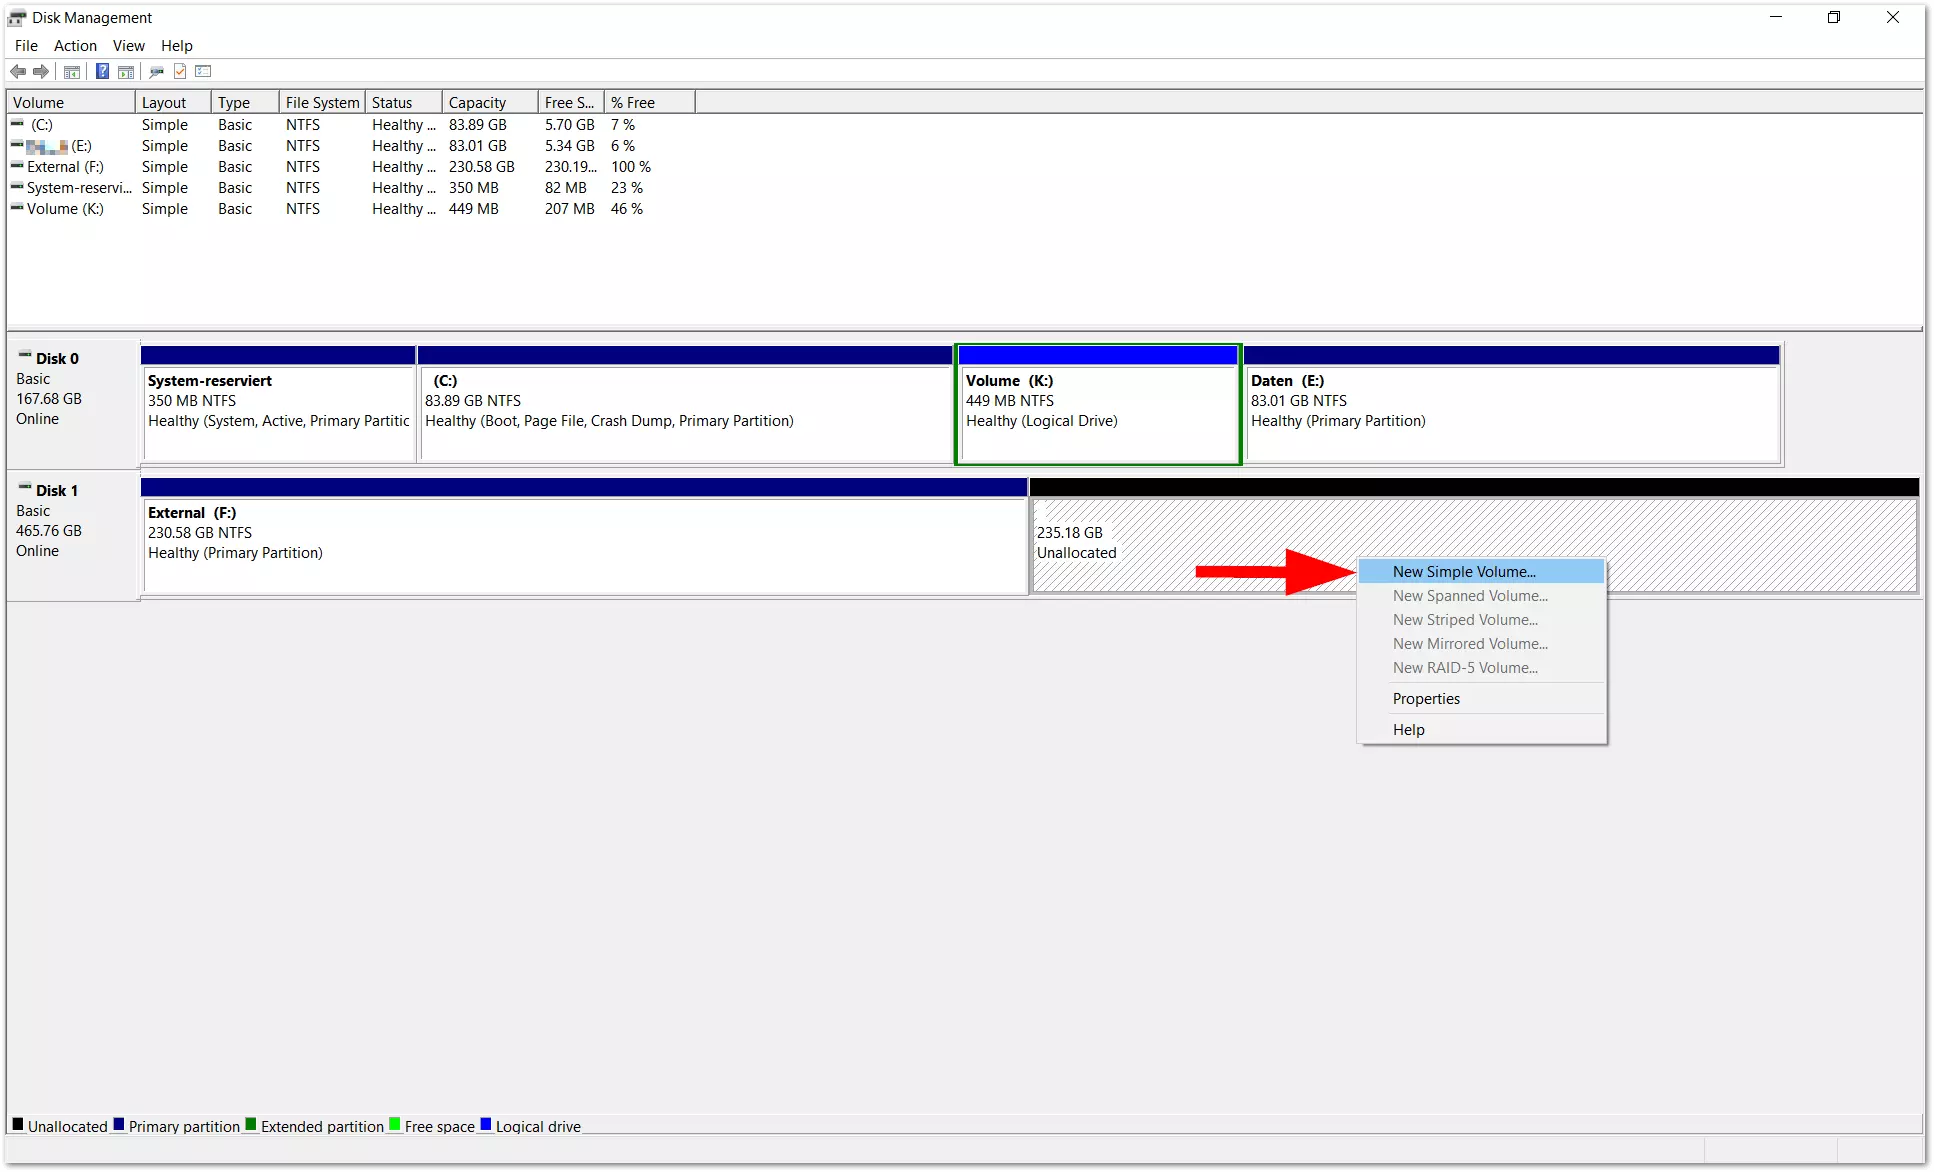
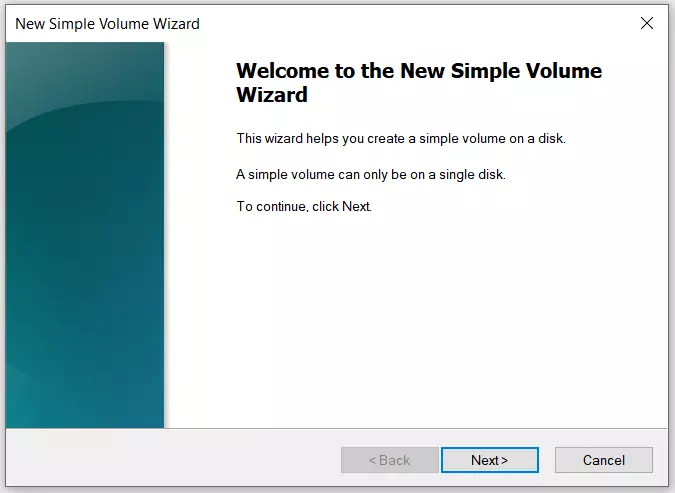
The partitioning process isn’t over yet. To use the partition with Windows Explorer, you’ll have to assign the new storage area another volume with its own drive letter. To do this, right-click on the shaded (unassigned) area and choose the entry “New Simple Volume” from the menu.
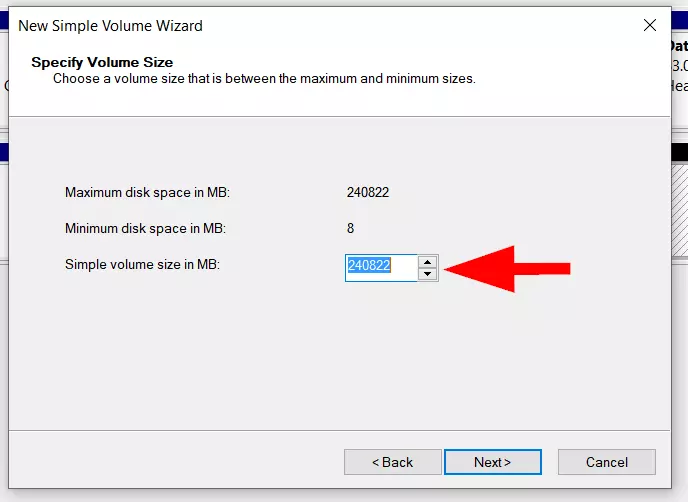
In the next step, you can specify the size of the volume. If you want to assign the volume all the available disk space, you don’t have to change anything. But you can also set up several volumes/partitions; if you want to do this, enter a smaller value here (e.g., 120,000).
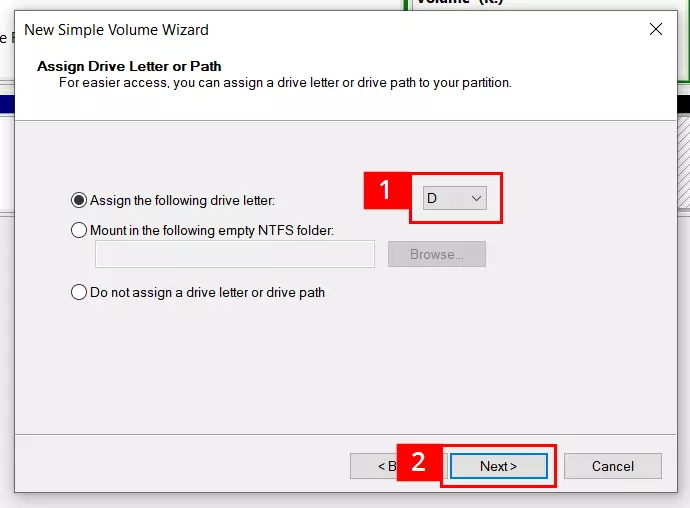
Now it’s time to assign a drive letter. In this example, we chose the letter D from the list of suggestions (see 1). Letters that are already being used by other drives don’t appear in the list. (If necessary, though, you can switch out most letters in Disk Management.) If you don’t change anything, Windows will use the pre-suggested letter. Once you’re done, click “Next” (see 2).
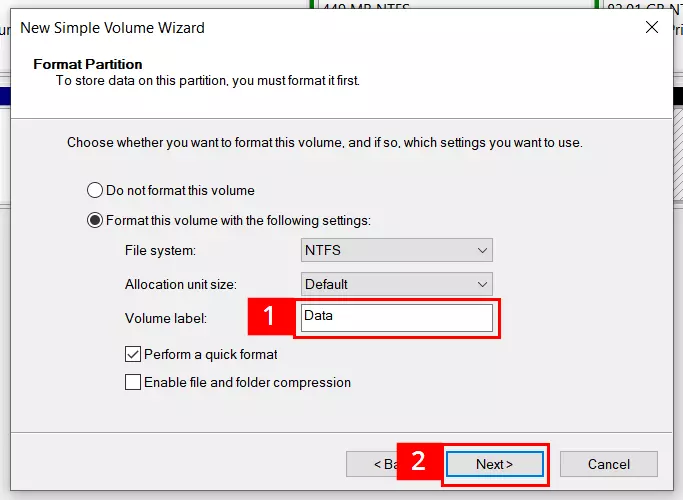
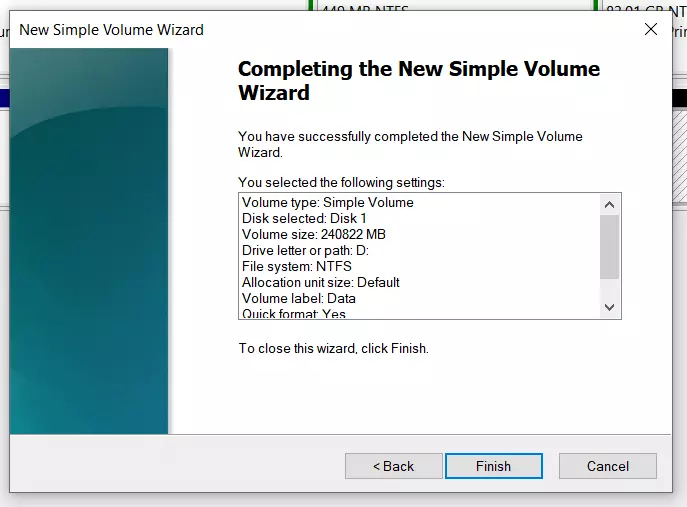
The next step is to name the volume. We delete the default entry “Volume” and replace it with the name “Data” (see 1). It’s also possible to specify a different file system here. If you’re working with an internal hard drive or external storage device that primarily works with Windows PCs, you can stick with the preset NTFS file system. When you’re finished, click “Next”.
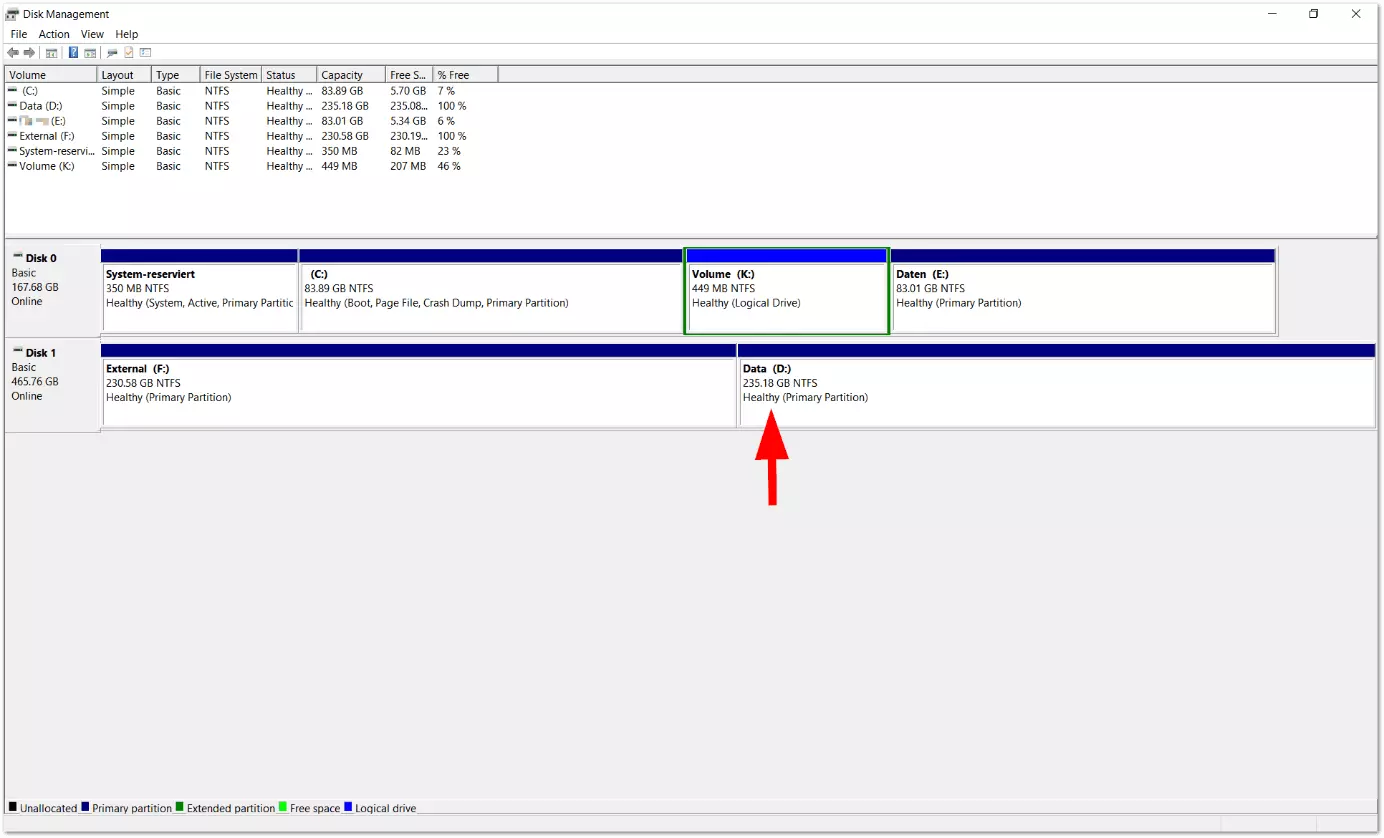
The wizard then closes, and you’ll end up back in the default Disk Management window. You should see the result of the configuration: The volume labeled “Data” was successfully set up. If necessary, you can further divide any of the volumes shown here.
Hard drive without partitioning
In this case, you can go directly to the section “Create a new simple volume” above and start the tutorial from there.
