Install and Run Joomla on an NGINX Server
This tutorial includes step-by-step instructions for installing Joomla on an NGINX server.
Joomla is a popular and award-winning content management system (CMS) which has won over millions of users thanks to its extensibility and ease-of-use. NGINX is a web server which offers high performance and stability coupled with a streamlined design and simple architecture.
Requirements
- A server running Linux (Ubuntu 16.04)
- NGINX installed and running.
- PHP version 5.3.3 or newer.
- MySQL 5.5.3+ or MariaDB 10.1+ (not compatible with MySQL 6+)
Thanks to free starting credit, you can test the IONOS cloud server for 1 month free of charge (or until the credit is used up) and experience the perfect combination of performance and security!
Verify Server Requirements
Joomla has a number of server requirements for installing the latest version (3.x). Most up-to-date servers running Linux will meet or exceed all of Joomla's requirements, but it is wise to check these before you install Joomla.
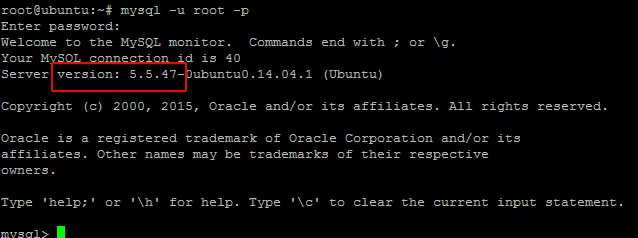
Check the MySQL/MariaDB Version
To check your version of MySQL/MariaDB, log into the client with the command:
sudo mysql -u root -pCheck the PHP Version
You can check your PHP version with the command:
php -vIn this example, the server is running PHP version 7.0.8:
user@localhost:# php -v
PHP 7.0.8-0ubuntu0.16.04.3 (cli) ( NTS )
Copyright (c) 1997-2016 The PHP Group
Zend Engine v3.0.0, Copyright (c) 1998-2016 Zend Technologies
with Zend OPcache v7.0.8-0ubuntu0.16.04.3, Copyright (c) 1999-2016, by Zend Technologies
Connect NGINX to PHP-FPM with FastCGI
In order to run Joomla, you will need to use FastCGI to connect NGINX to PHP-FPM. FastCGI is included with a standard NGINX installation. You can verify this by examining the /etc/nginx/fastcgi_params file:
more /etc/nginx/fastcgi_paramsThis file should read:
fastcgi_param   QUERY_STRING            $query_string;
fastcgi_param   REQUEST_METHOD          $request_method;
fastcgi_param   CONTENT_TYPE            $content_type;
fastcgi_param   CONTENT_LENGTH          $content_length;
fastcgi_param   SCRIPT_FILENAME         $document_root$fastcgi_script_name;
fastcgi_param   SCRIPT_NAME             $fastcgi_script_name;
fastcgi_param   PATH_INFO               $fastcgi_path_info;
fastcgi_param       PATH_TRANSLATED         $document_root$fastcgi_path_info;
fastcgi_param   REQUEST_URI             $request_uri;
fastcgi_param   DOCUMENT_URI            $document_uri;
fastcgi_param   DOCUMENT_ROOT           $document_root;
fastcgi_param   SERVER_PROTOCOL         $server_protocol;
fastcgi_param   GATEWAY_INTERFACE       CGI/1.1;
fastcgi_param   SERVER_SOFTWARE         nginx/$nginx_version;
fastcgi_param   REMOTE_ADDR             $remote_addr;
fastcgi_param   REMOTE_PORT             $remote_port;
fastcgi_param   SERVER_ADDR             $server_addr;
fastcgi_param   SERVER_PORT             $server_port;
fastcgi_param   SERVER_NAME             $server_name;
fastcgi_param   HTTPS                   $https;
# PHP only, required if PHP was built with --enable-force-cgi-redirect
fastcgi_param   REDIRECT_STATUS         200;
If this file is in order, the next step is to add the FastCGI configuration to the NGINX configuration file for the domain on which you are installing Joomla.
In most cases, the domain's configuration file will be located in /etc/nginx/sites-available/example.com.conf on Ubuntu (with example.com replaced with your domain name). Edit this file:
sudo nano /etc/nginx/sites-available/example.com.confUncomment these lines (if the configuration file was copied from the default) or add the following code to the server block:
location ~ \.php$ {
            include snippets/fastcgi-php.conf;
            fastcgi_pass unix:/run/php/php7.0-fpm.sock;
    }
After adding the new section, it will look like this:
server {
    listen       80;
    server_name  example.com;
    root /usr/share/nginx/example.com/html/;
    index index.php index.html index.htm;
}
Save and exit the file, then restart NGINX:
sudo nginx -s reloadNext, test the connection by creating a file named test.php in the NGINX document root:
sudo nano /usr/share/nginx/example.com/html/test.phpPut the following content into this file:
<?php var_export($_SERVER)?>Save and exit the file, then view it in a browser. If the connection to PHP-FM is working, you should see text output in your browser similar to:
array ( 'USER' => 'www-data', 'HOME' => '/var/www', 'HTTP_CACHE_CONTROL' => 'max-age=0', 'HTTP_UPGRADE_INSECURE_REQUESTS' => '1', 'HTTP_CONNECTION' => 'keep-alive', 'HTTP_COOKIE' => 'Drupal.toolbar.collapsed=0; _ga=GA1.2.1098258524.1476830307', 'HTTP_ACCEPT_ENCODING' => 'gzip, deflate', 'HTTP_ACCEPT_LANGUAGE' => 'en-US,en;q=0.5', 'HTTP_ACCEPT' => 'text/html,application/xhtml+xml,application/xml;q=0.9,*/*;q=0.8', 'HTTP_USER_AGENT' => 'Mozilla/5.0 (Windows NT 10.0; WOW64; rv:49.0) Gecko/20100101 Firefox/49.0', 'HTTP_HOST' => 'ubuntu.oxnardindustries.com', 'REDIRECT_STATUS' => '200', 'SERVER_NAME' => 'ubuntu.oxnardindustries.com', 'SERVER_PORT' => '80', 'SERVER_ADDR' => '50.21.182.126', 'REMOTE_PORT' => '61760', 'REMOTE_ADDR' => '45.48.69.102', 'SERVER_SOFTWARE' => 'nginx/1.10.0', 'GATEWAY_INTERFACE' => 'CGI/1.1', 'REQUEST_SCHEME' => 'http', 'SERVER_PROTOCOL' => 'HTTP/1.1', 'DOCUMENT_ROOT' => '/usr/share/nginx/ubuntu.oxnardindustries.com/html', 'DOCUMENT_URI' => '/test.php', 'REQUEST_URI' => '/test.php', 'SCRIPT_NAME' => '/test.php', 'CONTENT_LENGTH' => '', 'CONTENT_TYPE' => '', 'REQUEST_METHOD' => 'GET', 'QUERY_STRING' => '', 'SCRIPT_FILENAME' => '/usr/share/nginx/example.com/html/test.php', 'PATH_INFO' => '', 'FCGI_ROLE' => 'RESPONDER', 'PHP_SELF' => '/test.php', 'REQUEST_TIME_FLOAT' => 1478468241.011425, 'REQUEST_TIME' => 1478468241, )After your test is complete, delete this file:
sudo rm /usr/share/nginx/example.com/html/test.phpDownload and Unpack the Joomla Software
Install the unzip utility:
sudo apt-get install unzipGo to your website's document root:
cd /usr/share/nginx/example.com/htmlDownload the current release from the Joomla website by using the command:
sudo wget [download URL]To find the download URL, visit the current release page on the Joomla website. Copy the "Full Package" URL. You can paste it into the command line by clicking Shift + Insert.
For example, to download the current stable release as of this article's publication (Joomla 3.6.4) the command is:
sudo wget https://downloads.joomla.org/cms/joomla3/3-6-4/joomla_3-6-4-stable-full_package-zip?format=zipUnpack this file with the command:
sudo unzip [file name]You can use tab completion to make this process easier. Type sudo unzip joomla then hit Tab. The shell will automatically fill out the rest of the file name on the command line.
For example, to unzip the file downloaded above, the command is:
sudo unzip joomla_3-6-4-stable-full_package-zip\?format\=zipAfter the contents of the Drupal file have been unpacked, set the ownership of the files to the Apache user:
sudo chown -R www-data:www-data *Create the Database
Before installing Joomla, you will need to create a database. Log in to MySQL/MariaDB with the command:
sudo mysql –u root –pAfter you enter the MySQL/MariaDB root user password, you will be logged into the MySQL/MariaDB client.
Create a database with the command:
create database [database name];Replace [database name] with the name you want to use for your new database. For example, if you wanted to name your database my_joomla_site the command would be:
create database my_joomla_site;Create a user for this database and grant them privileges with the command:
grant all on [database name].* to [database username]@localhost identified by '[database user password]';Replace:
- [database name] with the name of your database.
- [database username] with the username you want to create for your database.
- [database user password] with a password for this user. Note: Be sure to give the user a strong password.
For example, to create a user named my_joomla_user with the password Fr4i*Re!2 and give the user privileges on the my_joomla_site database, the command would be:
grant all on my_joomla_site.* to my_joomla_user@localhost identified by 'Fr4i*Re!2';Once you have finished, exit the database with the command:
quit;Install Joomla
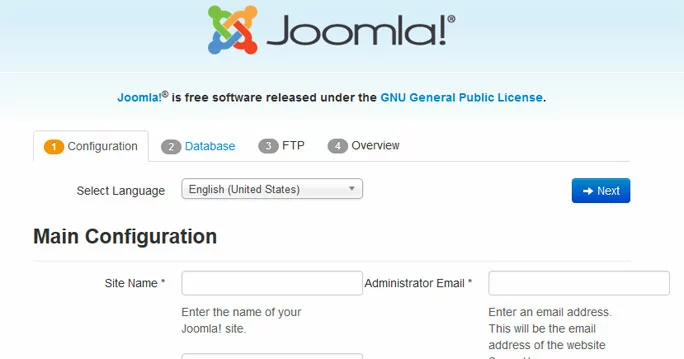
To complete the installation, switch to a web browser and go to your website. You will see the Joomla installation page.
Fill out the following fields:
- Site Name
- Administrator Email
- Administrator Username
- Administrator Password (twice)
Then click Next to go to the Database Configuration page.
On this page, fill out the following fields:
- Database Type: MySQLi
- Host Name: Localhost
- Username: The user you created for the database in the previous step.
- Password: The password for the database user.
- Database Name: The name of the database you created in the previous step.
- Table Prefix: Use the default, or specify one if you prefer.
- Old Database Process: Backup
Then click Next to go to the FTP Configuration page.
On this page, set the following:
- Enable FTP Layer: Yes
- FTP Username: Leave blank
- FTP Password: Leave blank
- FTP Host: 127.0.0.1
- FTP Port: 21
- Save FTP Password: No
Then click Next to go to the final installation page. Here you can review all your choices and make changes if necessary.
When you are sure that all of the information is correct, click Install to complete the installation.
After the installation has completed, click the yellow Remove installation folder button to remove the installation folder so that you can proceed.
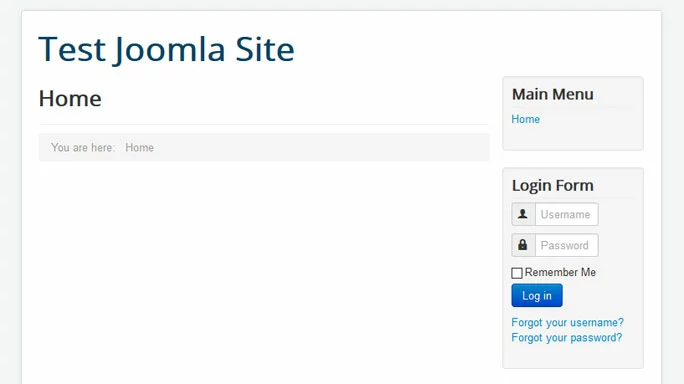
Go to your main website page and verify that Joomla has installed correctly.
From here, you can log into Joomla using the Administrator username and password which you set in the installation process.


