How to set up an ARK Survival Ascended Server
Setting up a dedicated ARK: Survival Ascended server on Windows can be done in just a few steps, and you don’t need advanced IT skills to do it.
What are the system requirements?
Before you start setting up your dedicated ARK: Survival Ascended server, make sure that your system meets the following requirements:
- CPU: To host your own ARK: Survival Ascended server, you need a powerful processor. This means you need a processor with at least four cores.
- RAM: Since ARK: Survival Ascended is a game that requires a lot of memory, your server should have a sufficient amount of RAM. You’ll need to have at least 16 GB for the server.
- Disk space: To accommodate all of your game data and your server’s operating system, you’ll need a large amount of disk space. You should plan for at least 200 GB of storage.
- Bandwidth: A stable internet connection and a good internet speed are essential for a smooth multiplayer gaming experience. For professional server providers like IONOS, providing this is par for the course. A broadband connection of up to 400 Mbps is always available.
- Operating system: If you want to run your server with Windows, you’ll need to decide which version you want to use. Since ARK: Survival Ascended was created with the Unreal 5 Engine, you should use Windows Server 2019 or a newer version of the operation system.
It’s important to keep in mind that the number of players has a significant influence on the server requirements. This is especially true for the RAM requirement, which increases with more players.
What types of servers does IONOS offer?
Before you can set up your ARK server, you need to decide which type of server you want to use. At IONOS, there are three different models you can choose from:
- Cloud server: Cloud servers from IONOS make use of hardware virtualization, allowing you to flexibly scale the computing power and adjust it depending on your needs at any time. Billing is done by the minute, so you only pay for the computing resources that you actually use.
- vServer (VPS): The vServers or virtual private servers (VPS) from IONOS are also derived from virtualized computing resources. Here you choose a plan that comes with a predefined set of server resources, which you pay a fixed monthly fee for. You also have the possibility to tailor your plan to your individual needs.
- Dedicated server: A dedicated server provides you with access to dedicated enterprise-grade hardware that is reserved exclusively for you. You don’t need to share resources with other users, as all the server resources are only for your use. Similar to plans for cloud servers from IONOS, you are billed by the minute and only pay for what you use.
Try out your VPS for 30 days. If you're not satisfied, you get your money back.
Step-by-step instructions for setting up an ARK: Survival Ascended server
You can set up a dedicated ARK: Survival Ascended-Servers on Windows in just a few steps.
Step 1: Open the ports
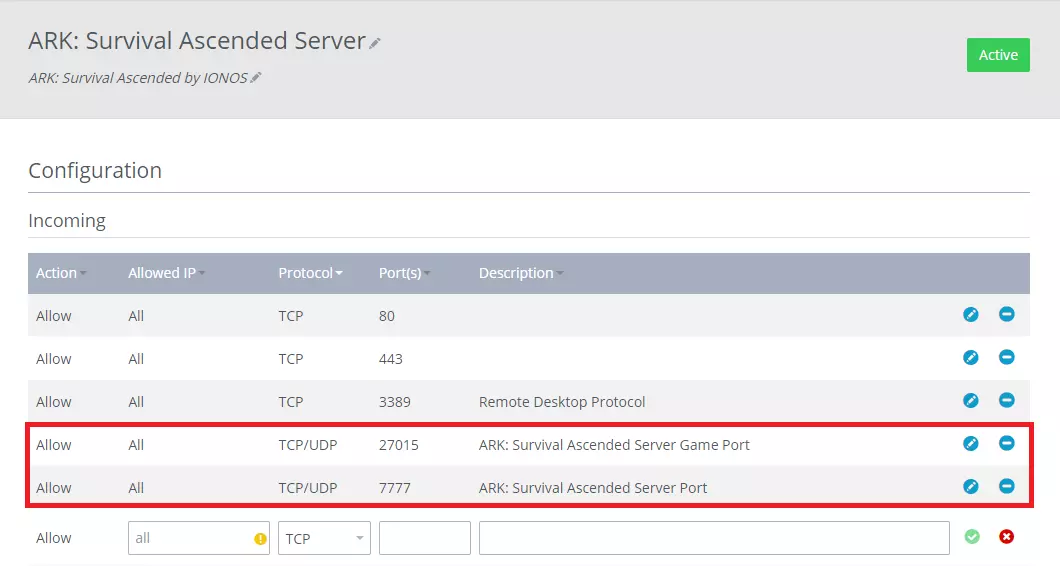
The first thing you need to do is open the relevant ports. These are ports 7777 und 27015.
The process for opening ports differs amongst hosting providers. With IONOS, you can do this in the Cloud Panel. You can add the port rules you need for your server under Network > Firewall Settings with just a few clicks.

Step 2: Install the required files
After connecting to your Windows server, you need to install SteamCMD and the server files for your ARK: Survival Ascended server. If you don’t have these files installed, you won’t be able to start the server. First, you need to create a folder named SteamCMD and another folder named ASAServer.
Now create a new file and name it start.bat. Then copy the following text into the file:
@echo off
set STEAMCMDDIR="C:\SteamCMD\"
set SERVERDIR="C:\ASAServer\"
set ARKAPPID=2430930
cd /d %STEAMCMDDIR%
del steamcmd.exe
timeout /t 5 /nobreak
curl -o steamcmd.zip https://steamcdn-a.akamaihd.net/client/installer/steamcmd.zip
powershell Expand-Archive -Path .\steamcmd.zip -DestinationPath .\
start "" /wait steamcmd.exe +force_install_dir "%SERVERDIR%" +login anonymous +app_update %ARKAPPID% validate +quit
cd /d %SERVERDIR%
start ShooterGame\Binaries\Win64\ArkAscendedServer.exe TheIsland_WP?listen?SessionName=<servername>?Port=7777?QueryPort=27015?ServerPassword=<serverpassword> -WinLiveMaxPlayers=50 -log
exitThis shell script ensures that the server files you need for your ARK: Survival Ascended server are downloaded, and that the server starts. There are just two adjustments that you need to make to the script (changing the third one is optional):
- Server name: First, you need to enter the name that you want to use for the server where
<servername>appears in the script. - Server password: You also need to create a server password and replace
<serverpassword>with the password you have chosen. - Maximum number of players: With the variable WinLiveMaxPlayers, you can specify the maximum number of players that are allowed to access your server. In the example above, we have decided to set the limit at 50 players. Remember that you need to have sufficient hardware resources to support the number of players you decide to let use your server.
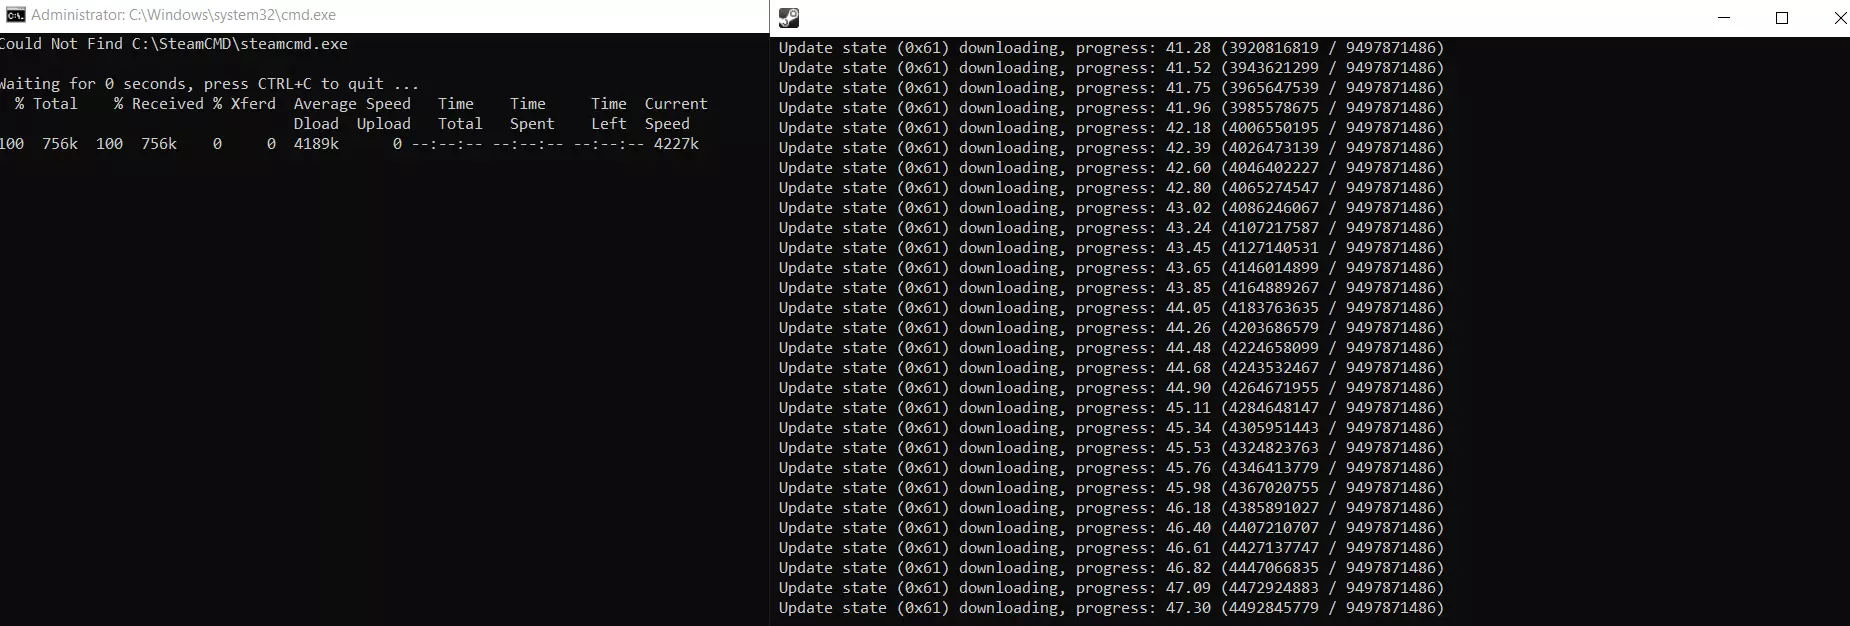
After you have made the necessary adjustments, you can run the script by double-clicking on the file. The download process will start in two command-line windows and may take some time.

Step 3: Configure your ARK: Survival Ascended server
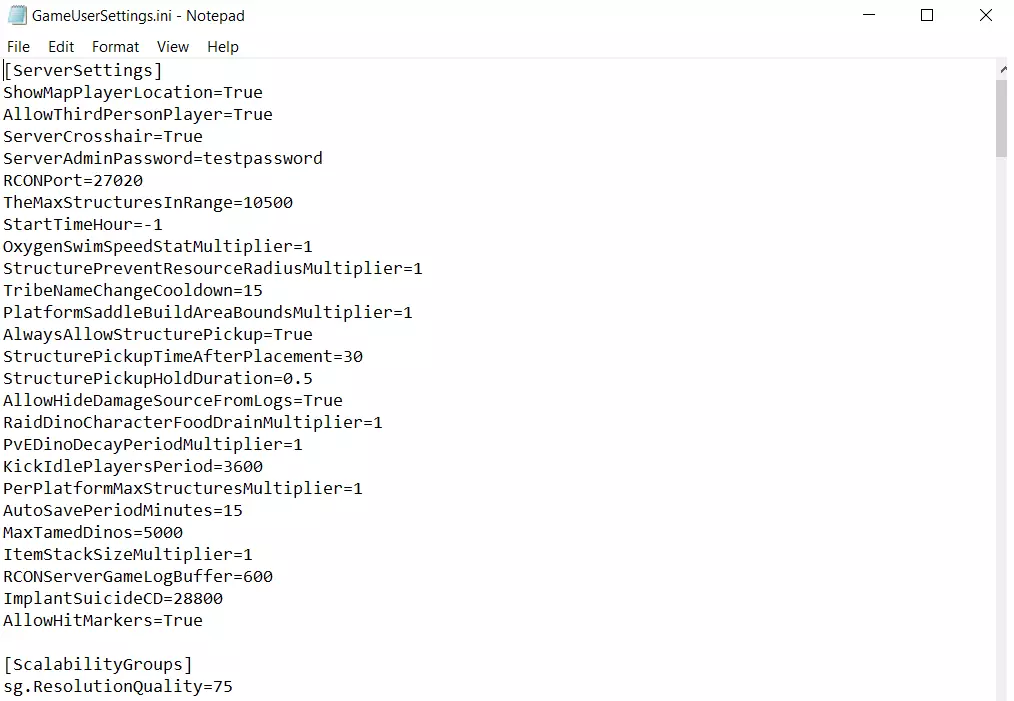
Once all the files are downloaded, you can begin configuring your ARK: Survival Ascended server. For this, you need to edit the Game.ini and GameUserSettings.ini files. These are usually located here: C:\ASAServer\ShooterGame\Saved\Config\WindowsServer. If you are unable to find the files, you can create them yourself.
In the configuration files, you can set various settings. For example, you can specify how often (in minutes) the game should autosave.

Step 4: Start the server
Now, you can start your own ARK: Survival Ascended server. To do this, run the start.bat file. After a few moments, you should see a line informing you that the ARK: Survival Ascended server has been successfully started:

If the terminal closes immediately after starting the shell script, make sure you are running the start.bat file as an administrator.
Step 5: Establish a connection to your ARK: Survival Ascended server
Once your server is up and running, you and your fellow players can connect to it. To do this, search for the server name you created in the server menu of ARK: Survival Ascended. Make sure that you have selected the option to display password-protected servers as well.

Now select your server from the list and connect to it. During this process, you’ll be prompted to enter a password. Enter the password that you designated as the server password in the start.bat file. Now you are ready to enjoy the game with your friends.

If you want, you can also connect your ARK: Survival Ascended-Server to a domain. Use IONOS Domain Checker to see if the domain you want is available.

