

Setting up a Docker Repository

Learn how to store your Docker images, either with a self-hosted local registry, or using a Docker Hub repository. This will allow you to store and organize your Docker images, and to share images among multiple teams.
"Registry" versus "Repository".
A repository is a place where data is actually stored. A registry is a collection of pointers to that data.
For example, a library's card catalog is the registry you would consult to find the location of the book you need. The library's actual bookshelves are its repository.
- Secures data transfers
- Avoids browser warnings
- Improves your Google ranking
Requirements
- Basic knowledge of Docker usage and commands.
- Docker installed and running on your system.
- An internet connection.
If you set up a self-hosted repository and choose to make it accessible from the internet, you will also need:
- A functioning domain name (URL).
- An SSL certificate.
Setting up a self-hosted Docker Registry
Docker provides a built-in registry server. The registry server runs in a container which you can start with the docker run command.
For example, to start a registry server named "my-registry" the command would be:
sudo docker run -d -p 5000:5000 --name my-registry registry:2If you are using a firewall, you may need to open access to port 5000.
Pushing an image to your self-hosted Registry
The first step to using your self-hosted registry is to tag a Docker image for that registry using the docker tag command:
sudo docker tag [image name] localhost:5000/[image name]For example, to re-tag the image my-nginx for your self-hosted registry, the command would be:
sudo docker tag my-nginx localhost:5000/my-nginxYou can then push this image to your registry with the command:
sudo docker push localhost:5000/[image name]To push the image we created in the example above, the command would be:
sudo docker push localhost:5000/my-nginxPulling an image from your self-hosted Registry
The command to pull an image from your registry is:
sudo docker pull localhost:5000/[image name]For example, to pull the image we created in the example above, the command would be:
sudo docker pull localhost:5000/my-nginxStopping and deleting your self-hosted Registry
If you make a mistake or simply want to stop and remove the registry you have created, along with all the images stored there, use the command:
sudo docker stop [repository name] && docker rm -v [repository name]For example, to stop and delete the registry we created above named my-registry the command would be:
sudo docker stop my-registry && docker rm -v my-registryAllowing outside access to your self-hosted Registry
Before you begin sharing your private registry, you will need to secure access with TLS using an SSL certificate.
Create a directory named certs in your Docker root directory. On most systems, this will be the /var/lib/docker directory:
sudo mkdir /var/lib/docker/certsName your SSL certificate (cert) file domain.crt and your SSL key file domain.key. Place both files into the /var/lib/docker/certs directory.
If you are updating an existing self-hosted registry, you will need to stop it with the command:
sudo docker stop [repository name]Start (or restart) your self-hosted registry with the command:
sudo docker run -d -p 5000:5000 --restart=always --name my-registry -v `pwd`/certs:/certs -e REGISTRY_HTTP_TLS_CERTIFICATE=/certs/domain.crt -e REGISTRY_HTTP_TLS_KEY=/certs/domain.key registry:2Accessing your self-hosted registry from another host
To access your registry from another host, use [your domain]:5000/[image name].
For example, to push an image named my-nginx to a registry hosted at example.com first you will need to tag the image:
sudo docker tag my-nginx example.com:5000/my-nginxYou can then push the image with the command:
sudo docker push example.com:5000/ubuntuTo pull the same image from that registry, use the command:
sudo docker pull example.com:5000/ubuntuSetting up a Docker Hub Repository
The Docker Hub website is a convenient place to store and organize your Docker images in the cloud. You can use this site to host your own public or private repository, manage user access to the repository, and access the repository from anywhere online.
Official images
Docker Hub is also an excellent place to browse public Docker images. Be aware that only repositories marked "Official" contain the official versions of the images.
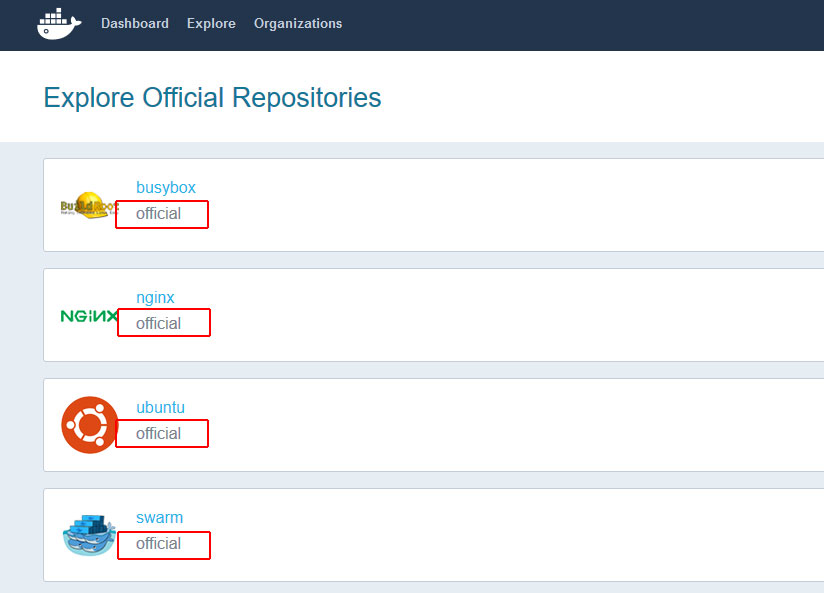
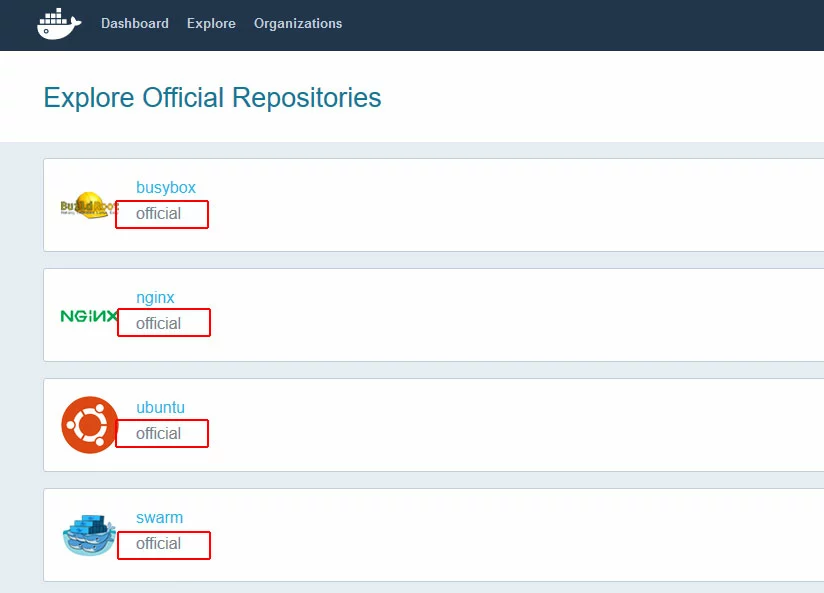
We recommend that you only pull and run official Docker images.
Creating a Docker Hub account
To begin, you will need to set up a Docker Hub account. Fill out your account details on the main Docker Hub website and click Sign Up.
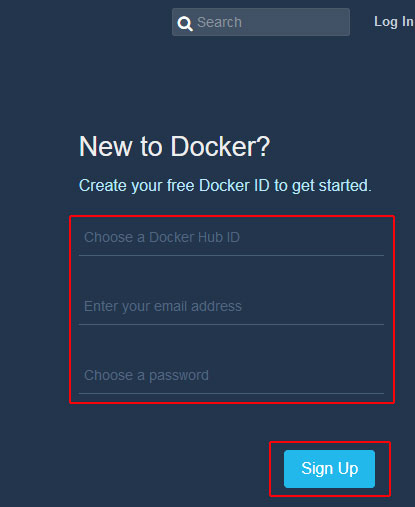
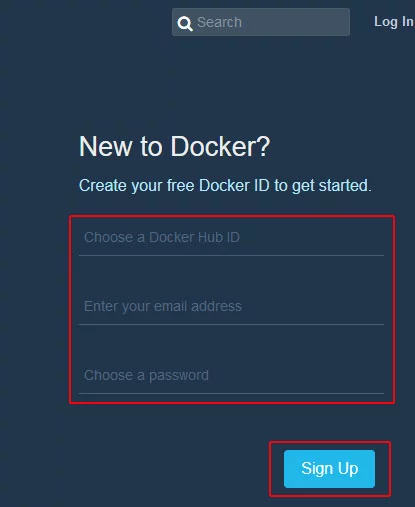
Check your email account for a message to complete your account activation, then sign into the site.
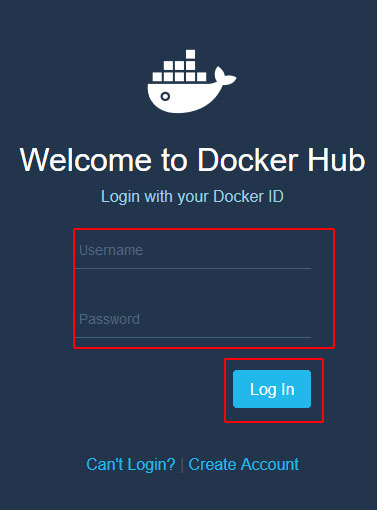
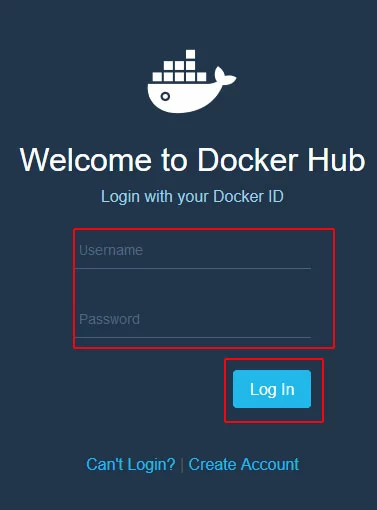
Every Docker Hub account can create a number of free public repositories. Each account also comes with one free private repository. You can purchase more private repositories for a monthly fee.
Setting up an organization and teams
Docker Hub lets you set up organizations and teams in order to manage a number of users. This is convenient if you have several different groups of people, and you need to manage their permissions separately.
The three access levels are:
- Read (can only pull images, not push them)
- Write (can both pull and push images)
- Admin (can pull and push images, as well as add and delete users)
Creating an Organization
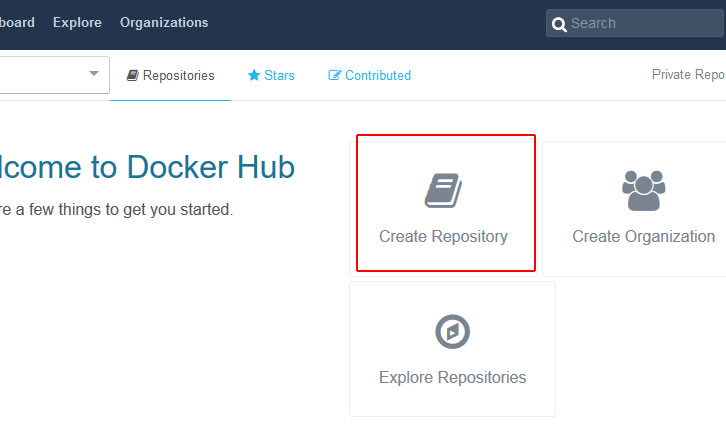
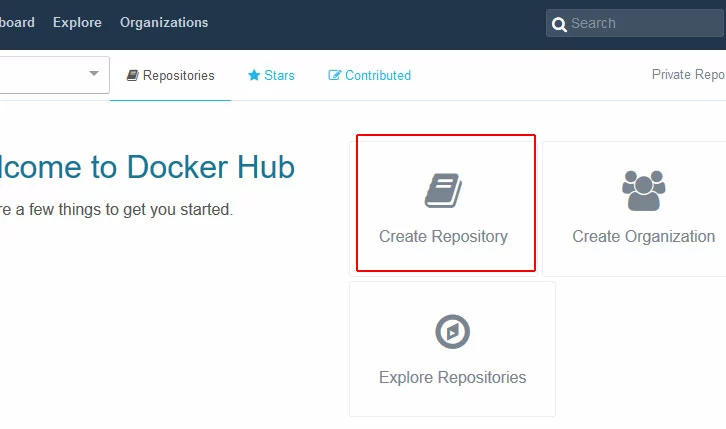
On the main Docker Hub Dashboard, click Create Organization.
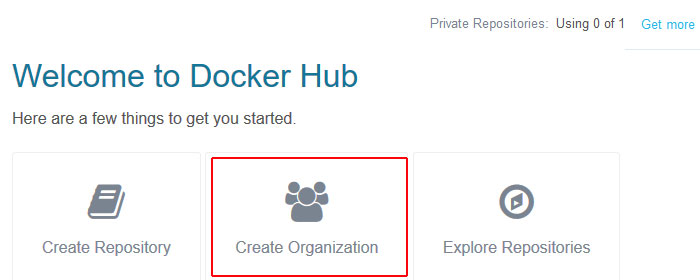
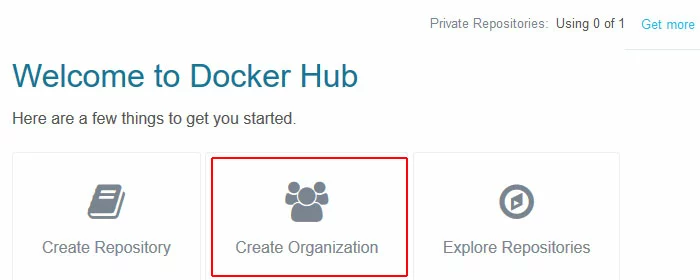
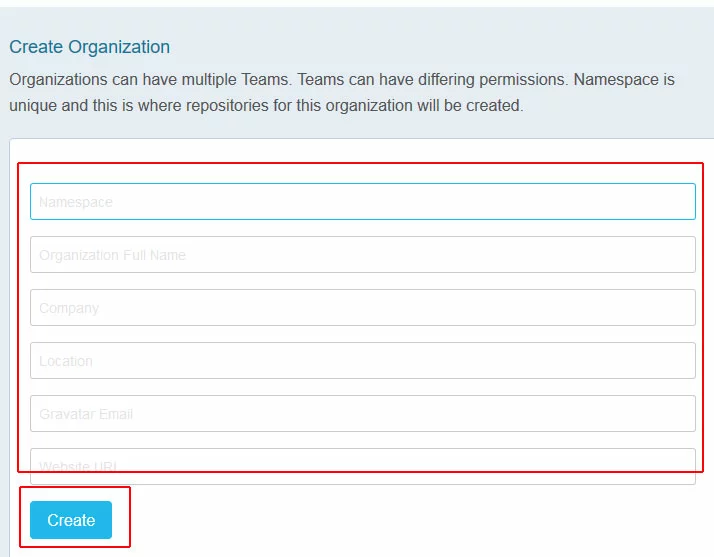
Fill out the organization's details, then click Create.
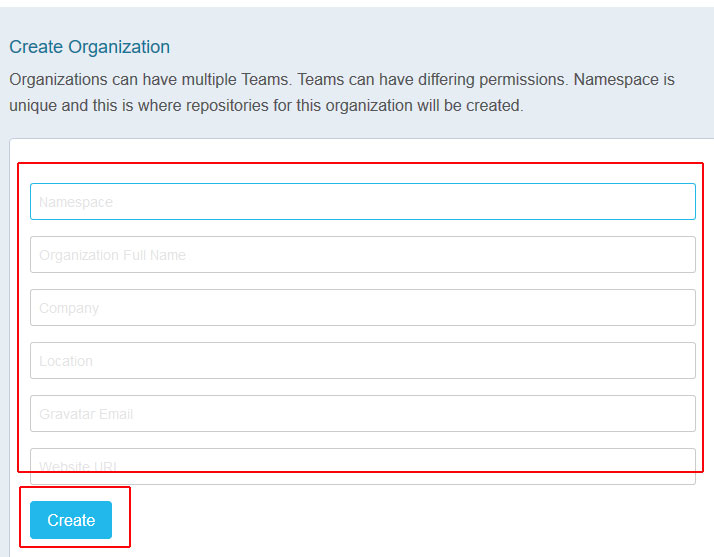
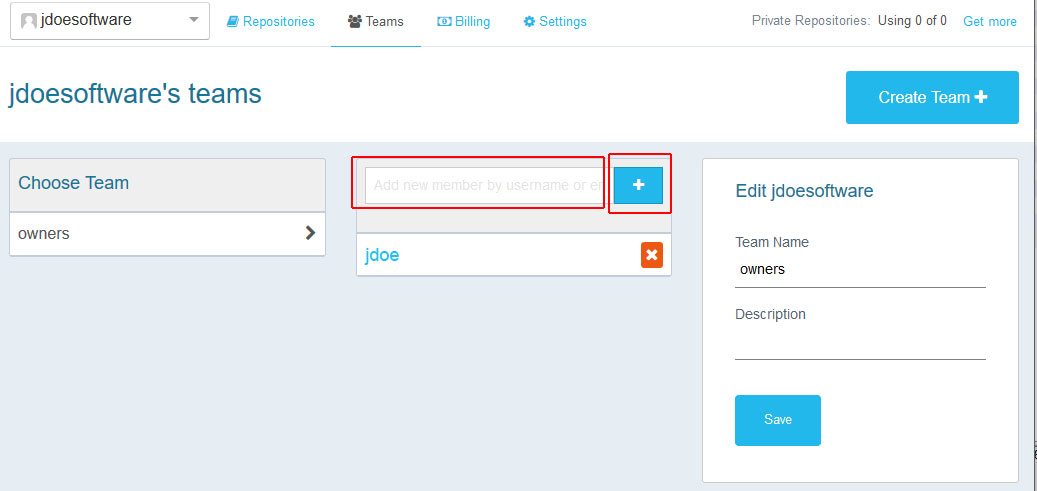
Every organization starts out with one default team, called Owners. You are automatically added to Owners when you create the organization.
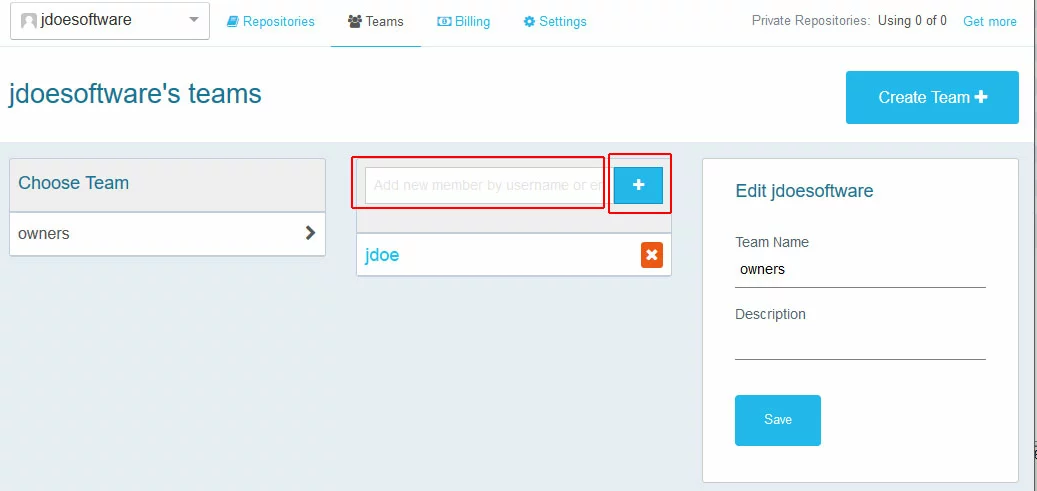
To add someone else to Owners, fill out their Docker Hub username and click the blue +.
Setting your organization to Public or Private
Organizations are Public by default. To set your organization to Private, on the main organization page click Settings.
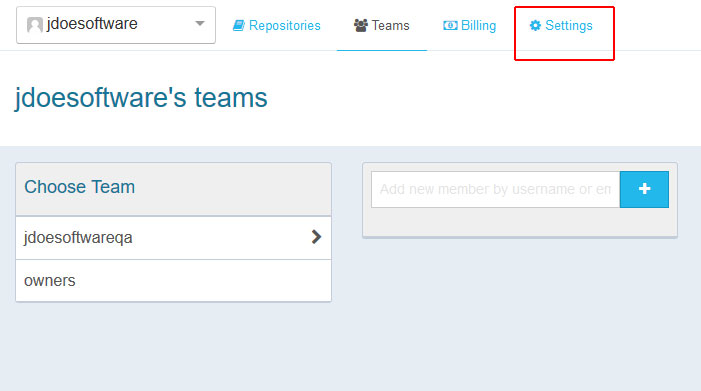
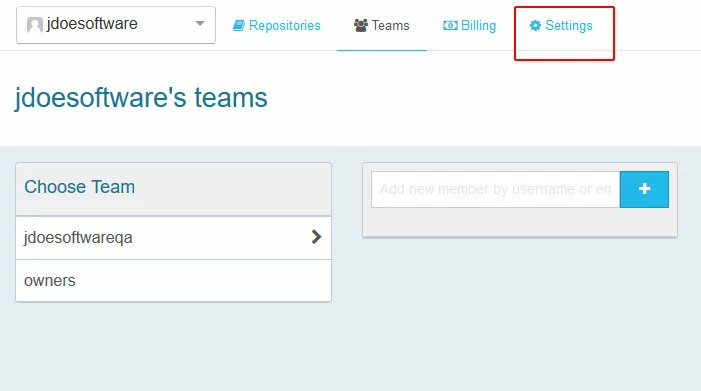
Click Private, then click Save.
Adding a team
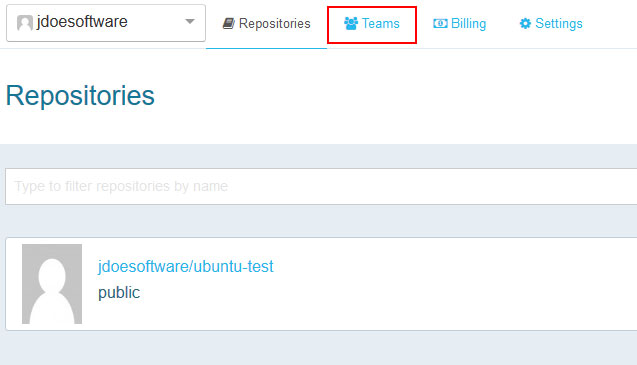
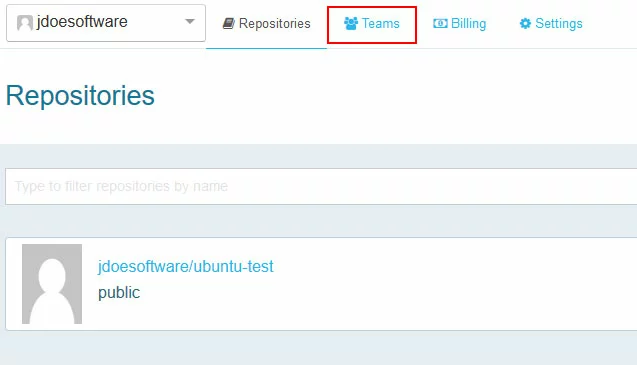
To add a team, select your organization name from the drop-down menu (if it is not already selected) and click Teams.
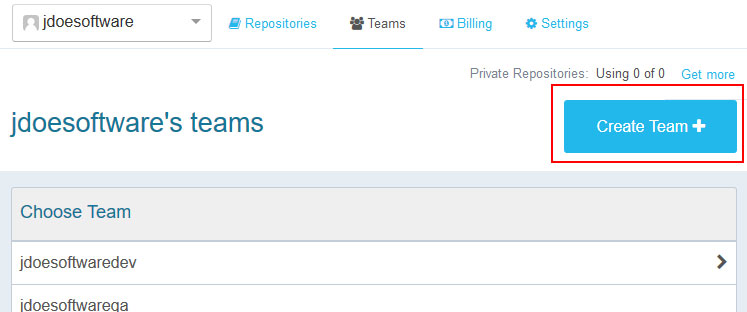
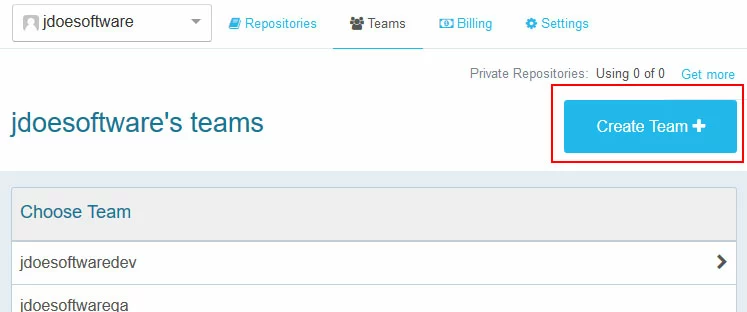
On the Teams page, click Add Team.
Fill out the team name and description, then click Add.
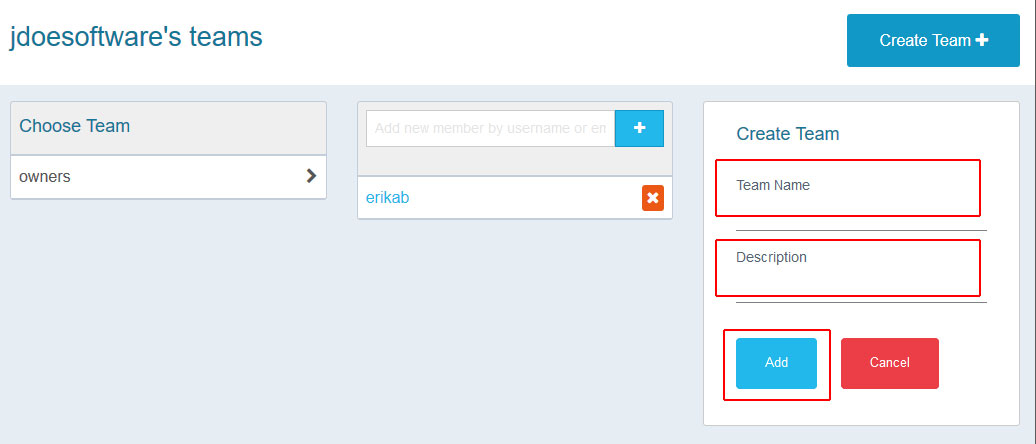
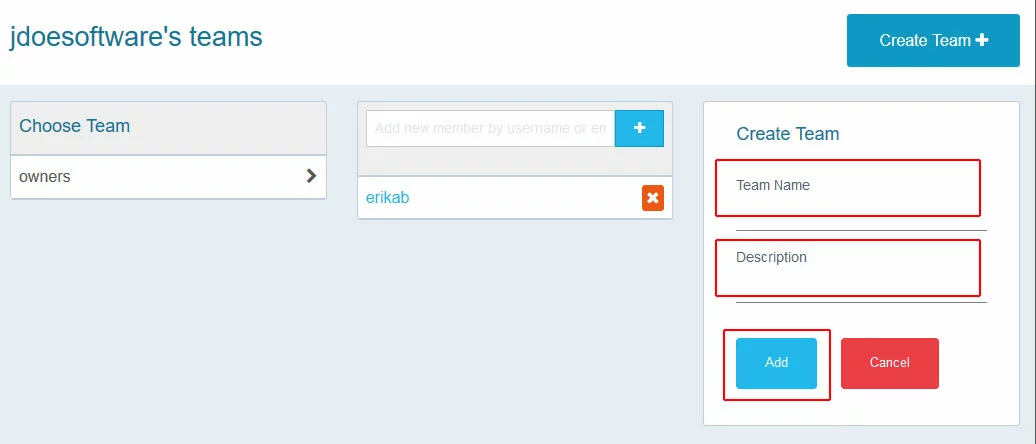
Each time you add someone to a team, they will receive an email from Docker Hub alerting them to the change.
Creating a Docker Hub Repository
From the Docker Hub dashboard, click Create Repository.
Fill out the repository details (be sure to set the Visibility drop-down to either public or private), then click Create.
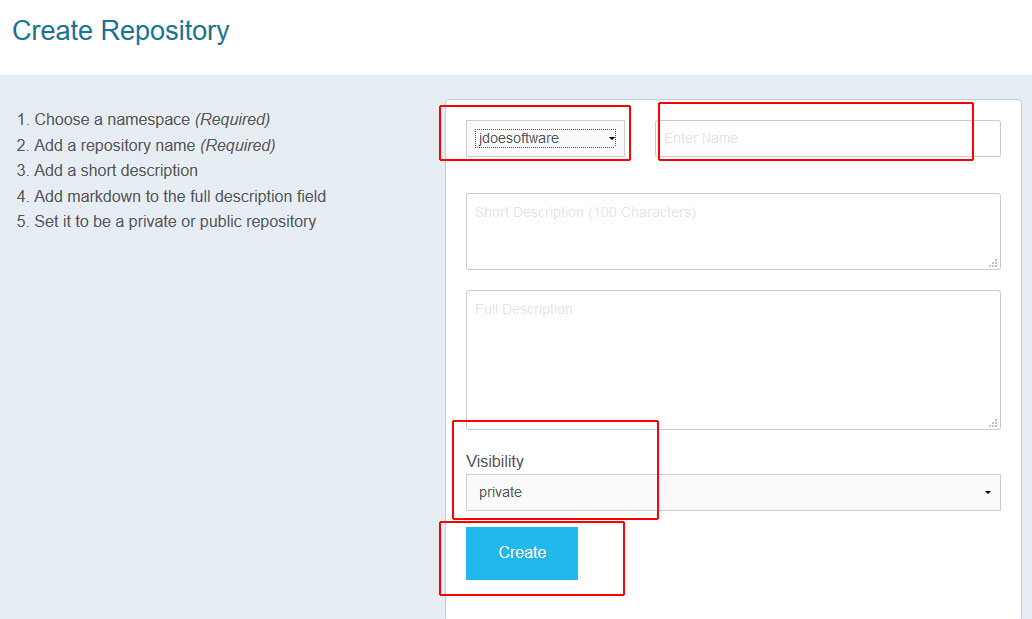
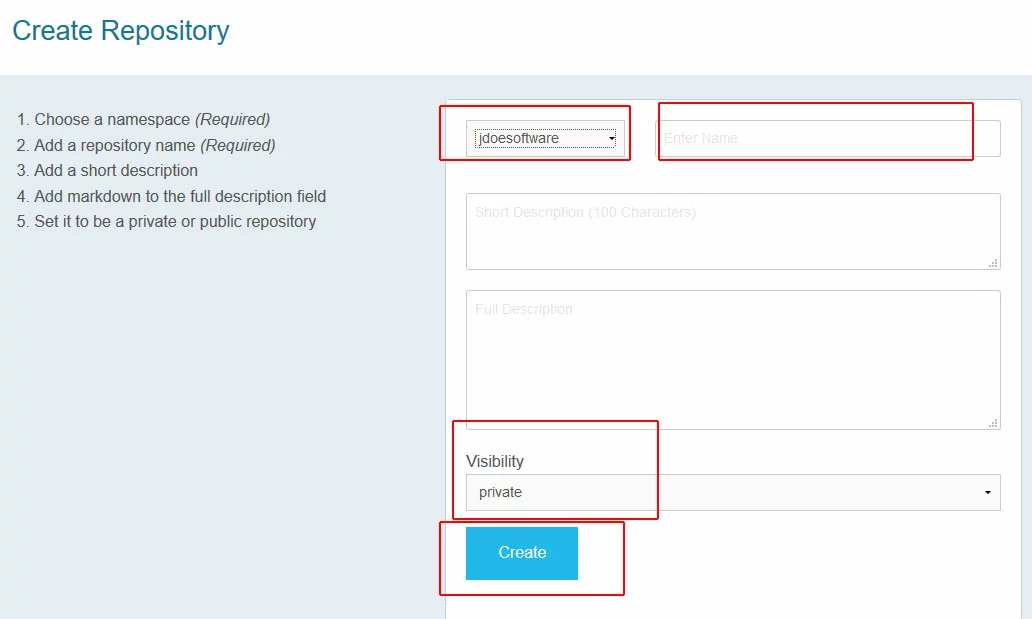
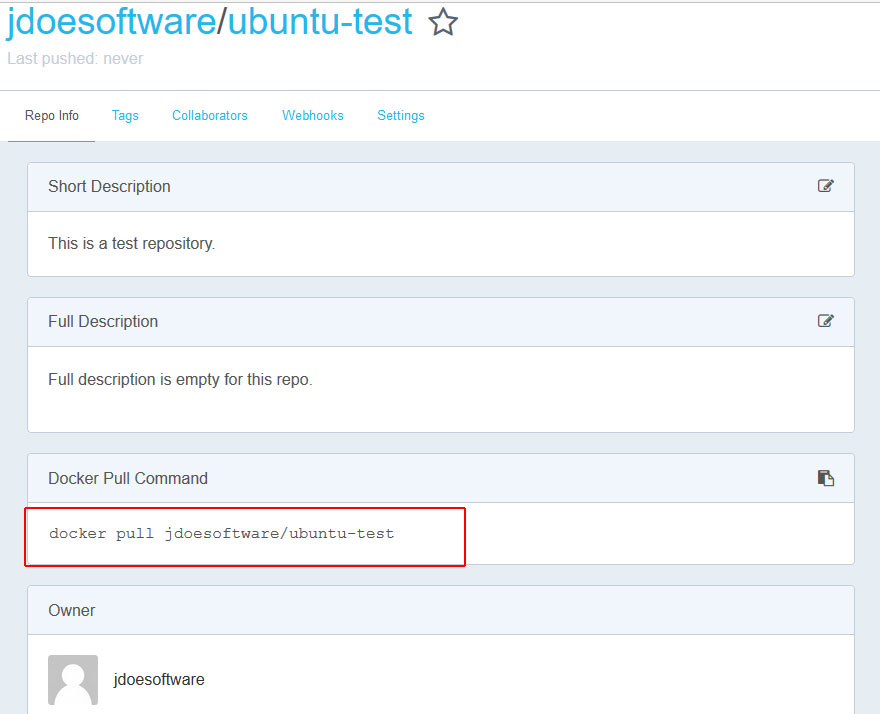
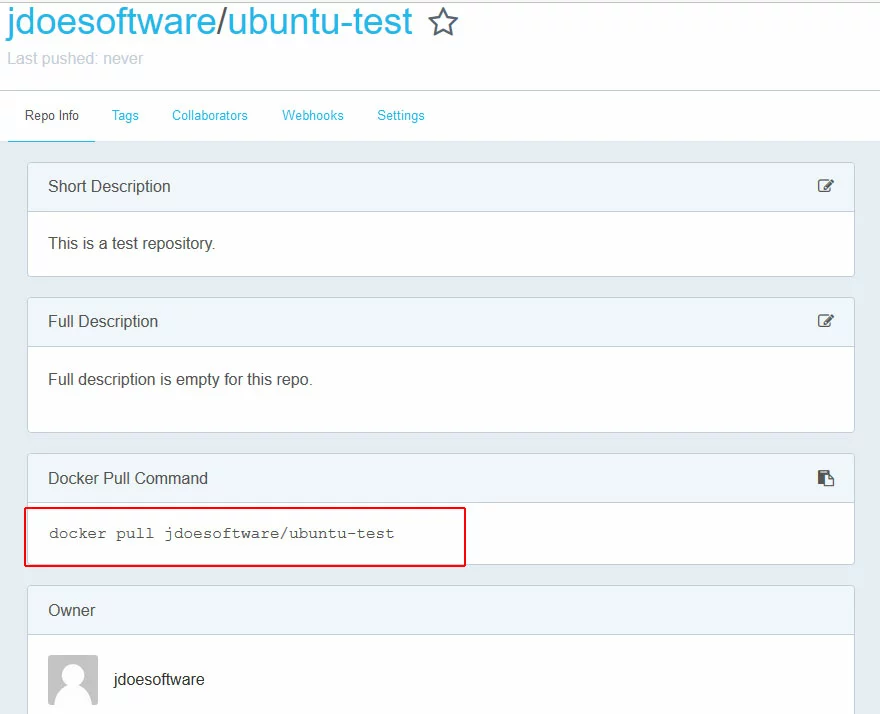
On the next page you will find details about your new repository, including the docker pull command for your images.
Setting Repository Team Access
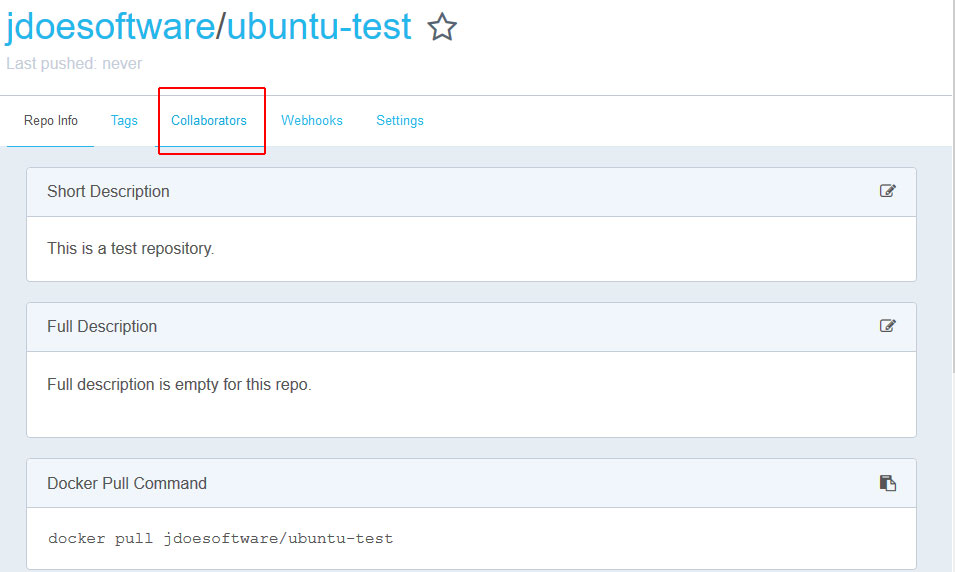
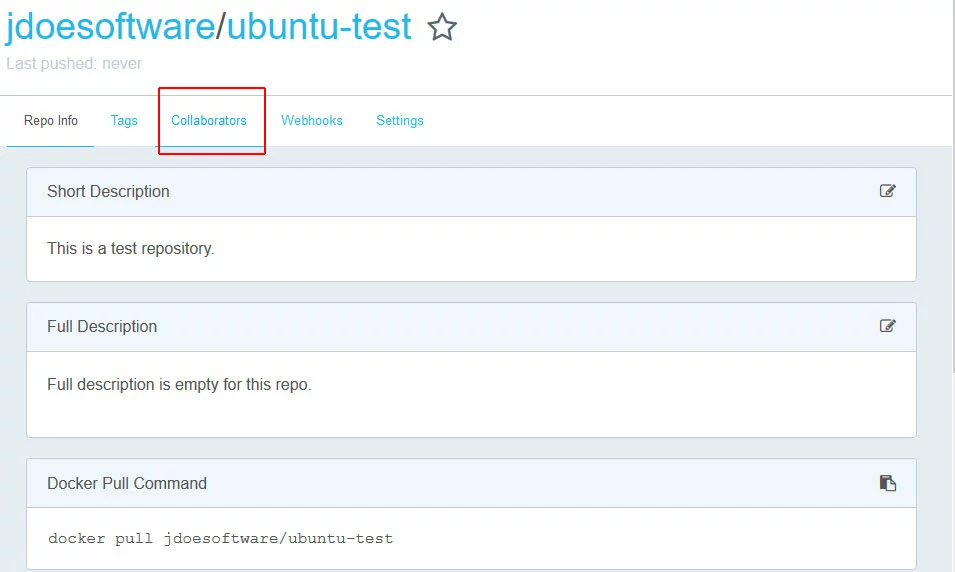
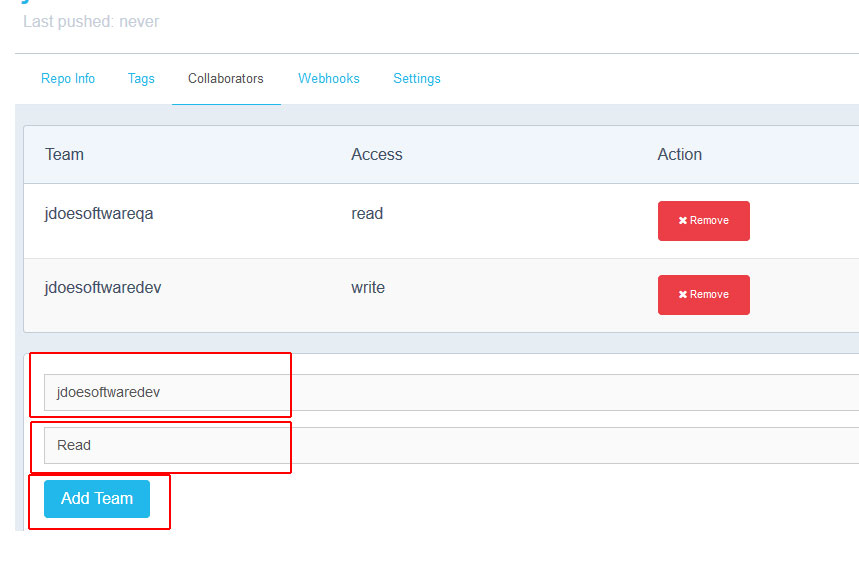
To set access to your repository by team, click Collaborators.
In our example, we have two teams:
- The QA department jdoesoftwareqa which needs read (but not write) access to the images.
- The developers jdoesoftwaredev who need both read and write access to the images.
There is no need for QA to push updated images to the repository, and we want to prevent them doing this by accident. However, the developers will need full access to the repository.
For security reasons, it is a good idea to sort all of your Docker Hub users into at least two groups: one with read-only access, and one with read/write access.
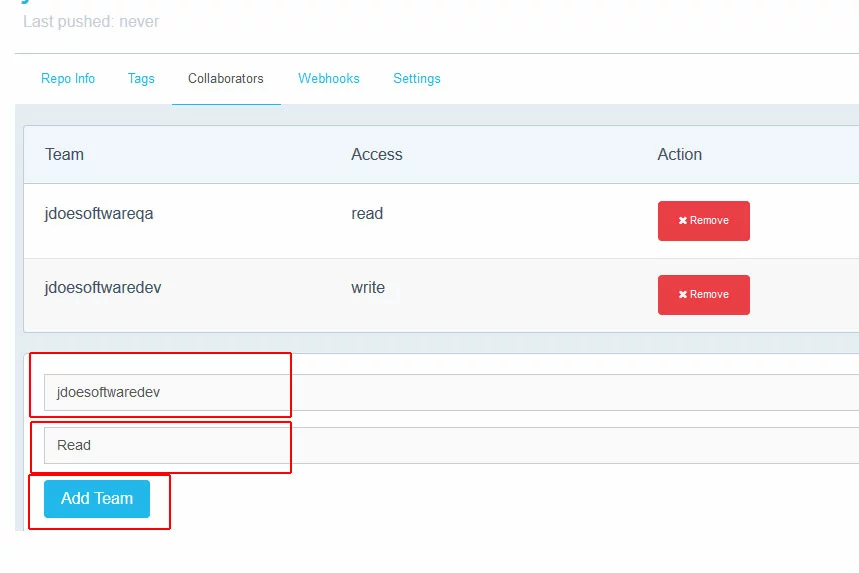
To set a team's access, select the team and access level from the drop-down menus, then click Add Team.
Accessing your Docker Hub Repository from the command line
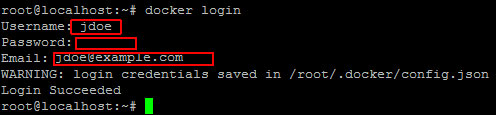
To access your Docker Hub repository from the command line, you must first authenticate with Docker Hub using the login you created on the website:
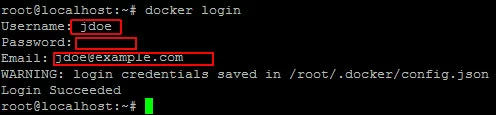
sudo docker loginYou will be asked to provide your Docker Hub login name, password, and email address.
Once you have logged in, you will be able to access your Docker Hub repository with the docker push and docker pull commands.
Pushing an image to your Docker Hub Repository
To upload (push) an image to your Docker Hub repository, you must first prepare the image. It will need:
- Your Docker Hub username or the name of your Docker Hub organization.
- The name of your Docker Hub repository.
- Optional: A version tag. (If no tag is specified, it will default to "latest.")
You can rename an existing image using the command:
sudo docker tag [existing image name or ID] [Docker Hub username or organization]/[repository name]:[tag]For example, if Docker Hub user jdoe wanted to upload an image currently named my-ubuntu-test to a Docker Hub repository named ubuntu-test and tag it version 1.0, the image would first have to be renamed with the command:
sudo docker tag my-ubuntu-test jdoe/ubuntu-test:1.0If jdoe is planning to push to the repository under the jdoesoftware organization, then the command will be:
sudo docker tag my-ubuntu-test jdoesoftware/ubuntu-test:1.0You can verify that the image was renamed correctly by listing all of the Docker images on your system with the command:
sudo docker imagesNext, you can push the image to the repository with the command:
sudo docker push [Docker Hub username or organization name]/[repository name]:[tag]To push the image we renamed in the previous example, the command would be:
sudo docker push jdoe/ubuntu-test:1.0Or:
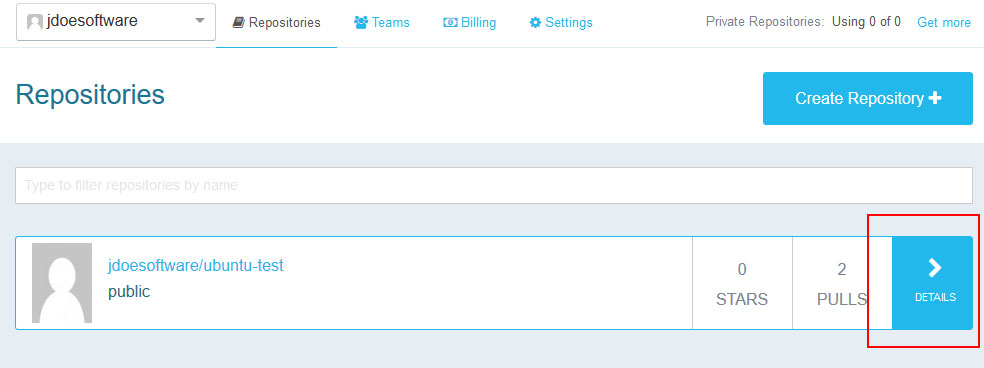
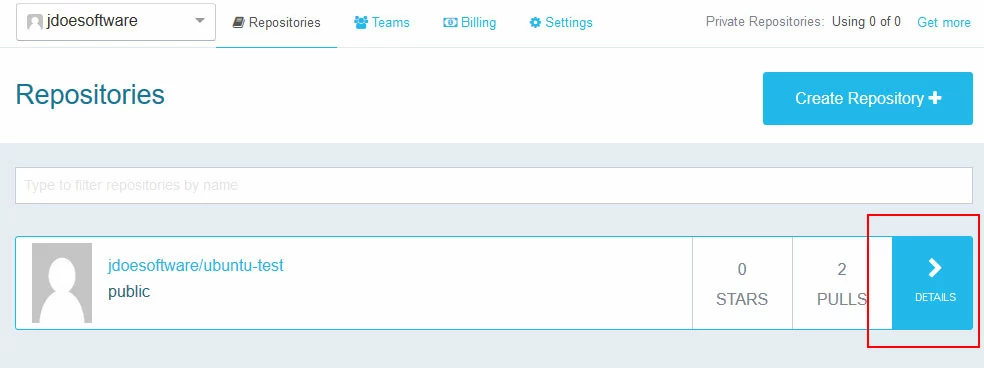
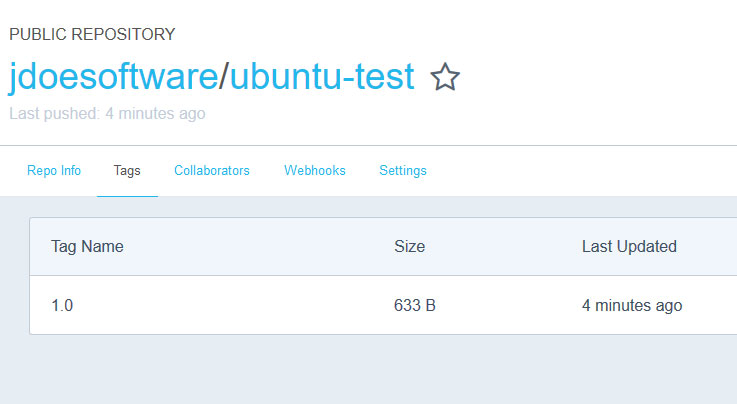
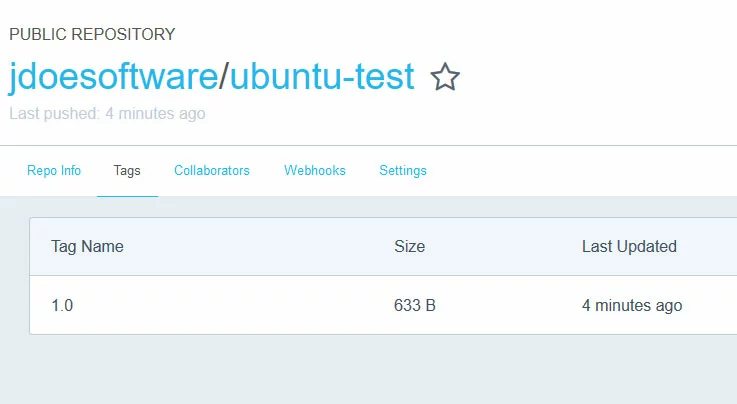
sudo docker push jdoesoftware/ubuntu-test:1.0To verify that the image was pushed to Docker Hub, go to the Docker Hub dashboard and click Details for your repository.
On the repository page, click Tags.
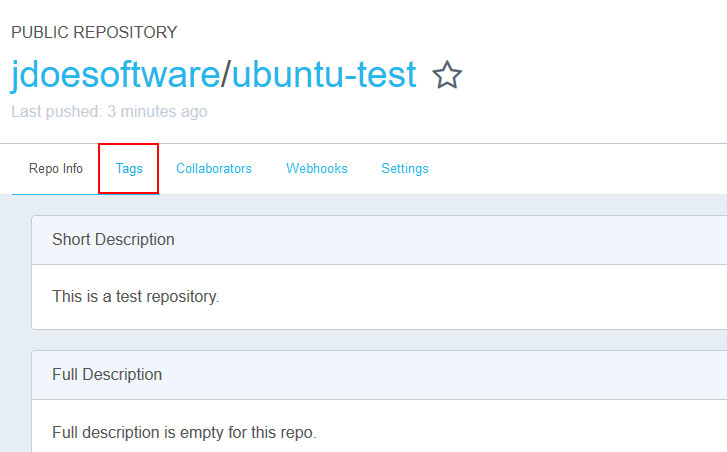
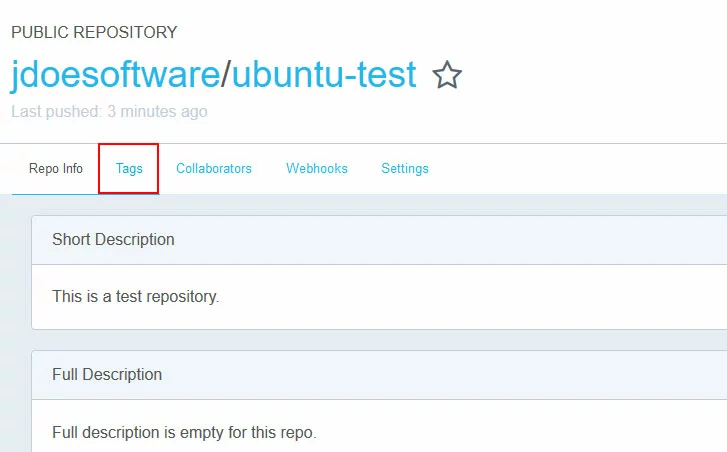
This will list the versions that have been pushed to the repository, along with the Last Updated time.
Pulling an image from your Docker Hub Repository
The command to pull an image from your Docker Hub repository is shown on the repository page on the Docker Hub website.
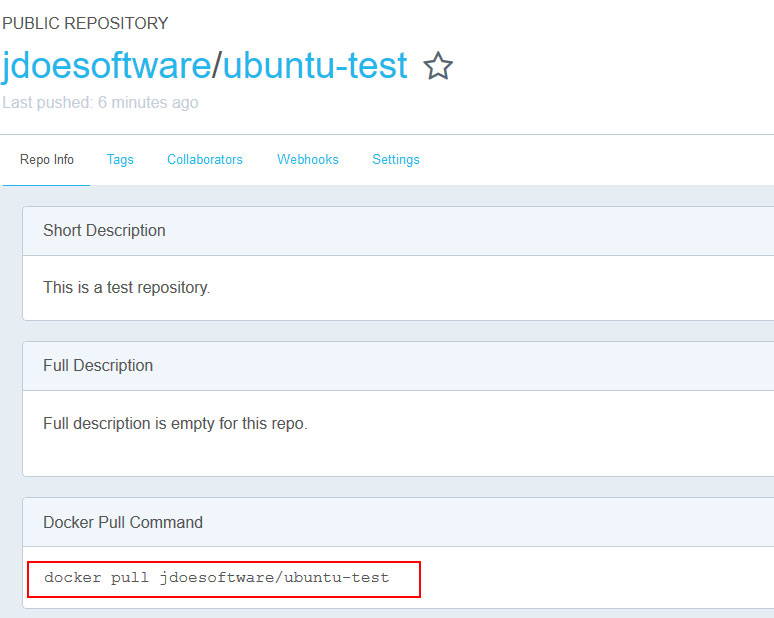
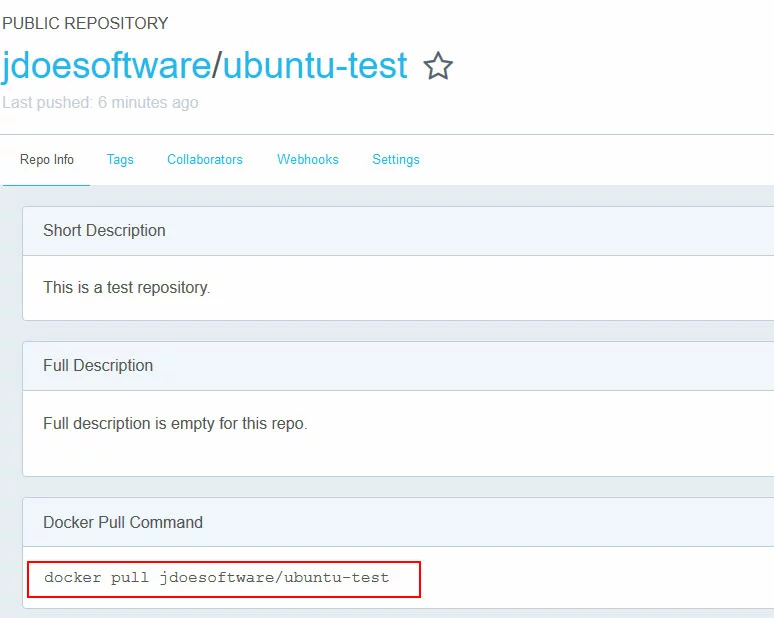
The command is:
sudo docker pull [your Hub username or organization name]/[your Hub repository name]:[tag]For example, to pull the image jdoe/ubuntu-test:1.0 which we pushed to the Hub in the section above, the command would be:
sudo docker pull jdoe/ubuntu-test:1.0Or:
sudo docker pull jdoesoftware/ubuntu-test:1.0You can verify that the image was renamed correctly by listing all of the Docker images on your system with the command:
sudo docker images- Dedicated enterprise hardware
- Configurable hardware equipment
- ISO-certified data centers
Reviewer

Christian Heldmaier
Christian Heldmaier is an experienced online marketing and SEO specialist from Karlsruhe. He has been working as an SEO Manager at IONOS since July 2020.