How to turn off the Windows firewall
The purpose of a firewall is to protect your computer. The Windows operating system comes with its own built-in firewall that offers protection against attacks and unwanted access. If an unauthorized third party tries to access your computer, the software will automatically block the attempt, thus protecting your system and your data.
The Windows firewall is a key cyber security solution. It acts as a filter between your system and the Internet, checking (without your input) whether programs installed on your PC are allowed to connect to the Internet, and whether online applications or third-party devices are permitted to access your PC. If the firewall detects unauthorized traffic, it will block the access attempt and notify you.
It is possible to disable the Windows firewall, but you should only do so temporarily. One situation where you might need to turn off the firewall is to install software that would otherwise be blocked. We’ve put together a step-by-step guide to show you how to turn off the firewall.
Turning off the firewall: instructions for Windows 10, 8 and 7
First introduced in Windows XP, the Windows firewall is now a standard component of all Microsoft operating systems. It was originally called the “Internet Connection Firewall” and could only filter incoming connections, but it has since been developed and optimized, and is now one of the most secure security solutions on the market. When Windows 10 was launched, Microsoft renamed the firewall “Windows Defender Firewall” to underline the fact that the firewall is the central component of its Windows Defender security suite.
The steps below explain how to disable the firewall in the latest version of the operating system (Windows 10) as well as in Windows 8, and Windows 7.
To make sure that you are always protected against cyber-attacks, we recommend that you only turn off your PC’s virus protection system for a short time. If you need to disable the Windows firewall to download a program, remember to turn it on again immediately afterwards to check all of the incoming and outgoing connections.
Turning off the firewall in Windows 10: a quick guide
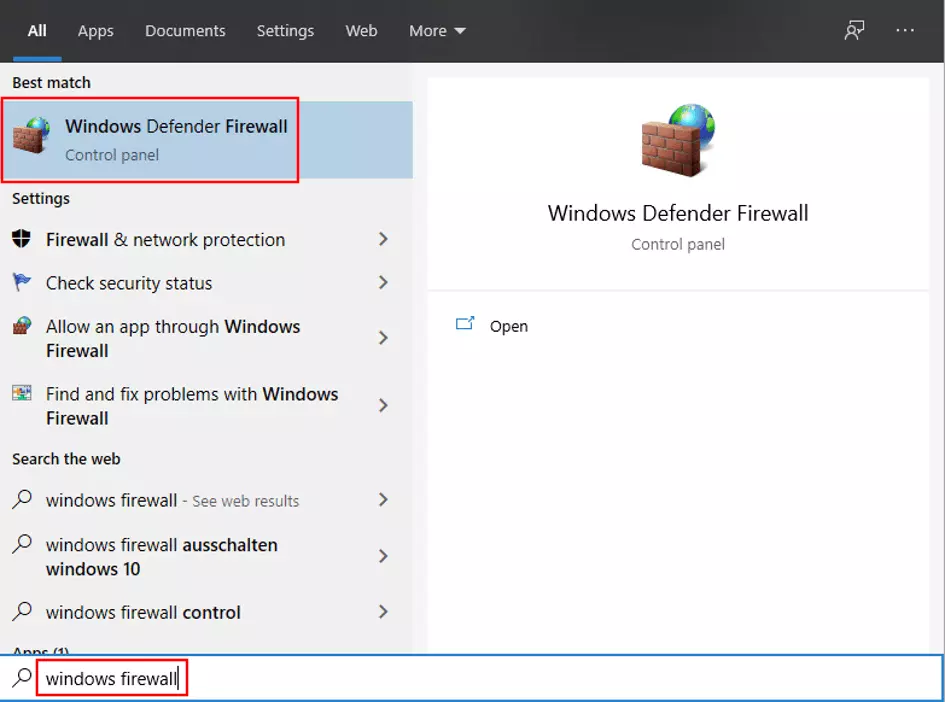
- Click on the “Search” icon or the search box in the taskbar and enter “Windows firewall”.
- Click on “Windows Defender Firewall” in the search results.
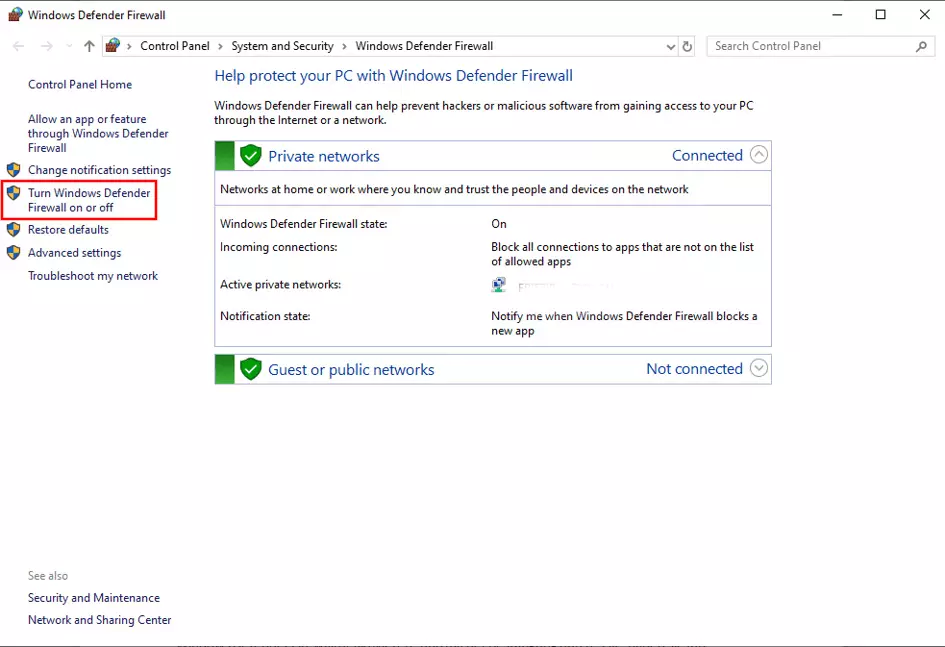
- In the menu pane, select “Turn Windows Defender Firewall on or off”.
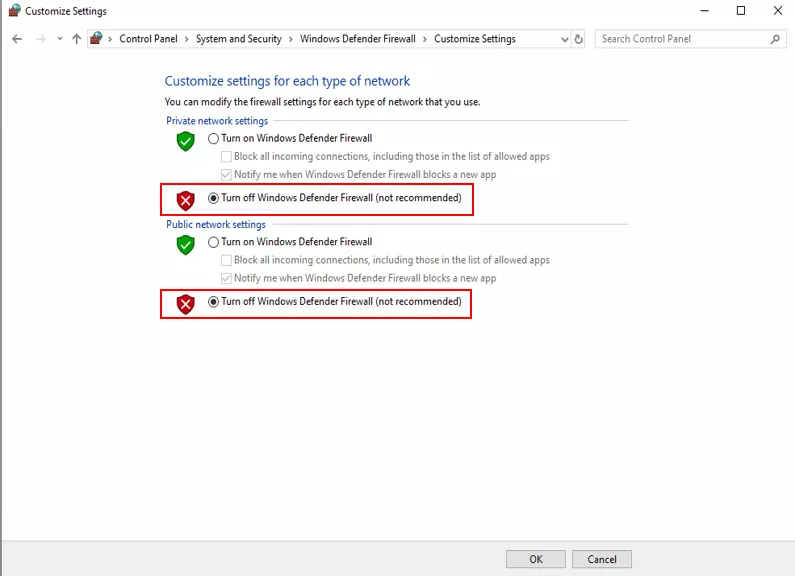
- Select “Turn off Windows Defender Firewall” for both networks (private and public).
Go back into this menu to re-enable the Windows firewall once you’ve finished the process that required a temporary shutdown.
Now let’s go through the steps in more detail, with screenshots to illustrate the process.
Step 1: Click on the magnifying glass or search box in the taskbar and enter “Windows firewall” or “Windows Defender Firewall”. Click on the corresponding search result.
Step 3: On the next screen you will see the firewall settings for both types of network: private and public. To disable the firewall completely, select “Turn off Windows Defender Firewall (not recommended)” for both network types. Click on “OK” to confirm the changes and disable the firewall.
Turning off the firewall in Windows 8: a quick guide
In Windows 8 and 8.1, the procedure for disabling the firewall is more or less the same as in Windows 10:
- Open the Search function (in Windows 8, you need to go into the Start menu to search).
- Enter “Windows firewall” or “firewall” in the search box.
- Click on the appropriate result to open the firewall menu.
- In the menu on the left, select “Turn Windows Firewall on or off”.
- For both network types (private and public), select “Turn off Windows firewall (not recommended)”.
- Click on “OK” to confirm.
You can only change the Windows firewall settings if you have administrator rights!
Windows 7: How to disable the firewall
Users of Windows 7 can follow the same steps to turn off the firewall in their system:
- Open the Start menu.
- Enter “firewall” or “Windows firewall” in the search box.
- Click on the corresponding search result.
- In the list of options on the left, select “Turn Windows Firewall on or off”.
- Select “Turn off Windows firewall (not recommended)” for both network types (private and public).
- Confirm the changes by clicking on the “OK” button.
Microsoft support for Windows 7 ended on January 14, 2020. This means that technical support and security updates are no longer available for this version. The only exception are business users, who can still access professional support on a fee-paying basis through to 2023. If this doesn’t apply to you, we strongly recommend that you upgrade to a newer version of Windows. More details can be found in our article about the end of support for Windows 7.
An alternative to disabling the Windows firewall: adding exceptions
Instead of disabling the Windows firewall, you can define exceptions for specific programs. Doing this stops the Windows firewall from monitoring, filtering, and blocking the activity of these programs. The steps for defining exceptions are the same whether you’re using Windows 10, 8 or 7:
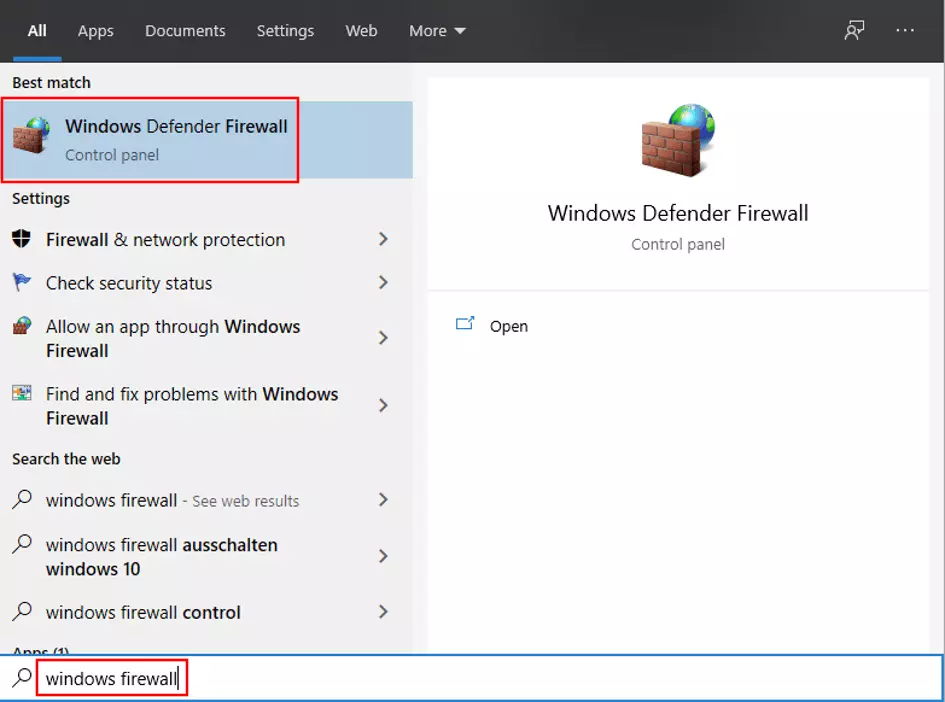
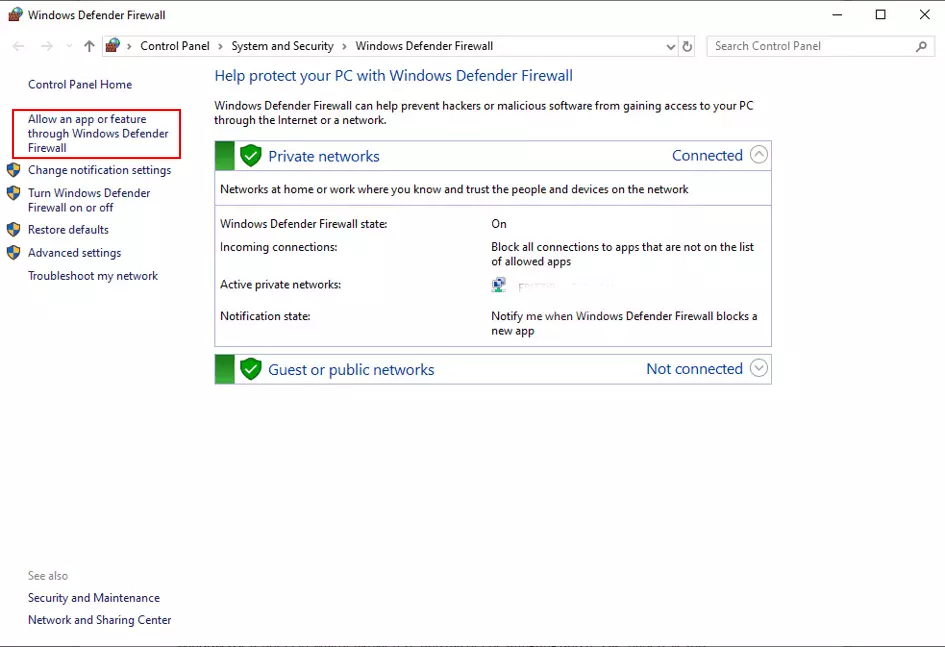
Step 1: Open the search box (from the taskbar or the start menu, depending on what version you are using) and enter “Windows firewall”. Click on the corresponding search result:
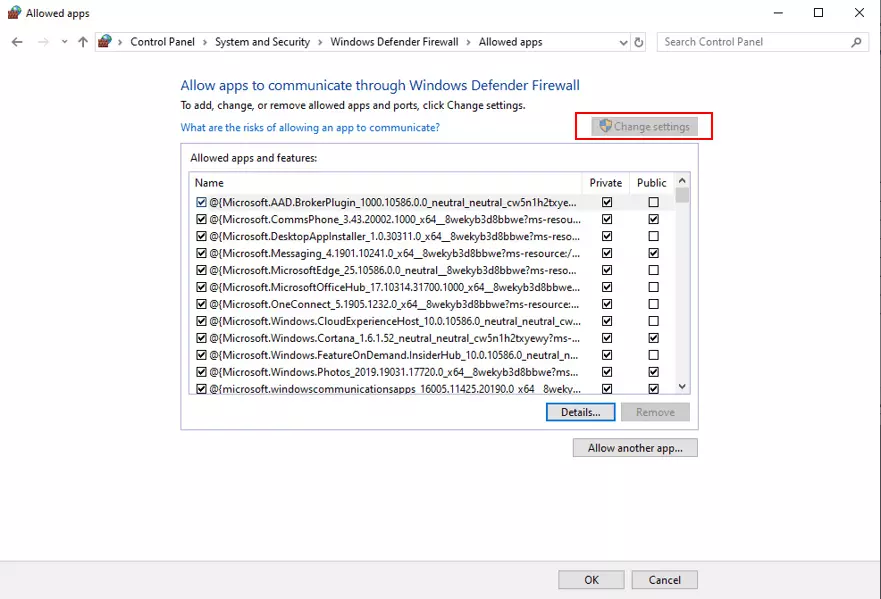
Step 4: To allow a new app to connect without being filtered by the firewall, click on the “Allow another app...” button at the bottom of the screen.
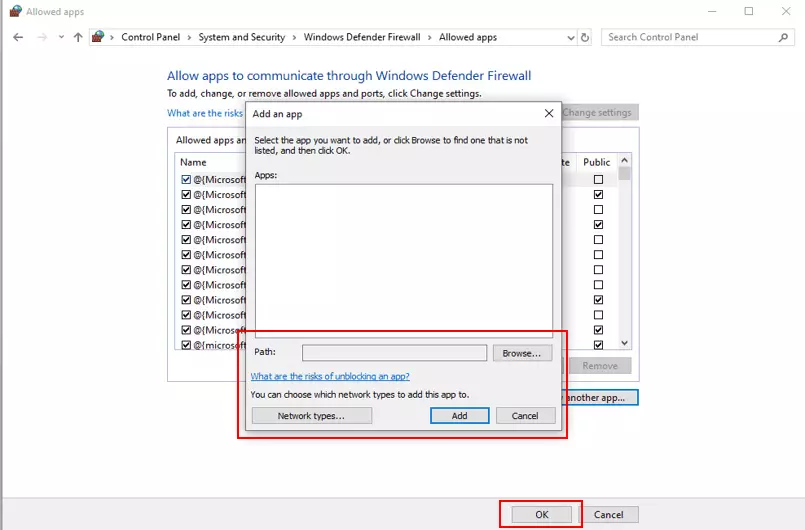
Step 5: You will now see a list of apps for which you can add individual rules. If the program you’re looking for isn’t in the list, you can add it by clicking on “Browse” and navigating to the app’s location on your PC. Once you’ve selected the relevant app, click on “Add” to confirm. You will now see your app in the list, where you can define additional settings relating to private or public networks.


