Windows Sandbox
A great number of programs are available to download from the internet for free. But freeware especially is associated with the risk of installing malware in addition to the actual application and thereby damaging the operating system. Users typically only realize that a program is harmful after having installed it. The sandbox solves this problem and allows users to install software preliminarily within an isolated environment. As of Windows 10 Pro version 1903, Windows Sandbox has been available as part of the operating system, but it is usually disabled in the settings. We explain how you can turn on Windows Sandbox step by step.
Windows Sandbox: a virtual testing environment
A sandbox is an isolated environment separated from the rest of the operating system. However, the same functions are available as in a “conventional” Windows version. Each time it’s used, the sandbox works like a newly booted computer, without any installed applications and programs.
This virtual environment lets you install and test potentially unsafe programs. If the software is harmful and contains a virus, it will have no effect on the actual operating system. When closing Windows Sandbox, all programs and data are automatically and permanently deleted. Before installing potentially dangerous applications or programs, it’s a good idea to run a test installation in the sandbox. This way, you can rule out the possibility of damaging your operating system.
The following computer requirements must be met in order to use Windows Sandbox:
- At least Windows 10 Pro version 18305
- 64-bit version
- Virtualization activated in BIO and a suitable CPU
- 1 GB of free memory, ideally on an SSD
- At least 4 GB of RAM, however 8 GB is recommended
- Two CPU cores
Unsure whether your Windows version is suitable? Find out what version of Windows you are running using the key combination [Windows] + [Pause].
How to turn on Windows Sandbox
By default, Windows Sandbox is deactivated. But it can be activated with just a few clicks in the Control Panel.
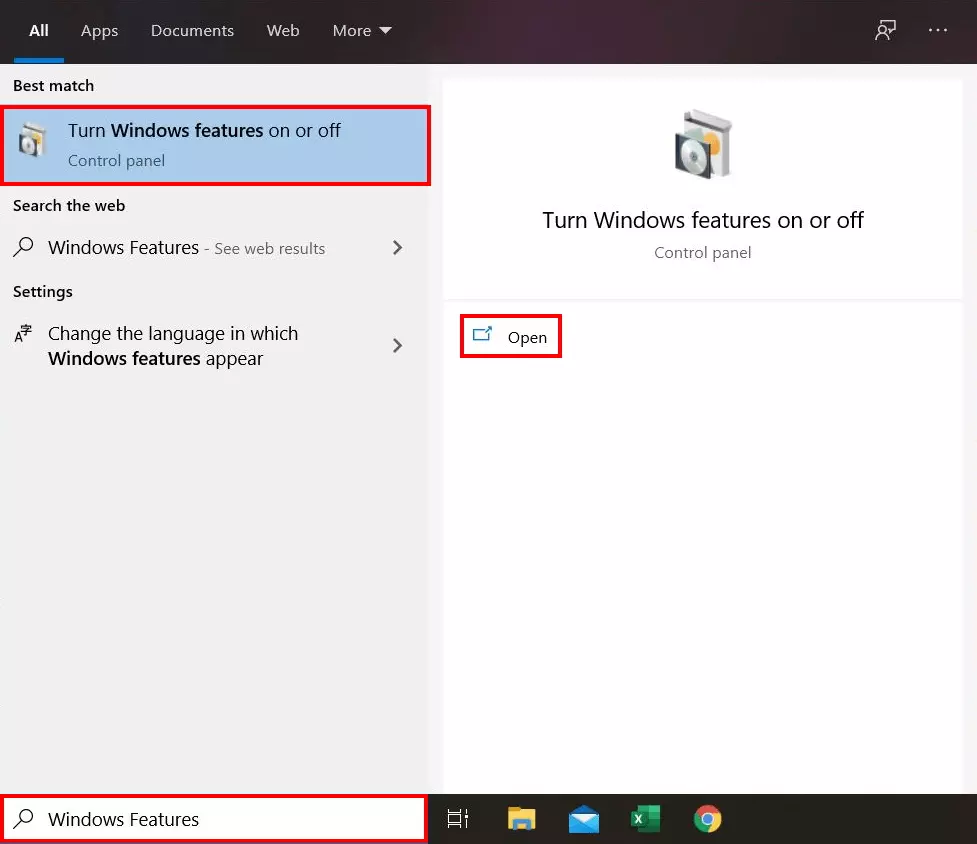
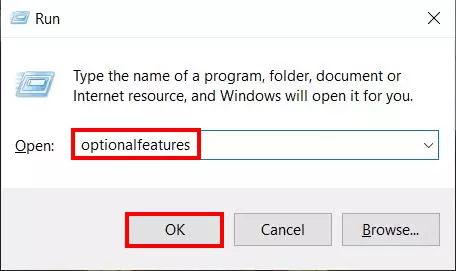
Step 1: Open Windows Features
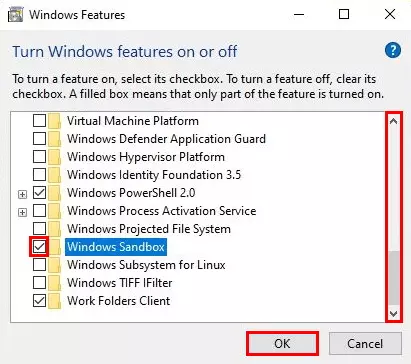
Step 2: Turn on Windows Sandbox
If the “Windows Sandbox” option is greyed-out and can’t be selected, it is likely that virtualization in BIOS is deactivated. First, you will need to start the BIOS and then enable Windows Sandbox from there.
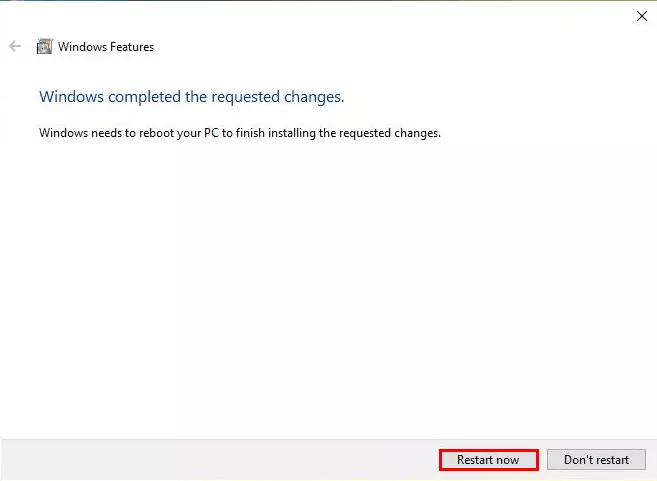
Step 3: Restart the computer
Once you have confirmed your entry, the operating system will automatically load all necessary data for Windows Sandbox. Once the process has completed, a dialog will prompt you to restart the PC. This is necessary in order to activate the sandbox successfully. Follow the instructions and click on the “Restart now” button.
Step 4: Open Windows Sandbox
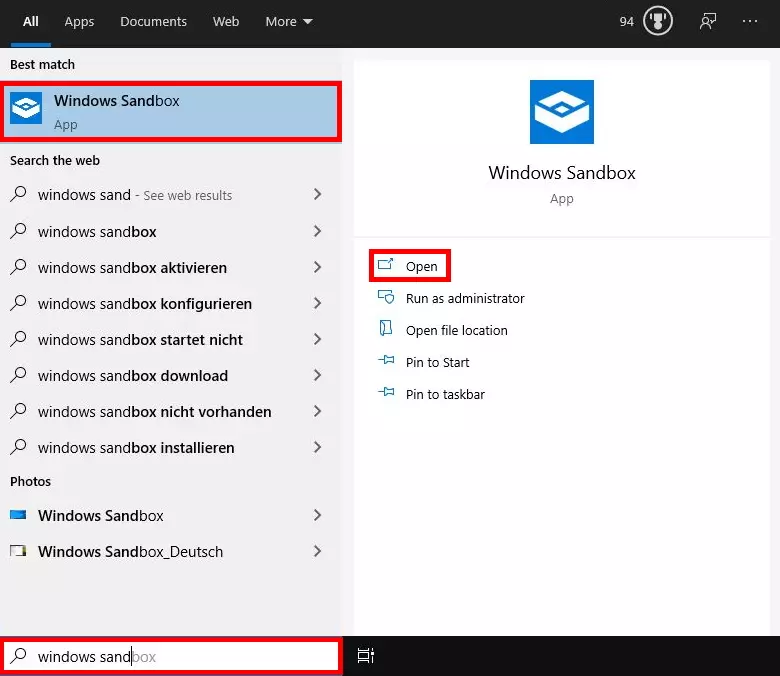
After the computer has been restarted, Windows Sandbox will be ready to use. To launch it, enter the name of the Windows feature into the search field in the task bar. Next, click on the respective search result on the left or select the option “Open” on the right.
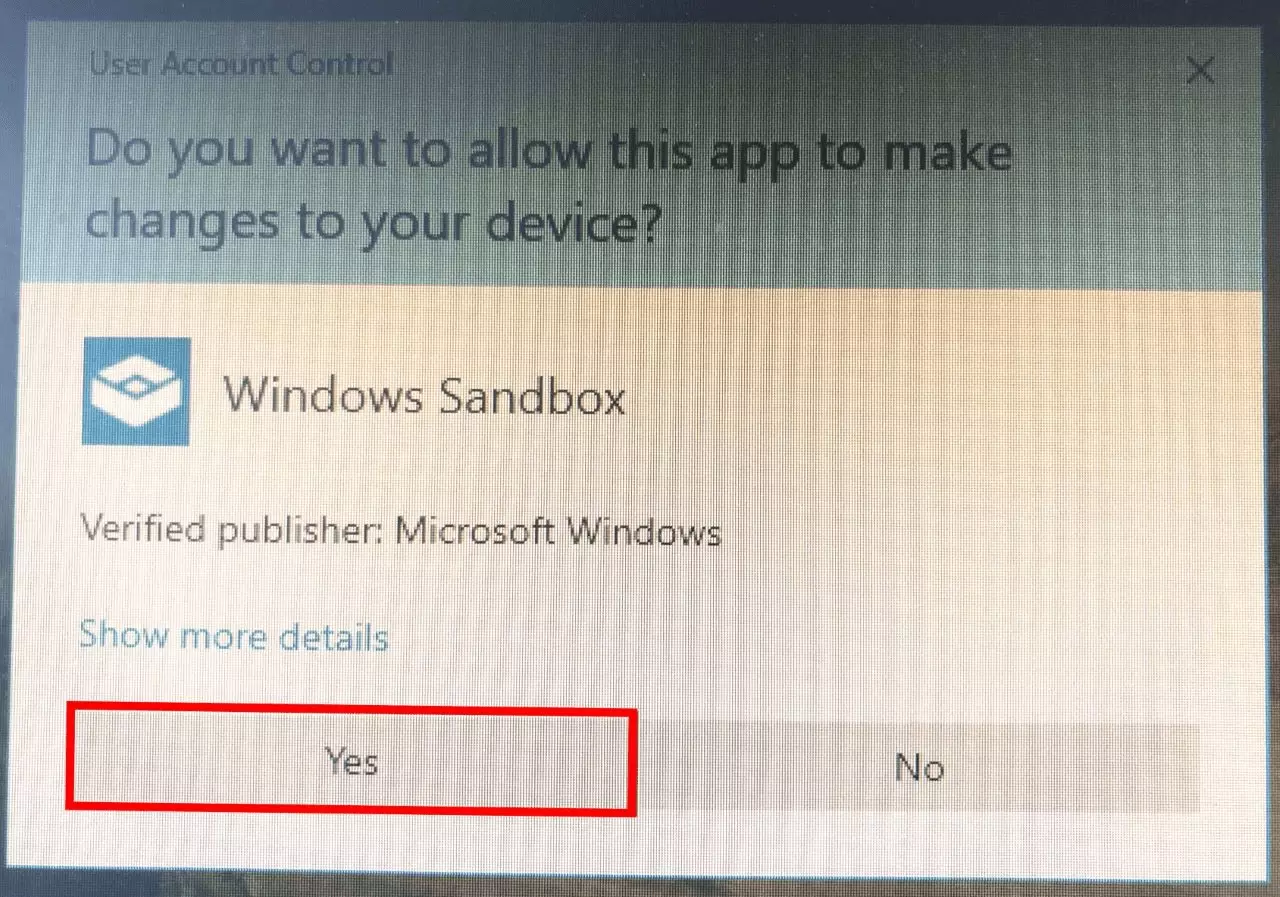
Step 5: Confirm Safety Query
Step 6: Use Windows Sandbox
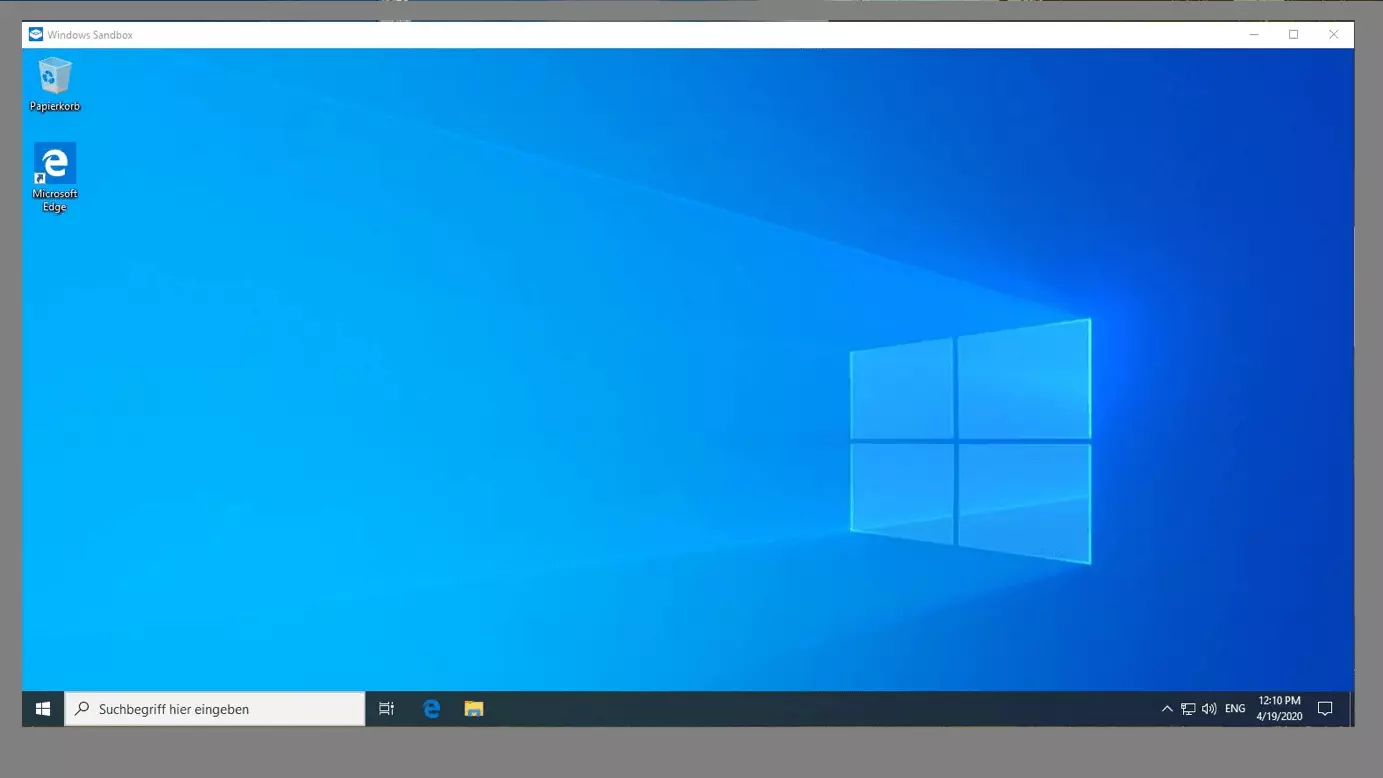
Windows Sandbox will then open as its own window. The user interface is identical to the normal Windows operating system. To start a program in the sandbox, copy the files from the regular operating system into the cache using the key combination [Ctrl] + [C]. Next, insert the file into the sandbox using [Ctrl] + [V]. There, you can run or install the application.
Once you have completed the trial installation in the secure environment, close the sandbox by clicking on the “X” in the top-right corner. The system will then automatically delete all data in the sandbox irrevocably. To use the tested program on a permanent basis, you will need to re-install it on the main operating system.


