How to create an email group in Gmail – a guide
With a Gmail email group, you can send the same email to multiple recipients at once and don’t have to type in all the email addresses individually. How exactly this works, you will learn in this article with step-by-step instructions.
- Simple registration
- Premium TLDs at great prices
- 24/7 personal consultant included
- Free privacy protection for eligible domains
Short Guide: Create email group in Gmail
- Open the mail.google.com page in your browser and sign in.
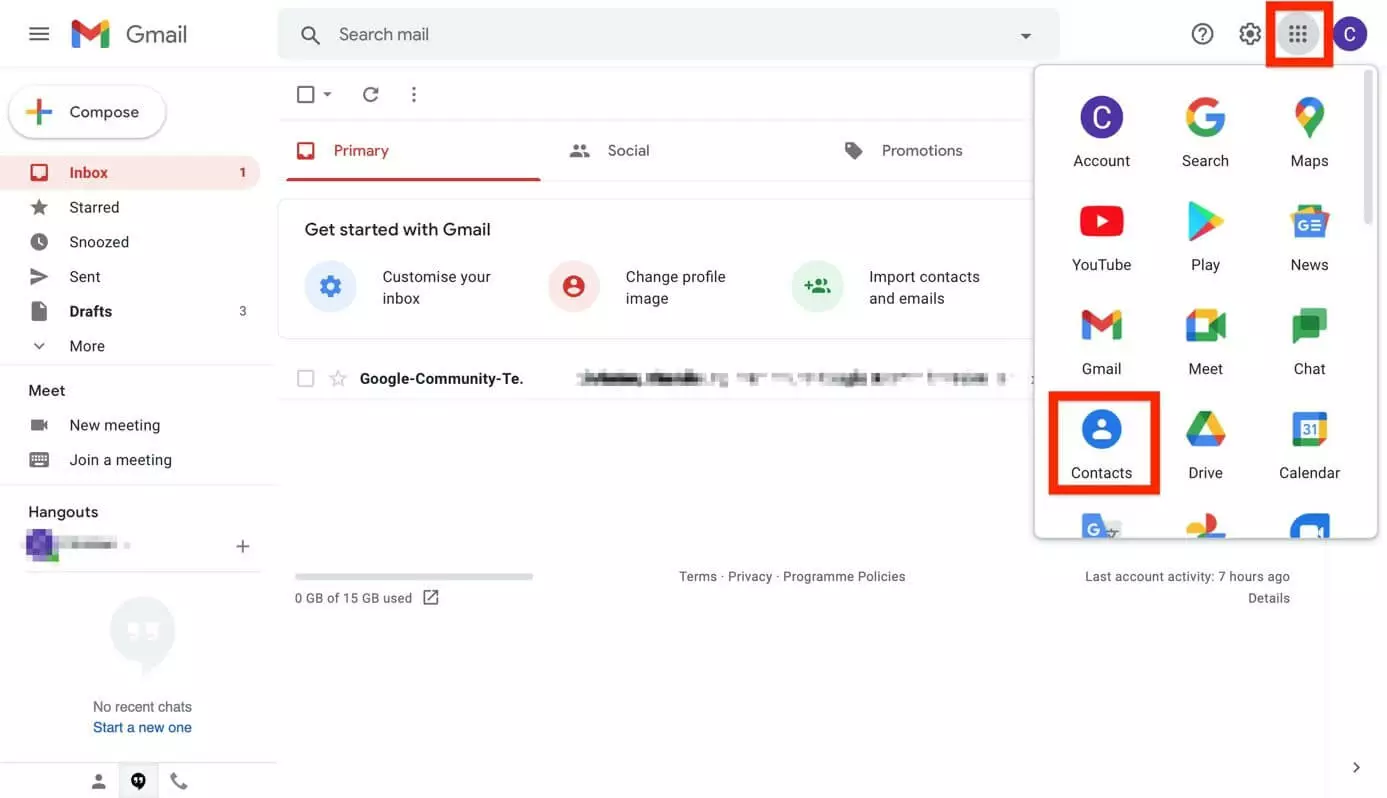
- Click the cube (“Google Apps”) in the top right corner and select “Contacts”.
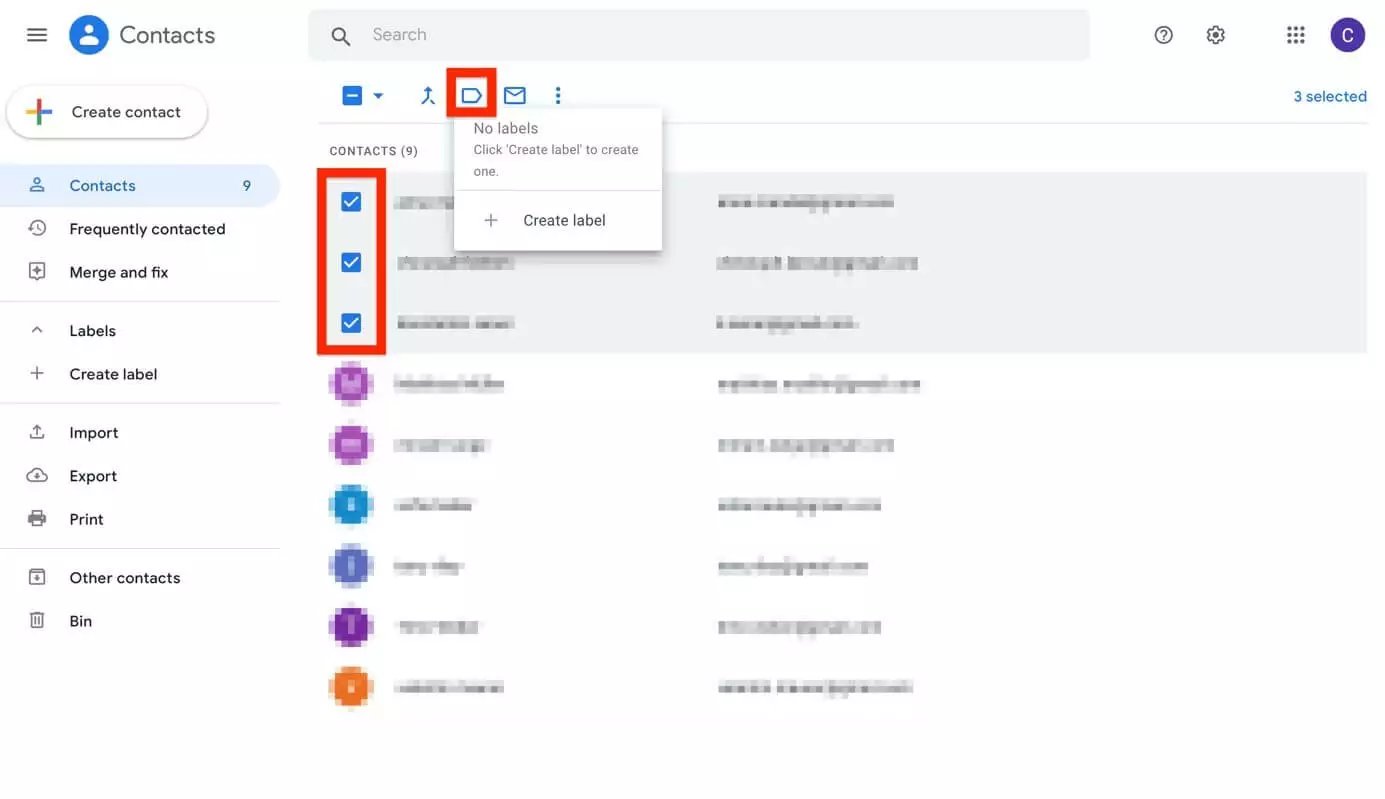
- Select the contacts you want to add to the Gmail email list, and then click the “Manage labels” icon (above the contact list), and then click “Create label”.
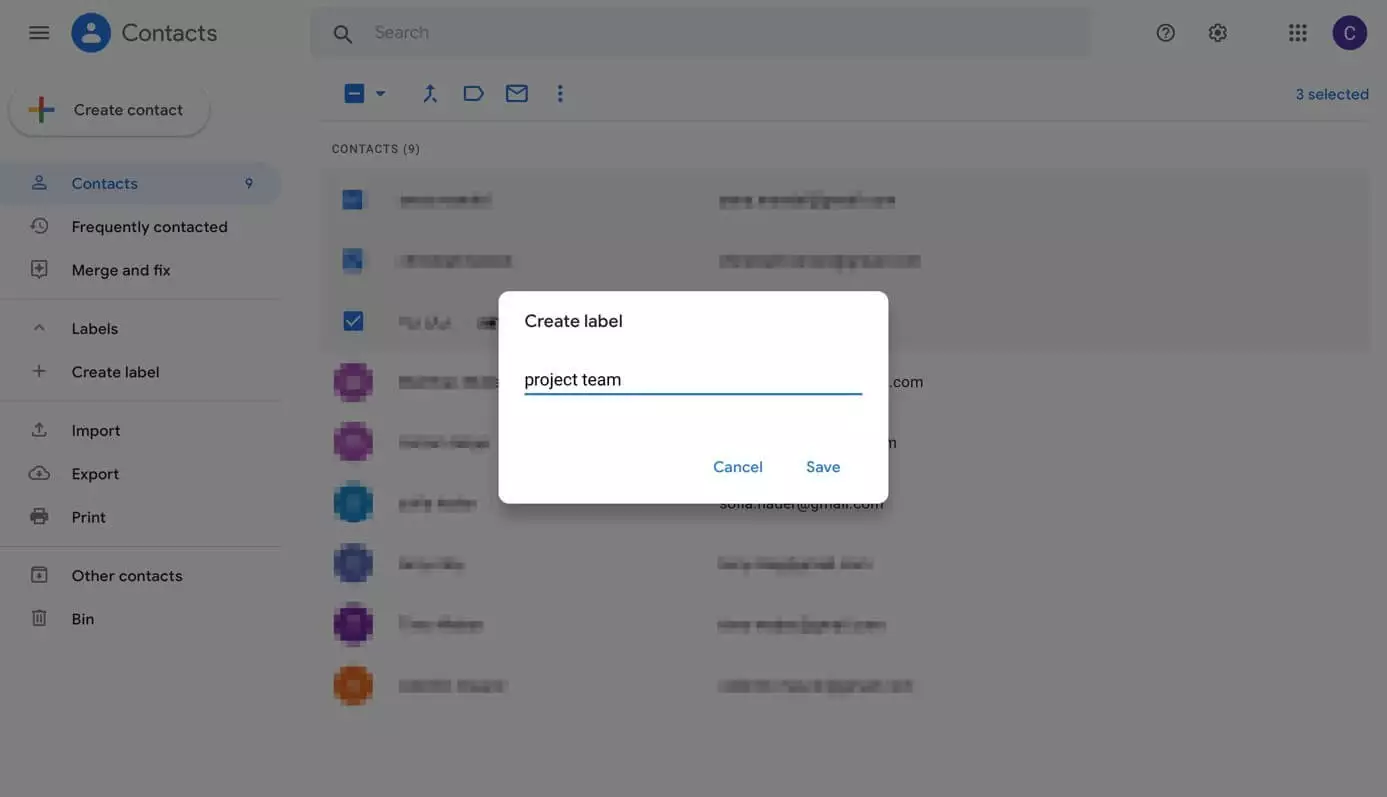
- Enter a name for the group and save your entry. The group will be displayed on the left side under “Labels”.
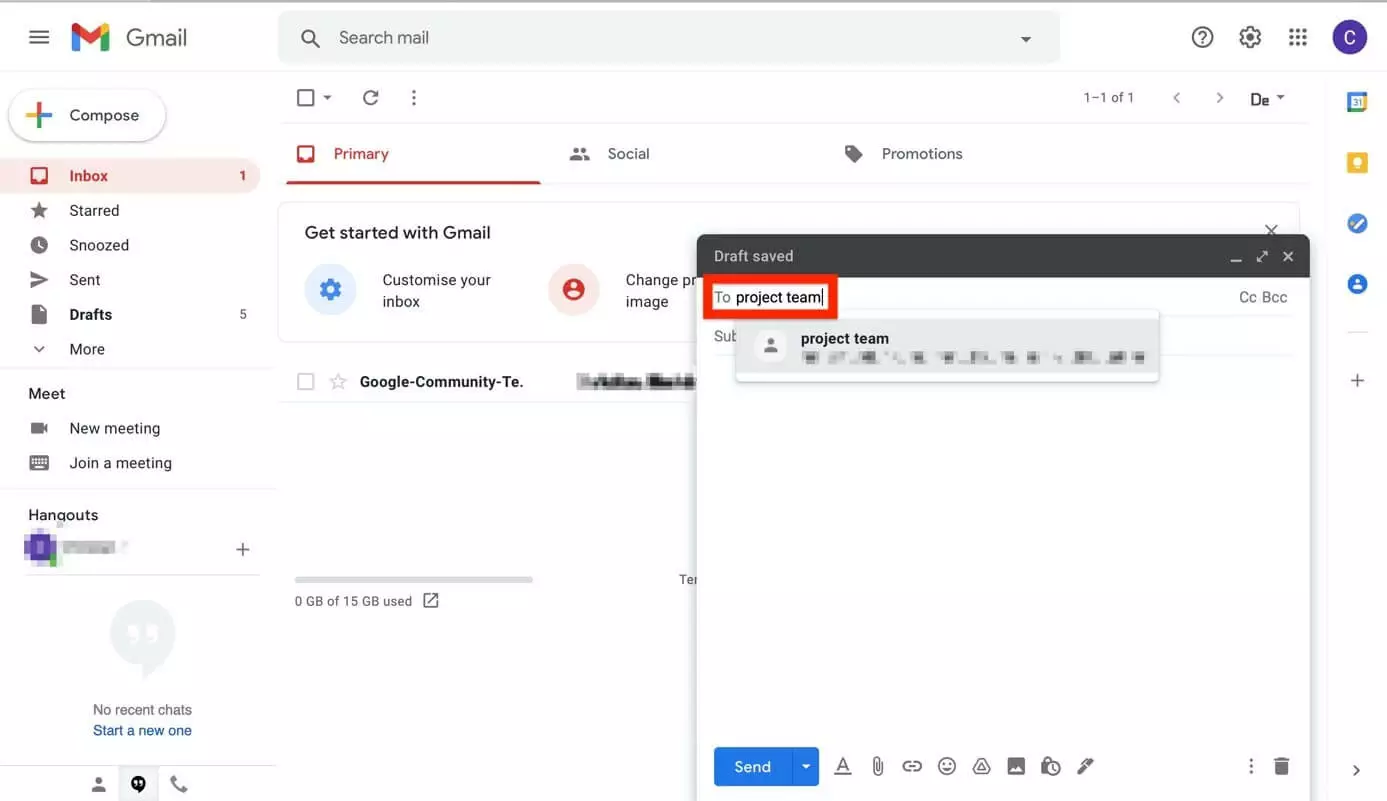
- If you now want to send a new message to this Gmail list, enter the name of the group in the “Recipient” field.
How to create an email group in Gmail: Step by step
The short guide above is a great overview for how to create a group email in Gmail, but you might need more information. The following steps will show you what to do in detail.
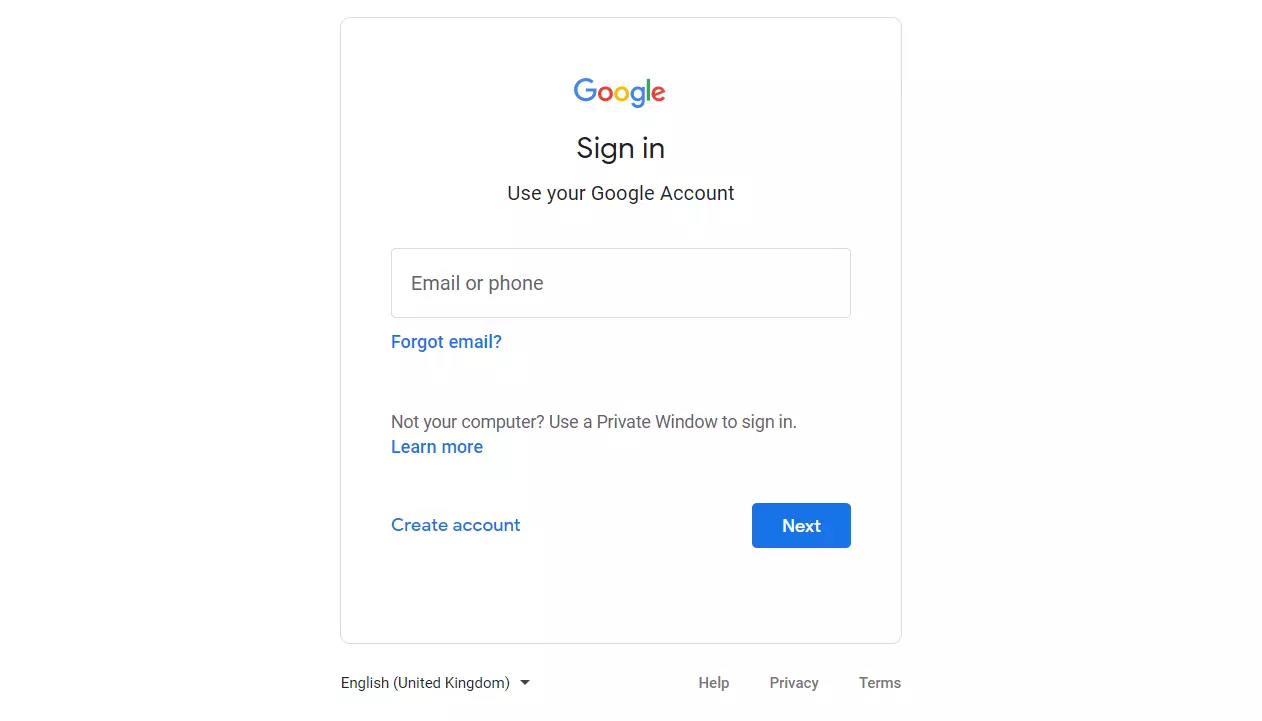
Step 1: Sign into Gmail
To create a new Gmail group, the first step is to launch your browser and log in to mail.google.com with your personal Gmail account.
Step 2: Open contacts
Step 3: Create a new Label
Now select all the contacts you want to add to the Gmail email group and click - above the contact list - on the “Manage labels” icon and then on “Create label” to create a new Gmail group.
Step 4: Create a name for the list
Step 5: Send an email to the email group
Now you can send a new message to all contacts in the Gmail group list at any time. To do this, enter the label name in the “Recipient” field. The group you created will now appear as a suggested recipient. If you confirm the label, all members of this group will automatically be added as recipients.
Register your own custom email address with IONOS today!
Gmail Group Emails: Add and remove recipients
If you want to add contacts to a created Gmail group, proceed like this:
- Open Google Contacts.
- Select one or more contacts by clicking the box next to the contact name.
- Click on “Manage labels” and then on the group label of your choice. Confirm with “Apply”.
If one of your Gmail contacts has multiple email addresses, only their default email address will be added to the desired group. You can change this entry for a contact at any time using the pencil icon.
If you want to delete a contact from a group, proceed as follows:
- Open Google Contacts.
- Click the desired group name in the left side menu.
- Select the contacts you want to remove by clicking the boxes next to each contact name.
- Click the three-dot icon (“More actions”) at the top right, and then click “Remove from label”.
Delete or rename Google email groups
You can delete or rename a Gmail email group that you have created at any time. To do this, proceed as follows:
- Open Google Contacts.
- Navigate to the label you want to edit in the left side menu
- Select the Rename label or Delete label button
Get Google Workspace at IONOS. Use Gmail bundled with your own domain and benefit from all Google apps in one central location.
Further Gmail tips
Creating your own Gmail email group is not the only handy feature offered by Google’s popular mail client. Learn about other handy features and tips that every Gmail user should know in the guides listed:
- Out of Office in Gmail: If you are unavailable for a certain period of time, you can set up an out-of-office message that will be automatically sent to your contacts.
- Gmail forwarding: Set up automatic forwarding of your emails with Gmail.
- Gmail read receipts: Receipt confirmation gives you the assurance that important emails and attachments have been read or seen by the recipient.
- Gmail archive: The archive function is a convenient solution for tidying up your inbox.
- Cancel sending an email in Gmail: Carelessly sent mails can be recalled with this clever function.
- Change password in Gmail: Set up a new password for yourself if you want to change your old password or have forgotten it.
- Delete Gmail account: We will guide you through the process of deleting your Gmail account.
- Automatic backup & easy recovery
- Intuitive scheduling and management
- AI-based threat protection
