How to create a Joomla template
Joomla provides frontend templates that you can use to change the appearance of your website. For maximum individuality, you can create Joomla templates yourself.
What do you need to create a Joomla template?
It is not difficult to give your Joomla website its own individual look. You only need three things to make your own Joomla template for your website:
- Joomla installation, minimum version 3.9: You need a current version of the CMS. All versions from the 2018 Joomla 3.9.x onwards are suitable for creating your own templates.
- Basic HTML and PHP knowledge: You need basic knowledge of HTML and PHP to follow the tutorial.
- CSS knowledge: CSS (Cascading Style Sheets) is required for website design. Our CSS tutorial provides a good introduction to the style sheet language. You should also be familiar with the most important CSS tricks if you want to create a Joomla template.
How to create a Joomla template step by step
Once the above requirements are met, you can start creating your own template. To do this, log in to your Joomla website and then follow our step-by-step instructions below.
Step 1: Create folder structure
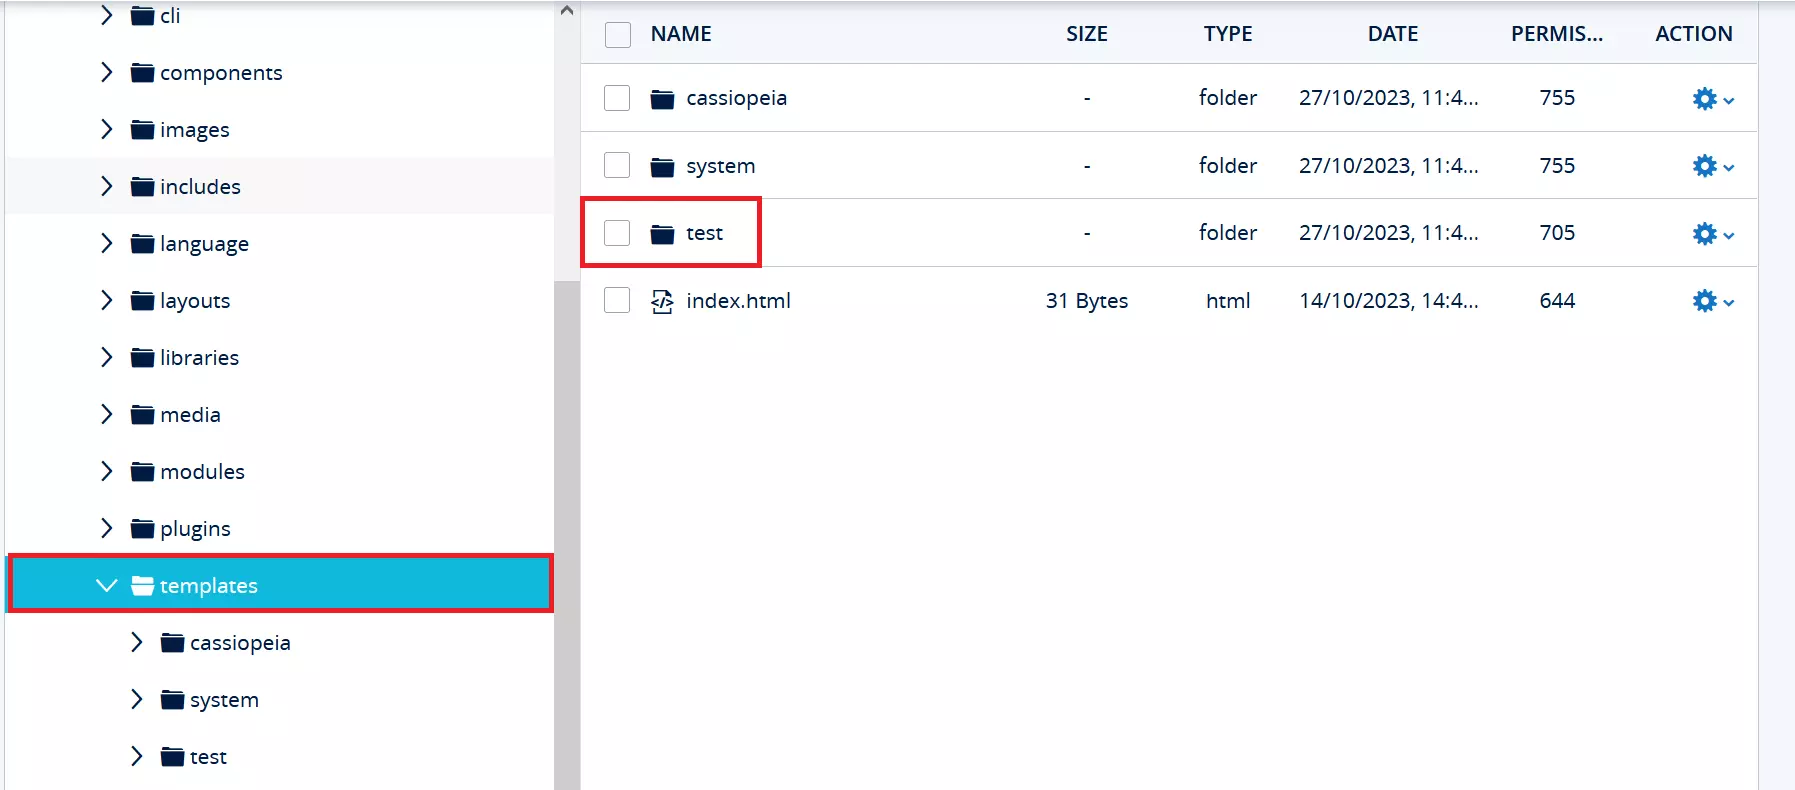
The first step is to create the folder structure required for your template. This can be done in just a few clicks. To do this, navigate to the templates folder, which can be found in the file structure of your Joomla installation. All your templates will be listed in this folder. Create a new folder and name it. We will create a folder named “test”, where the template will be placed later on.

All files required for the template must be created to complete the folder structure. The code is based on a sample template:
templateDetails.xml
First, you should create the file that makes it possible for you to install a template in Joomla in the first place. This is the manifest file templateDetails.xml. All basic information about your template is defined in this file. This includes the name or the author of your template, for example.
You don’t need to be an Extended Markup Language professional to understand the lines of code in the file. The most important XML file tags are:
<name>: Name of the template<creationDate>: When the template was created<author>: Author of the template (i.e., you)<authorEmail>: Author’s email address (i.e., yours)<authorUrl>: URL of your website<copyright>: Copyright owner of the template<license>: Information about the license<version>: Current version of the template<description>: Description of the template<files>: All files to be installed with the template<positions>: Positions of the modules in the template
<?xml version="1.0" encoding="utf-8"?>
<!DOCTYPE install PUBLIC "-//Joomla! 2.5//DTD template 1.0//EN" "https://www.joomla.org/xml/dtd/2.5/template-install.dtd">
<extension version="3.1" type="template" client="site">
<name>test</name>
<version>1.0</version>
<creationDate>19.10.2022</creationDate>
<author>Example user</author>
<description>IONOS Joomla Test Template</description>
<files>
<filename>index.php</filename>
<filename>templateDetails.xml</filename>
<filename>template_preview.png</filename>
<filename>template_thumbnail.png</filename>
<filename>favicon.ico</filename>
<folder>css</folder>
</files>
<positions>
<position>menu</position>
<position>aside</position>
<position>footer</position>
</positions>
</extension>index.php
The index.php file is the place where the main layout of your entire website is specified. At the beginning, a simple HTML basic structure is enough:
<!DOCTYPE html>
<html lang="en" dir="ltr">
<head>
<meta name="viewport" content="width=device-width, initial-scale=1.0" />
<!—Header details-->
</head>
<body>
<div id="navbar">
          <nav>
<ul>
<li><a href="#">Category 1</a></li>
<li><a href="#">Category 2</a></li>
<li><a href="#">Category 3</a></li>
<li><a href="#">Category 4</a></li>
</ul>
          </nav>
      </div>
      <div id="content">
<h1 id="heading">Test template</h1>
<img class="iamge" src="https://picsum.photos/900/500" alt="Image"/>
<p>You can create a Joomla template in just a few steps. Just follow the step-by-step instructions from IONOS.
</p>
      </div>


    <footer id="copyright">
      <div id="footercontent">
<p>Copyright by IONOS</p>
      </div>
</footer>
</body>
</html>css folder and template.css
Next, create a folder called “css”. This folder will contain all the files that influence your template’s design. In this folder, you will create the file template.css, where you can use code to specify the layout you want.
body {
font-family: "Arial", serif;
color: black;
line-height: 150%;
}
#navbar ul {
    list-style-type: none;
    margin: 0;
    padding: 0;
    overflow: hidden;
    background-color: #003399;
}
#navbar li {
    float: left;
}
#navbar li a {
    display: block;
    font-size: 26px;
    color: white;
    text-align: center;
    padding: 16px 18px;
    text-decoration: none;
}
#navbar li a:hover {
    background-color: white;
    color: #003399;
}
#heading {
    font-size: 48px;
    color:    #003399;
    text-shadow: 0 0 5px #000099;
}
#footercontent {
    float: right;
    padding-right: 10%;
}
Step 2: Install template
The second step is to install the template you just created. To do this, navigate to System > Install > Discover in the Joomla backend. You should now find your template there under the name you chose. Click on the box to the left of your template’s name to install the Joomla template.


Step 3: Activate template
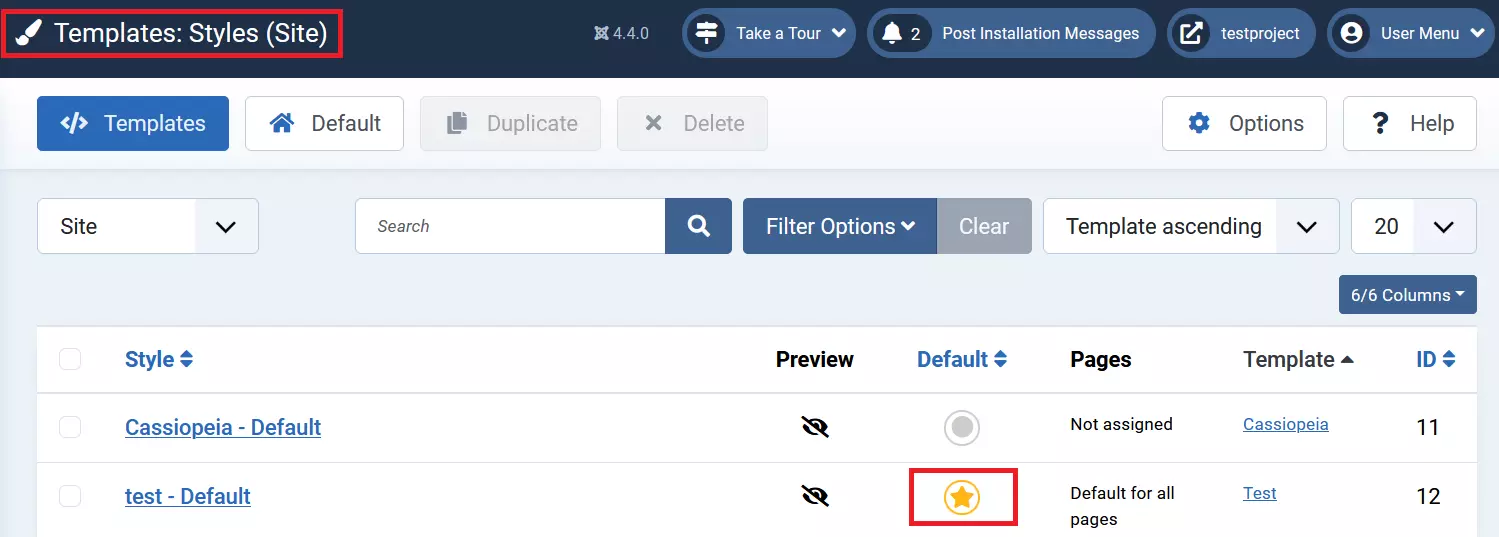
After your template has been installed, you need to activate it. This can also be done with just a few clicks in the Joomla backend. Navigate to System > Templates > Templates: Styles (Site). You can set your template as the default by clicking on the star button to the right of your template name.

Step 4: Connect template with Joomla
It is important that you connect your template to Joomla so that your website can be displayed with its new look. For this you need to edit the index.php file. To include your CSS stylesheet, use the following line of code and add it at the very top of your index.php file:
Step 5: Load header details
In the next step you have to include the header details in your index.php file. You can use PHP for this as well. In the index.php file, simply replace the <!—header details–> comment with the following line of code:
<jdoc:include type="head" />This way you request the CMS to load the relevant header information into your index.php file.
Afterwards you can preview your Joomla website:

Step 6: Connect module
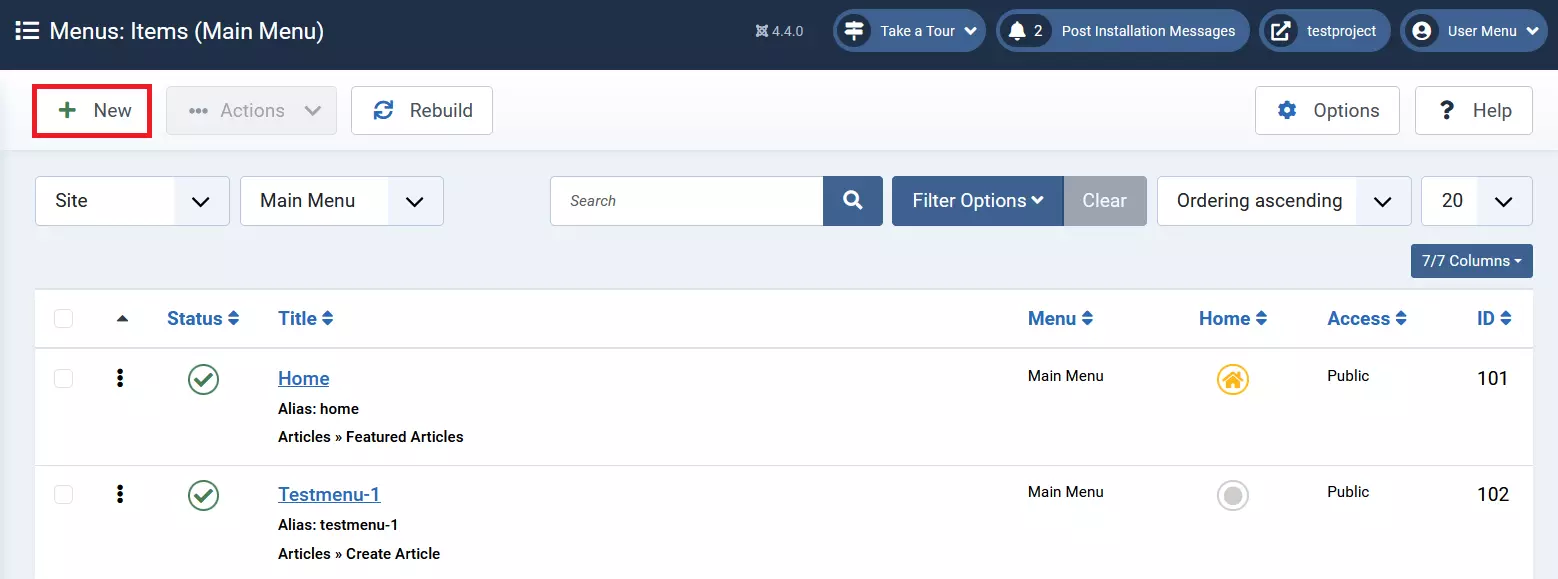
The last step is outputting your Joomla content in your template. To see this in practice, you first need to create several new menu items in the backend of your website. You can do this by clicking on Menu > New.

Now navigate to System > Extensions > Side Modules and select the menu you just created. In the advanced settings, you can set the module tag. Select the nav option.

Now replace the “nav” tag in your index.php with the following line of code to customize your template accordingly:
<jdoc:include type="modules" name="menu" style="xhtml" />Don’t have your own website yet? With Joomla hosting from IONOS, it’s easy to create your own Joomla website. In addition, you can register the domain you want with IONOS at an affordable price.

