How to change language settings in Word
For users in the U.S., Word automatically displays the ribbon and commands in English and makes English the default language when spell-checking texts and suggesting corrections. However, if you often work with documents in other languages, you can change the language in Word. Doing so can really help you as you work. In this article, we show you how to easily change the Word display language and the spell check language.
- Up to 50 GB Exchange email account
- Outlook Web App and collaboration tools
- Expert support & setup service
How to change the language in Word quick guide
- Click on File in the ribbon and then on Options in the bottom left.
- Select the Language option in the Word options window.
- Here you can change the Word display language. The changes will be applied after restarting Word. You can also change the language of the spell checker here too.
Powerful Exchange email and the latest versions of your favorite Office apps on any device — get started with our free setup assistance.
Unless otherwise indicated, the following instructions refer to Microsoft 365 and Word versions 2021, 2019 and 2016. Some steps may differ for older Word versions.
How to change the language in Word step by step
To change the display language in Word, click File on the ribbon and then Options. In the next dialog box, select Language in the sidebar on the left.

In the following menu, you can add the display language you want to use under the heading Office display language. Once you have added a language, you need to set it as the preferred language. To do this, click on the button labeled accordingly. This setting isn’t applied until you restart Word. The user interface is then displayed in the new language.
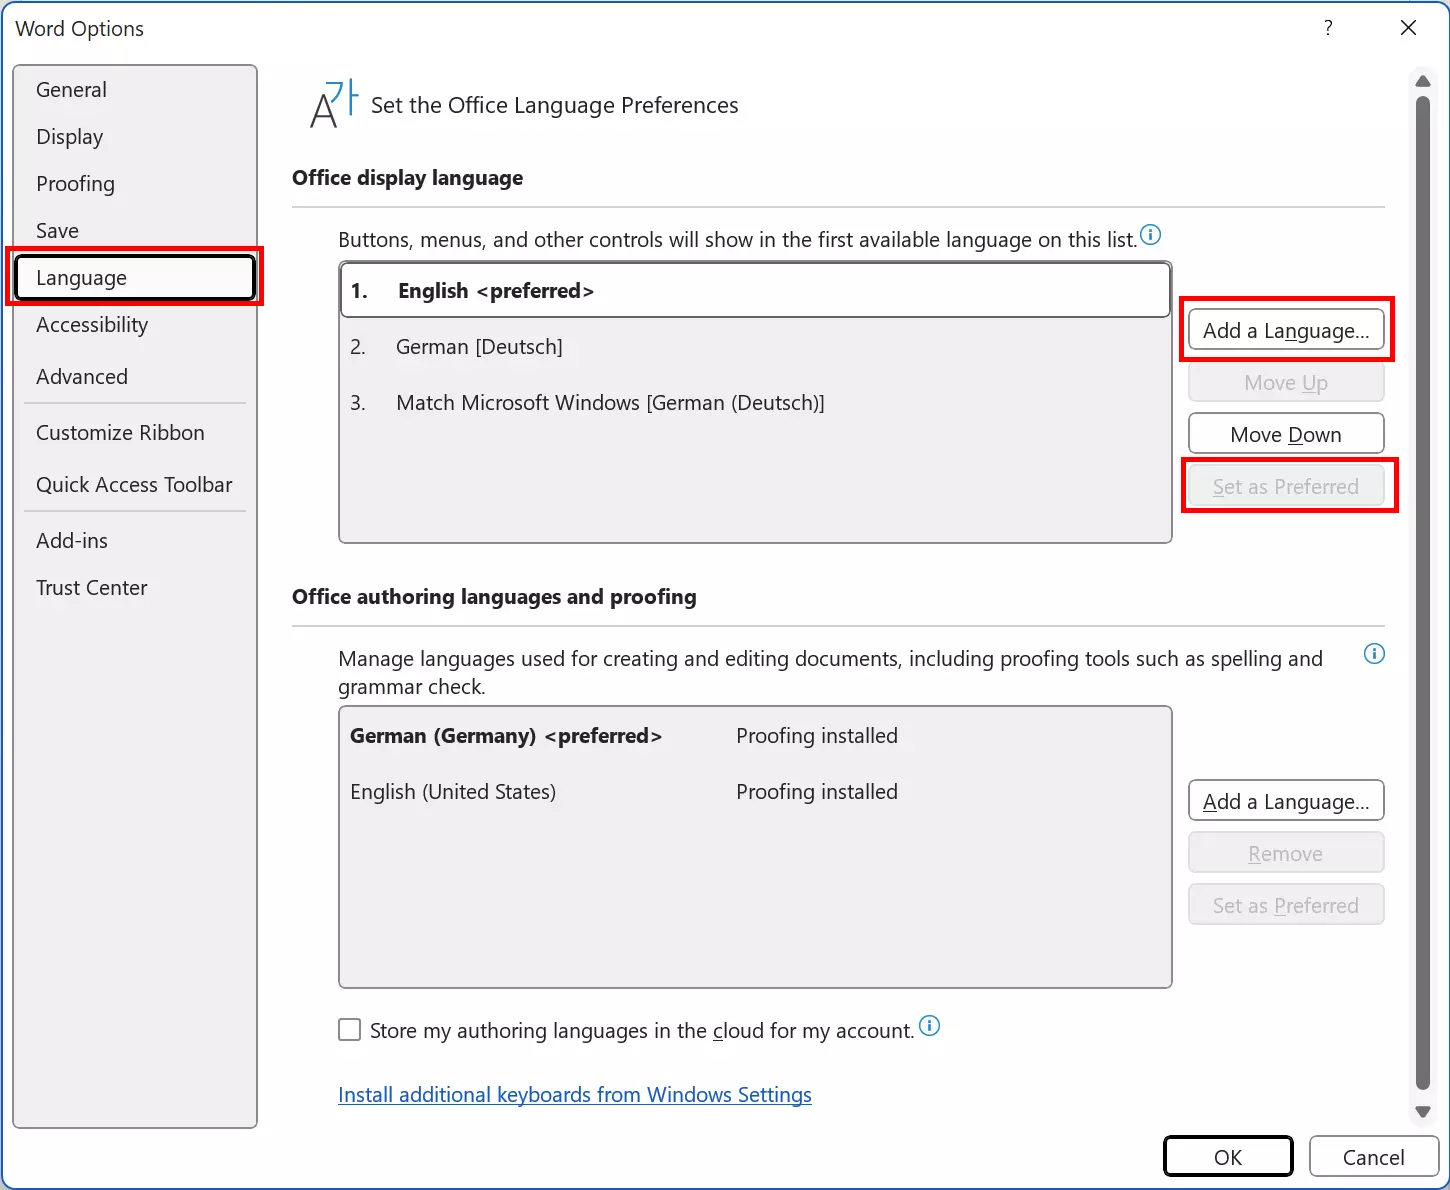
If you are using Word 2016, you can also set the Word help language independently of the display language. To do this, select a help language in the list box to the right of the display language and set this as the default. Help texts within Word are displayed in this language. After making the change, click OK at the bottom and restart Word.
If the Word user interface is displayed in the desired language but the spell checker isn’t working, then it may have been incorrectly set. You can find out more about what to do if the spell checker isn’t working in our Digital Guide article on the topic.
- Up to 50 GB Exchange email account
- Outlook Web App and collaboration tools
- Expert support & setup service
How to change the editing language in Word
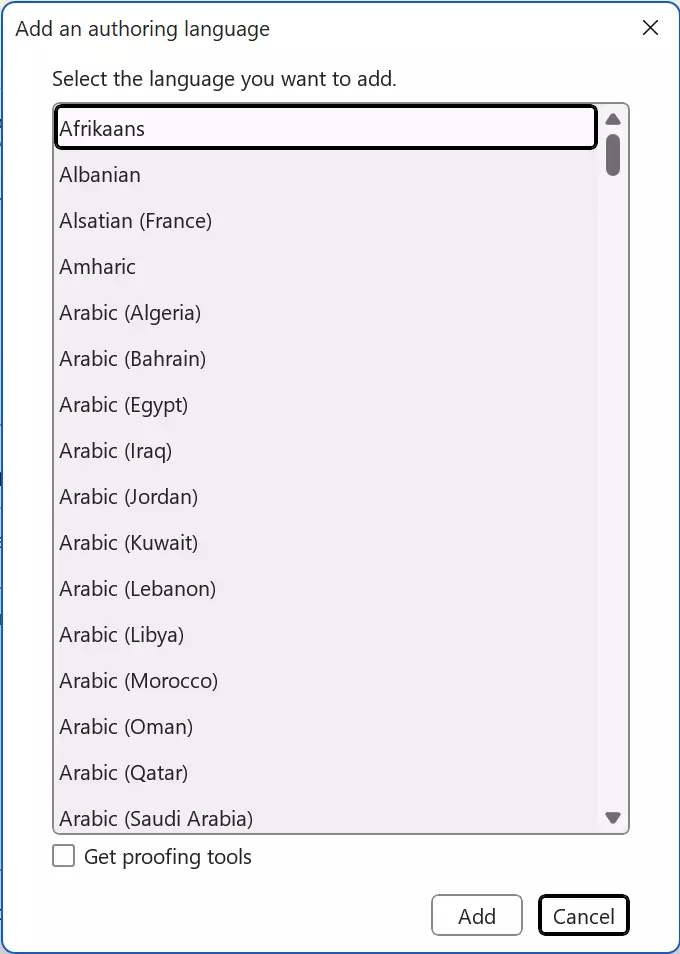
In the same menu under File > Options, you can also change the language that Word uses for editing. The setting for this can be found under the heading Office authoring languages and proofing. As with the display language, you can add a new editing language by clicking on the corresponding button and selecting the language you want to use for editing from the list. To designate a language that has already been added as the preferred editing language, all you need to do is click on the Set as Preferred button.
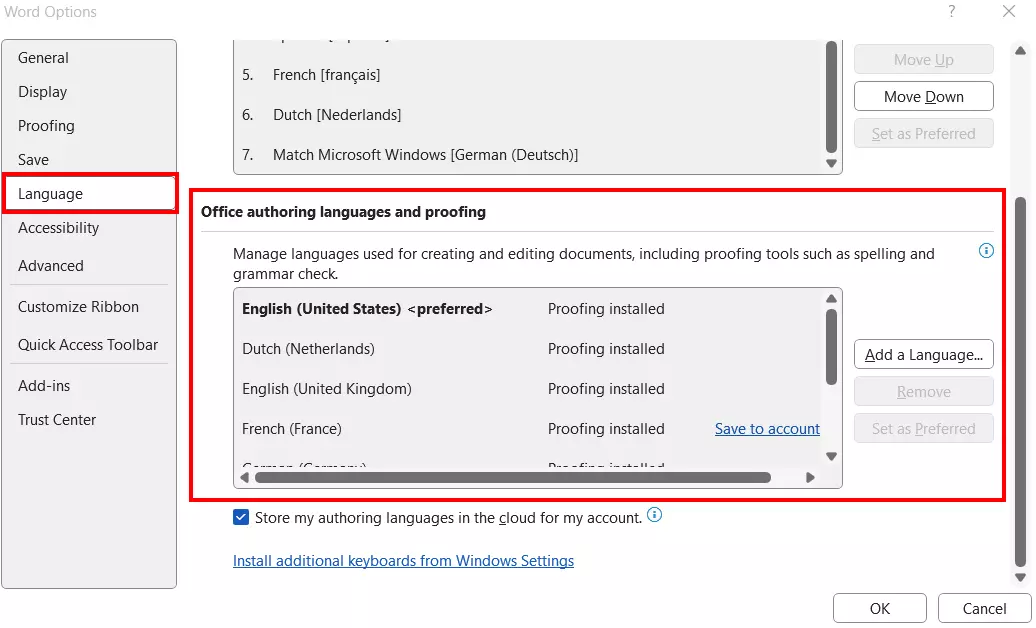
The procedure is slightly different in Word 2016. The settings for the spell check language can be found under the heading Select editing languages. To add an additional language, select your desired language from the Add a Language drop-down menu. You can set your preferred language by clicking on Not enabled next to said language. Once you’ve enabled the language you want to use for editing, click Set as Preferred to set the language for all new documents. Save your changes by choosing OK.
Need flexible, GDPR-compliant online storage with maximum data security? Then HiDrive from IONOS is the right choice for you!
Changing the display language in Word Online
The online version of Word is a free alternative to the desktop version of Word. Word Online edits documents on OneDrive and also takes on the display language of OneDrive.
- In the browser of
www.office.com, click on the settings icon at the top right and then on Change language.
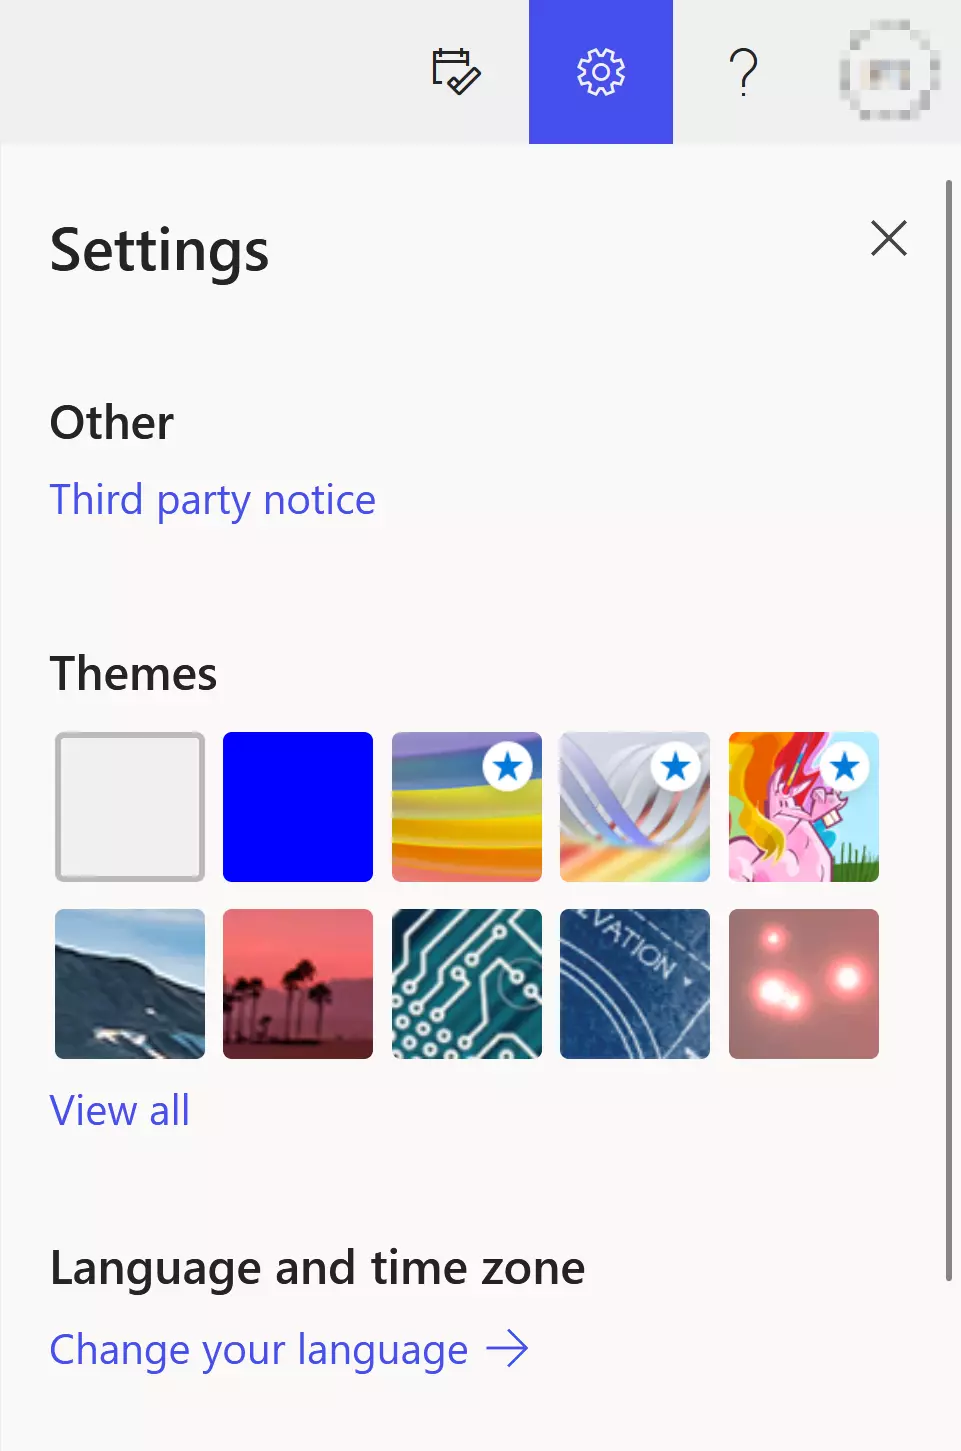
- Under the Languages heading, click on Display language > Change display language. You can now select a different display language for OneDrive from the list.
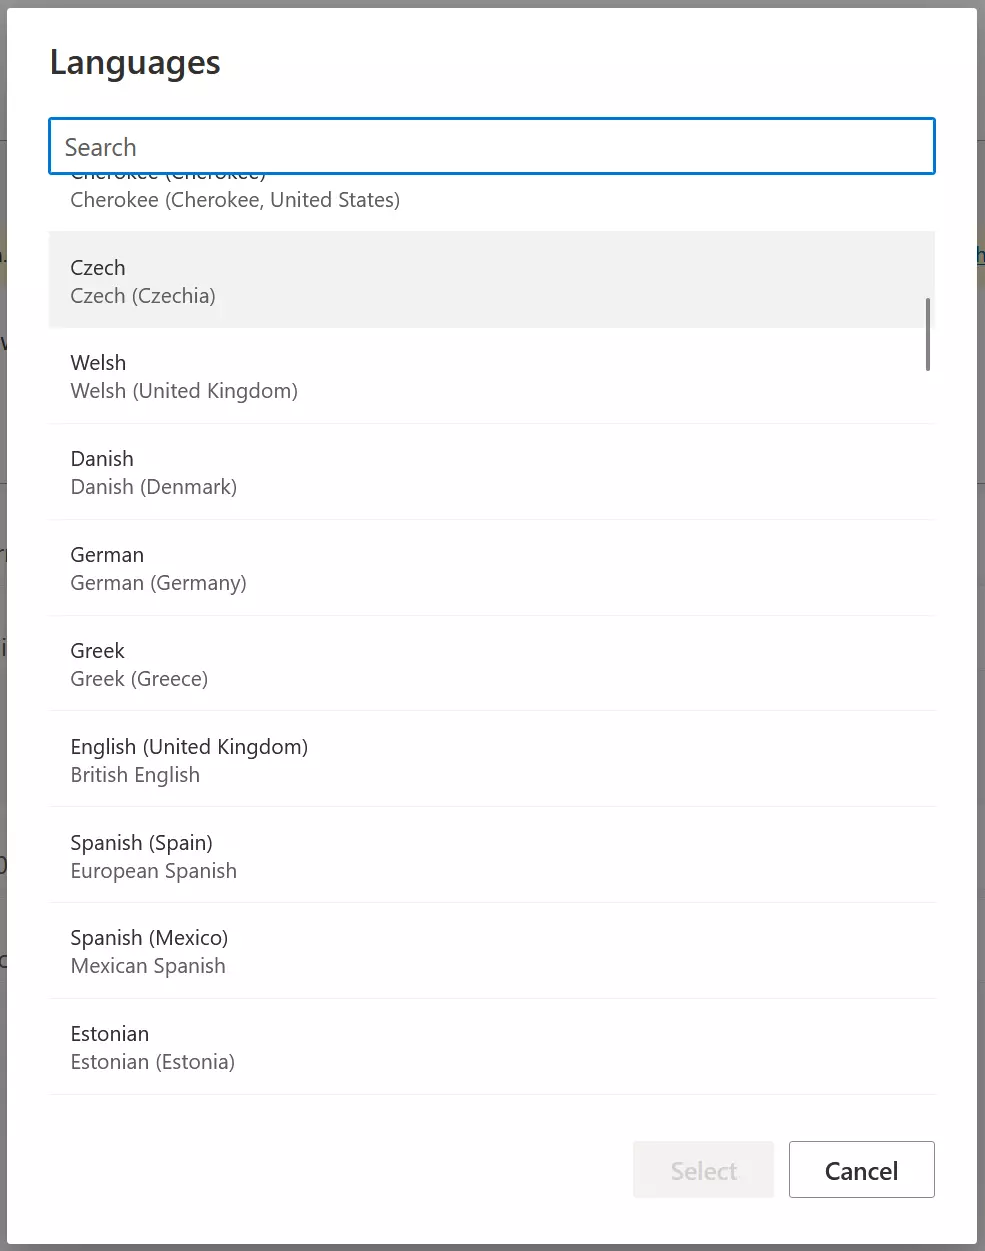
- Confirm the selection with Select and Update. The OneDrive interface will then be displayed in the browser in the new language.

- To ensure that the entire Word user interface is displayed in your selected language, you should log in again.
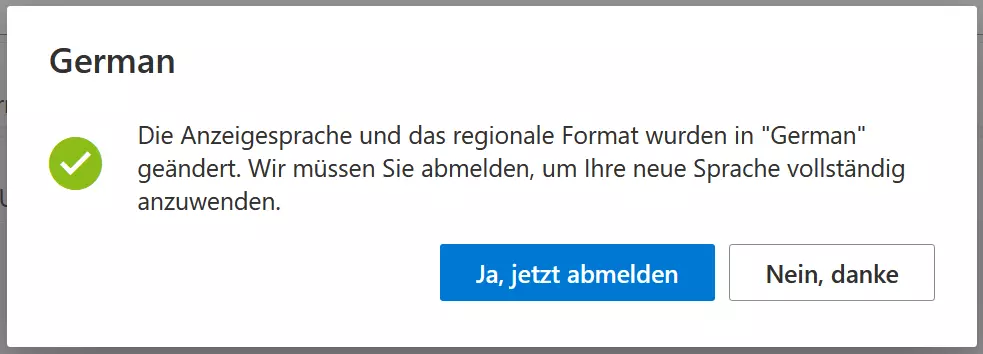
- Only after having logged in, will the Word Online interface appear in the newly selected language.

Microsoft 365 is a server-based office solution that includes the popular Office applications Word, Excel and PowerPoint and is ideal for home users and small businesses. Automatic updates ensure that you always have the latest version.
Changing the editing language in Word Online
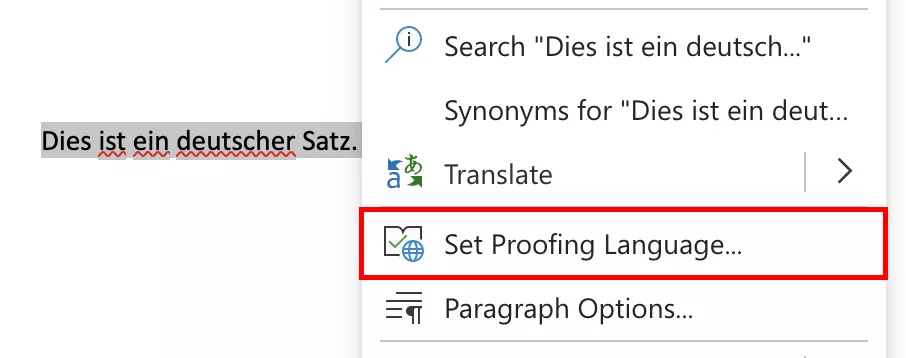
In Word Online, the editing language is set individually for each document. Open a document, select all text using the keyboard shortcut [Ctrl] + [A] or select several paragraphs. Then, right-click within the selected area. A toolbar and a context menu will appear. In the context menu, select Set Proofing Language. A list of available languages will appear. Select the language you want to use and click OK.
If you use Word for your online business, you’ll no doubt work with sensitive data at times. It may therefore be necessary to encrypt a Word file or recover a deleted Word document. It may also be the case that you need to unlock a Word document from other Word documents. Our Digital Guide articles can help you.
How to change the language in Word on a Mac
The procedure for setting the language is slightly different in the macOS version of Microsoft Word. To change the editing language on a Mac, go to Tools > Language and select the desired language. If you want to use this language as the default language for all new documents, click the Default button.
The display language for Word cannot be changed independently of the operating system language in macOS. Word always uses the system setting on a Mac. If you want to change the display language for the user interface, you have to change the language for the operating system. You can find this setting in the Apple menu under System Preferences > General > Language & Region.
Word won’t open or Word isn’t responding? Sometimes it can be difficult to find the cause. Our articles show you how to diagnose and solve the problem.

