How to share an Outlook calendar
Microsoft Outlook provides not only email capabilities but also extensive groupware functionalities for managing contacts, tasks, and appointments. Businesses utilize Outlook’s calendar feature to organize collaboration and plan meetings. Shared scheduling is made easier through Outlook calendar sharing, both within the organization and with external parties.
Powerful Exchange email and the latest versions of your favorite Office apps on any device — get started with our free setup assistance.
How to share an Outlook calendar quick guide
- Open calendar view > Home tab > click on Share calendar
- Select calendar and adjust permission settings > OK
- Select contact under Add > Adjust authorization settings > OK
Microsoft Office 365 provides cloud-based office applications, whereas Outlook is a desktop application installed locally. For personal use, it is primarily utilized as an email program that manages multiple accounts. In organizational settings, Outlook often acts as a client for the Microsoft Exchange Server, which serves as a central hub for emails, appointments, and tasks. The following sections will demonstrate the options available for sharing calendars both in the Outlook desktop application and the web version.
In this article, we provide you with step-by-step instructions for the Outlook versions of Microsoft 365 as well as for Outlook 2021, Outlook 2019 and Outlook 2016. The user interface differs depending on the version and Outlook view settings. However, the process for exporting contacts from Outlook is basically the same.
How to share a calendar in Outlook desktop
In the Outlook desktop version, you have the following options for granting other people access to calendar information:
- Share the Outlook calendar as a snapshot
- Share the Outlook calendar (only in combination with an exchange server)
- Share the Outlook calendar by publishing it on a website
The following screenshots were created with Microsoft 365 Outlook.
How to share your Outlook calendar as a snapshot
Regardless of how Outlook is used in your home or business, the desktop application will allow you to send a snapshot of your calendar by email. Follow these steps:
- Click on the Calendar tab in the footer bar of your Outlook application window.
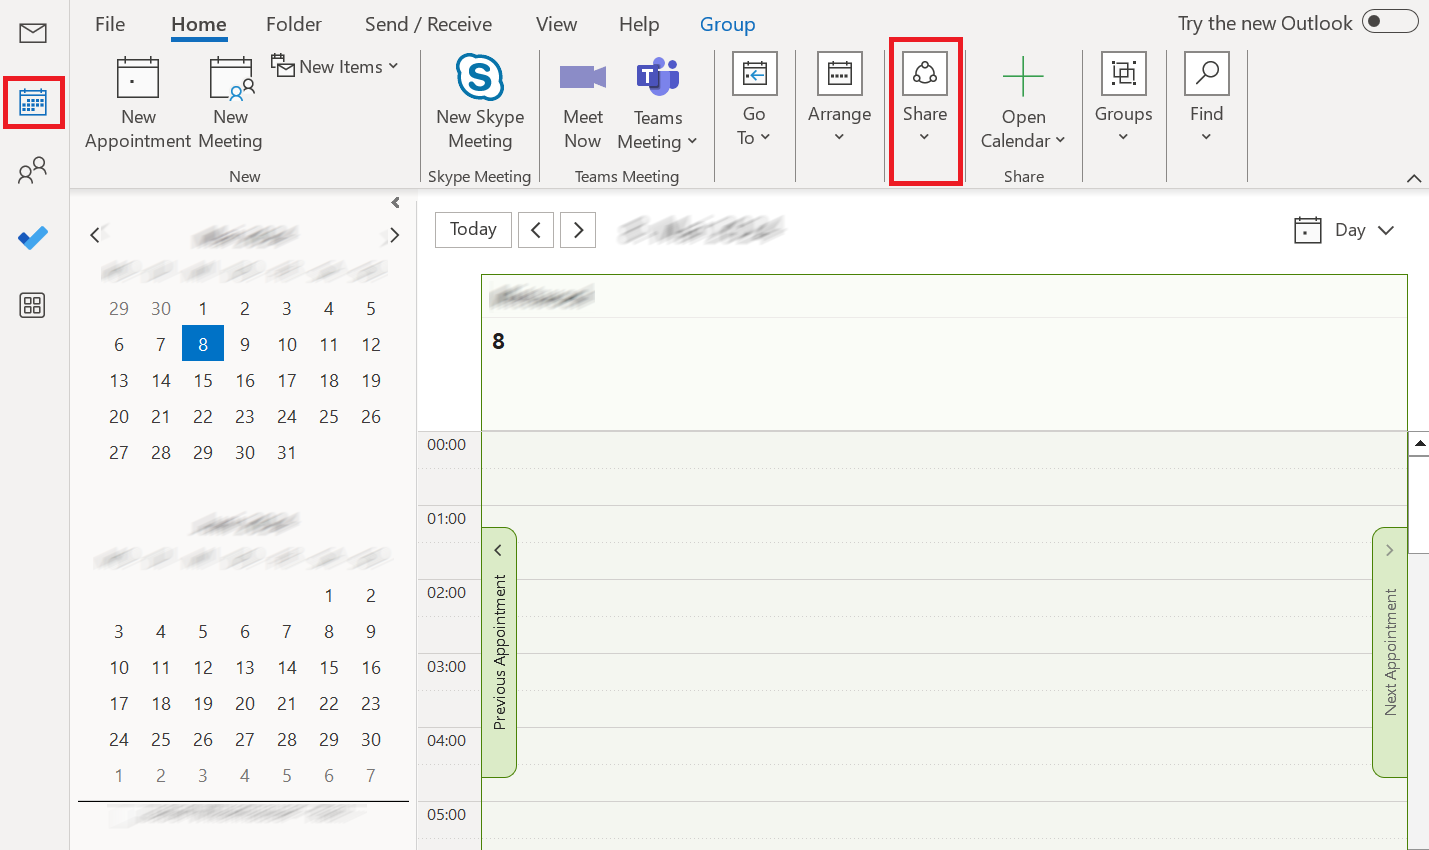
Sharing calendars in Outlook is not limited to just the default calendar automatically generated in each Outlook profile. Create as many calendars as you like and share them with different people as needed.
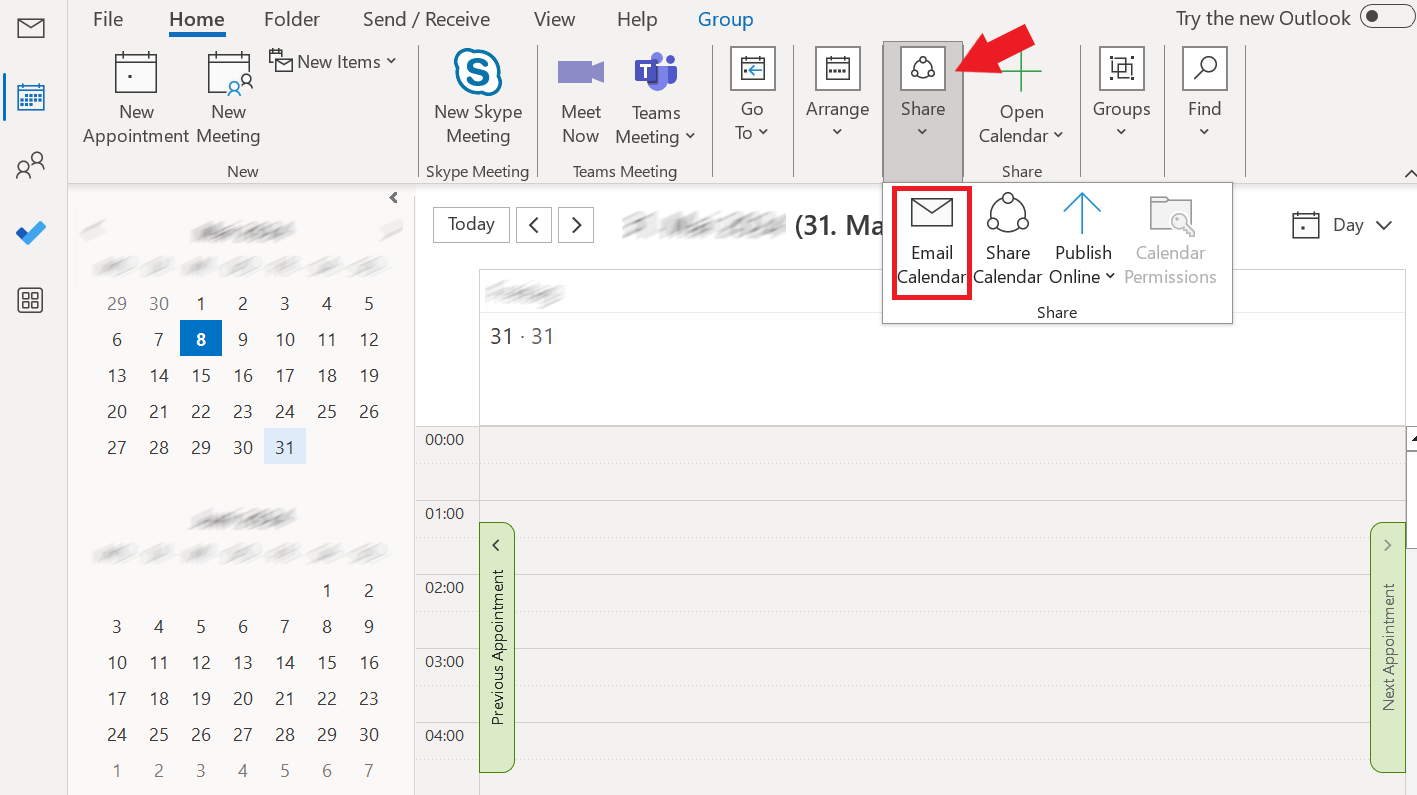
- Select the Home tab in the toolbar and click on Email Calendar under Share.
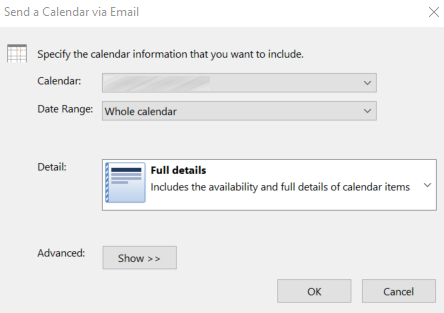
- A window will open for a new message, and the dialog box Send a Calendar via Email will appear. There you can select the desired calendar and a time period. You can select the entire calendar or just individual days, weeks or months.
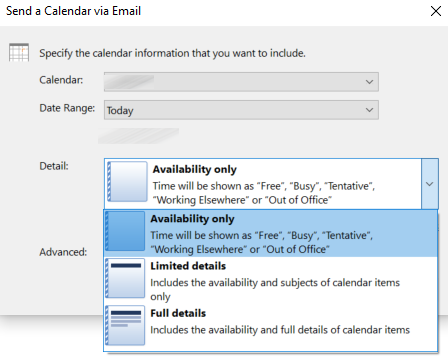
- Select one of three levels of detail to define what information the calendar section should contain.
- Under Advanced, Outlook offers the option of including appointments and attachments marked as private in the snapshot of your calendar. You can also choose one of two email layouts:
- Daily schedule
- List of events
If you mark an appointment as private in Outlook, it will not be displayed when sharing the calendar or in snapshots. Unless you explicitly include items marked as private by checking the corresponding box.
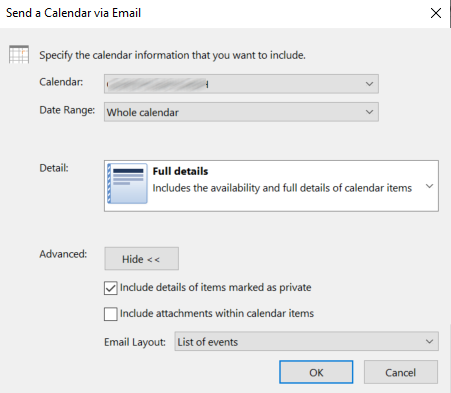
Once you have selected the desired calendar and made settings for the time period, the level of detail and the display format, confirm with OK. Outlook will then insert a copy of the selected calendar section as a snapshot in a new email.
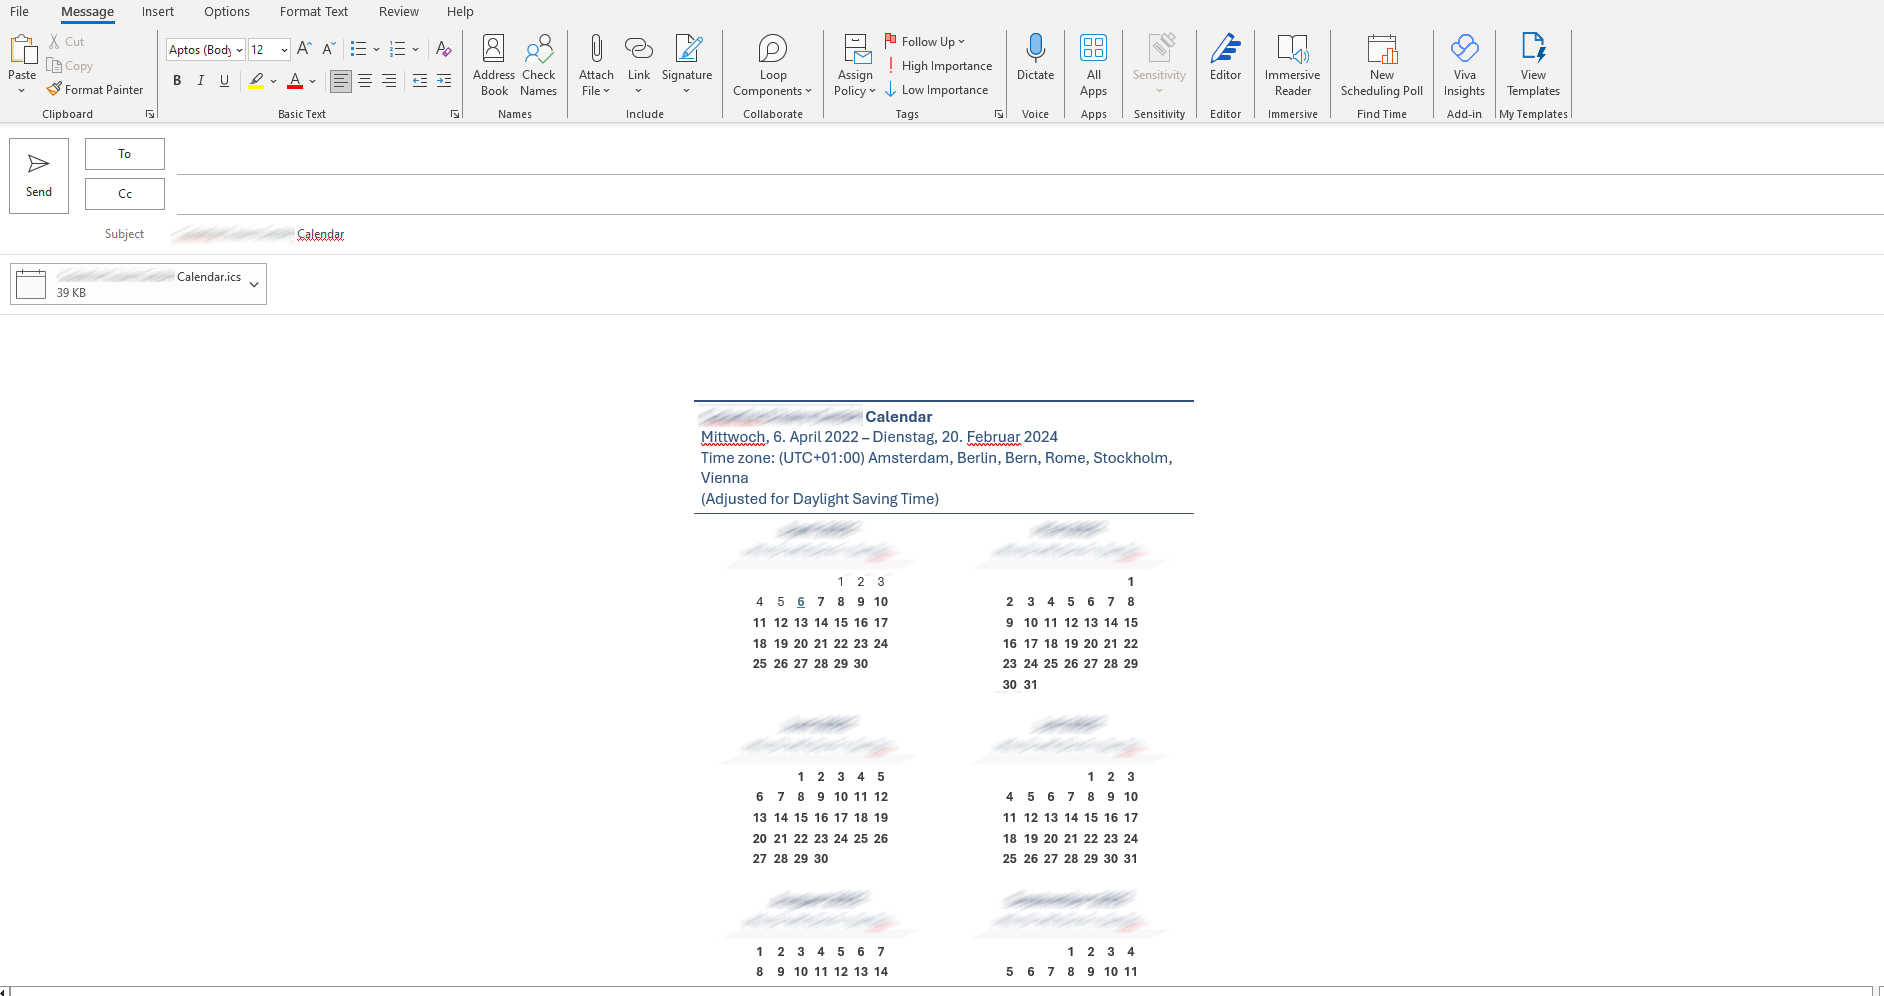
- Enter the desired recipient’s email address and add a personal message to the email if required. Click Submit to share your Outlook calendar.
Each message created with the “Send a Calendar via Email” function also contains an iCalendar file (ICS), which enables the recipient to open the selected calendar section in any calendar program. The file format is supported by various products from different providers. The best known of these applications include Google Calendar, Apple Calendar, IBM Lotus Notes, Yahoo! Calendar, Evolution, eM Client, Mozilla Thunderbird, SeaMonkey and Novell GroupWise.
How to share your Outlook calendar with Microsoft Exchange Server
If you use your Outlook desktop application in conjunction with an exchange server, the software allows you to share calendars that are updated automatically. To share an Outlook calendar, you can send a sharing invitation to people both inside and outside your company. Alternatively, Outlook allows you to publish your calendar on a website.
Reach out in your name every time you hit send — includes domain, 2 GB+ storage, and more.
How to share your calendar with people inside your own organization
To share your Outlook Calendar with a person in your organization, follow these steps:
- Select the calendar view in your Outlook desktop application. Then go to the Home tab in the toolbar and then Share Calendar in the Share section.

- In the dialog box that appears, use the Add section to search for individuals in your address book that your wish to share your calendar with. Select the desired Outlook calendar permissions for each person, then click OK to send an automatic sharing invitation via email. You can modify the access levels for others at any time via this menu.
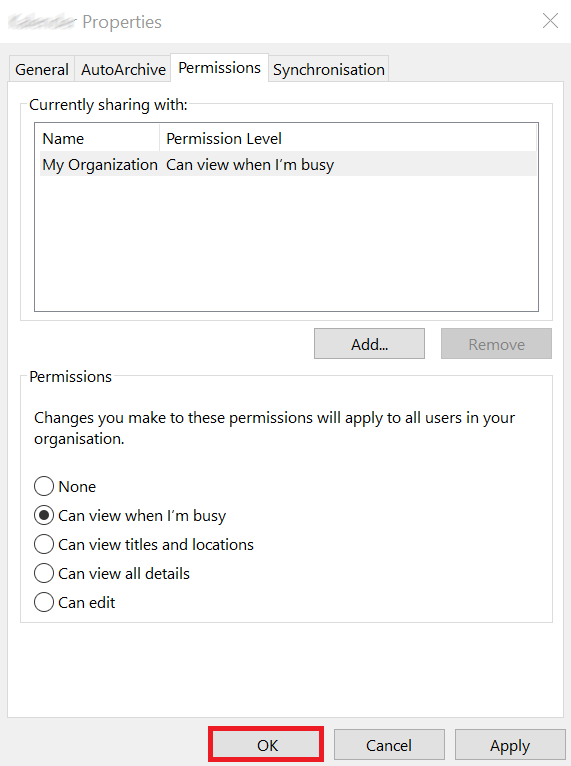
Recipients who receive a sharing invitation by email only need to click on the Open calendar button to add the sharing calendar to their own calendar list.
If you want to stop sharing your calendar again, select the people you want to revoke access to under Currently shared with:. Click on Remove and then OK to save the changes.
How to share your calendar with people outside your organization
Do you want to share your Outlook Calendar with contacts outside your organization? It is more or less the same process as sharing a calendar with colleagues. However, something to note is that many networks limit your ability to share detailed calendar information with those not in your network.
How many details your organization can share with external users is set out by your network administrator in the sharing policy settings. If it is not possible to share your calendar with the desired level of detail, you will receive an error message stating that the calendar cannot be shared.
In this case, contact the administrator of your network or select a different level of detail.
How to publish a calendar to a website
Another way to share an Outlook calendar with people outside your own organization is to publish it on a website set up specifically for this purpose. Outlook offers the Publish Online function for this purpose. Please note that you need a web server that supports the WebDAV protocol. Proceed as follows when publishing:
- Go back to the Outlook calendar view, check the calendar you want to share and select the Home tab. There, click on Publish Online.
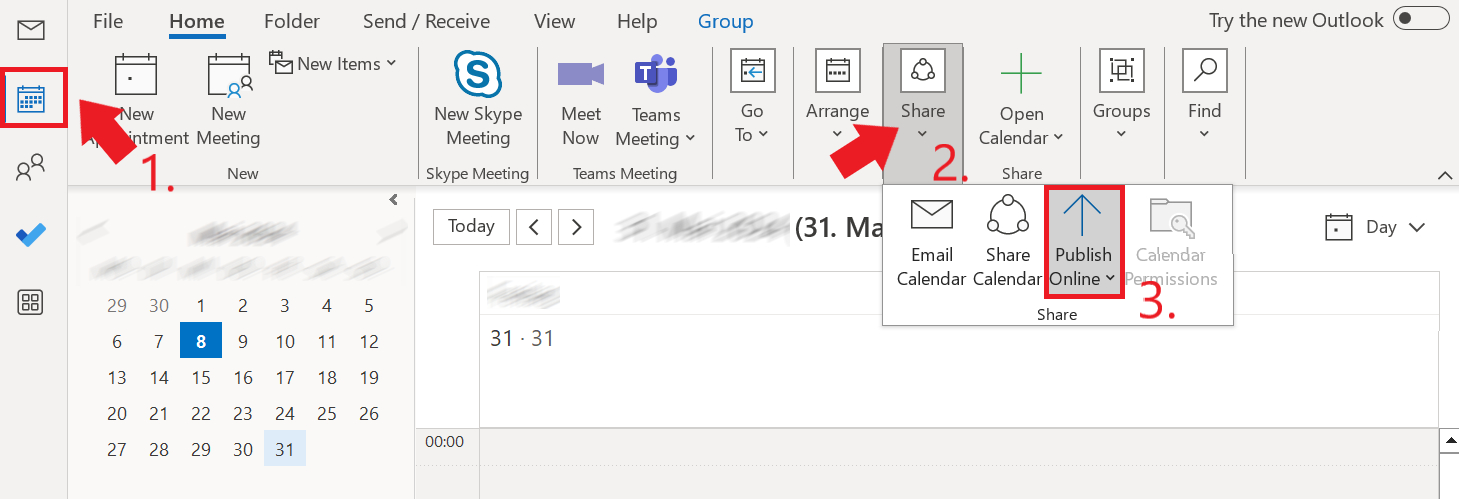
- The Publish to WebDav Server… function is displayed in the drop-down menu. Select this function.
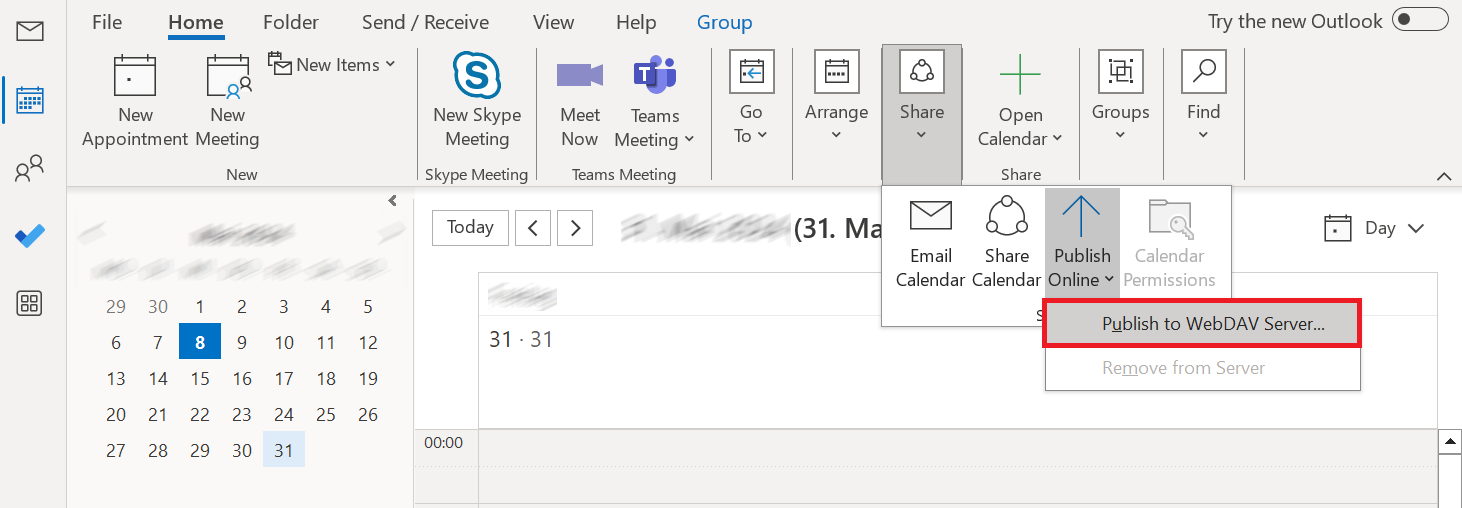
Alternatively, some Outlook implementations offer the option of publishing calendar websites directly on the Exchange server within your own network.
- If you decide to publish to a WebDav server, Outlook will prompt you for the WebDav server address, and the desired time span and level of detail using the Publish Calendar to Customised Server box.
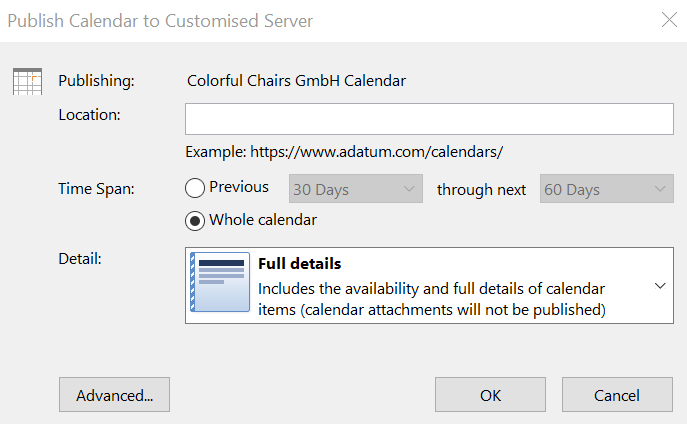
- In the Publish Calendar to Customised Server dialog box, click Advanced… to make detailed settings for upload method, private items or update frequency.
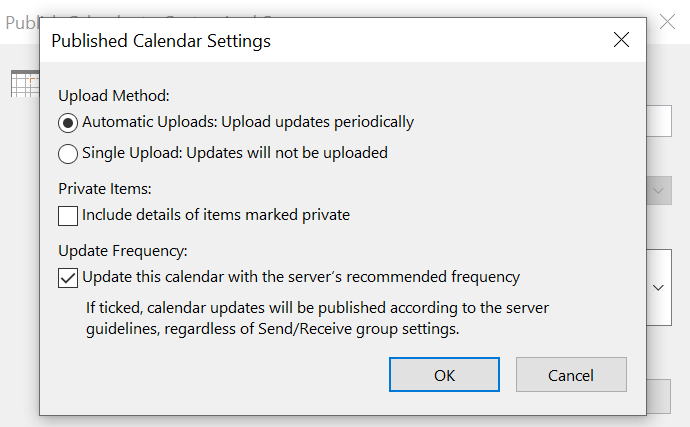
Calendar information that you post on a website is visible to anyone who knows the website’s URL.
How to share your Outlook calendar on the web and the new Outlook
Sharing calendars works slightly differently in the web version of Outlook and the new Outlook:
- Select the calendar you want to share and click Share.
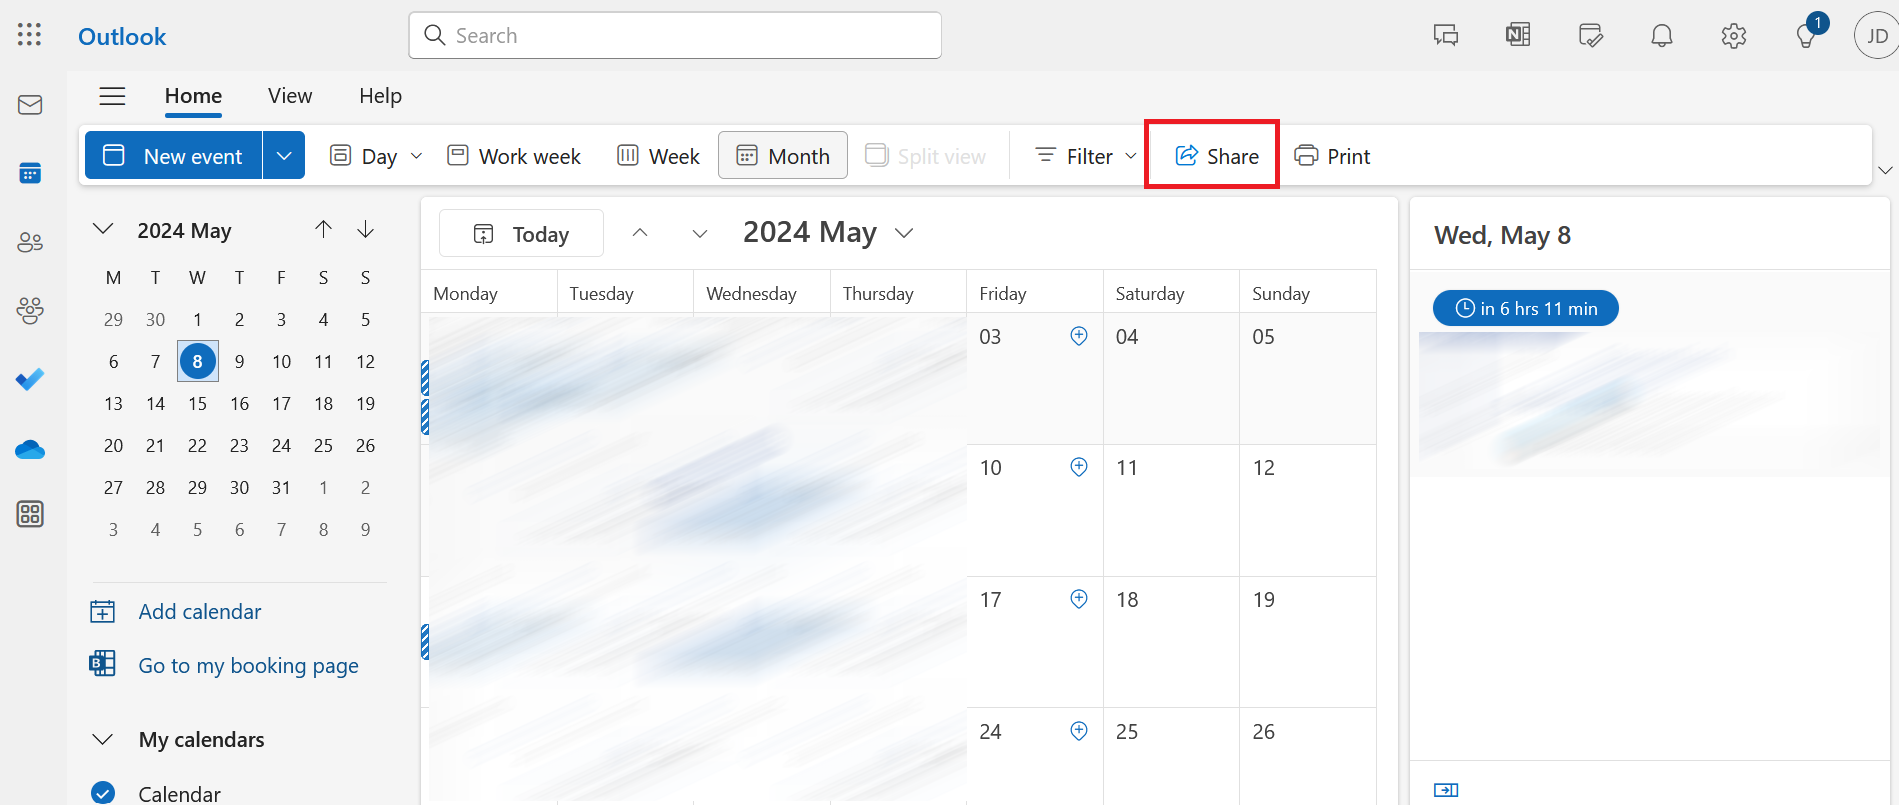
In the Sharing and permissions dialog box that appears, you can view who has access to your calendar both within and outside your organization. You can also modify the Outlook calendar permission settings directly from there.
- To share the calendar with a new person, enter their email address or contact name in the input field.
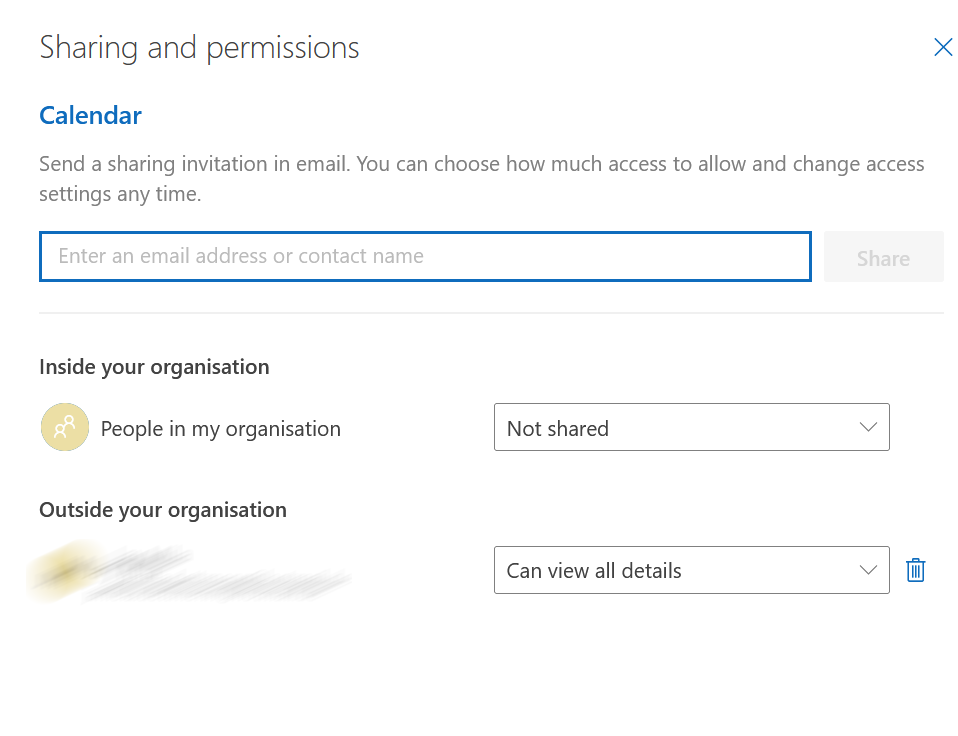
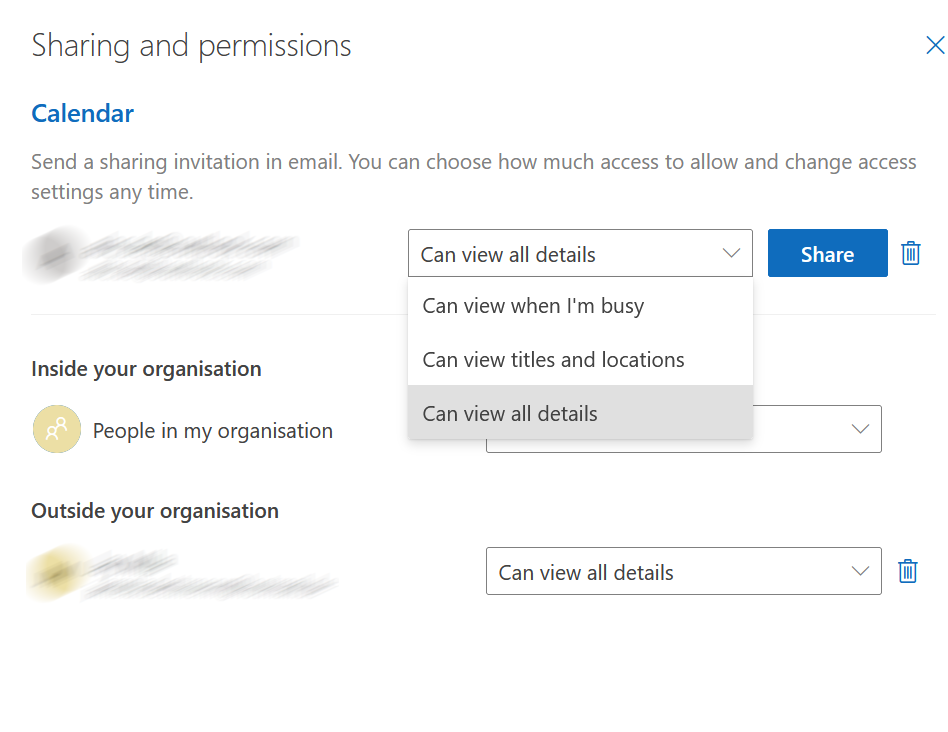
- If you have entered an email address or a contact, you can adjust the authorization settings via the drop-down menu. Click on Share to send an invitation by email.
- Intuitive drag and drop editing
- AI-powered text generation
- Multiple templates to choose from