How to add Favicons in WordPress
There are two components that appear in browser tabs - the title of the webpage that’s open there and a small icon, known as the favicon. Both of these elements make it easier for users to identify a website when there are several tabs open in the browser window. Favicons are also an important part of a company’s corporate branding and improve user experience. When it comes to adding a favicon in WordPress or changing your existing one, you have three options. Keep reading for a step-by-step explanation of favicons in WordPress.
Why should you add a favicon in WordPress?
The term “favicon” is short for “favorite icon”. The small icon is an integral part of a company’s online presence. It’s shown in the tab bar of the browser, in the bookmark list, in WordPress mobile apps, and in mobile search results. This makes it important to choose a straightforward yet expressive symbol for your favicon. Adding a favicon to your WordPress site comes with the following benefits:
- It makes your website look more serious and professional.
- It makes it easier for the user to recognize your company and what it does, which improves the user’s experience of your website.
- It has a positive effect on SEO.
- If the user has several tabs open in their browser, page titles won’t be shown but the favicon is always visible.
Most companies use their logo or an adaptation of it for their favicon in WordPress.
How to add or change favicons in WordPress
You have three options for setting a favicon in WordPress: using the WordPress Customizer, using a plug-in, or adding it manually. Keep reading for the details on each of these options.
In this article, we explain how you can add a favicon to your WordPress site, assuming that you have already created one. If you don’t have a favicon yet, you can make one using most common graphics programs or with a favicon generator.
Method 1: WordPress Customizer
The simplest and easiest method for adding a favicon in WordPress has been available since WordPress version 4.3. It’s as simple as uploading your favicon, cropping it if necessary, and then finalizing it in a few clicks.
If you choose this method for managing your favicon in WordPress, your favicon should have a minimum size of 512x512 pixels. However, since the icon will be displayed with a size of 16x16 pixels in the browser tab, you should be sure that your logo is still recognizable at this scale. We’ll now explain step-by-step how to set a favicon in WordPress using the Customizer.
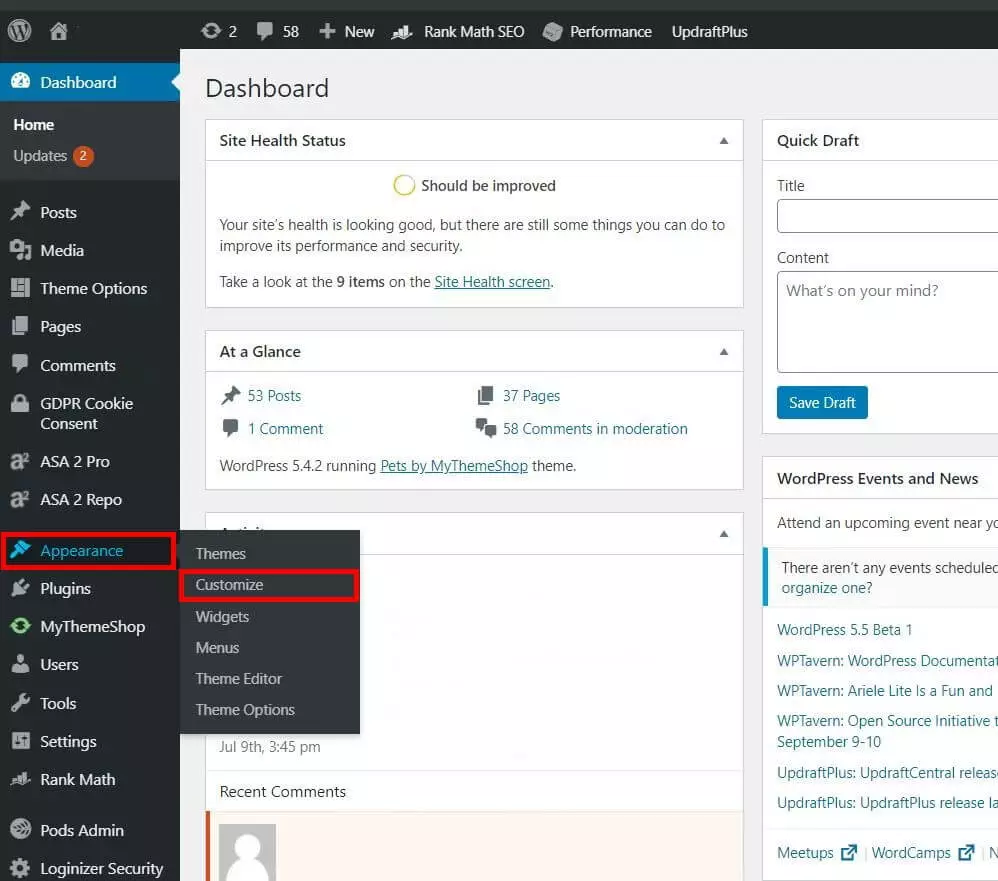
Step 1: Open the Customizer
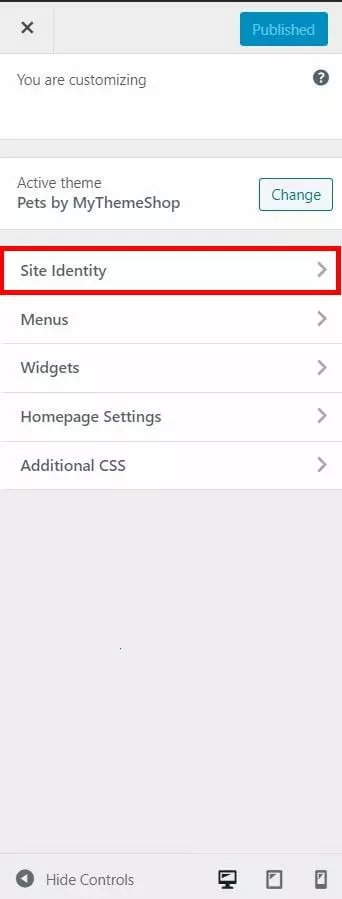
Step 2: Open “Site Identity”
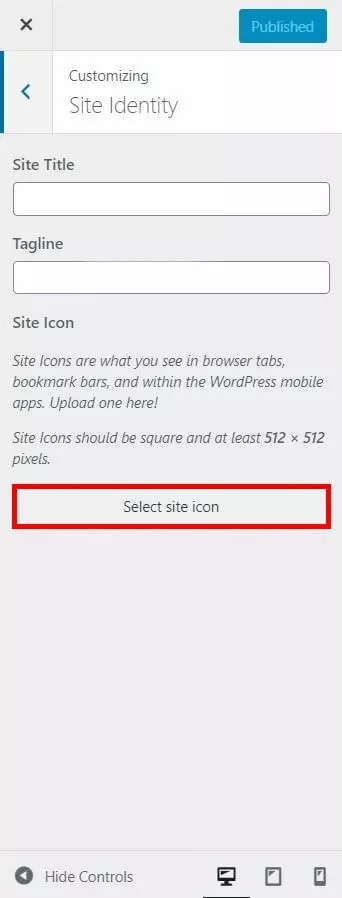
Step 3: Click on “Select site icon”
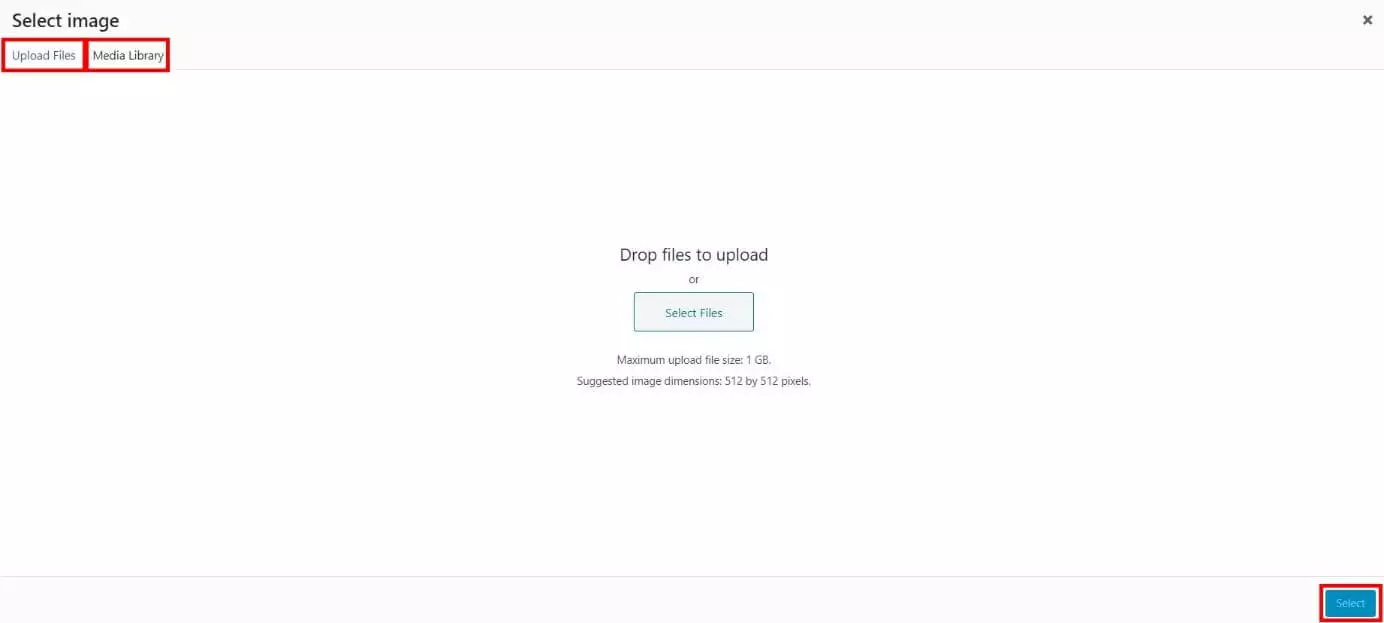
Step 4: Select your favicon
In the next step, the WordPress media library will open. If you’ve already uploaded your favicon to WordPress, you can simply select it. Otherwise, click on “Upload Files” and choose the file from the folders in your computer. Confirm your selection by clicking the “Select” button.
Step 5: Crop your favicon
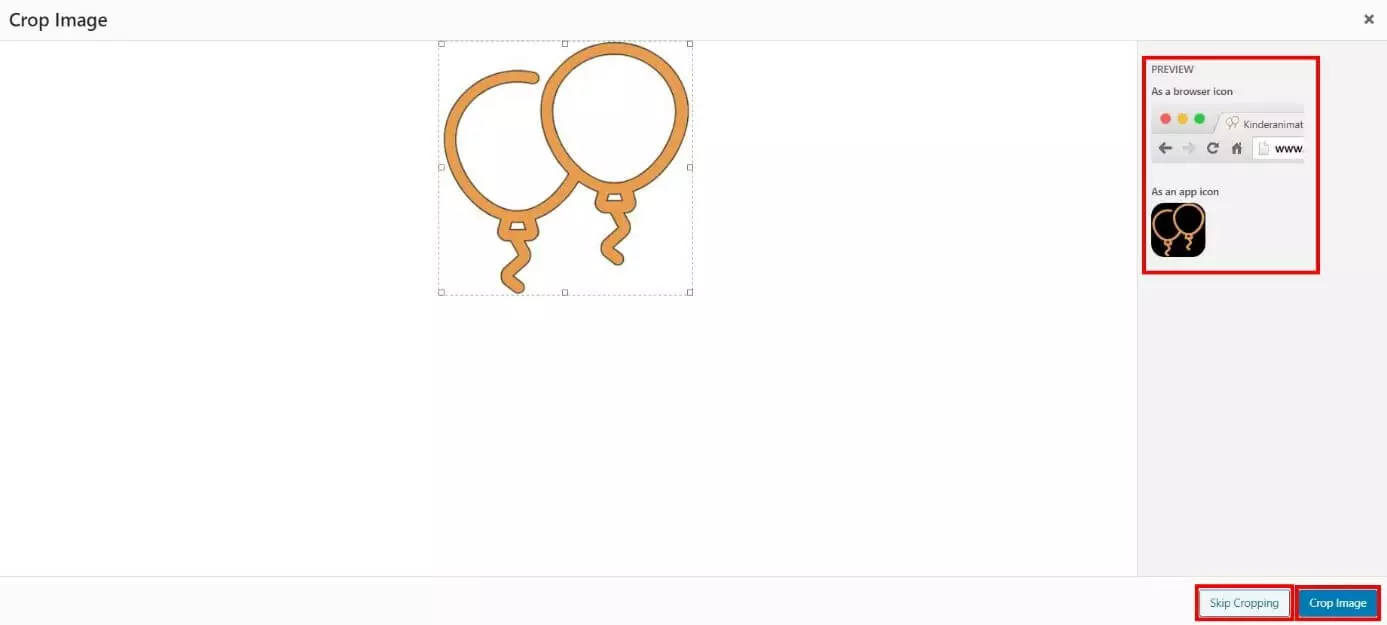
You’ll then have the chance to crop the image you selected. WordPress automatically shows a preview of your favicon in the menu on the right. As soon as you’ve finished cropping, confirm your selection by clicking “Crop Image”. If your image is already correctly sized, simply click on “Skip Cropping”.
WordPress will then automatically implement your favicon. If you want to change your favicon again, simply navigate back to the WordPress Customizer as explained above.
Method 2: Favicon plug-in
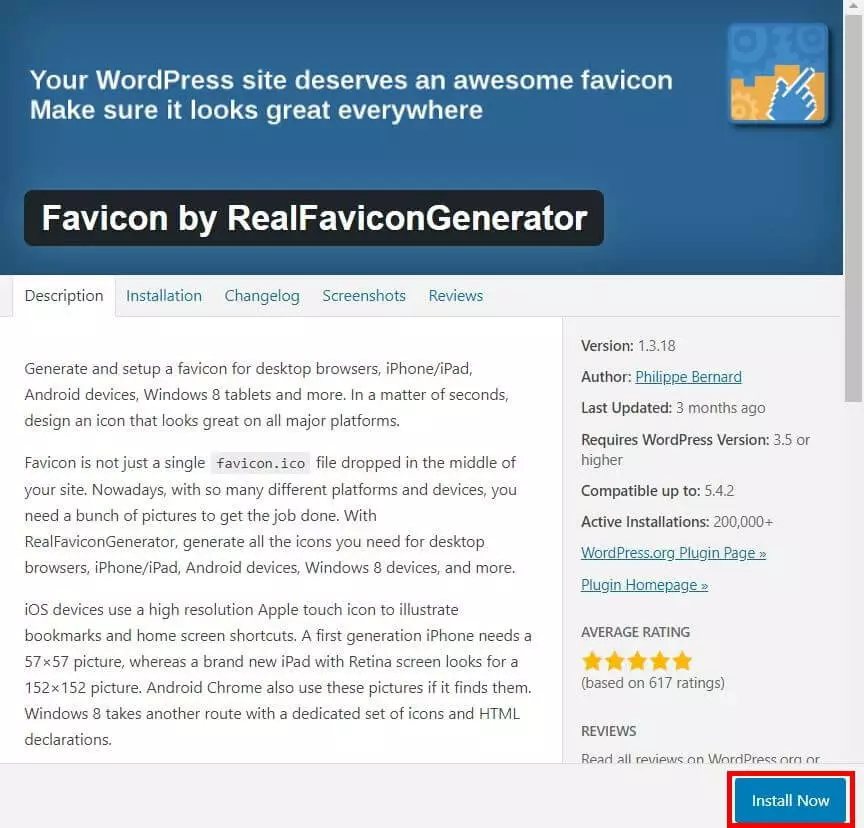
WordPress offers a plug-in for almost every feature you might need, so naturally there’s one for favicons as well. One of the most popular, free plug-ins is Favicon by RealFaviconGenerator. This plug-in provides more options for editing than the WordPress Customizer, so you can improve the compatibility of your favicon with various devices and app icons. In what follows, we explain how you can use this plug-in to add a favicon in WordPress.
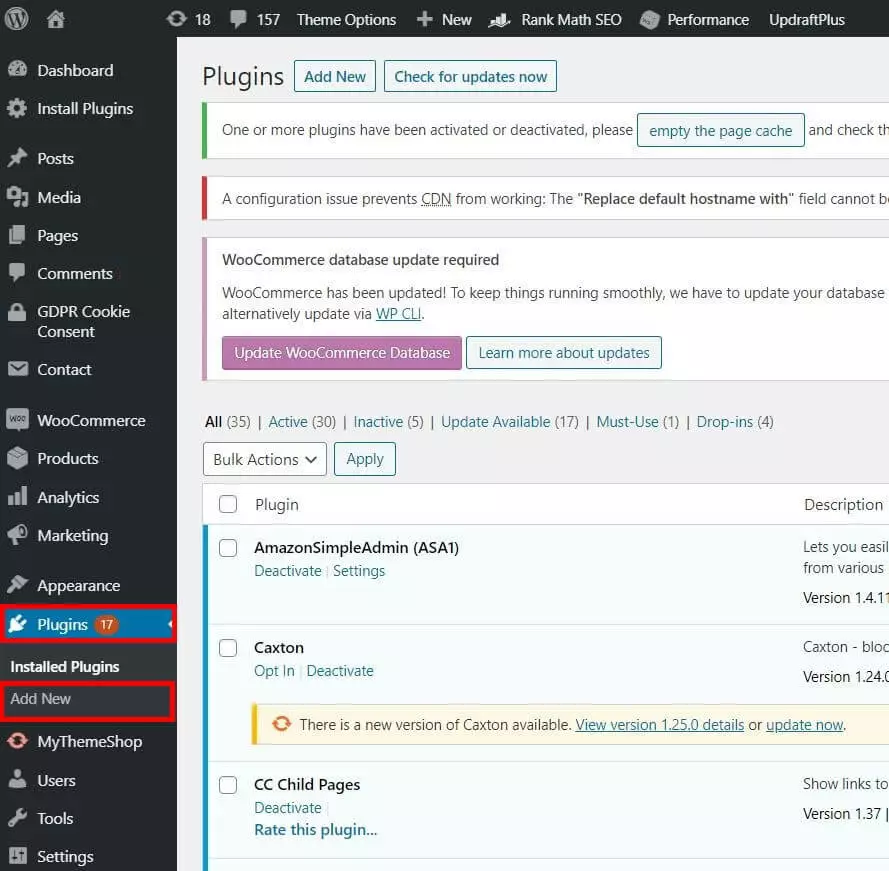
Step 1: Install the plug-in
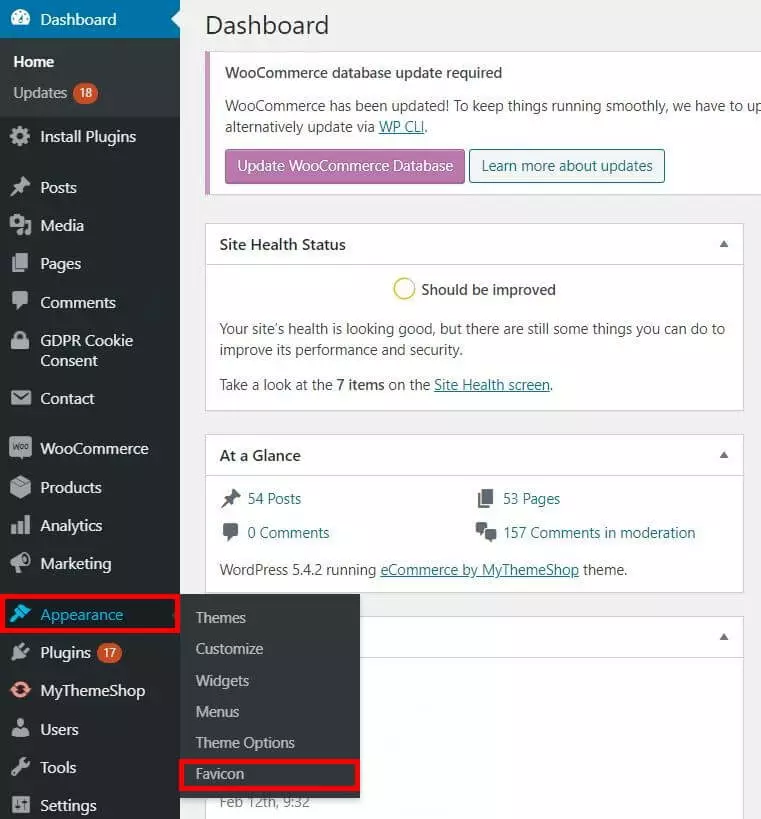
Step 2: Open the settings for the plug-in
Step 3: Selecting your favicon
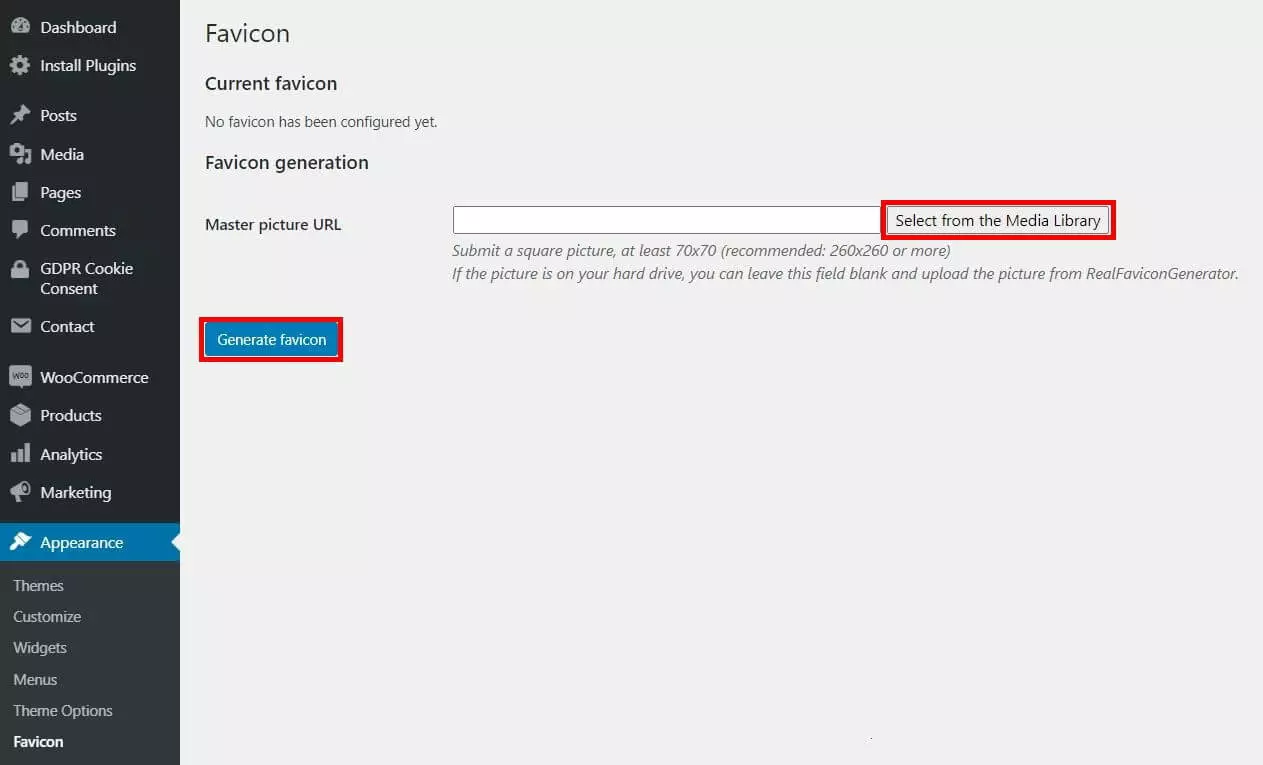
Click on “Select from the Media Library” in order to open the WordPress media library and select the image you want to use for your favicon. The image is required to have a minimum size of 70x70 pixels; however, a size of 260x260 or larger is recommended. After you’ve selected the image, confirm your selection with the button “Generate favicon”.
Step 4: Set your favicon
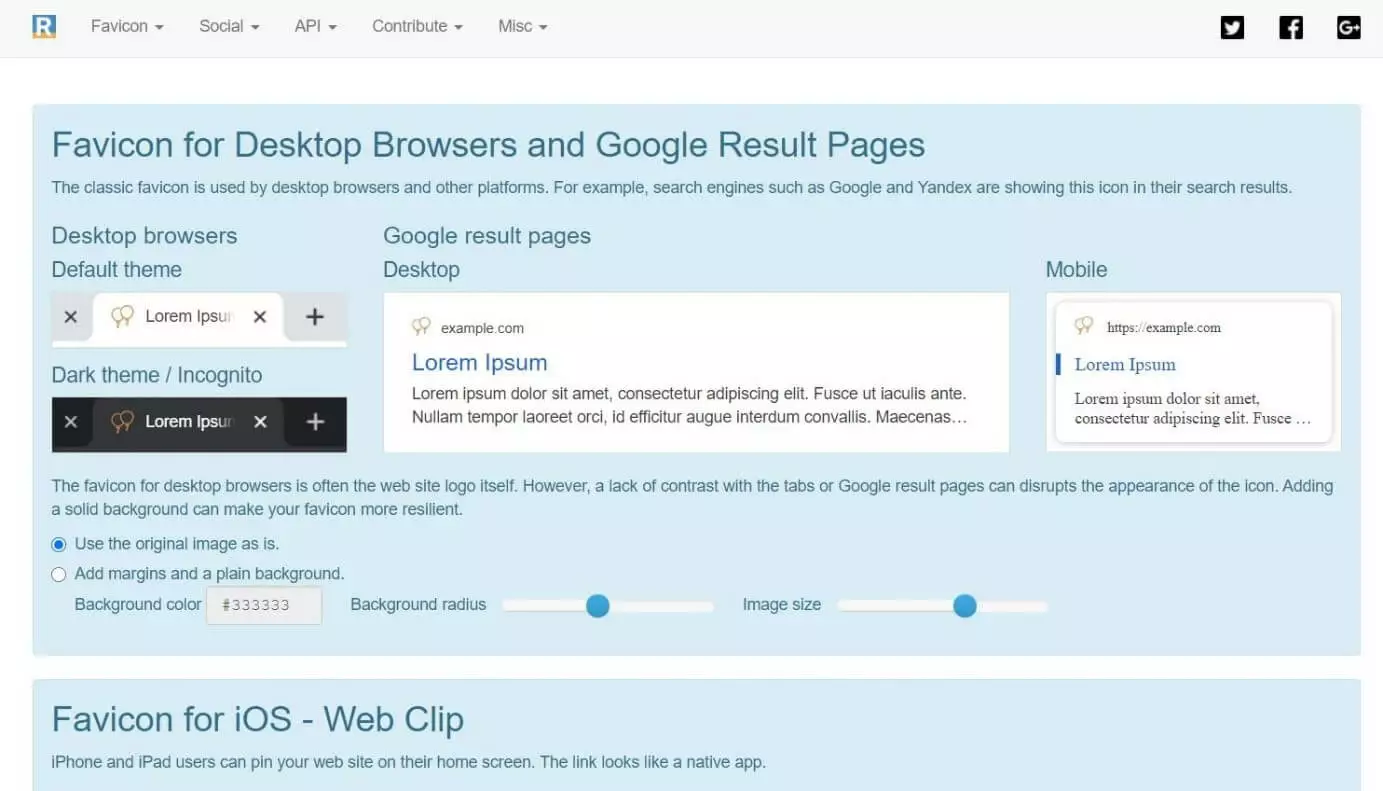
The plug-in will automatically redirect you to the app’s website. As soon as you’ve uploaded your favicon, you’ll have the chance to edit it. Take advantage of these features if you’d like to adapt the appearance of your favicon for desktop browsers, Google search results, or various smartphones.
Method 3: Add the favicon manually in WordPress
WordPress also makes it possible to manually implement changes in many cases. You can thus add a favicon to your WordPress site using File Transfer Protocol (FTP). You’ll need a favicon package with various files and HTML code. Both of them can easily be created with an online tool.
Step 1: Create a favicon file
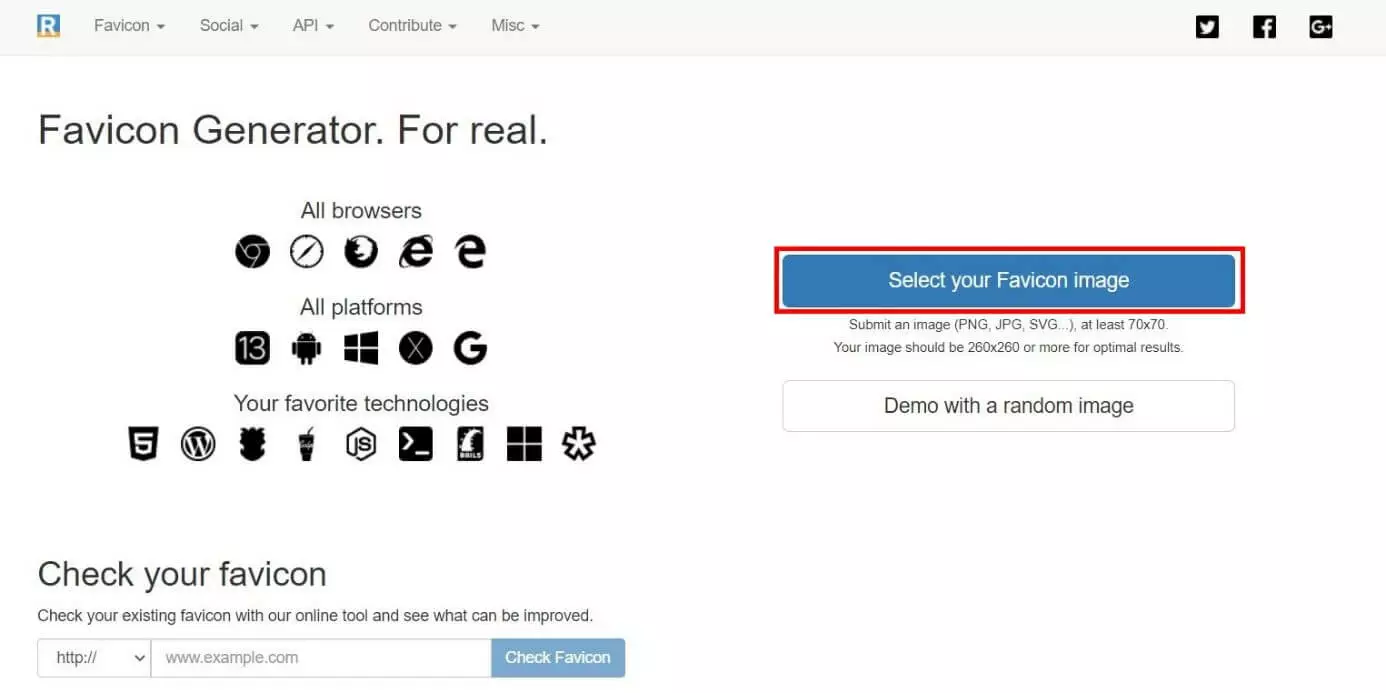
Open an online tool for generating a favicon. In this example, we use the “Real Favicon Generator”. In the app, click on the button “Select your Favicon image” to upload the relevant image.
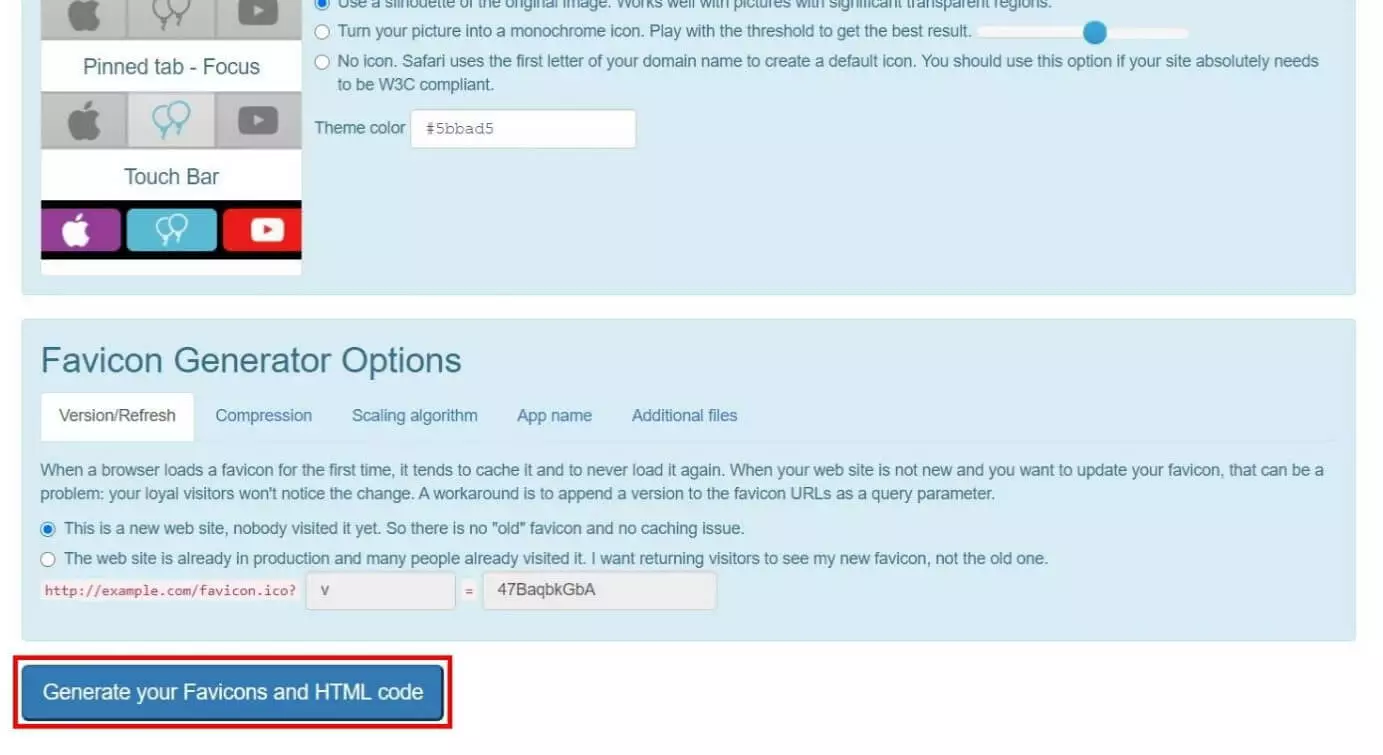
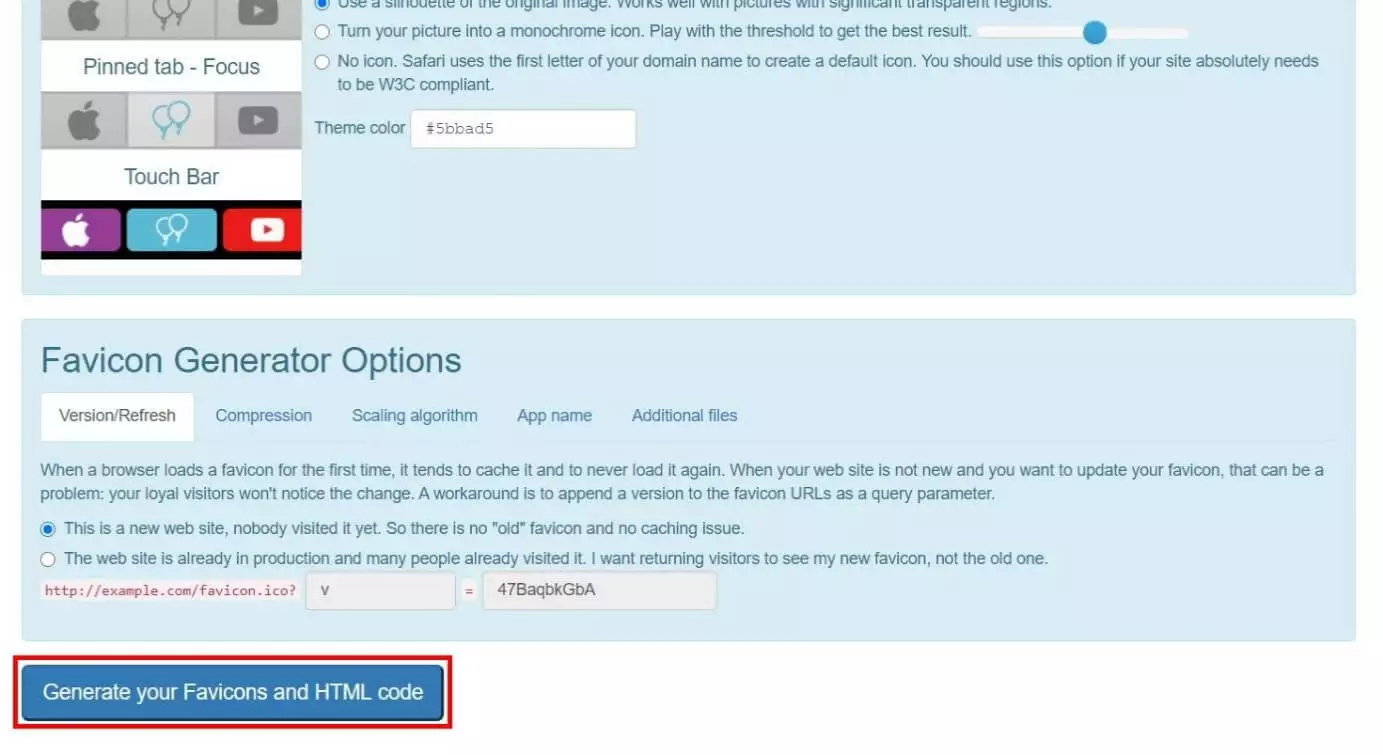
Next, you’ll have the option of editing the properties of your image, such as size and background. When you’re done making your desired changes, click on “Generate your Favicons and HTML code” at the bottom of the page.
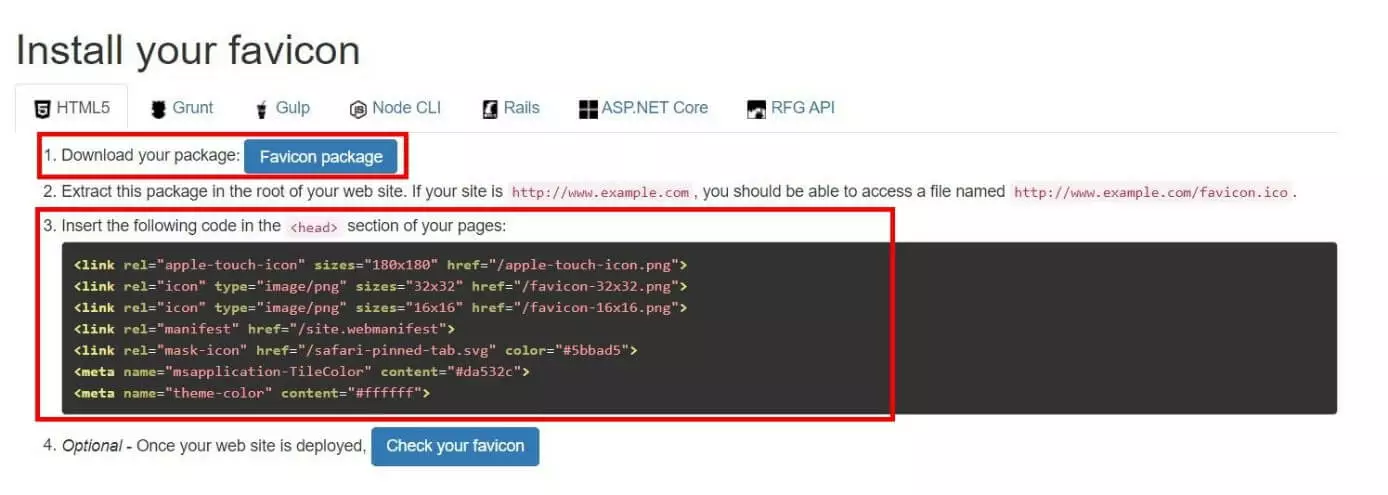
Step 2: Upload the favicon package using FTP
You can now use FTP to access the WordPress data. Open the main directory and upload the favicon package there. Be sure that you’re in the same folder as the WP admin or WP content folder.
Step 3: Insert HTML code
Finally, open the file header.php and insert the HTML code for the favicon in the header area. Make sure that your domain and favicon path are entered correctly.
Professional WordPress hosting offers a simple point of entry into WordPress, with more security and automatic backups of your site.


