How to change the DNS server on your Mac
To quickly change the DNS server on your Mac, you can simply adjust the network settings. Alternatively, you can also make changes directly via your router.
How to change the DNS server on your Mac via the network settings

To switch your Mac’s DNS settings, do the following:
- Click the Apple icon in the upper left corner to launch System Preferences.
- Select “Network”.
- Select your network profile. You can choose between LAN and WLAN.
- You might need to confirm your access rights before proceeding. To do so, click on the lock symbol and enter your username and password.
- Click on “Advanced”.
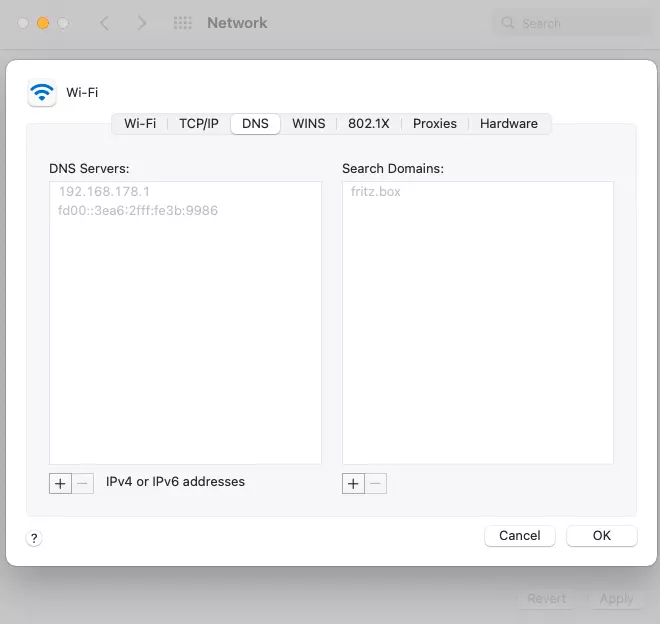
- A tab with the different options will display. Select “DNS”.
- On the left side under “DNS”, you’ll find all servers currently in use. Hit the plus symbol to add a new server, use the minus symbol to delete others. The servers are specified with an IPv4 or IPv6 address. If you haven’t added any servers, only the default server will be displayed. This cannot be removed.
- To change your Mac’s DNS server, confirm your choice and click “Ok” and “Apply”.
- Faster domain resolution to keep you online longer
- Added protection against outages and downtime
- No domain transfer needed
How to change the server via the router
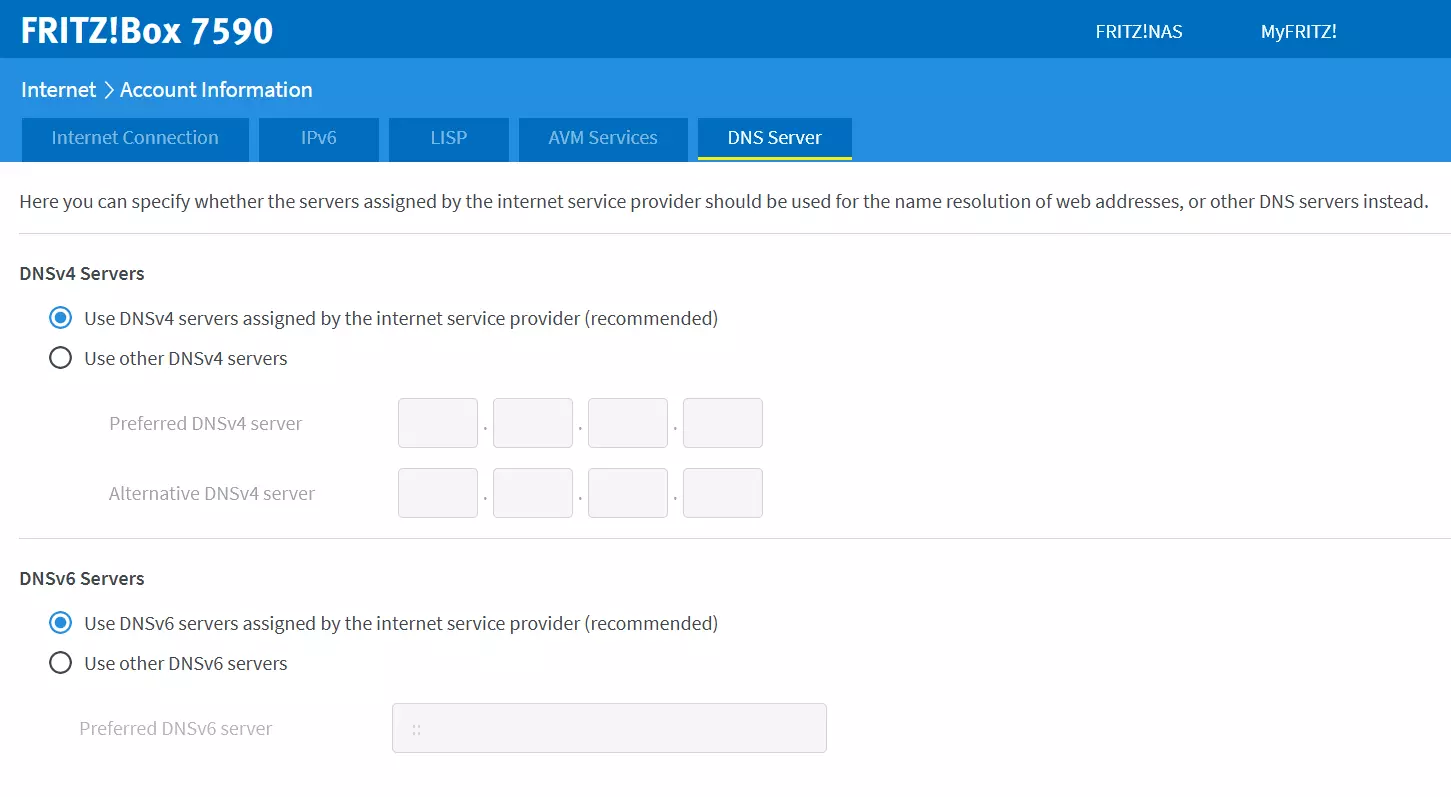
To apply the DNS changes to all your connected devices, you can modify the DNS settings directly via your router. The individual steps will depend on your provider and the respective router model. Generally, the following steps apply:
- Access the user interface of your router from your browser.
- Log in with your user data.
- You may see a section called “Internet” with different access options. Select “DNS”.
- At this stage, servers are usually divided into DNSv4 and DNSv6. Click the option you’re currently using.
- Enter the IP address you wish to use.
- Confirm your selection.
With this procedure, you’re not just changing your Mac’s DNS server but the DNS for all connected devices. By taking this approach, you retain control of your server and benefit from not having to change each device individually.

Why should you change your Mac DNS server?
A Domain Name System (DNS) server responds to requests from a device and resolves them into a valid IP address. In this way, users can enter the domain name of a web address in a browser instead of entering the full web address.
While a server is usually automatically assigned to you, in certain circumstances, it may make sense to change your DNS server settings. The most common reasons for this are as follows:
- Overload: If a DNS server is overloaded, it can take a long time to display a website. As a result, you may receive a timeout notification and not be able to access the website. If the DNS server is not responding, changing the server may resolve the situation.
- Security: Some DNS servers can block potentially malicious websites and thus prevent malware. On the other hand, some servers store search queries and pass them on for commercial use. You can prevent this by changing the DNS settings.
- Filter: As previously mentioned, some servers filter websites. To access a blocked website, change the DNS server on your Mac to prevent a filter list from being used.
Changing your Mac DNS server is super easy. The process differs somewhat between different operating systems. To find out more, check out our articles on: