How to install and configure an Ubuntu FTP server
The FTP protocol remains one of the most popular solutions for uploading and downloading files. That’s why, in this guide, we’ll show you how to set up your own Ubuntu FTP server — and highlight the key points you need to keep in mind throughout the process.
How to install an Ubuntu FTP server
Before you can start setting up your own FTP server, the first step is to choose the right software. Ubuntu systems like Ubuntu 22.04 already include a built-in option in the package manager: vsftpd. To install the application, simply open the terminal and enter the following command:
sudo apt-get install vsftpd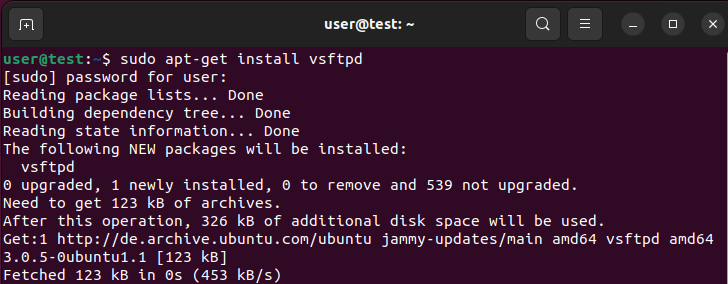
Looking to store or transfer data? Lay the foundation for secure file transfers and rent your secure FTP Server from IONOS — with SSH, SSL/TLS, and daily backups included.
The right hardware for your Ubuntu FTP server
The hardware requirements for an FTP server running on Ubuntu 22.04 vary depending on your use case. To ensure optimal internet connectivity and performance, we recommend hosting your server with a professional provider like IONOS. With VPS (virtual private servers) and dedicated servers, you have two powerful options for running a high-performance FTP
The table below outlines three possible scenarios for your Ubuntu FTP server and the most suitable IONOS hosting plan for each.
| Ubuntu FTP Server Scenario | Recommended IONOS Plan |
|---|---|
| Basic FTP server; occasional data transfers | VPS Linux M |
| Large FTP server for internal company use; regular transfers | VPS Linux XL |
| Public FTP server; continuous data transfers | Dedicated Server AR6-32 SSD |
- Save 50% or more vs leading hosts
- Unlimited traffic & no setup fees
- 99.99% uptime guaranteed
- Free 24/7 premium support
How do you set up and configure an FTP server on Ubuntu? Tutorial
After finishing the short installation, you can close the terminal again and start configuring the Ubuntu FTP server. To do this, open the vsftpd.conf configuration file, which is located by default in the etc directory.
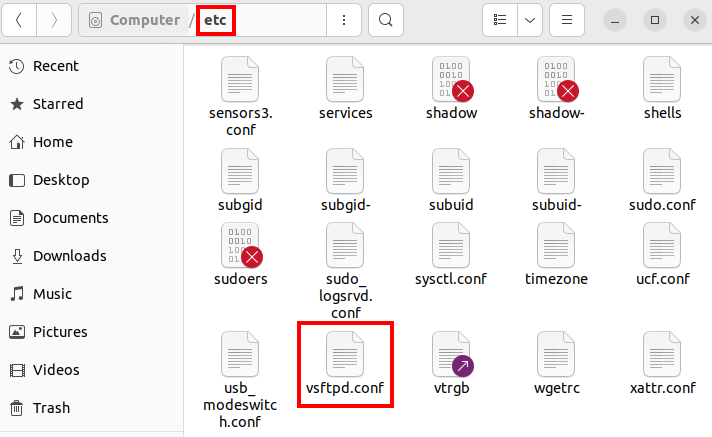
To open and edit the configuration file of your Ubuntu FTP server, you’ll need a basic text editor. Ubuntu comes with gedit (the GNOME editor) preinstalled for this purpose.
The contents of the file can generally be divided into two sections:
- Lines that begin with a hash symbol (
#) are commented out and therefore ignored by the vsftpd server. These lines may include comments explaining various configuration options, or they may represent disabled features. - Lines that do not begin with a hash symbol contain the actual configuration settings that will be interpreted and used by the server.
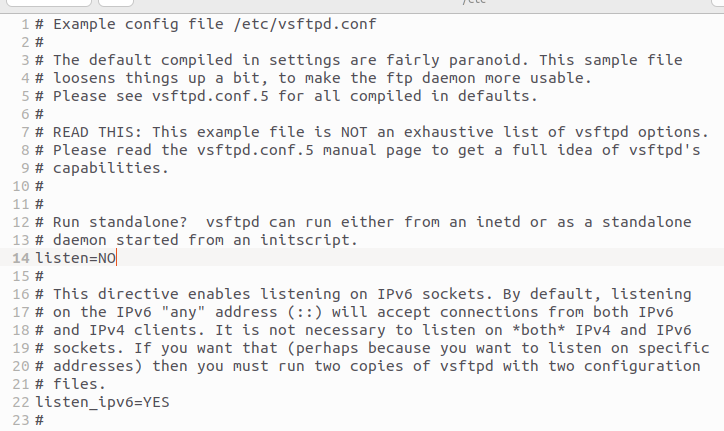
There are no general requirements for additional setup of the FTP server, since it depends on what you personally need and what demands you place on your server. Here it’s important that you consider the various options first. In the following sections of this Ubuntu FTP server guide, you’ll find information about the various settings and their functions.
To save changes to the vsftpd.conf file, you need root privileges. Otherwise, you’ll only be able to view the configuration file without making edits.
Allow anonymous access
By default, vsftpd is configured so that users can only log in to the FTP server with a specific account. However, the File Transfer Protocol also supports an anonymous login option that allows users to access the server without providing personal information. To enable this access type, look for the entry anonymous_enable=NO in the configuration file and change the parameter from NO to YES:
anonymous_enable=YES
Extend anonymous user rights
By default, access rights are heavily restricted when users log in anonymously to an Ubuntu FTP server. For example, users can only download files that are readable by everyone (anon_world_readable_only=YES). If you change this setting to NO, downloads of other files will also be permitted.
If your FTP server is connected to the internet, it is not recommended to expand permissions for anonymous sessions. Otherwise, you risk unauthorized third parties misusing your server!
Additional available options for expanding the permissions of anonymous users include:
anon_mkdir_write_enable: Allows anonymous users to create new directories if you set this toYESor remove the leading#. This requires thatwrite_enableis also enabled.anon_other_write_enable=YES: If you add this line, anonymous users will be able to rename and delete files and directories on the FTP server.anon_upload_enable=YES: This enables anonymous file uploads. To use it, you must also activatewrite_enableand create a separate upload directory, since anonymous users cannot write directly to the home directory.
Restrict local user access to the home directory
If you want to grant local users access only to their own home directory (/home/username), you can configure this in the vsftpd.conf file. The relevant configuration parameter is chroot_local_user. In Ubuntu 22.04, this line is commented out by default. To restrict local accounts from accessing any other directories, simply remove the # at the beginning of the line:
chroot_local_user=YESEnable or disable local user login
To allow local users to access the FTP server, the setting local_enable=YES must be enabled — which is the default configuration. If you want to prevent local users from accessing your Ubuntu FTP server, simply comment out the corresponding line by adding a hash symbol (#) at the beginning:
#local_enable=YES
Enable global write access
In Ubuntu 22.04, the default configuration does not allow either local or anonymous accounts to use FTP write commands. The relevant line for global write access, write_enable=YES, is commented out by default. To allow logged-in users to modify the file system on the vsftpd server, you’ll need to remove the leading hash symbol (#) from this line:
write_enable=YESRestrict FTP access to specific accounts
In some situations, it may be useful to block certain users from accessing the Ubuntu FTP server or to clearly define which users are allowed to log in.
To deny access to specific users, add the following lines at the end of the configuration file:
userlist_deny=YES
userlist_enable=YES
userlist_file=/etc/vsftpd.user_listUsers listed in the external file vsftpd.user_list will be denied access in this setup. All other users will still be able to log in as usual.
If you want to allow access only to specific users, you need to set the userlist_deny parameter to NO. As a result, only the user accounts listed in the vsftpd.user_list file will be able to log in.
userlist_deny=NO
userlist_enable=YES
userlist_file=/etc/vsftpd.user_listIn both cases, you’ll need to manually create the external text file vsftpd.user_list in the /etc/ directory. Each user account should be listed on a separate line in the file.
Additional options at a glance
| Option | Default Value | Description |
|---|---|---|
download_enable
|
– | Enable (YES) or disable (NO) downloads
|
ssl_enable
|
NO
|
Enable SSL encryption for FTP access |
force_anon_logins_ssl
|
NO
|
Require SSL connections for anonymous users (YES)
|
force_local_logins_ssl
|
NO
|
Require SSL connections for local users (YES)
|
anon_max_rate
|
0
|
Max download speed (in bytes/second) for anonymous users; 0 means unlimited
|
local_max_rate
|
0
|
Max download speed (in bytes/second) for local users; 0 means unlimited
|
max_clients
|
0
|
Max number of clients allowed at the same time; 0 means no limit
|
max_per_ip
|
0
|
Max number of connections allowed per IP address; 0 means no limit
|
anon_root
|
/home/ftp
|
Default directory for anonymous users |
By the way, you can view a complete list of all available options by running the following command in the terminal:
man vsftpd.conf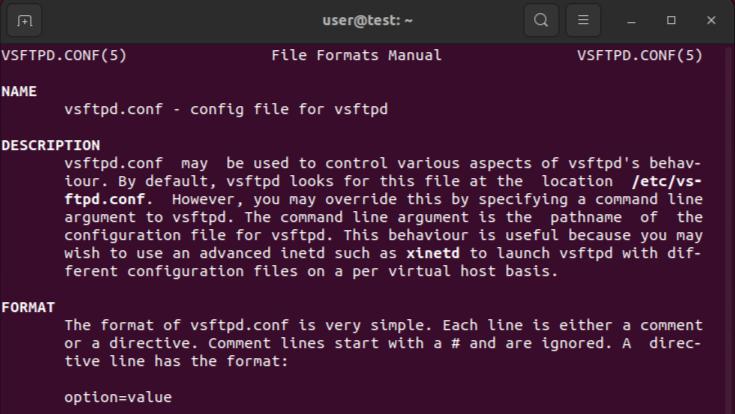
- Dedicated enterprise hardware
- Configurable hardware equipment
- ISO-certified data centers
How to use the FTP server under Ubuntu 22.04
After you’ve set the configuration file to your desired specifications, don’t forget to save it. For the server application to accept all changes, a restart is required, which you initiate with the following command:
sudo systemctl restart vsftpdIf you haven’t started the FTP server yet, do this with the terminal command:
sudo systemctl start vsftpdIf you want to stop the Ubuntu FTP server, simply replace the start parameter in the previous command with stop.
Create an FTP user account
Now that you’ve set up and started your Ubuntu FTP server, you’ll need a user account to log in. In this example, we’ll create a user named “ftpuser” with the password “test123”.
sudo useradd -m user -s/usr/sbin/nologin
sudo passwd userNext, allow login access for the NoLogin shell by adding the following line to the end of the /etc/shells file:
/usr/sbin/nologinConnect to the FTP server
You can now use the user account you created to connect to the vsftpd server using the FTP client of your choice. A popular solution, which is included in Ubuntu’s default package repositories, is the cross-platform open-source application FileZilla. You can install it the traditional way via the terminal:
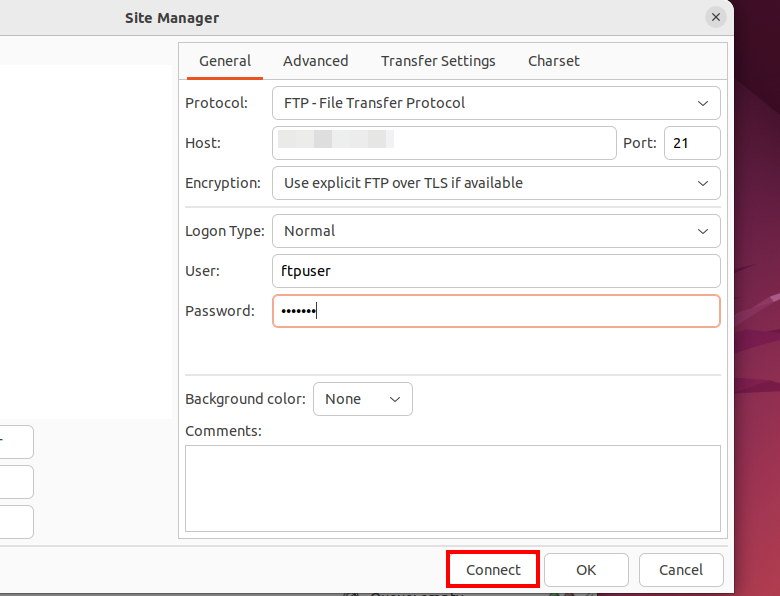
sudo apt-get install filezillaOpen FileZilla and add a new connection using the appropriate details: In the Host field, enter the IP address of your Ubuntu FTP server — unless you’ve changed the default settings, it will be listening on port 21. Select the “File Transfer Protocol”, and if possible, choose “SFTP (Secure FTP)” or “FTP over TLS”, as a plain FTP connection over port 21 poses a significant security risk. For the Logon Type, select “Normal”. Enter the previously created username and password in the User and Password fields. Click “Connect” to establish the connection to your server.
500 OOPS: Security feature causing issues
If you’ve set up an Ubuntu FTP server and certain settings aren’t working, there could be several reasons: You may have forgotten to restart the FTP server or save the configuration file, or there may be a syntax error in the vsftpd.conf — for example, a misplaced space character. One common error message with a completely different root cause is the following:
500 OOPS: vsftpd: refusing to run with writable root inside chroot ()
This message, which may appear during connection attempts, is not actually an error in the traditional sense — it’s a security feature. The background is a potential vulnerability in the glibc library (Ubuntu’s default C programming language library), which users with write access to their own root directory could exploit. To bypass this security restriction, there are two possible solutions:
- Remove write permissions from the user’s root directory: This method revokes write access to the user’s own root directory, limiting write operations to subdirectories only. This restriction resolves the “500 OOPS” issue, but it can be inconvenient if files are required to be written directly to the root directory. Use the following terminal command to apply this fix:
chmod a-w */home/user*- Allow write permissions to the root directory in
vsftpd.conf: If you have no security concerns about potential misuse of write access, you can explicitly allow this behavior by configuring the Ubuntu FTP server accordingly. To do this, simply add the following line to the configuration file:
allow_writeable_chroot=YESTry out your VPS for 30 days. If you're not satisfied, you get your money back.

