Importing Outlook contacts: Transferring existing address information to the Outlook address book
Even in times of Facebook and WhatsApp, e-mails still play an important role. Especially in the business world, electronic messages continue to be an indispensable means of communication, and distribution lists and newsletters are still among the simplest tools for contacting a large user group with the least possible effort. The central component of e-mail traffic is a client including an address book in which all relevant contact data can be stored.
In the ranks of these mail clients, Microsoft Outlook has been a key player for more than two decades – also thanks to great freedom in contact management. The integrated import/export wizard, for example, enables you to easily import existing lists of contacts into Outlook. How is an address import prepared, and which steps are necessary?
- The world’s leading email and calendar solution
- Secure hosting from a single source
- Anytime remote access with Microsoft Outlook
Importing Outlook contacts: What are the requirements?
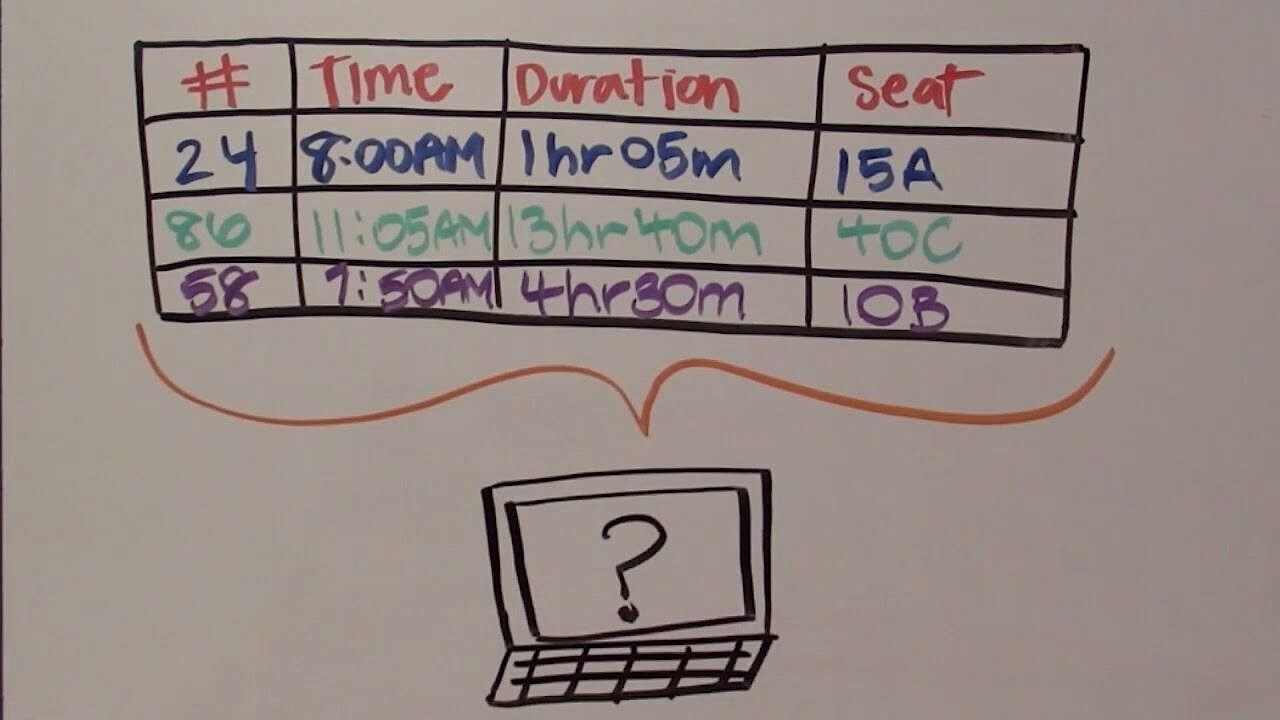
There are different reasons why it is useful to import contacts into Outlook: Typically, you’ll have external lists of contacts that you would like to import into your Outlook address book. However, it’s also possible that you’ll want to import contacts that you have previously exported from Outlook – for example, to create a backup or because you want to change the version. In the latter case, the contact list already exists in the required import format CSV (the values in this file are divided by separators). If you have your own contact list, e.g. in the form of an Excel spreadsheet, you must first save it in CSV format before you can import it into your Outlook address book.
 To display this video, third-party cookies are required. You can access and change your cookie settings here.
 Saving your spreadsheets as a CSV file
All common spreadsheets such as Microsoft Excel, OpenOffice, or LibreOffice Calc offer the option of saving workbooks as CSV files. For Excel users, for example, this works as follows:
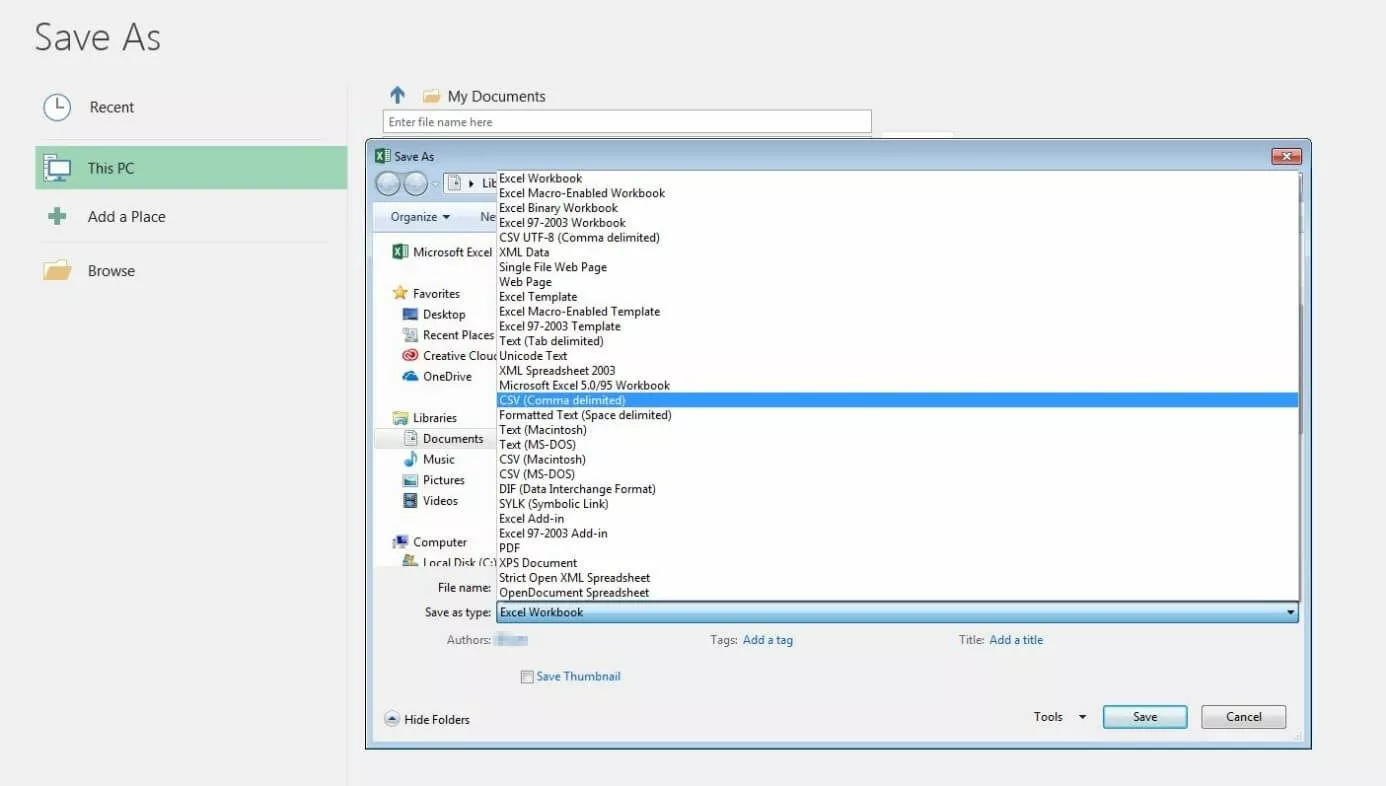
- In the first step, click the worksheet that contains the contact information that you want to import into the Outlook address book. Then navigate to the “File” tab and click “Save As.”
- Decide where you want to save the file and open the menu in the “File Type” field by clicking the small, downward-pointing triangle icon.
- Locate and select “CSV (delimited).” Finally click “Save.” Excel will inform you that some features of the workbook will be lost (due to the switch to CSV format), which you accept by clicking “OK.”
Importing contacts into Outlook: Step-by-step instructions for desktop clients and web app
If you have the contacts you want in CSV format, you can immediately start importing them into your Outlook address book. You do not need any additional software for this. The import/export wizard of Microsoft Outlook is integrated by default, and supports the import without external tools or plugins. Depending on the current version of Outlook and whether you are working with the desktop or the web client, the procedure differs slightly. We have summarized the import process in the different editions of Outlook below for you.
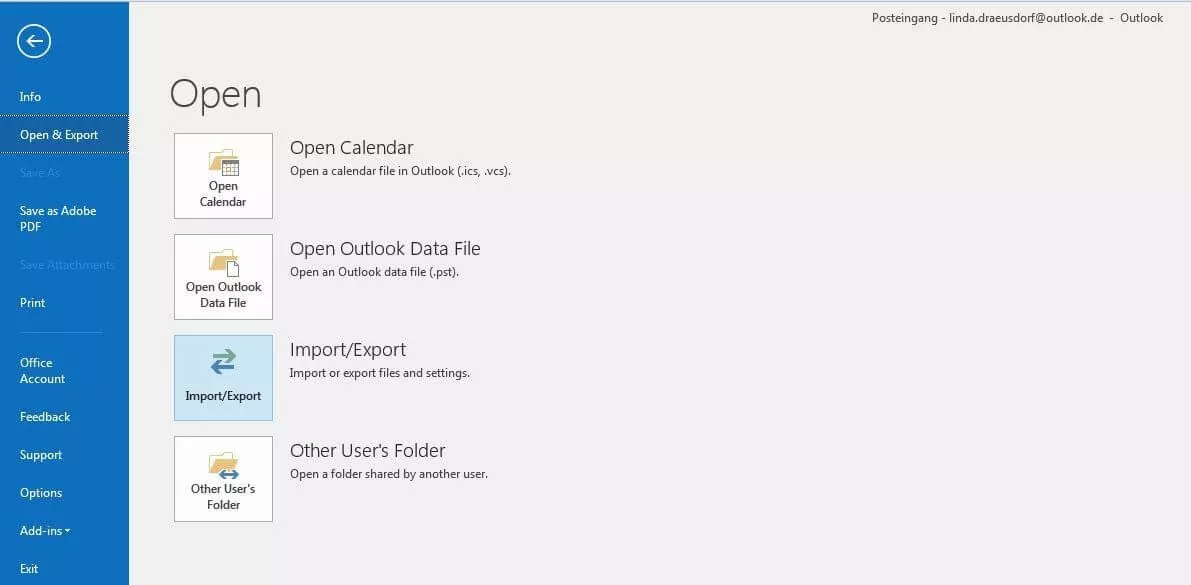
How to import contacts in Outlook 2016 and 2013
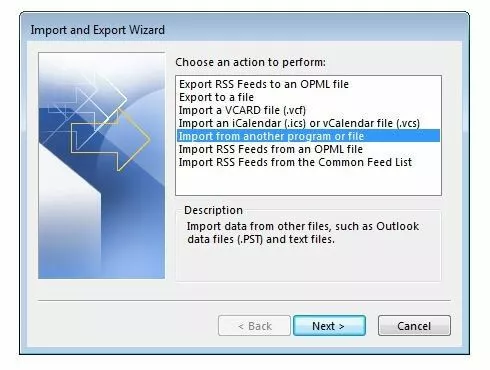
In the start menu of the import/export wizard you can select various actions. The action “Import from another program or file” required for the import is already marked by default, so that you only have to press the “Next” button.
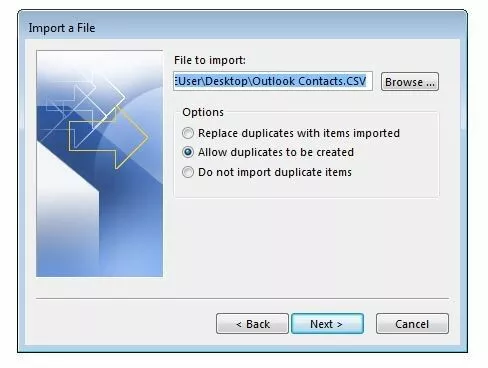
Before you click “Next,” you have the option of selecting one of three import variants:
- Replace duplicates with items imported: If a contact already exists in Outlook, the listed information for this contact is discarded and replaced by the information from the import file.
- Allow duplicates (default option): If a contact already exists in Outlook, the import/export wizard creates a duplicate of this contact. Later, you can combine the information in the address book or remove the desired version.
- Do not import duplicate items: If a contact already exists in Outlook, the information to import it is discarded.
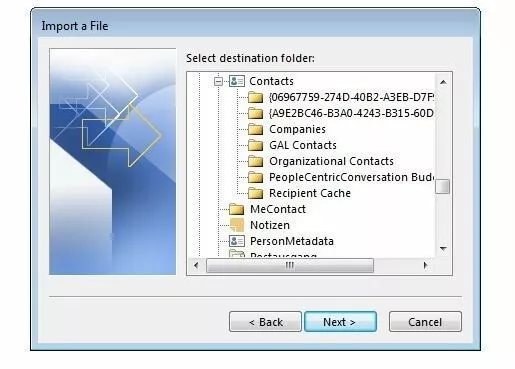
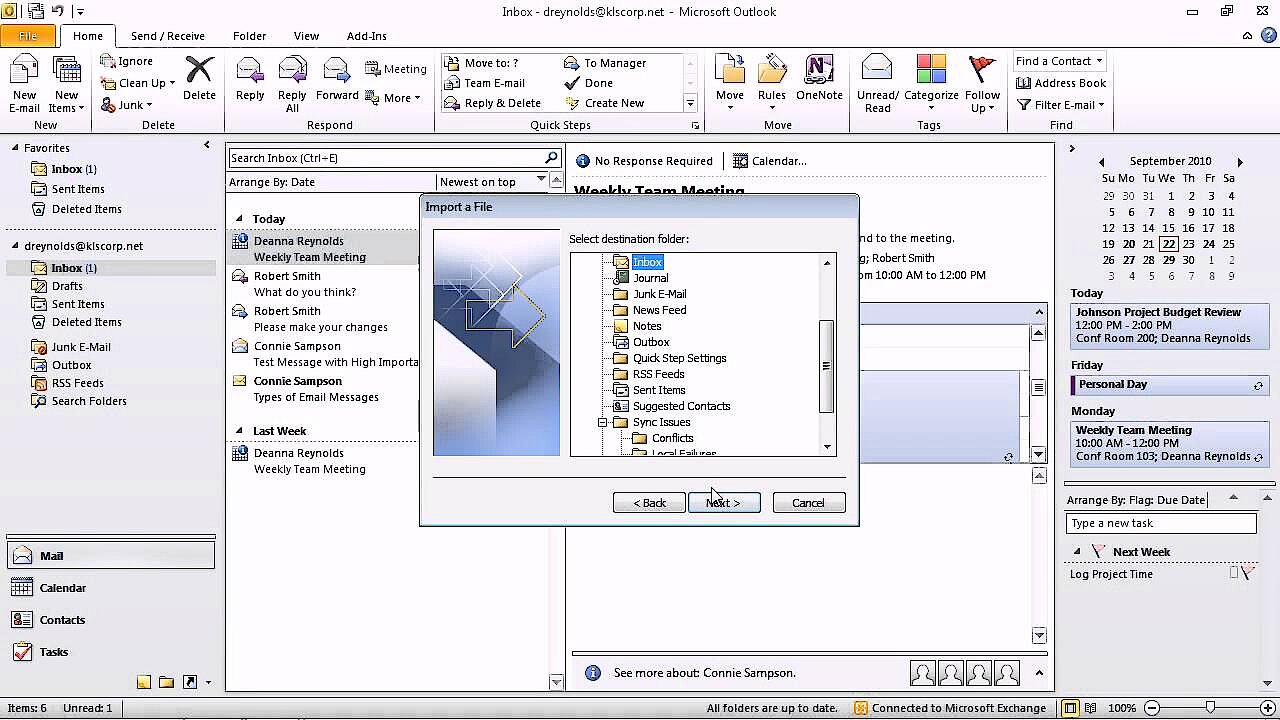
Irrespective of the selection made, you will be prompted to specify the destination folder in the following menu. Search for the entry “Contacts” and click on “Next.”
After a final click on “Finish”, Outlook starts the import process.
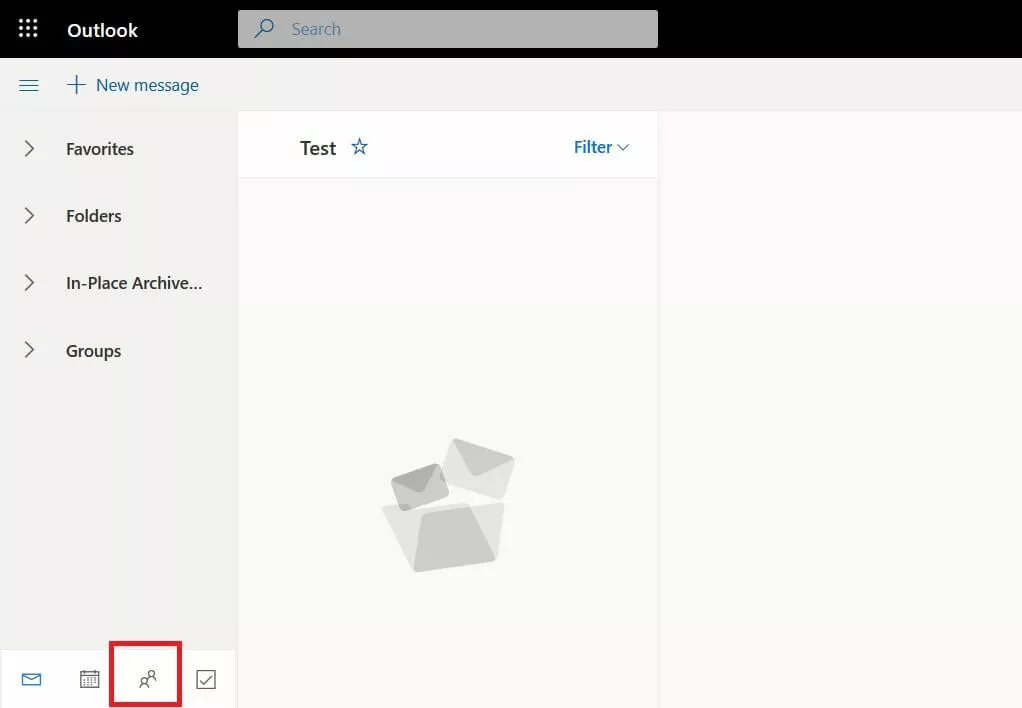
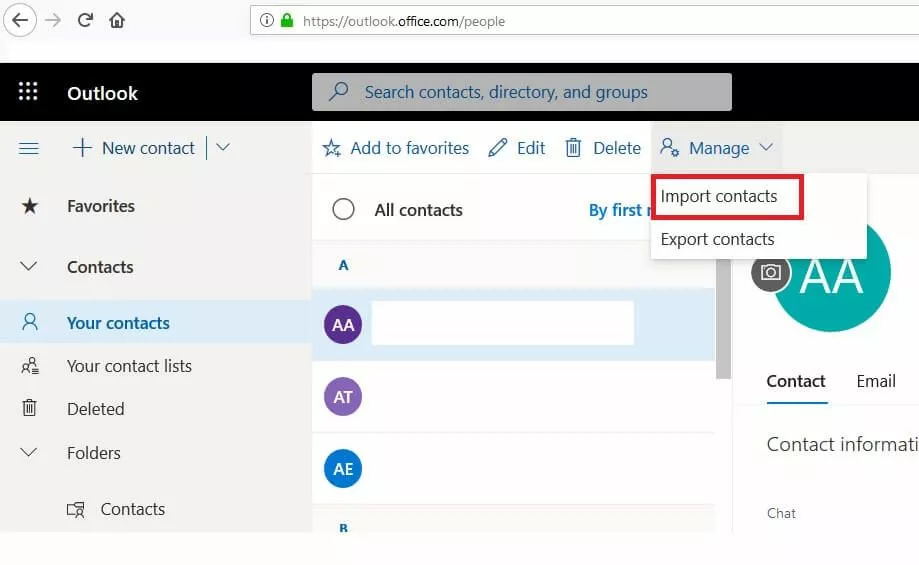
Importing contacts in Outlook on the web – how it works
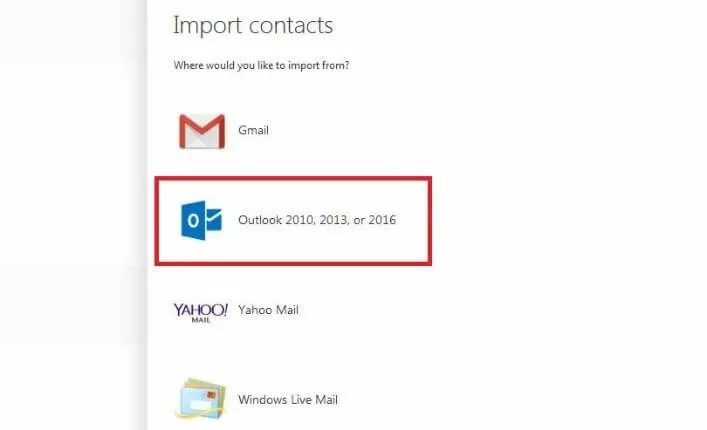
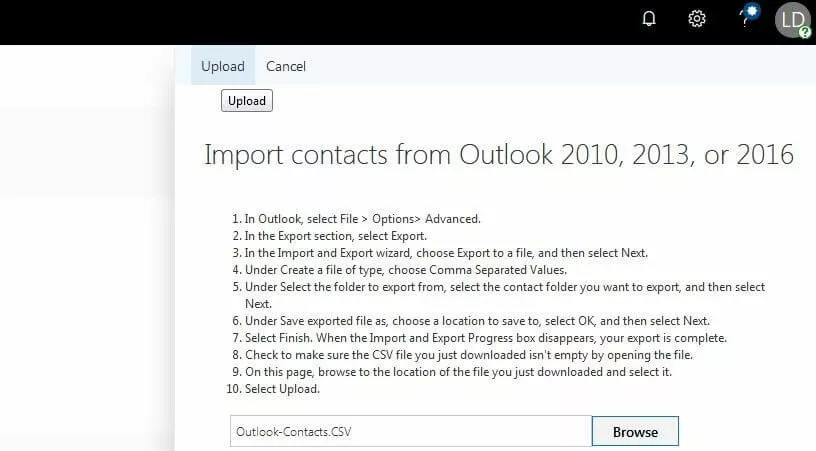
Subsequently, the import menu opens in which you should specify the source of the contacts. As an alternative to Outlook, Gmail, Yahoo Mail, and Windows Live Mail are available as starting points. So if you want to import contact lists from one of these three e-mail services, you have the chance to do so at this point. For the CSV file we use in this tutorial, we need the import option “Outlook 2010, 2013 or 2016”:
How to import contacts in Outlook 2010
Outlook 2010 also has a feature to import contacts. However, as the user interface of the Microsoft e-mail client has changed over the years, the path to the import/export wizard differs slightly from how it works in the newer versions of Outlook. The following step-by-step guide shows you how to import contacts in the 2010 edition:
- Select the “File” tab and click on “Open” there. Finally, use the “Import” button to start the import/export wizard.
- Look for the action “Import from other programs or files” in the list, click on it and confirm your selection with “Next.”
- Specify “Comma Separated Values (Windows)” as the file type to import, and then the location where the CSV file is stored. As with imports in Outlook 2013 and 2016, you can also specify in this menu whether duplicate address entries are to be allowed or not allowed.
- Select the “Contacts” folder to which you want to add the new address information and start the process by clicking on “Finish.”
 To display this video, third-party cookies are required. You can access and change your cookie settings here.

