

Windows 10 clipboard

The Windows 10 clipboard is a clever temporary storage solution for files that you want to copy and paste from one place to another. Since recently, the Windows 10 clipboard offers space for up to 25 files in the cache. We will explain how to use the clipboard step by step.
Quick guide: How to open the Windows 10 clipboard
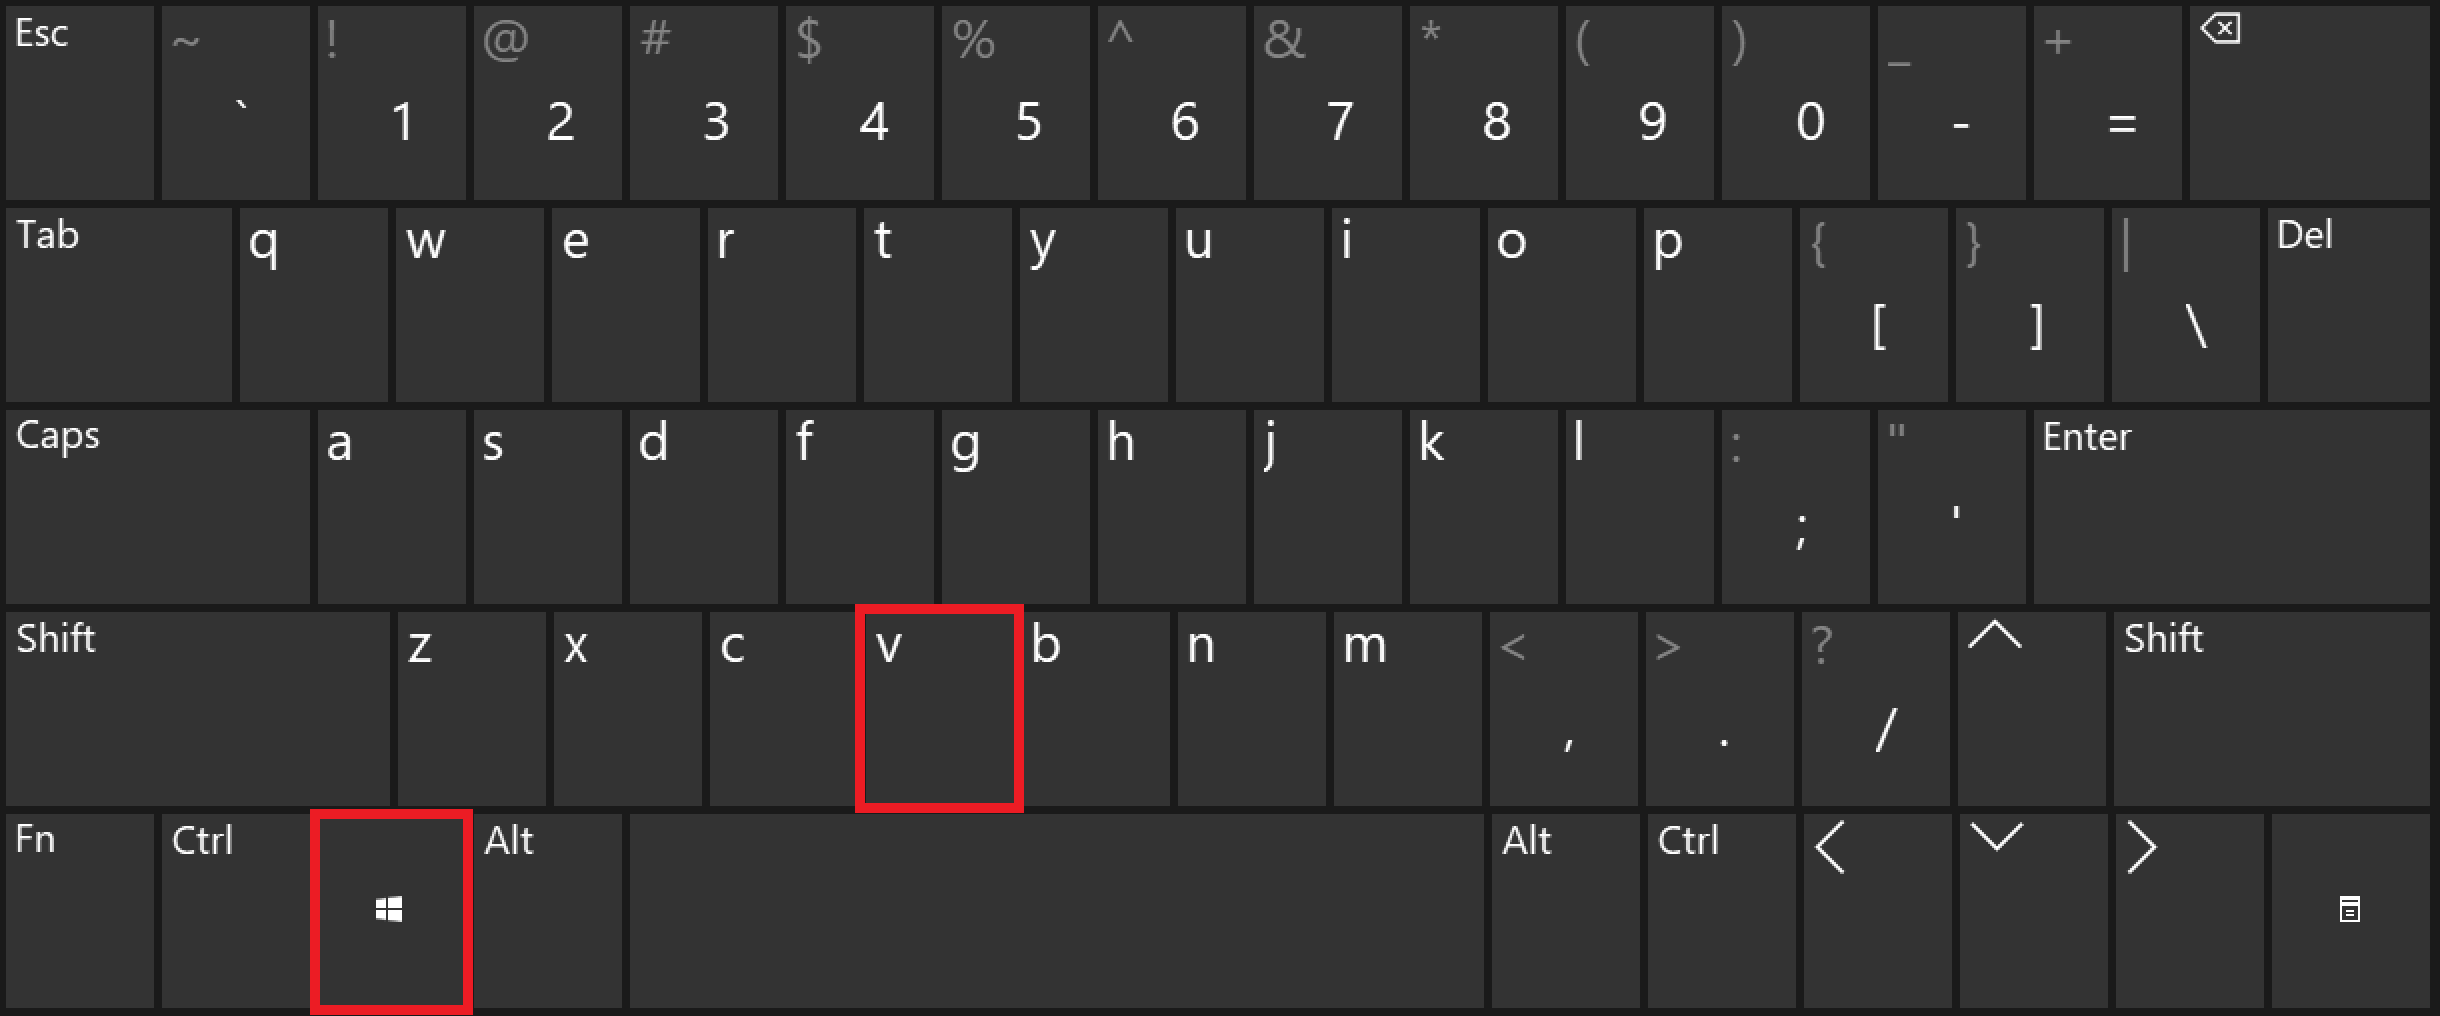
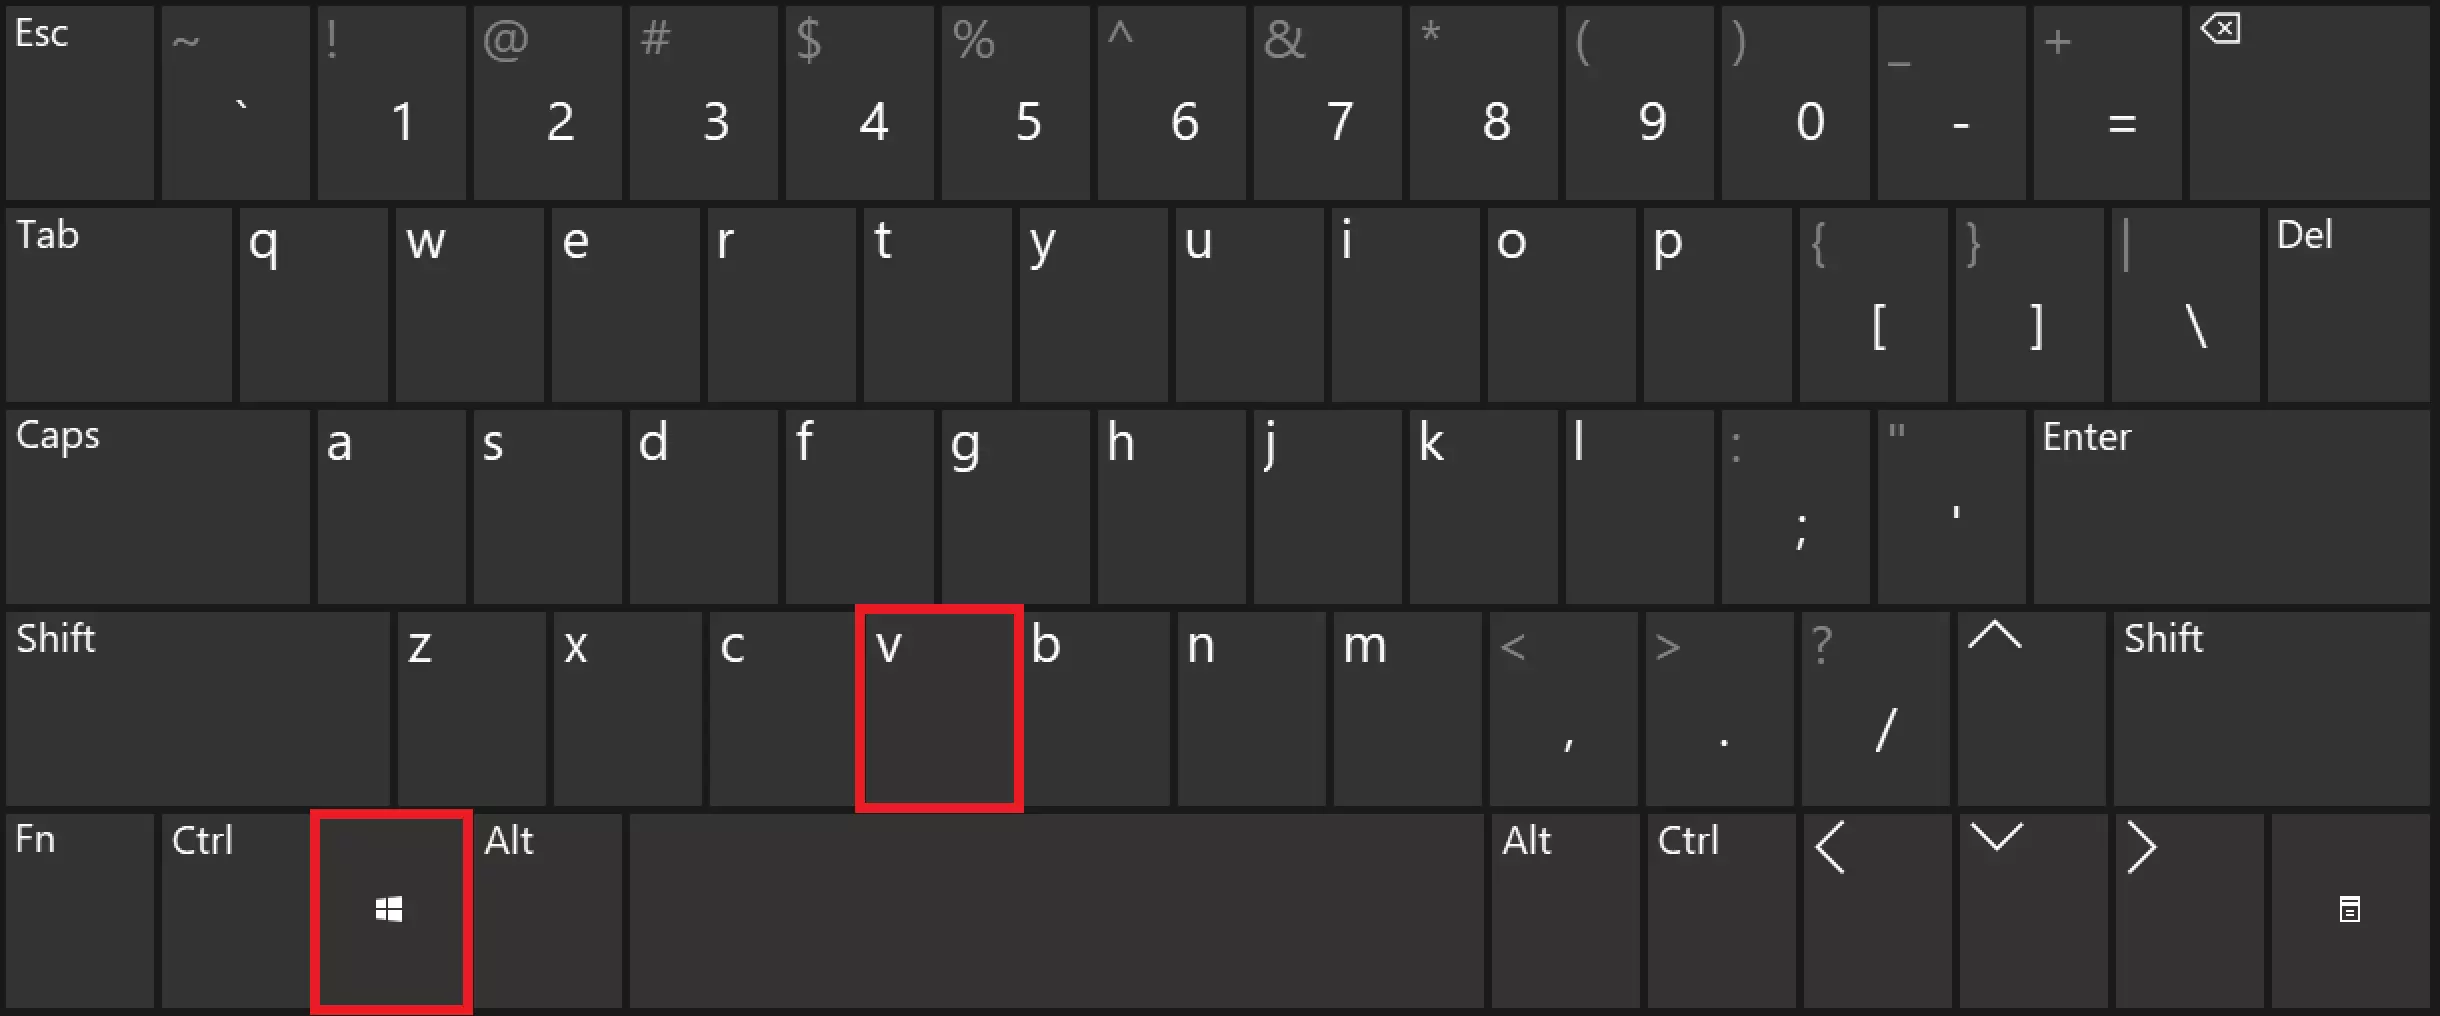
General: Shortcut [Windows] + [V].
In Microsoft Office applications (Word, Excel, PowerPoint, etc.):
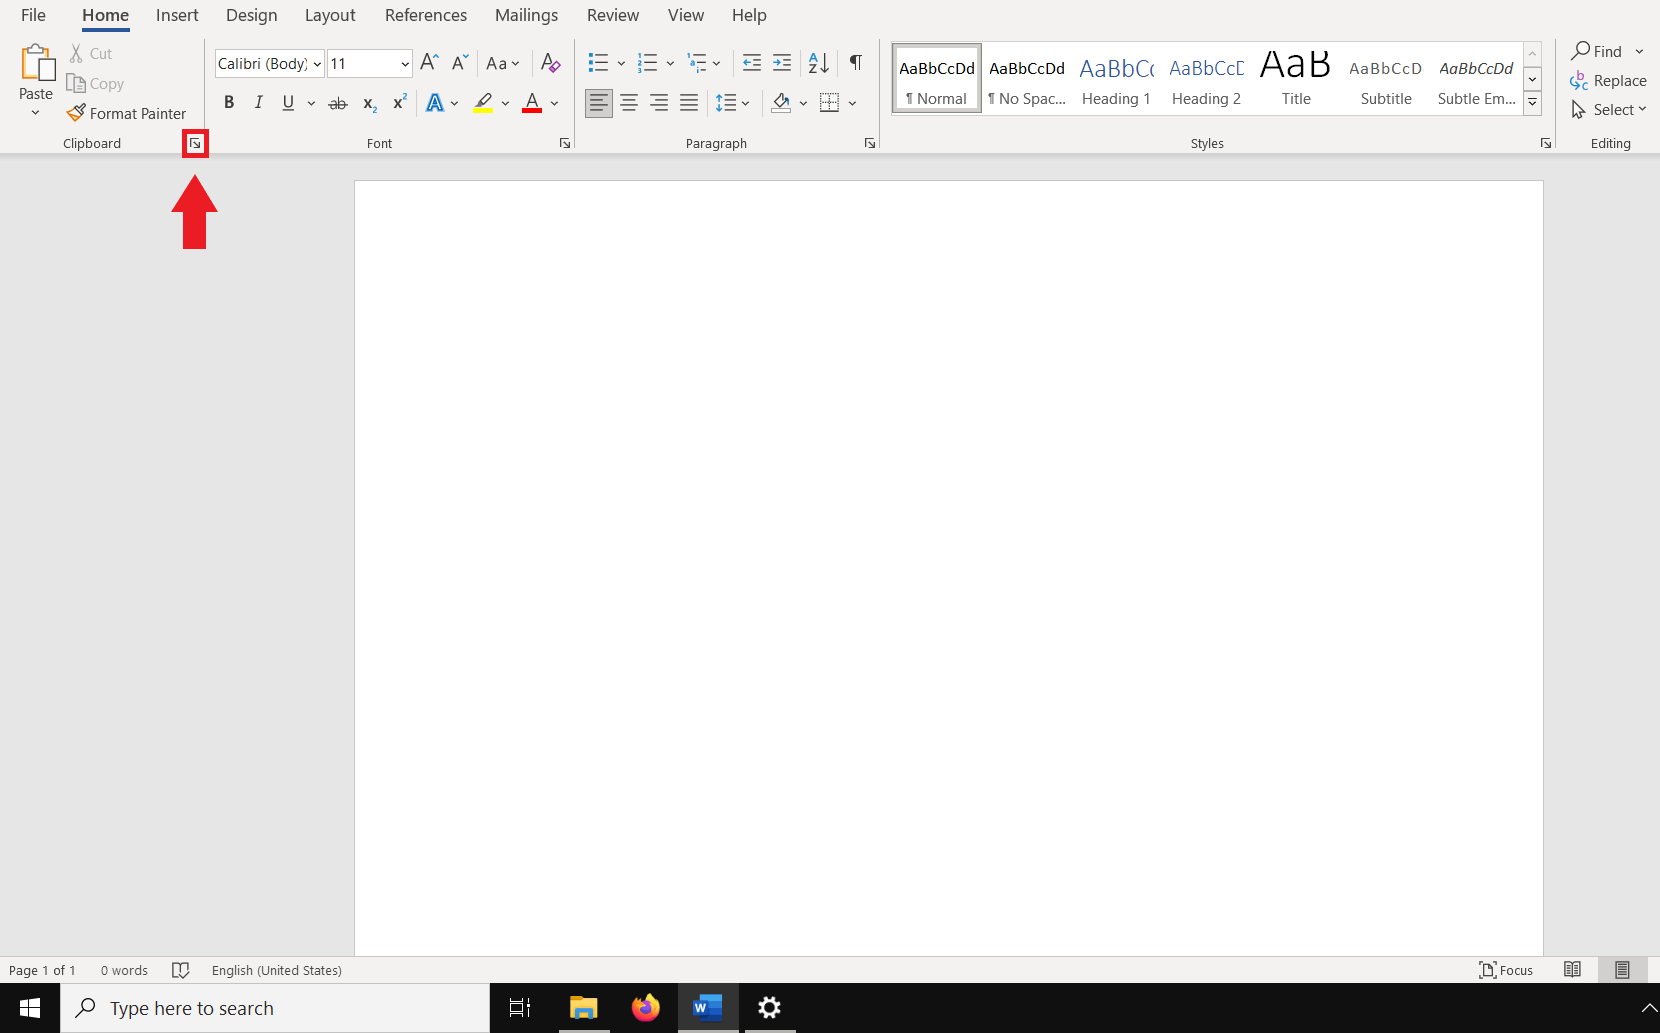
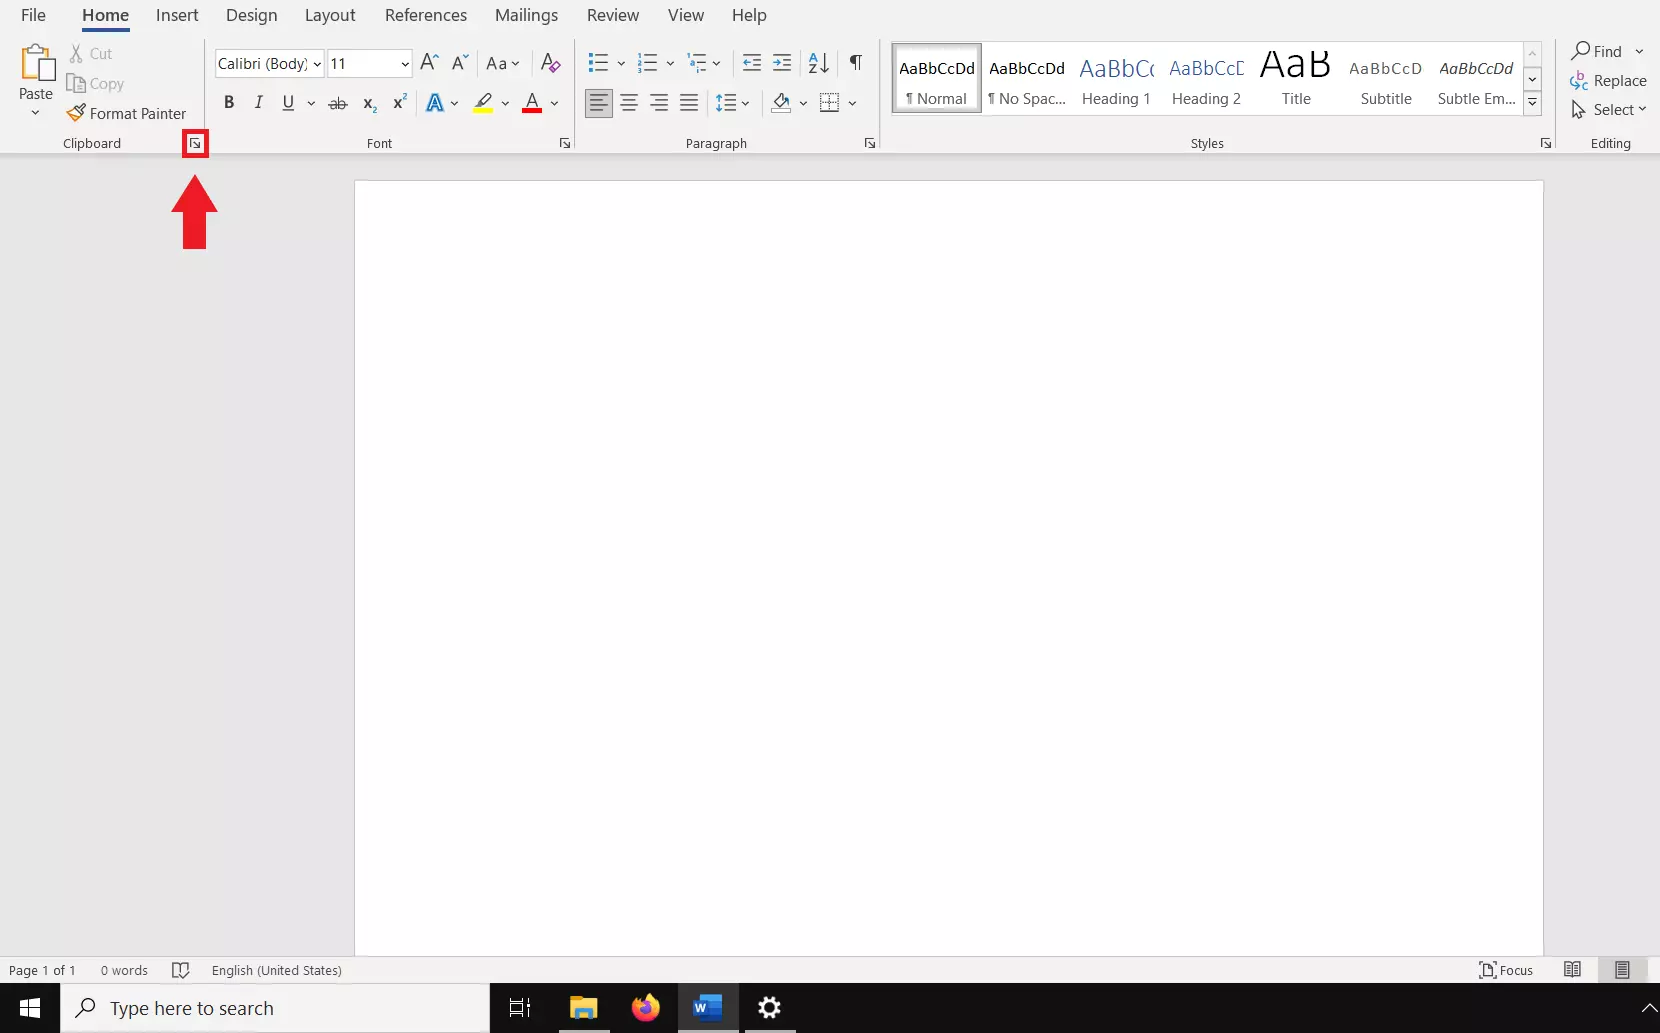
- At the top left of the menu, expand the “Clipboard”
- The clipboard will open on the left.
- Select the element you want to cut and paste.
- In the drop-down menu, select “Paste”.
What is the Windows 10 clipboard?
You’ll know that when using Windows, you’ll need to transport pieces of data such as Windows screenshots, images, links, or files from one place on the PC to another. This would ideally be done quickly and preferably without creating new folders. Windows has the clipboard for this purpose, which temporarily stores copied or cut files like a short-term memory.
Until recently, it was only possible to store a single file in the clipboard. This was automatically overwritten as soon as you copied or cut a new file. Since the Windows 10 update 1809, the clipboard’s performance has improved. It now stores up to 25 files at a time, which can be viewed, selected, and pasted in the clipboard history.
The Windows 10 clipboard and Windows shortcuts are basically an inseparable unit. Only with the Windows shortcuts for “Cut” Ctrl + X, “Copy” Ctrl + C, and “Paste” Ctrl + V do you get the full functionality out of the clipboard.
Windows 10 clipboard: enable history
Since the history for cached files in the clipboard is disabled by default, you need to enable it first.
Here’s how to do it:
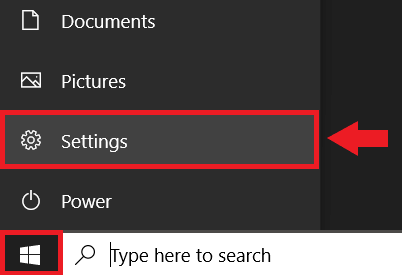
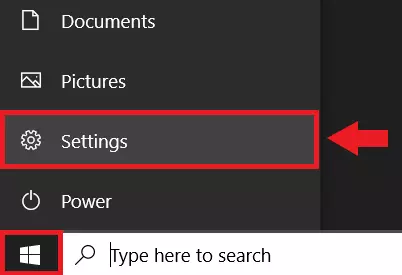
Step 1: From the Windows Start menu, go to “Settings” and then “System”.
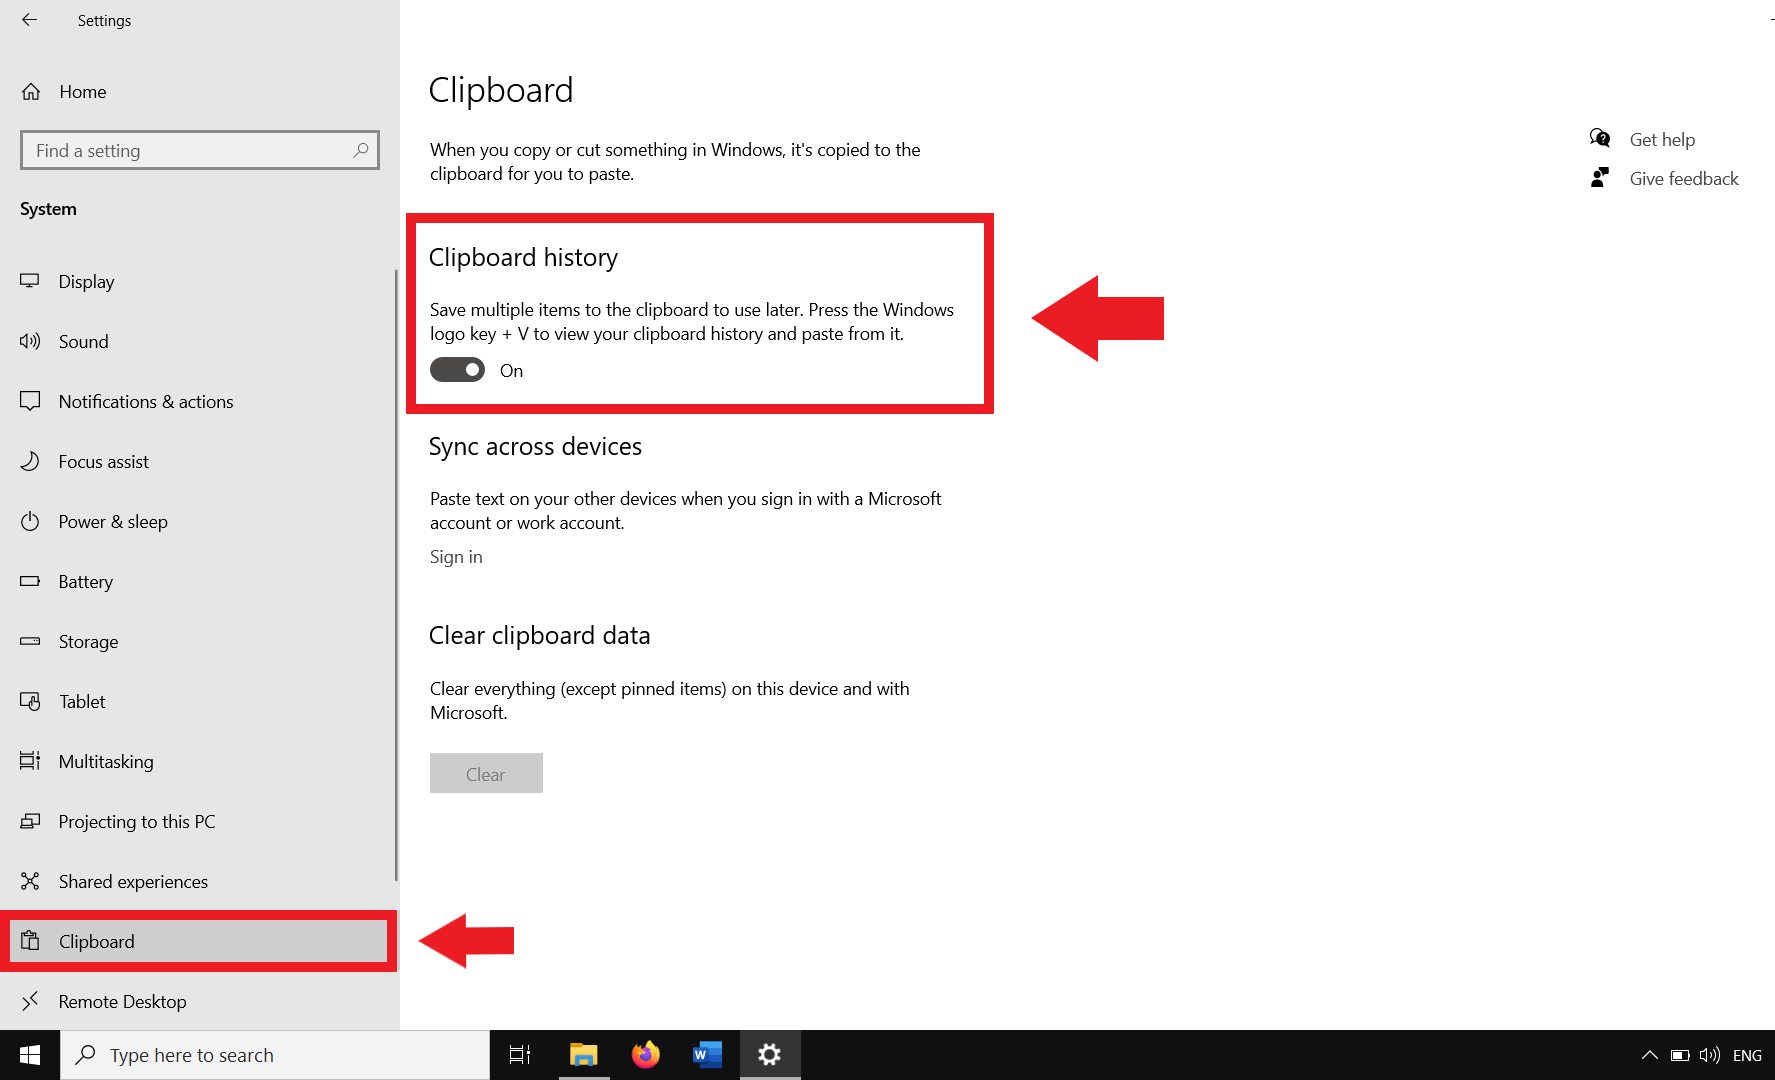
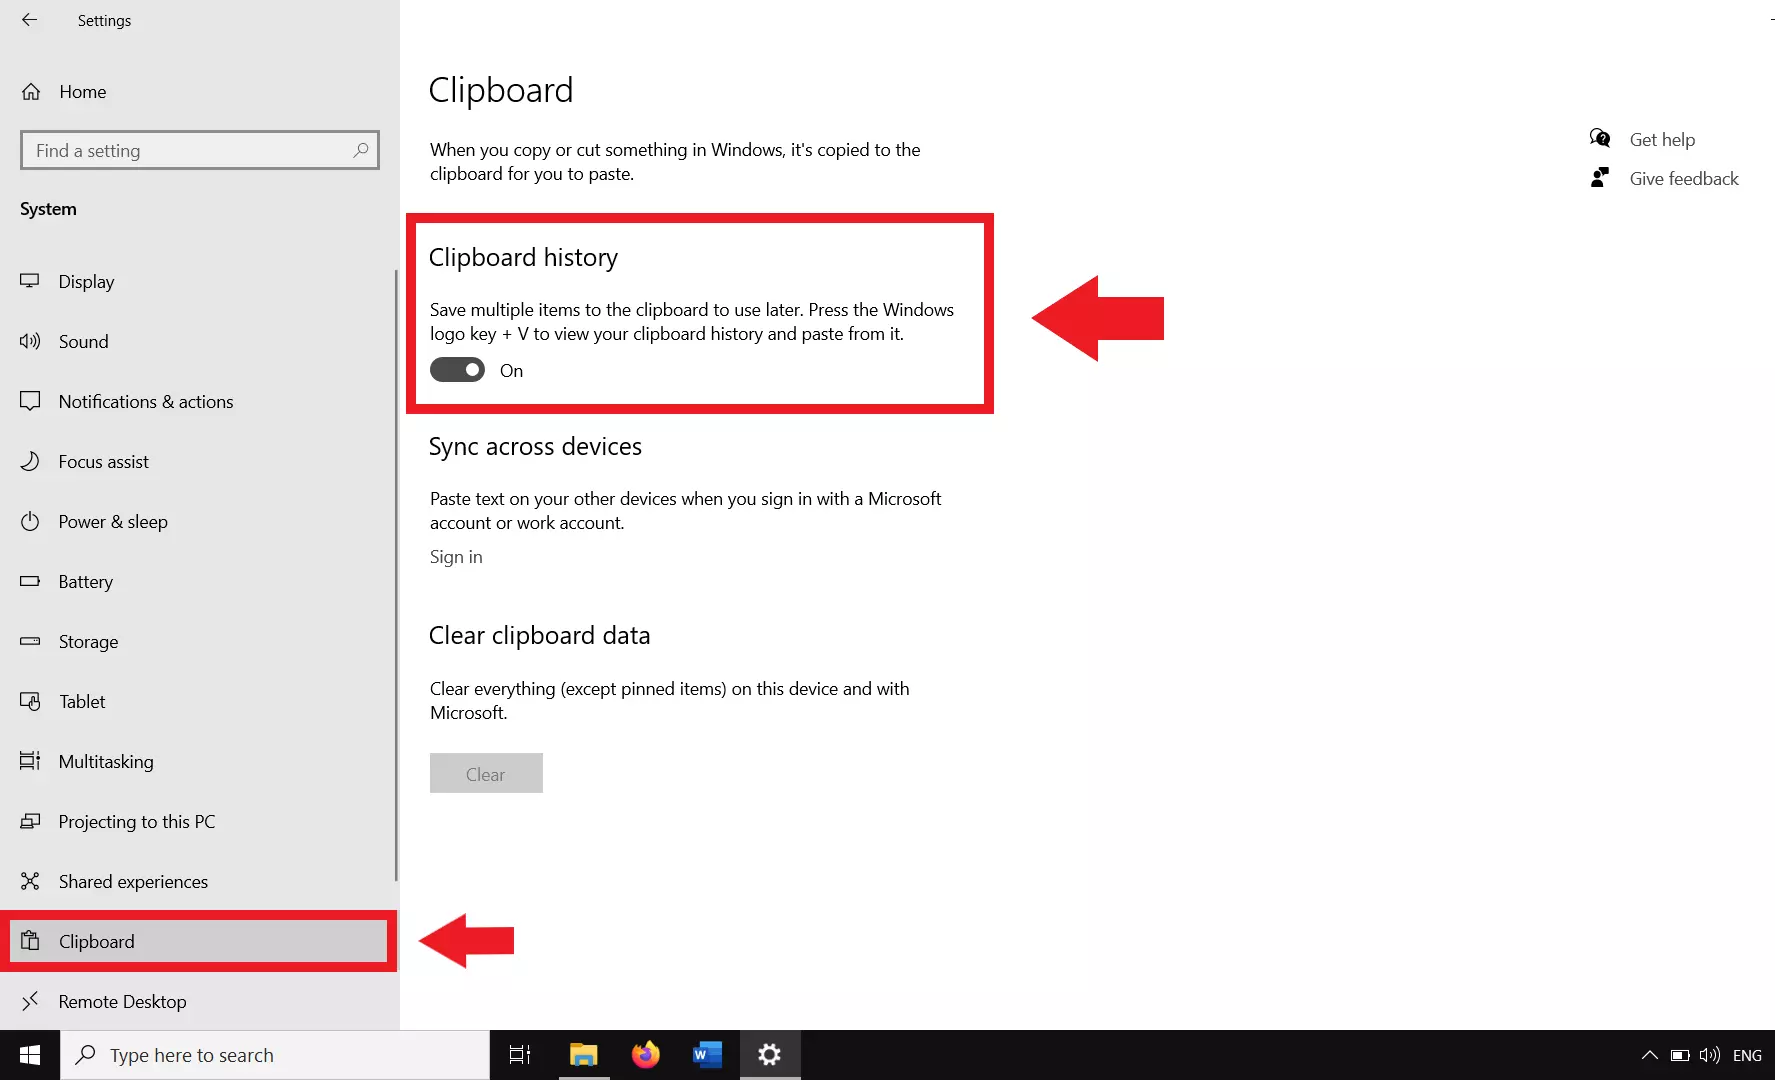
Step 2: Click “Clipboard” in the left sidebar and set the toggle at “Clipboard history” to “On”. To deactivate the history again, set the toggle back to “Off”.
Open the Windows 10 clipboard
Files of all kinds can be moved to the clipboard in Windows 10 either by selecting them with the mouse, with the touchpad, or via Windows shortcuts for “Cut” and “Copy”. To view the cached entries and paste them elsewhere, you first need to open the clipboard.
Proceed as follows:
Open clipboard via shortcut [Windows] + [V].
Step 1: The fastest way to open the clipboard in Windows 10 is to use the Windows shortcut [Windows] + [V].
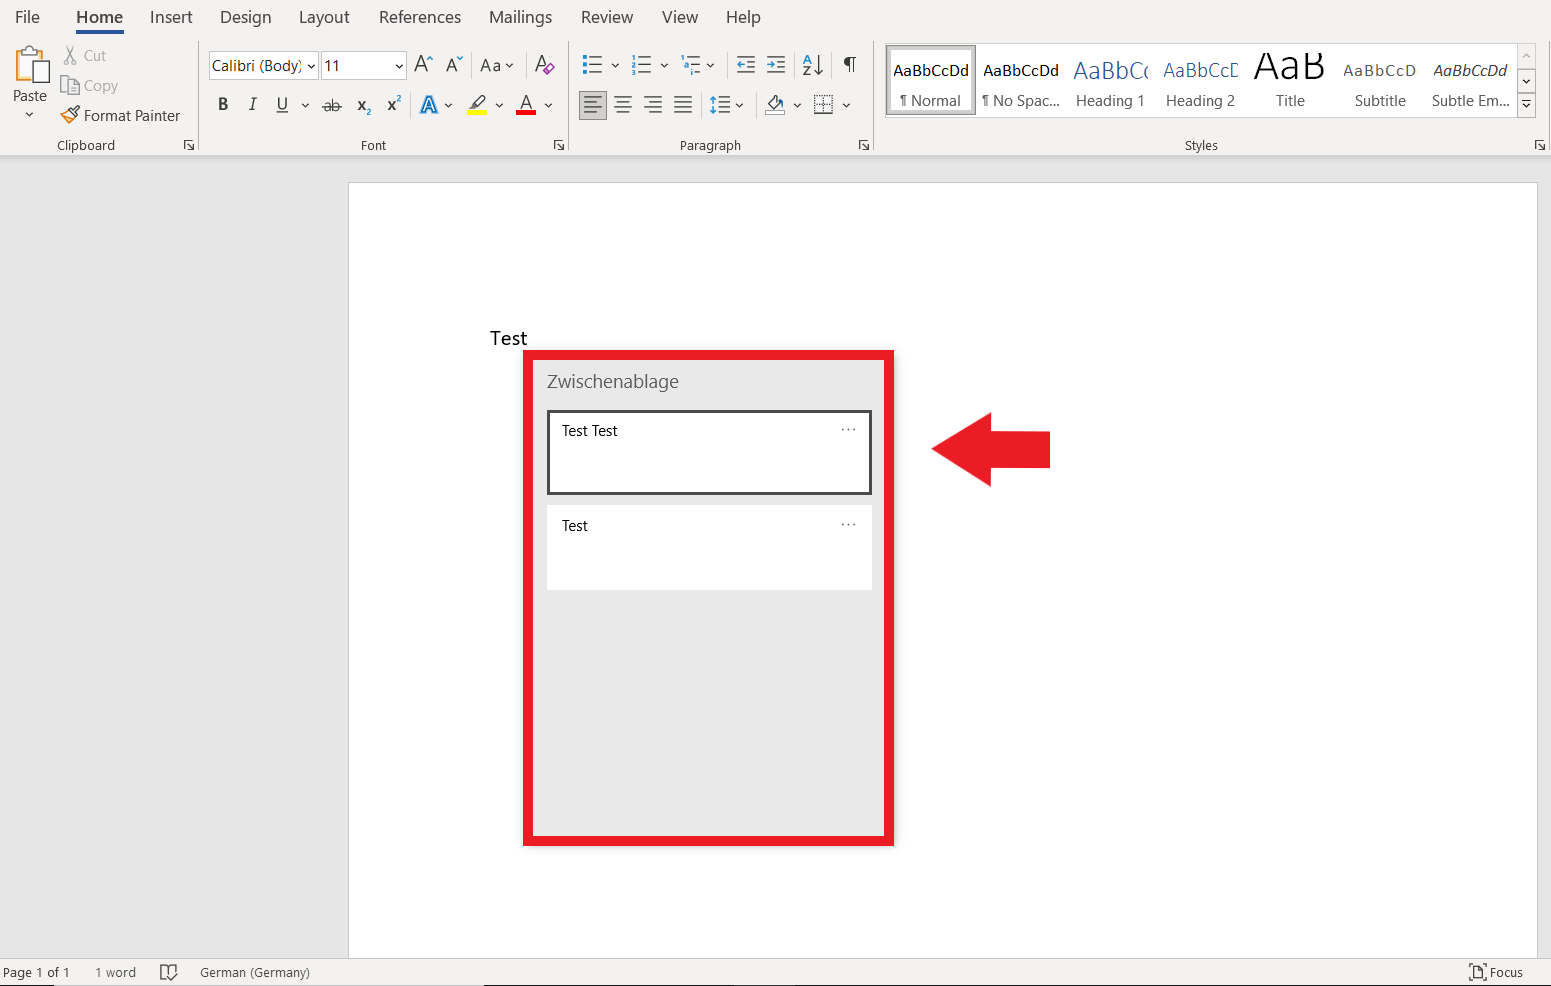
Step 2: The opened clipboard menu opens and shows you the list of all cached entries. Select a location where you want to paste a cached file and click the desired entry to paste.
Open Windows 10 clipboard in Microsoft Office
Step 1: In the Microsoft Office programs Word, Excel and PowerPoint you will find the group “Clipboard” in the top left corner of the document. Click there on the small arrow in the lower right corner.
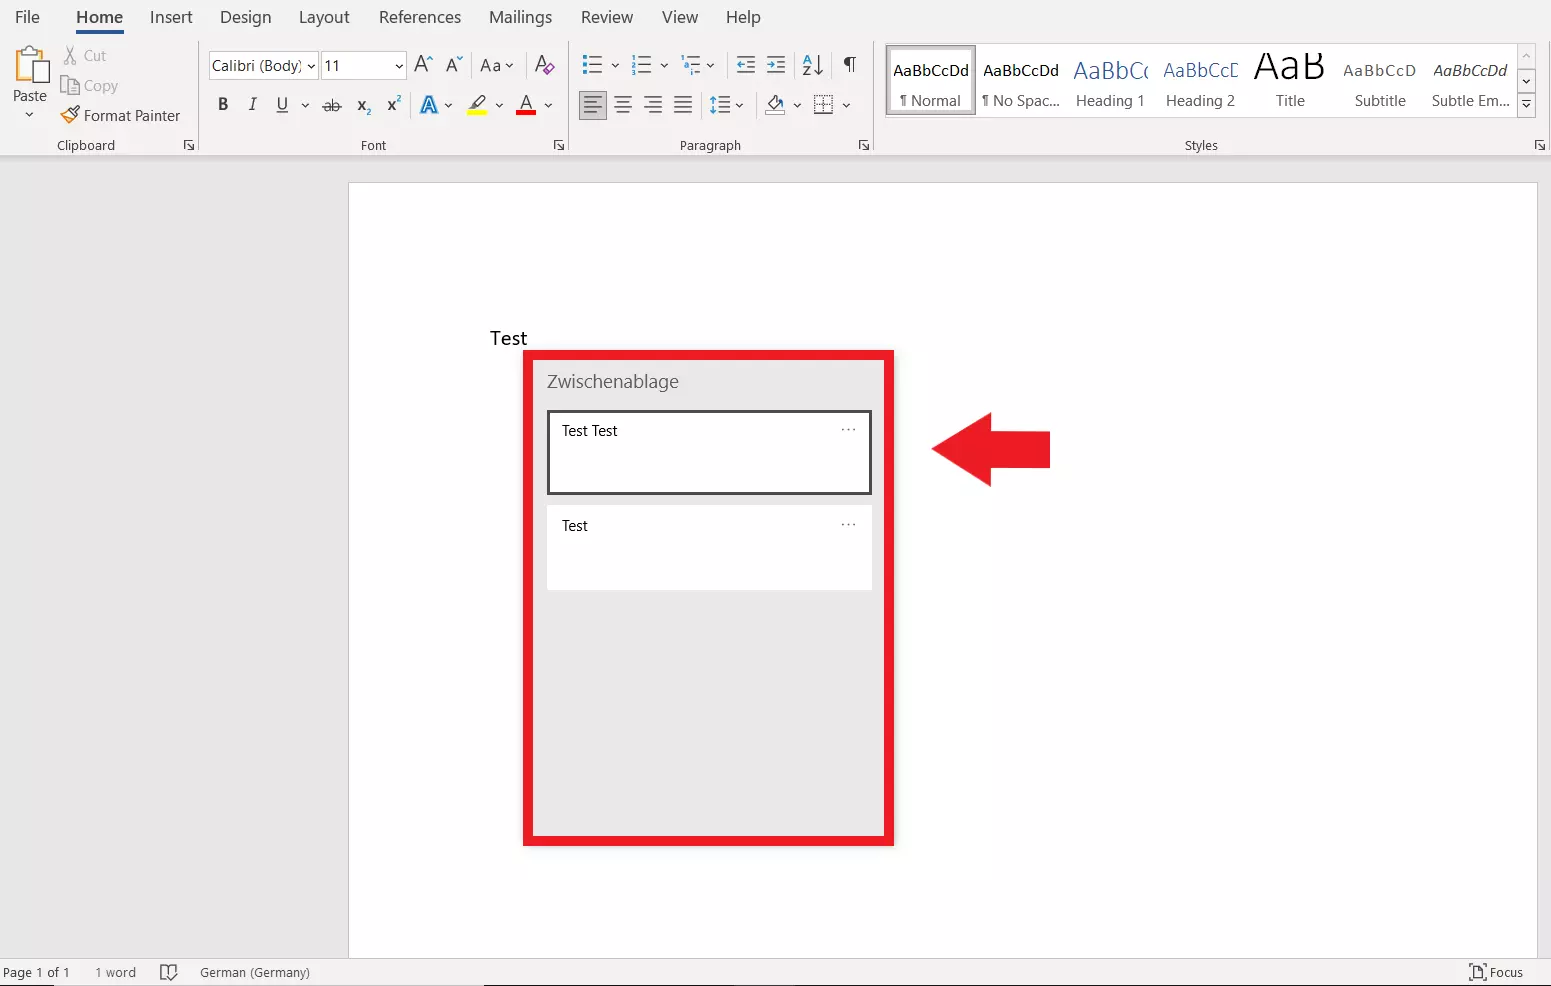
Step 2: The clipboard will now open with the current history on the left side of your document.
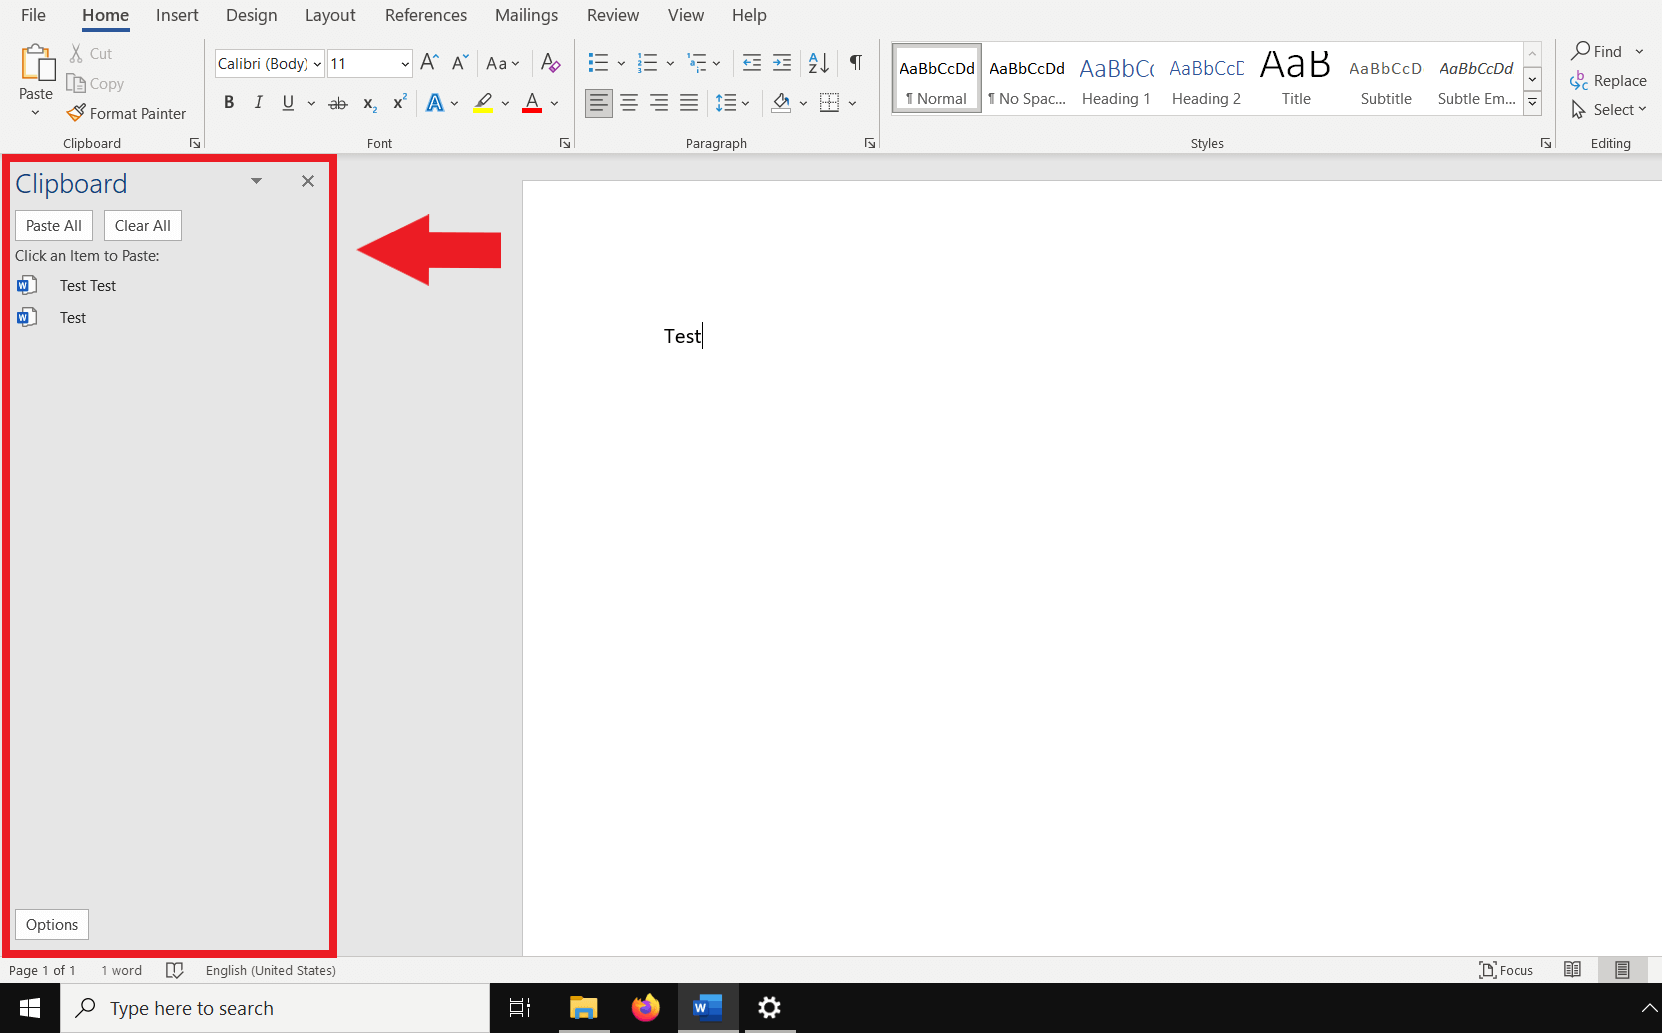
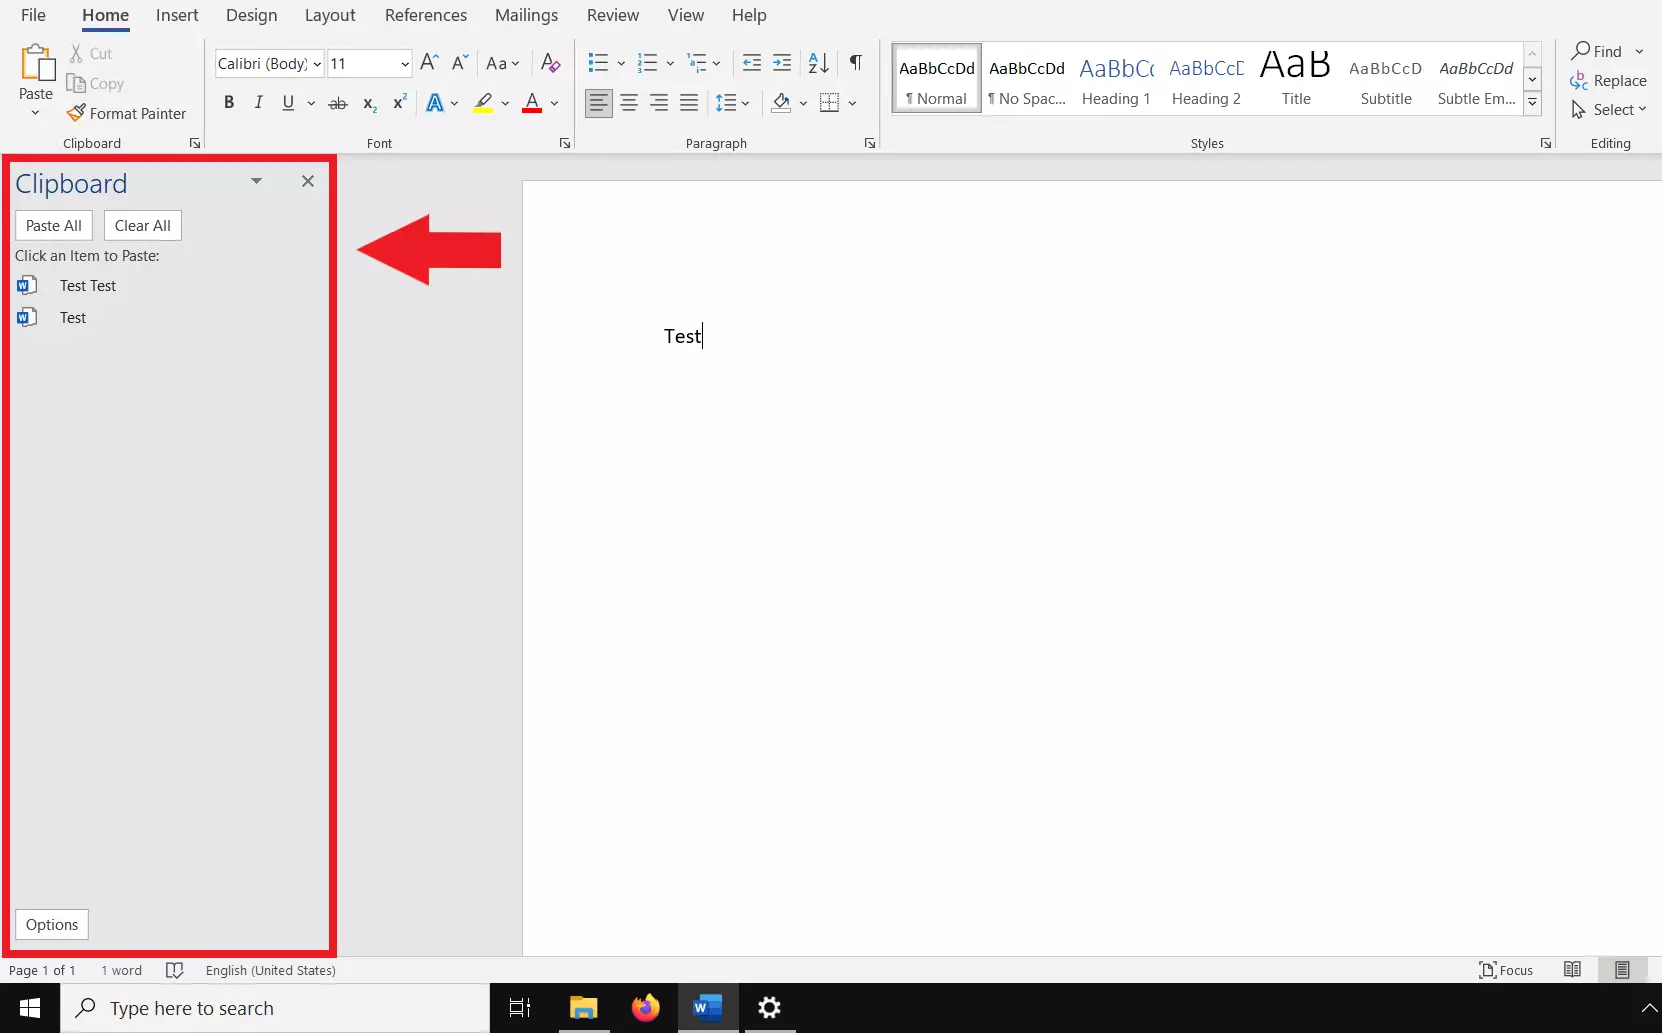
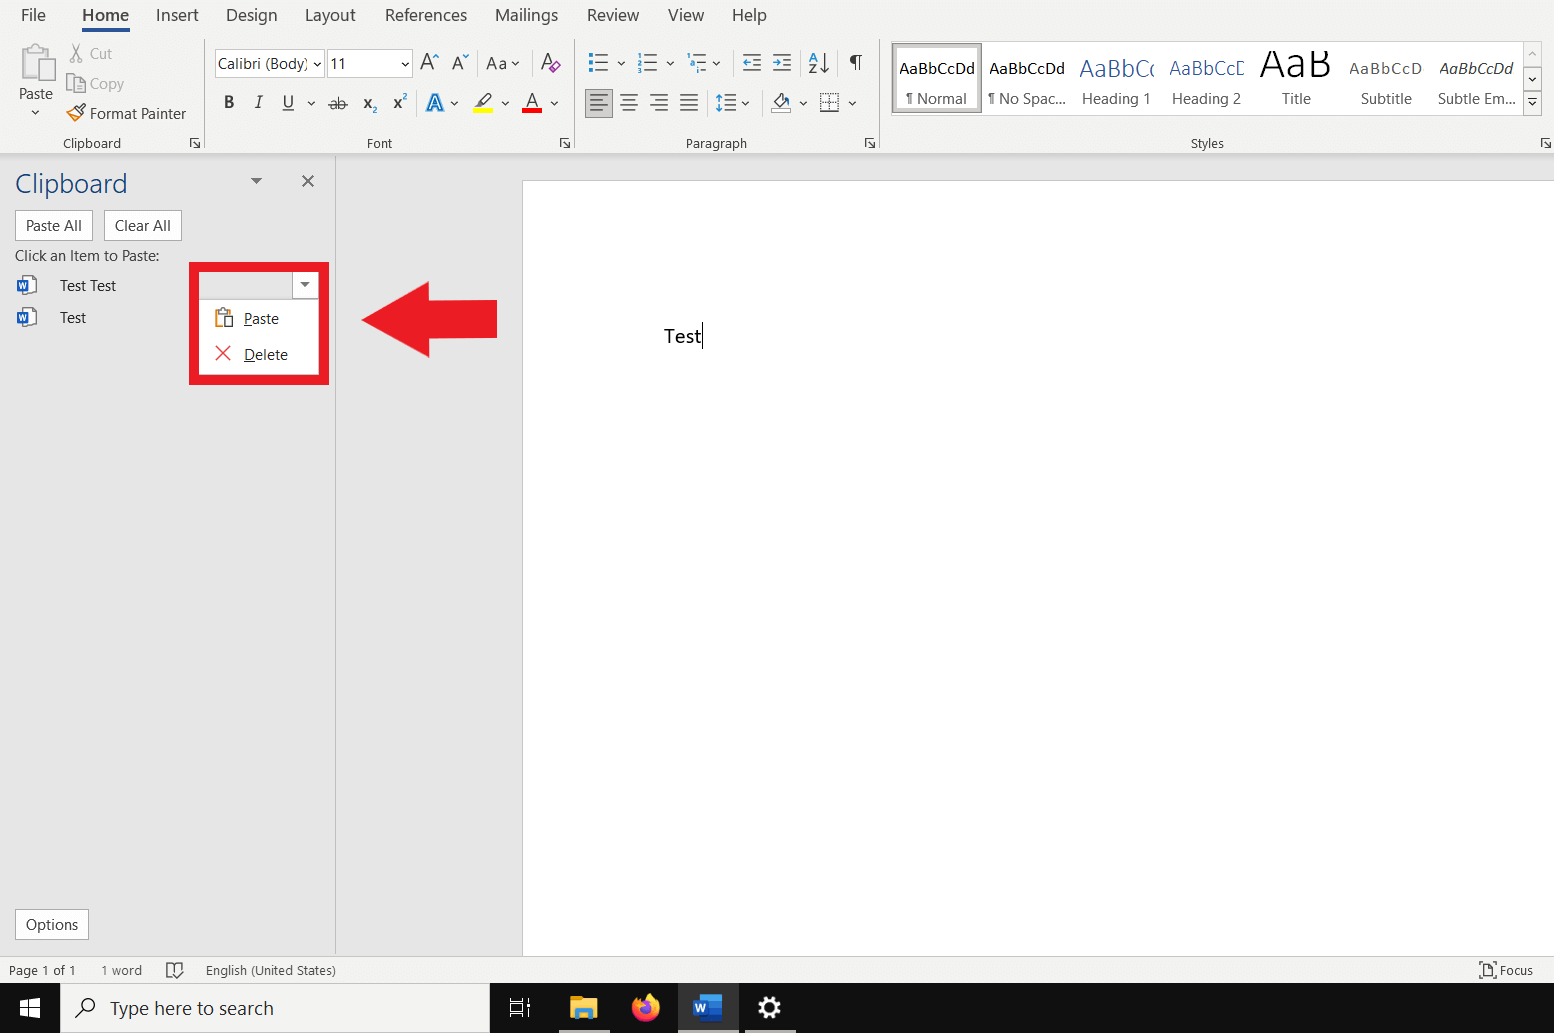
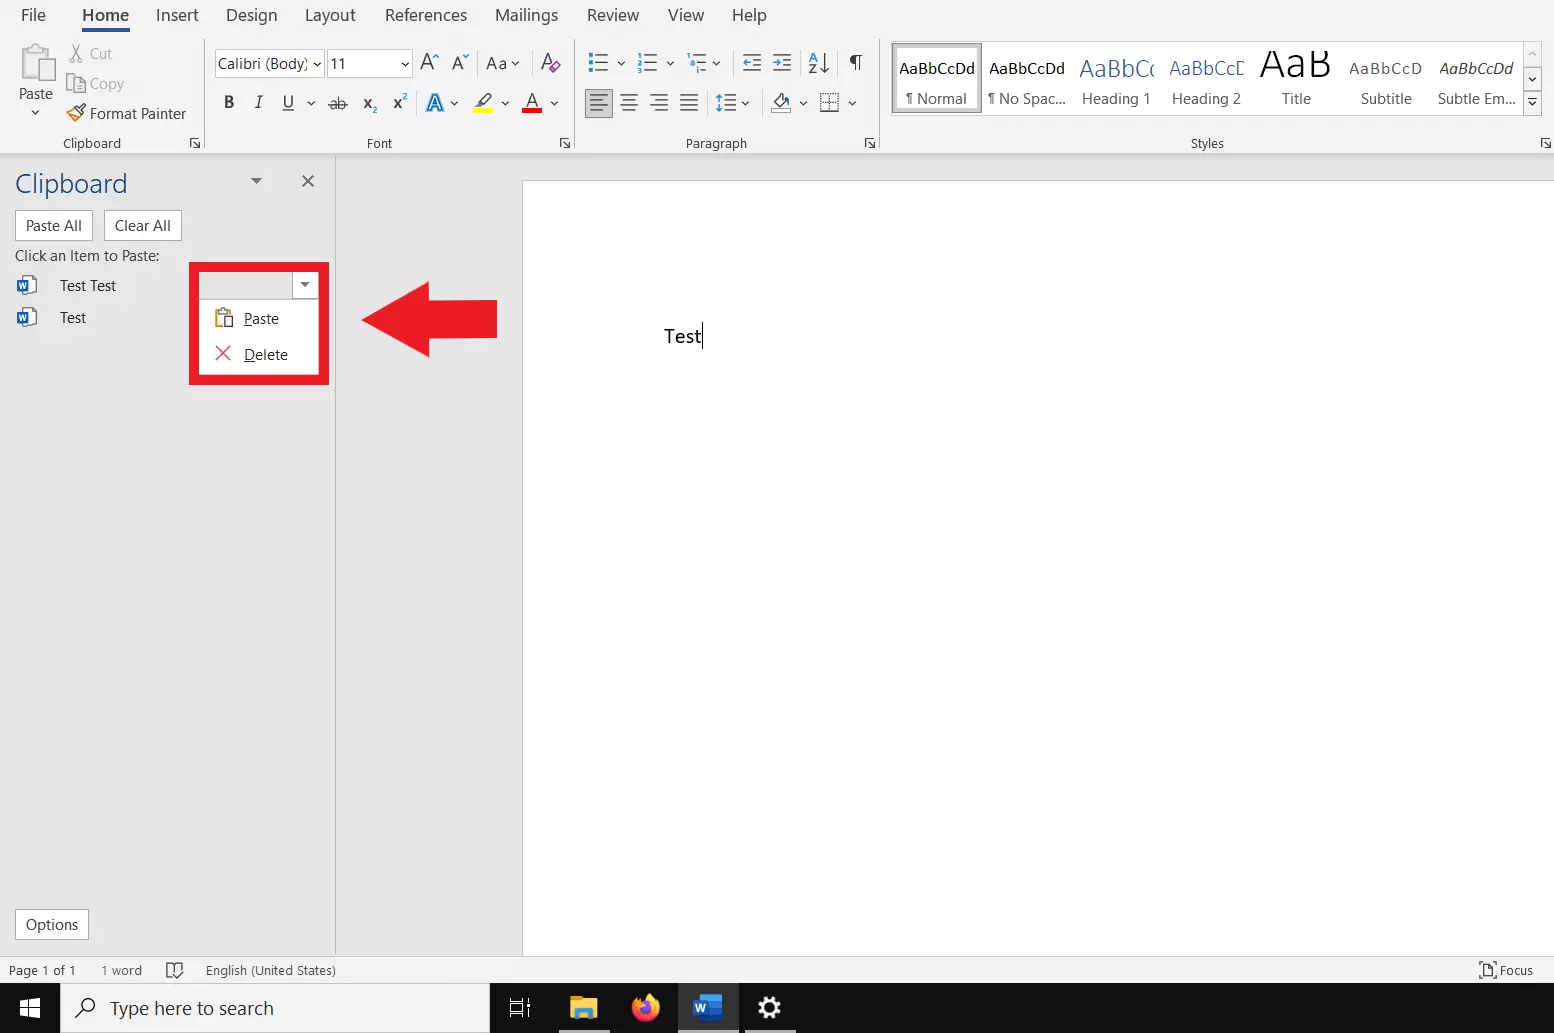
Step 3: You can now transfer an entry directly to the desired location by clicking on it or choose between the “Paste” and “Delete” options in the drop-down menu.
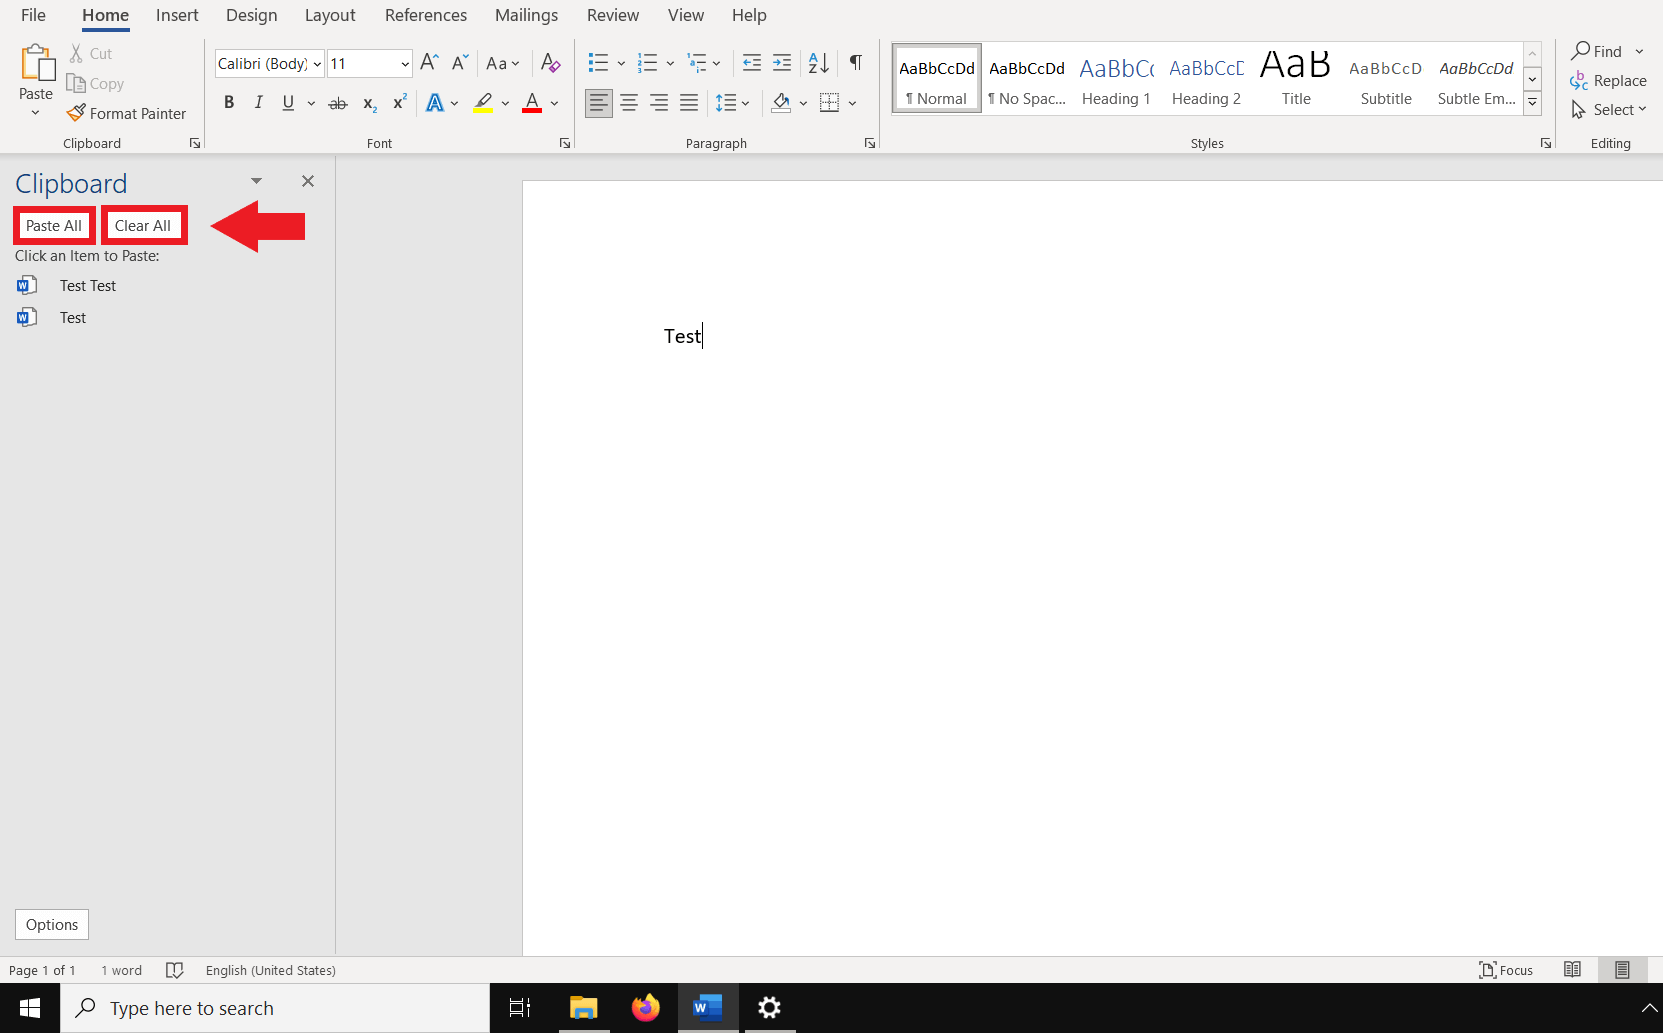
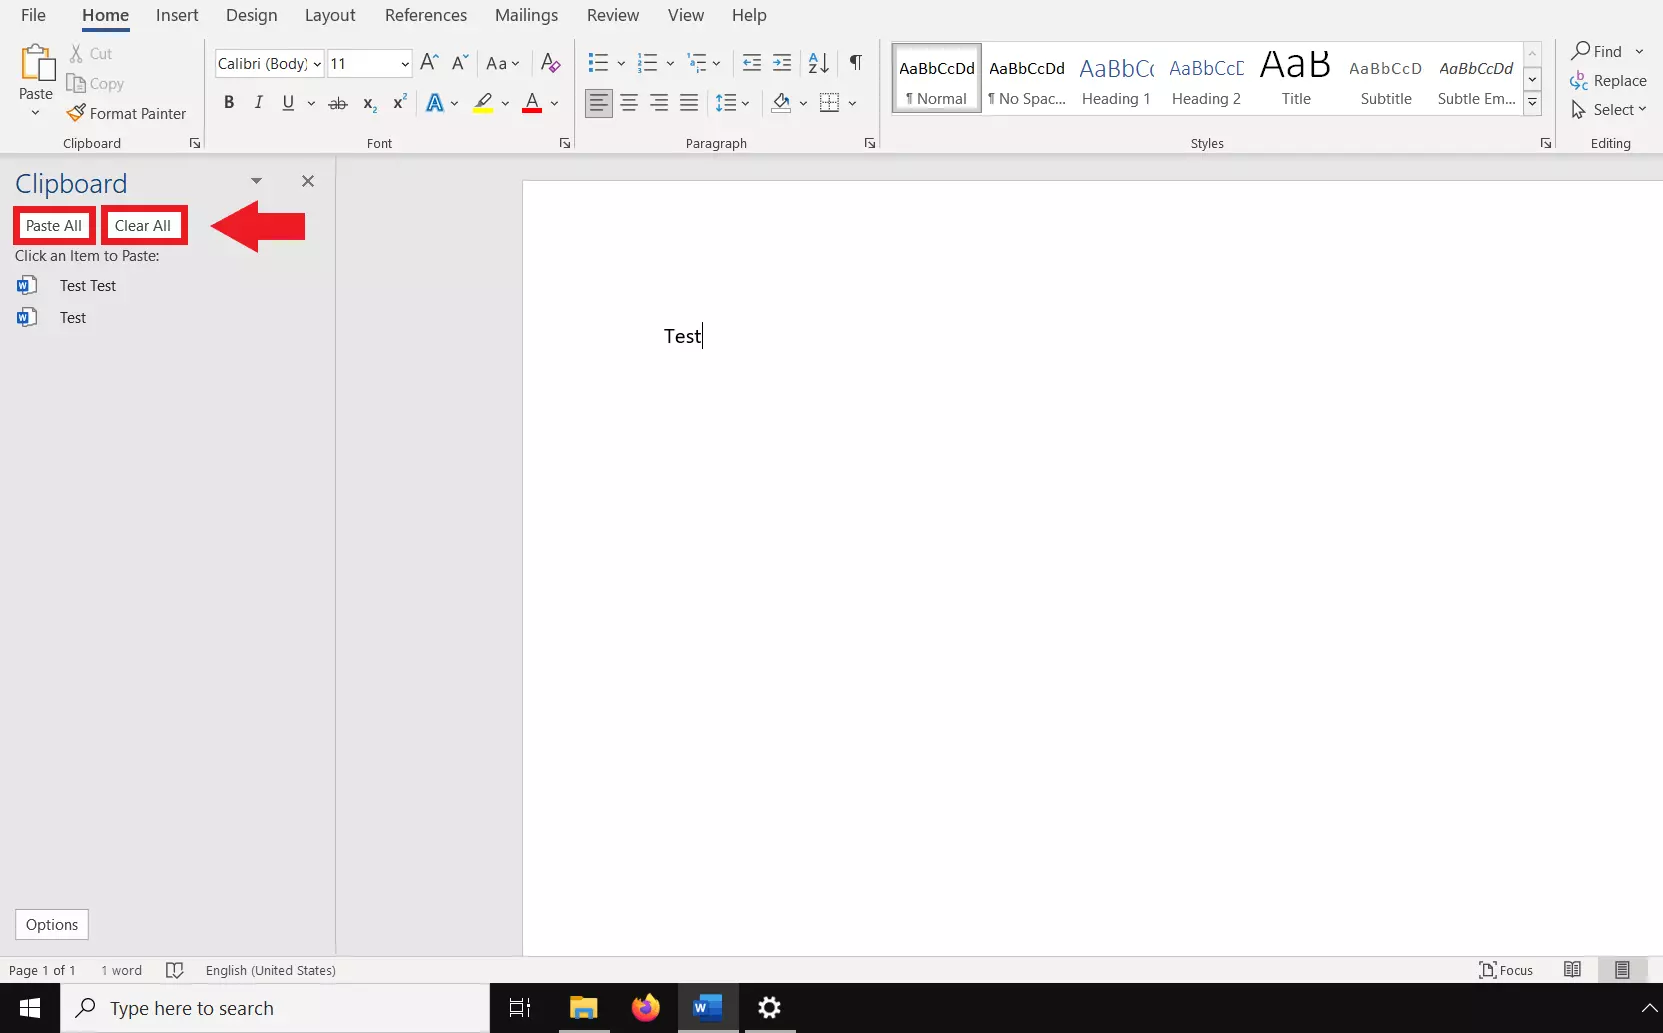
Step 4: To insert all the cached files in the specified order, go to “Insert All”. To delete all the files, go to “Delete All”.
Reviewer

Christian Heldmaier
Christian Heldmaier is an experienced online marketing and SEO specialist from Karlsruhe. He has been working as an SEO Manager at IONOS since July 2020.