How to install n8n with Plesk step by step

Deploying n8n with Plesk gives you an easy way to manage your server along with a flexible, self-hosted automation tool. This lets you automate recurring tasks, connect different services, and build workflow-based processes without having to start from scratch.
Step 1: Check requirements and choose the right server
Before you install n8n, check that your server is set up correctly and has enough resources for how you intend to use it. n8n’s requirements depend on how many workflows you run and on how many webhooks are active. The number of executions you’ll run at the same time and how many services you connect also need to be factored in. If you only run a few small automations, a modest setup is enough. For regular, large-scale use, plan for more CPU, RAM and storage.
For an n8n Plesk install, you’ll need:
- A Linux server with Plesk installed
- A domain or subdomain to access n8n
- A valid SSL certificate
- The Docker extension in Plesk, which is supported on current Linux systems such as Debian 10 to 12 and Ubuntu 18.04 to 24.04
- A reverse proxy setup; on Linux, Plex uses NGINX as a frontend, which routes traffic from your domain to the n8n container
n8n is a powerful automation tool, but it’s not the only option. Many people start with tools like Zapier or Make because they are fully cloud-based and don’t require their own server. Compared to Zapier and Make, n8n gives you more control over your data and costs, along with greater flexibility to customize workflows through self-hosting. In many cases, moving from Zapier to n8n is also relatively straightforward.
Use case 1: Personal use and small startups
If you want to use n8n by yourself, for a side project or with a very small team, start with 4 vCores, 4 GB RAM, and 120 GB NVMe. This setup is enough to run a few workflows, such as form notifications, simple social media automations or small data transfers between two to four tools or apps. It also works well for learning and testing. You can work in a realistic environment without making your setup larger than it needs to be.
Use case 2: Growing startups and small teams
If you start using n8n on a regular basis, you’ll need a more powerful setup. 6 vCores, 8 GB RAM, and 240 GB NVMe will give you more headroom for multiple active n8n workflows, scheduled cron jobs, connections to CRM systems or eCommerce platforms, and your first webhooks. This setup works well if multiple people are using n8n or if automations are already part of your day-to-day work. Typical examples include lead processing, email routing, internal alerts, simple reporting workflows or syncing data between SaaS tools.
Use case 3: SMBs with multiple business processes
Small and medium-sized businesses wanting to use n8n across multiple departments will need 8 vCores, 16 GB RAM, and 480 GB NVMe. At this point, you’re usually not just automating individual tasks, but connecting workflows across sales, customer service, and marketing teams, and integrating eCommerce platforms and internal tools. Typical examples include ticket routing, ERP or eCommerce data syncing, reporting, and invoicing. You might also handle triggers from forms or webhooks. These setups run more tasks at once, so extra memory helps keep things stable.
Use case 4: Agencies, platforms, and high-load environments
If you run n8n for multiple clients, projects, or high-volume workflows, you’ll need a more powerful setup. 12 vCores, 24 GB RAM, and 720 GB NVMe gives you enough headroom for simultaneous executions, more complex workflows, and a larger number of connected tools and services. This kind of setup works well for agencies managing multiple clients or campaigns, as well as platforms that receive data in real time through APIs and webhooks. A VPS of this size handles these workloads reliably. In these environments, load spikes are normal and can slow things down. You’ll need more CPU to reduce delays and more RAM to keep longer or more resource-heavy workflows stable.
Overview of requirements by use case
| Use case | Typical use | Recommended setup |
|---|---|---|
| Personal use and small startups | A few workflows, internal automations, forms, notifications | 4 vCores CPU, 4 GB RAM, 120 GB NVMe |
| Growing startups and small teams | Multiple workflows, initial webhooks, CRM and eCommerce integrations | 6 vCores CPU, 8 GB RAM, 240 GB NVMe |
| SMBs with multiple processes | Cross-team workflows, customer service, marketing, data syncing and reporting | 8 vCores CPU, 16 GB RAM, 480 GB NVMe |
| Agencies, platforms and high-load environments | Many simultaneous executions, larger data volumes, many integrations | 12 vCores CPU, 24 GB RAM, 720 GB NVMe |
- Automate manual routines for tech teams
- Automation on your own server: no task limits, full cost control
- Over 500 integrations and tools thanks to open source
Step 2: Prepare a domain or subdomain for n8n
Decide which address n8n will use. A dedicated subdomain such as n8n.your-domain.com is usually the simplest option. It keeps your automation setup separate from your main website and makes SSL and proxy configuration easier. Because n8n runs behind Plesk as a reverse proxy, you’ll need a clearly defined target address. This ensures traffic is routed correctly and avoids conflicts later.
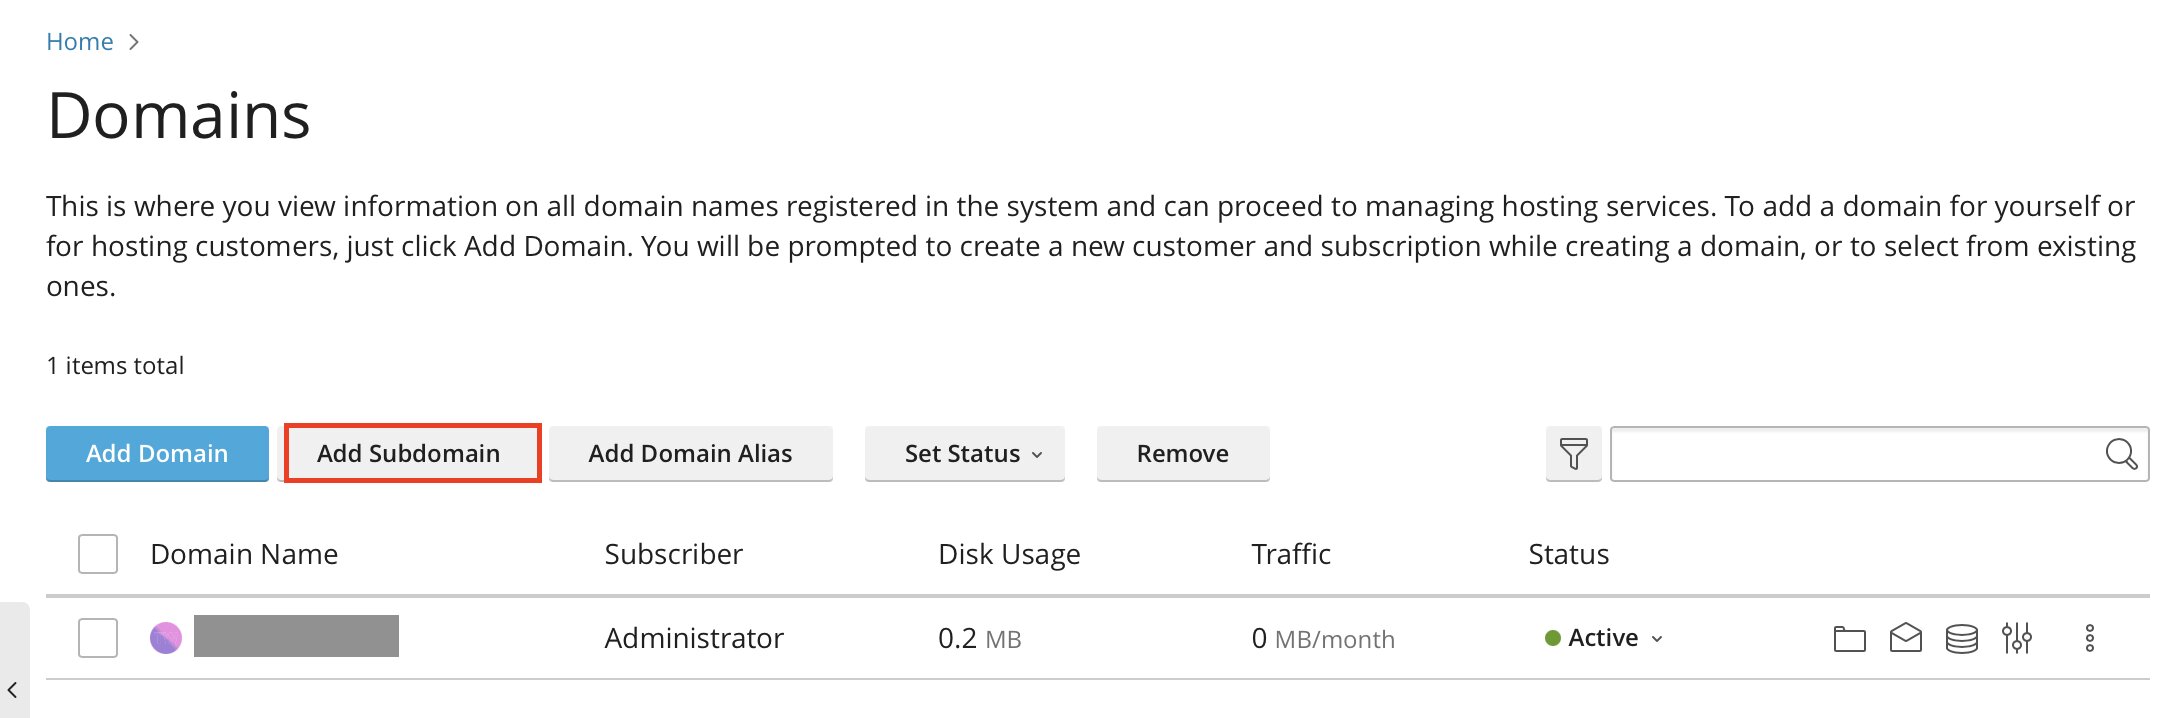
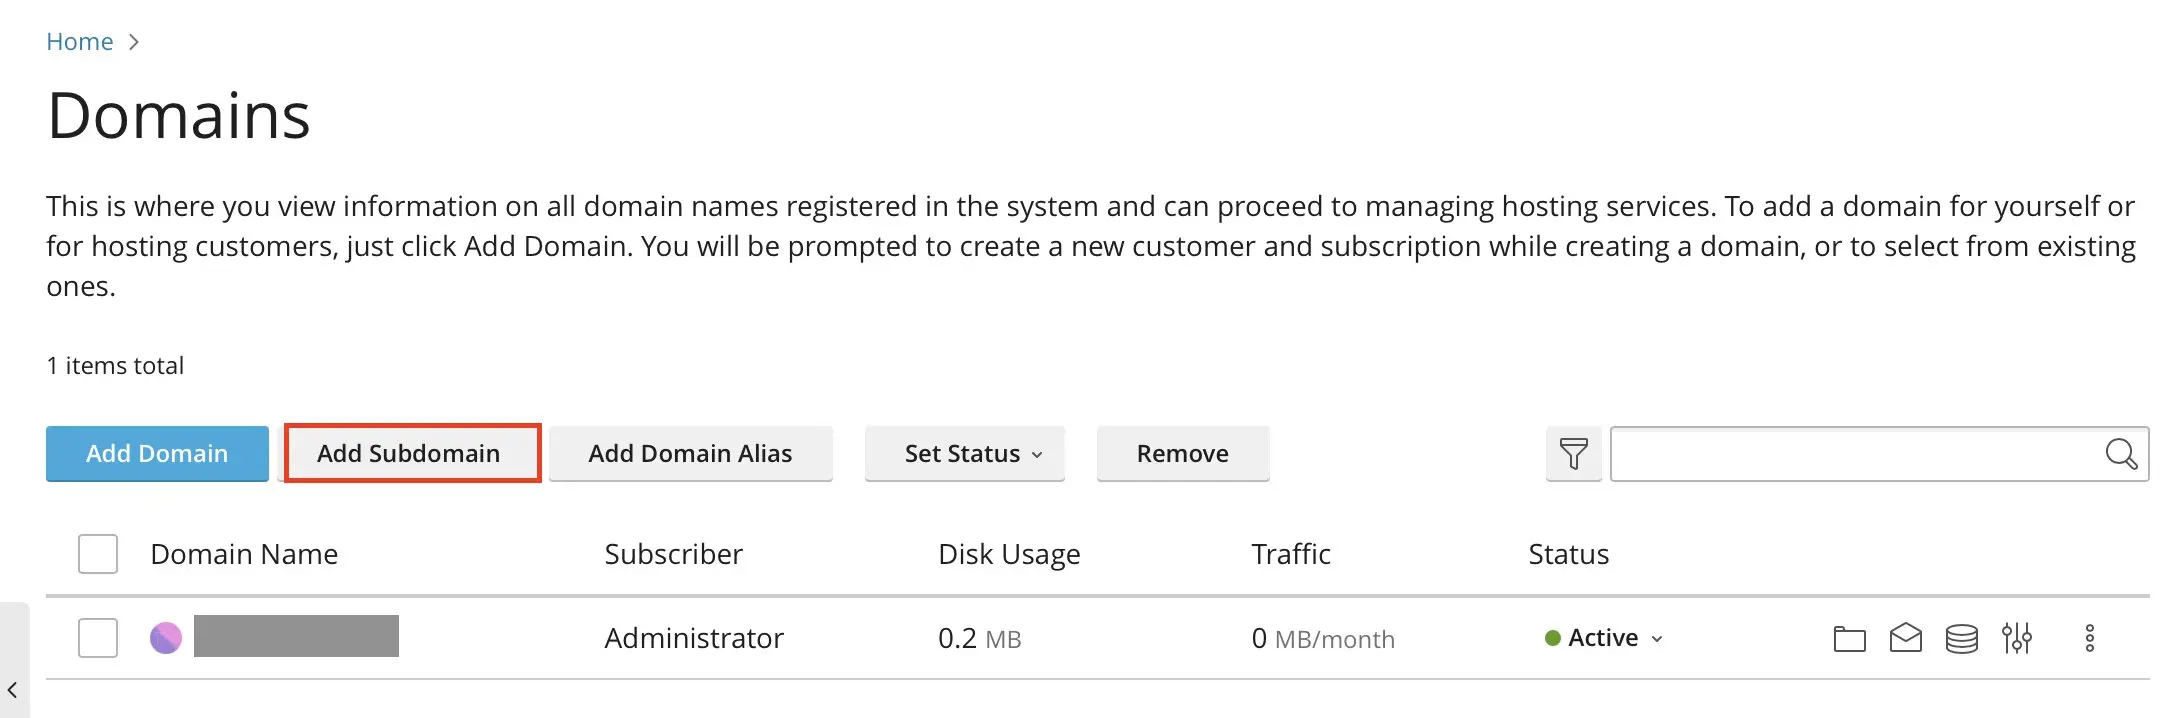
Start by creating the domain or subdomain in Plesk. Make sure the DNS record already points to your server. Then open the Domains section in Plesk and confirm the new domain appears there. Use a new subdomain for n8n to avoid conflicts with existing website configurations.
Step 3: Enable SSL for the domain
Secure the domain with HTTPS before making n8n publicly accessible. Plesk includes a built-in Let’s Encrypt integration that makes it easy to issue and renew free SSL certificates. This matters for n8n because many external services only accept webhooks or OAuth callbacks over HTTPS. Login sessions, API requests, and workflow data should also never be exposed over unencrypted HTTP.
Open the domain in Plesk and enable an SSL certificate.
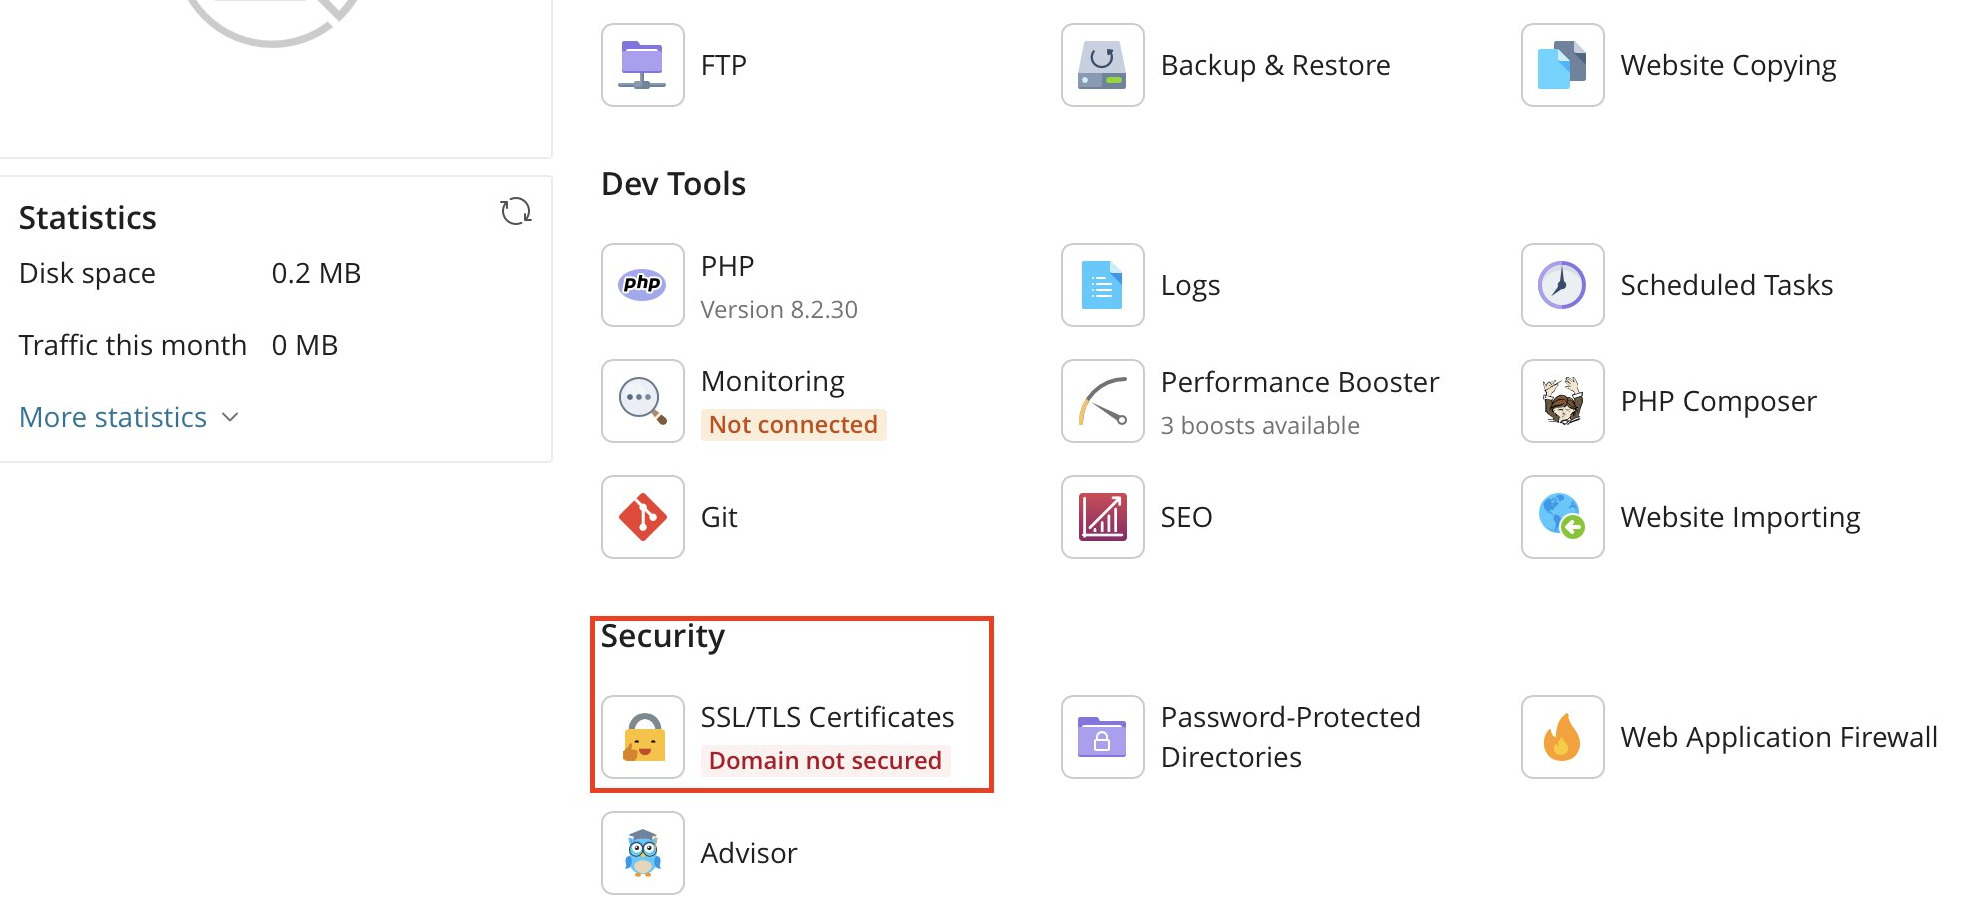
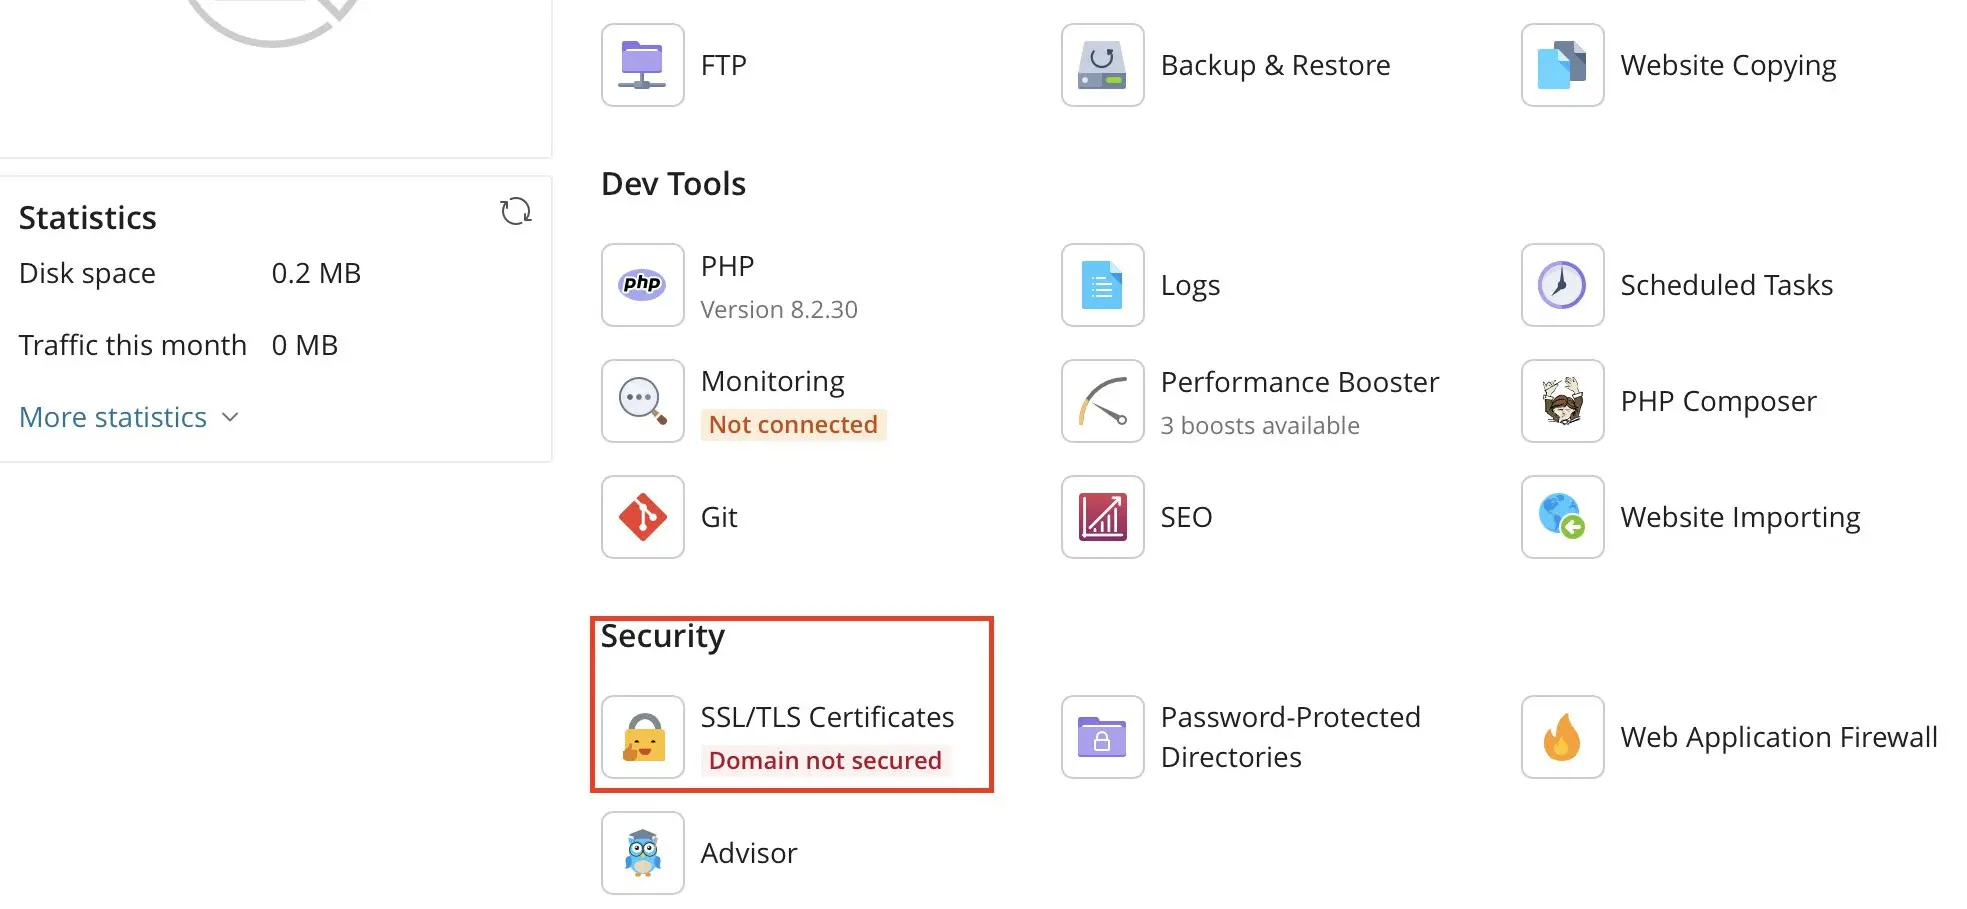
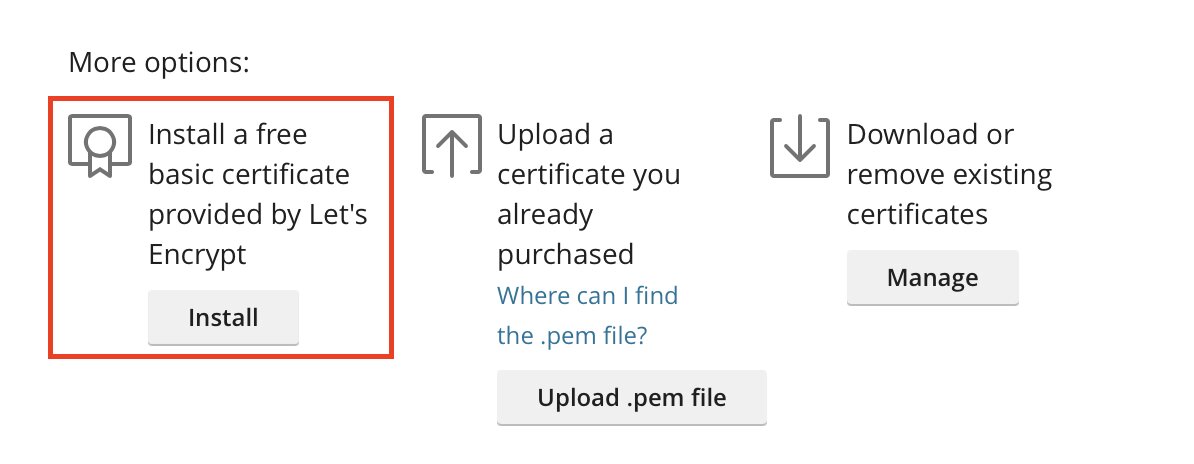
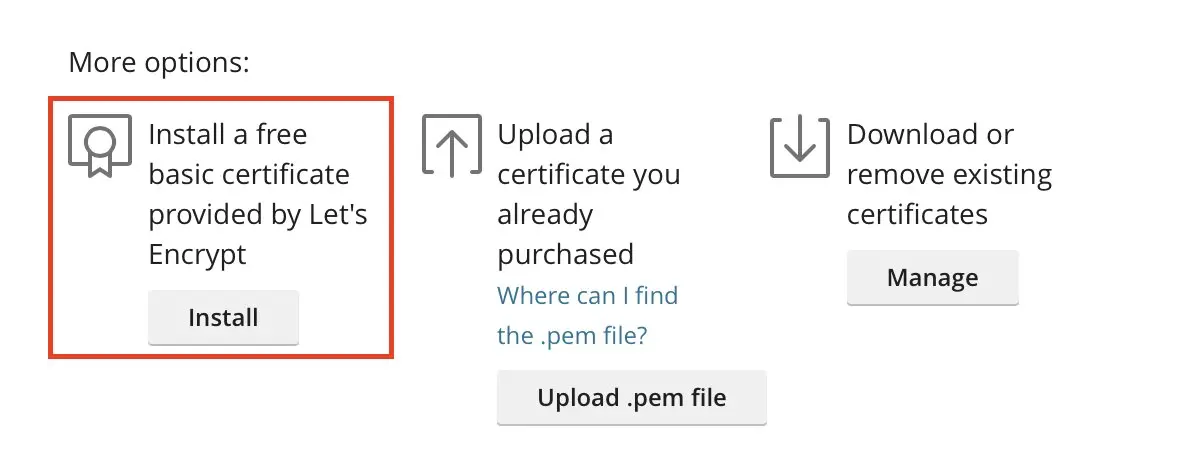
If Let’s Encrypt is already installed, request a certificate in the interface. Then enable automatic redirection from HTTP to HTTPS so all traffic uses encryption. You can also use this menu to download or remove existing certificates.
Step 4: Install the Docker extension in Plesk
Using Docker to run n8n in an isolated container makes it easier to update and manage n8n. In Plesk, the Docker extension lets you deploy and control containers directly from the admin interface.
Open Extensions in Plesk and install the Docker extension if it’s not already available.
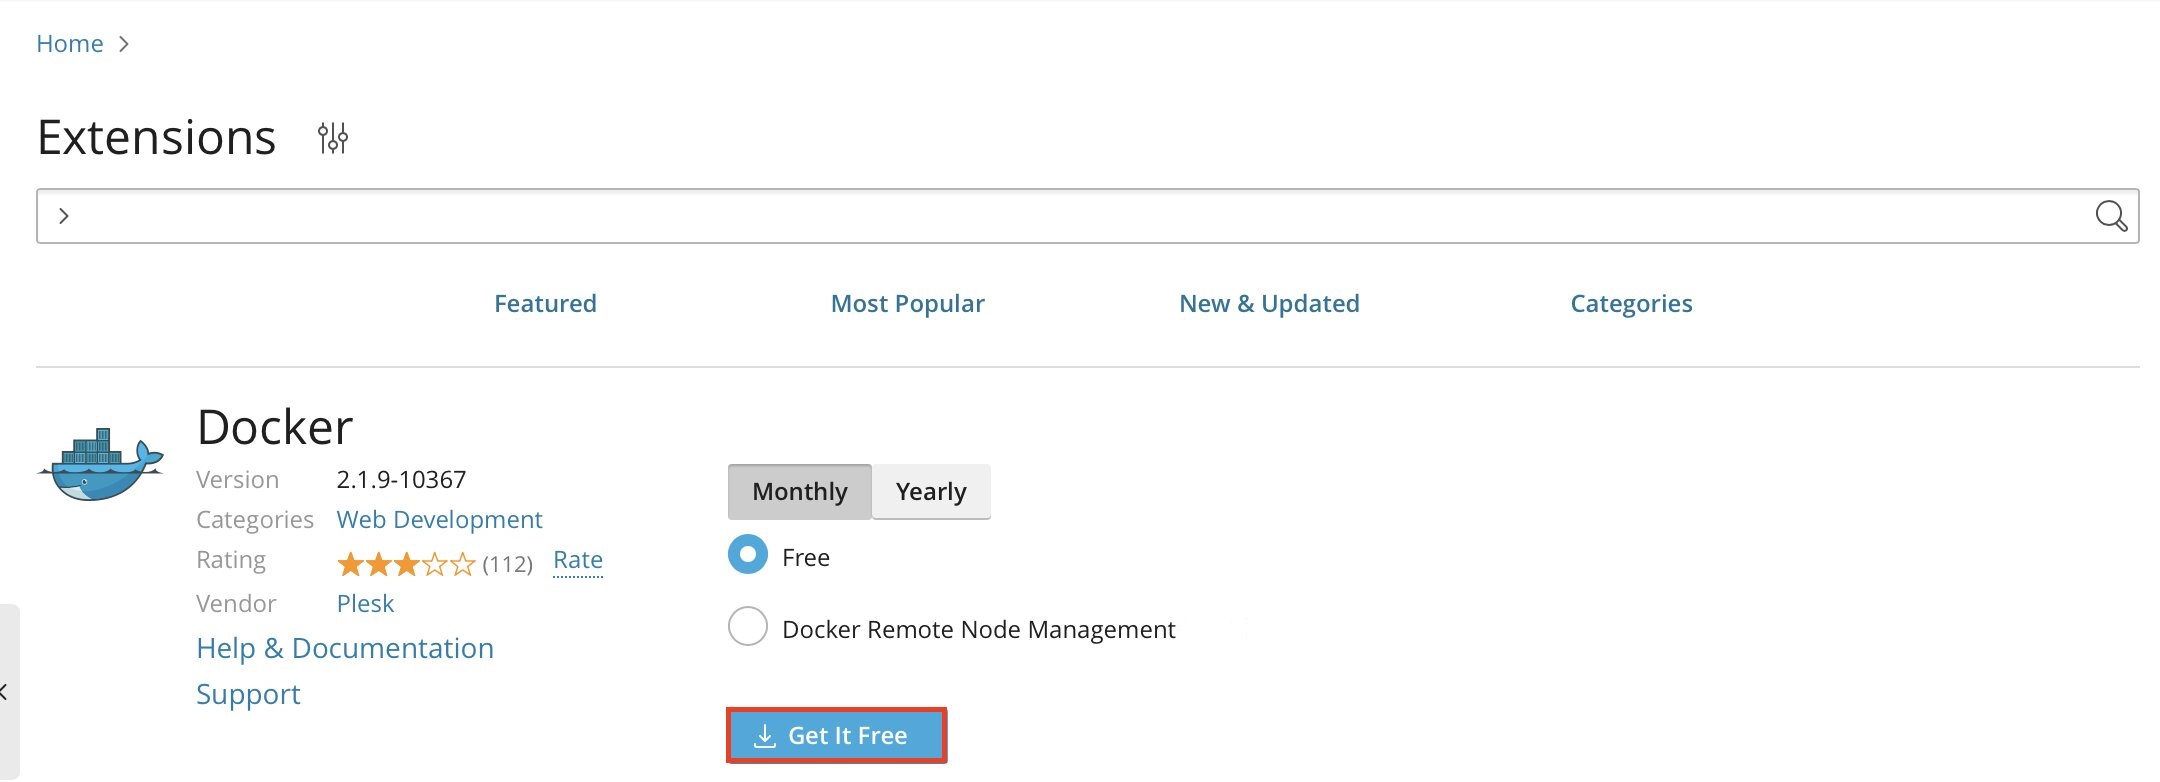
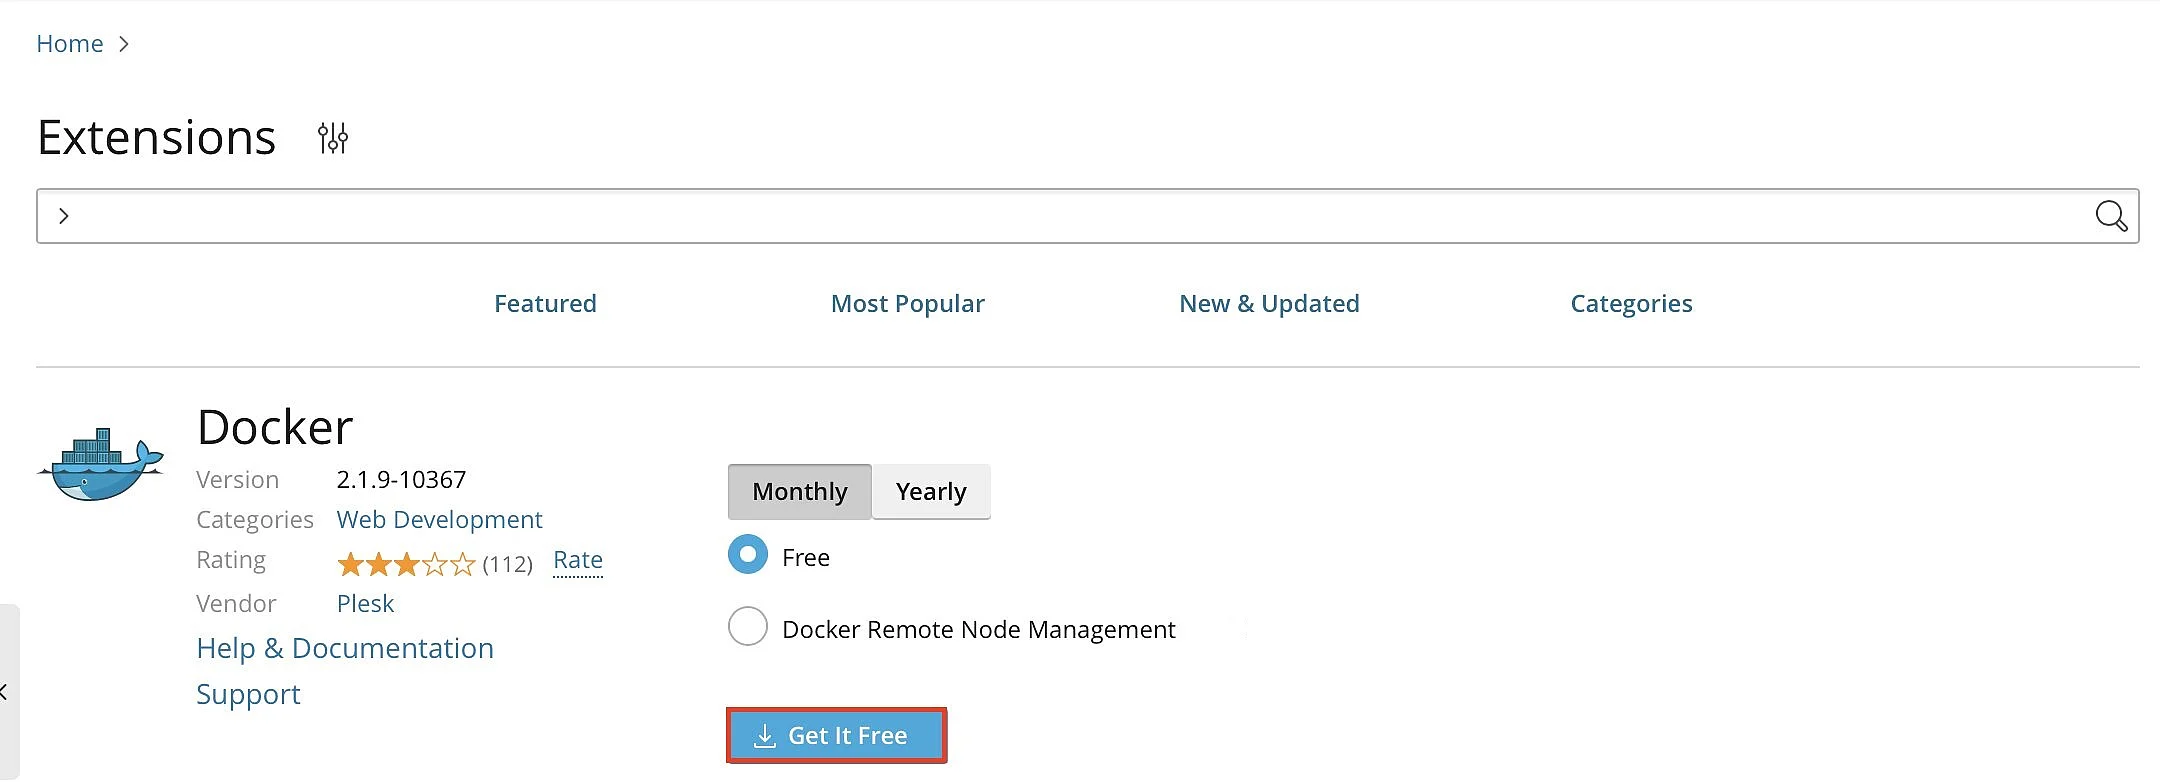
After installation, a dedicated Docker section appears in the left sidebar. Use it to search for images, create Docker containers, assign ports and set variables.
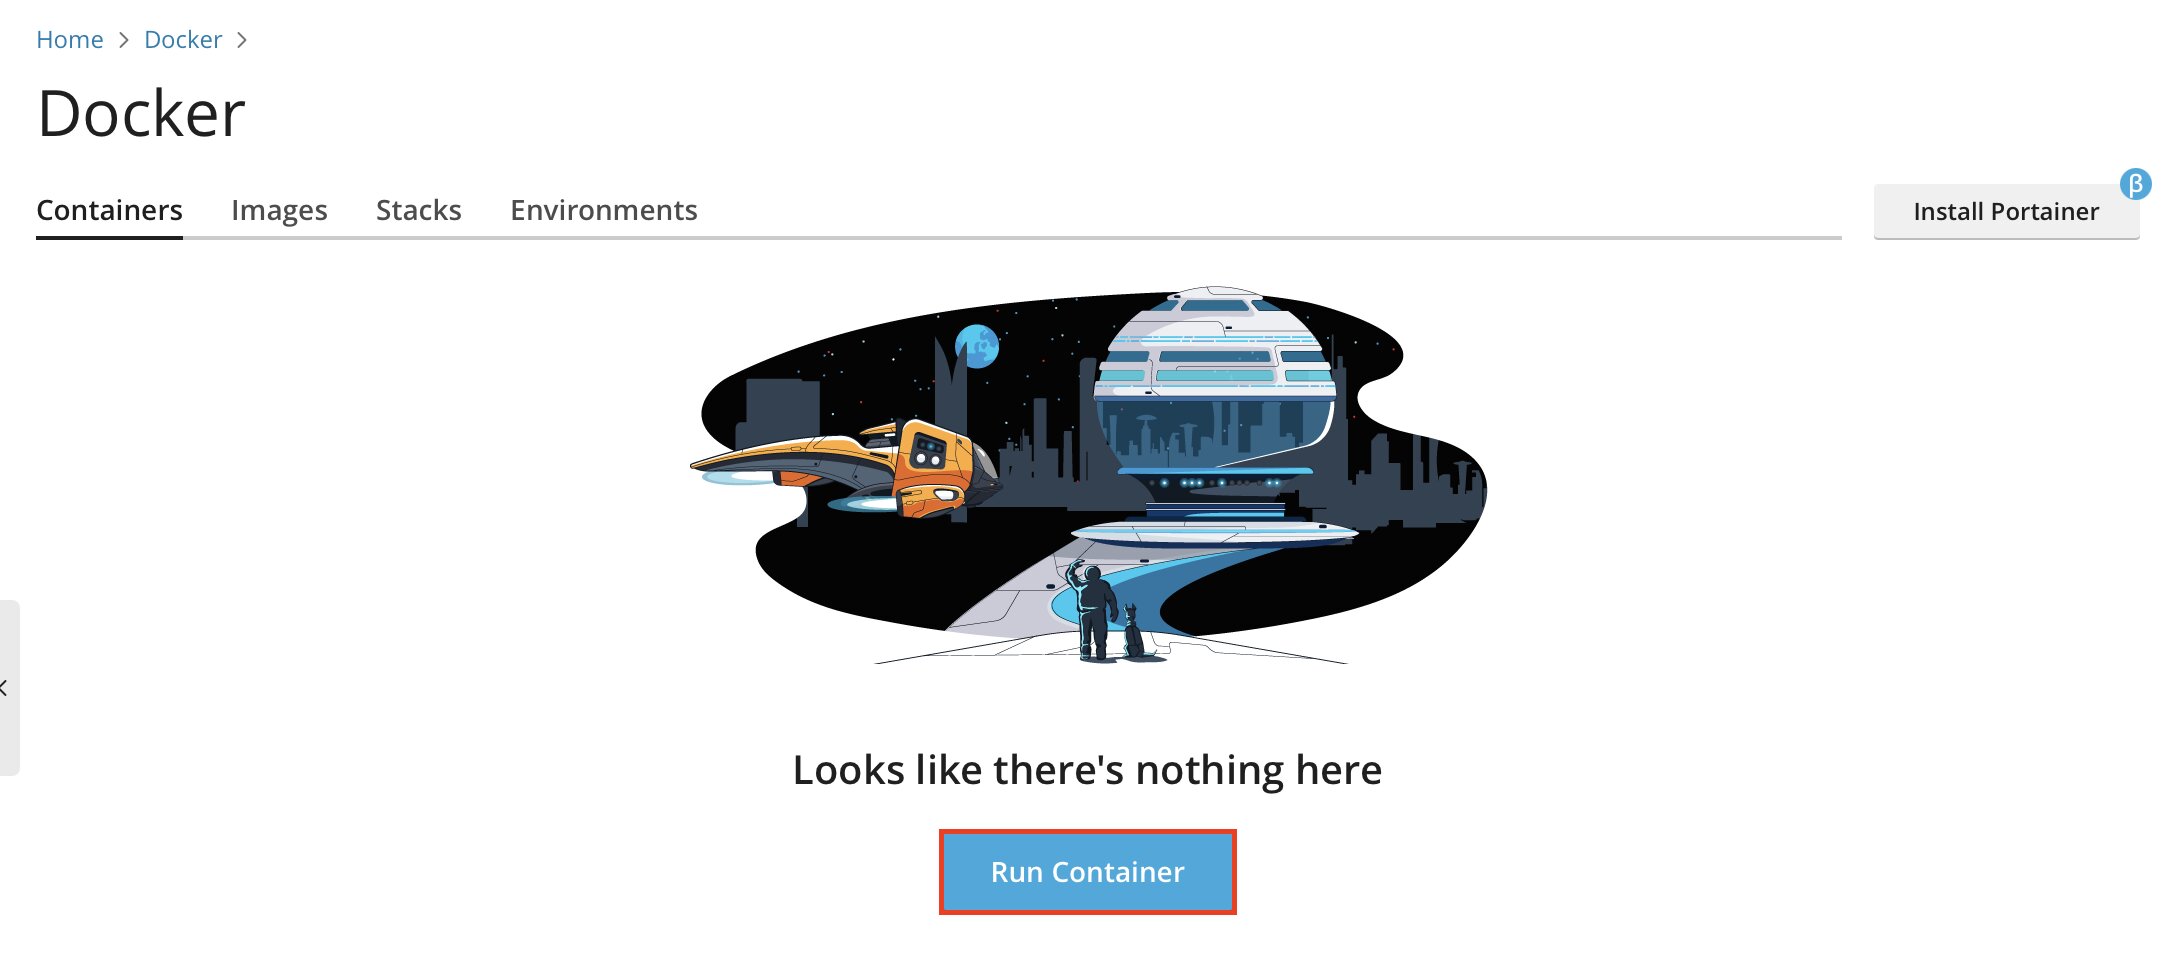
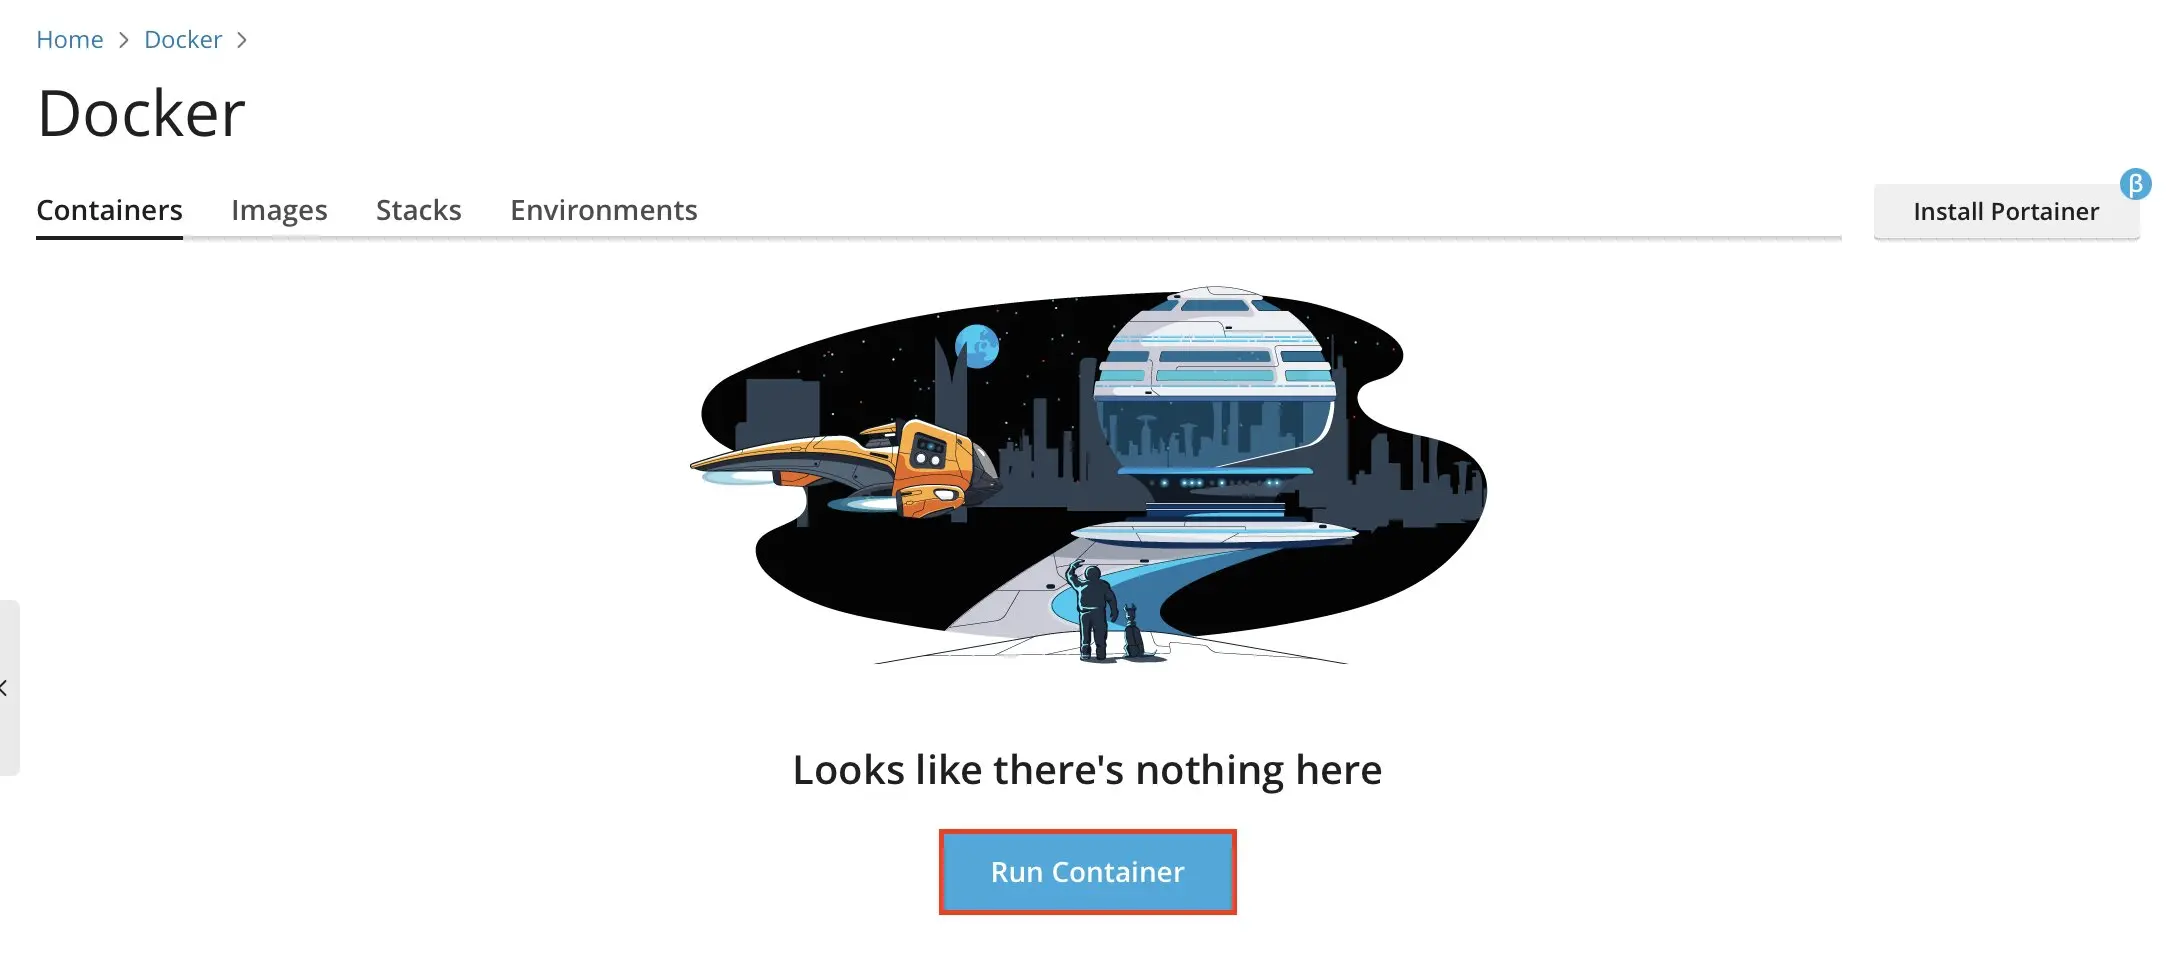
This setup uses Docker, one of the most common ways to self-host n8n. For more advanced environments, you can also run n8n on Kubernetes, which is better suited for scalable or distributed setups.
Step 5: Create an n8n container in Plesk
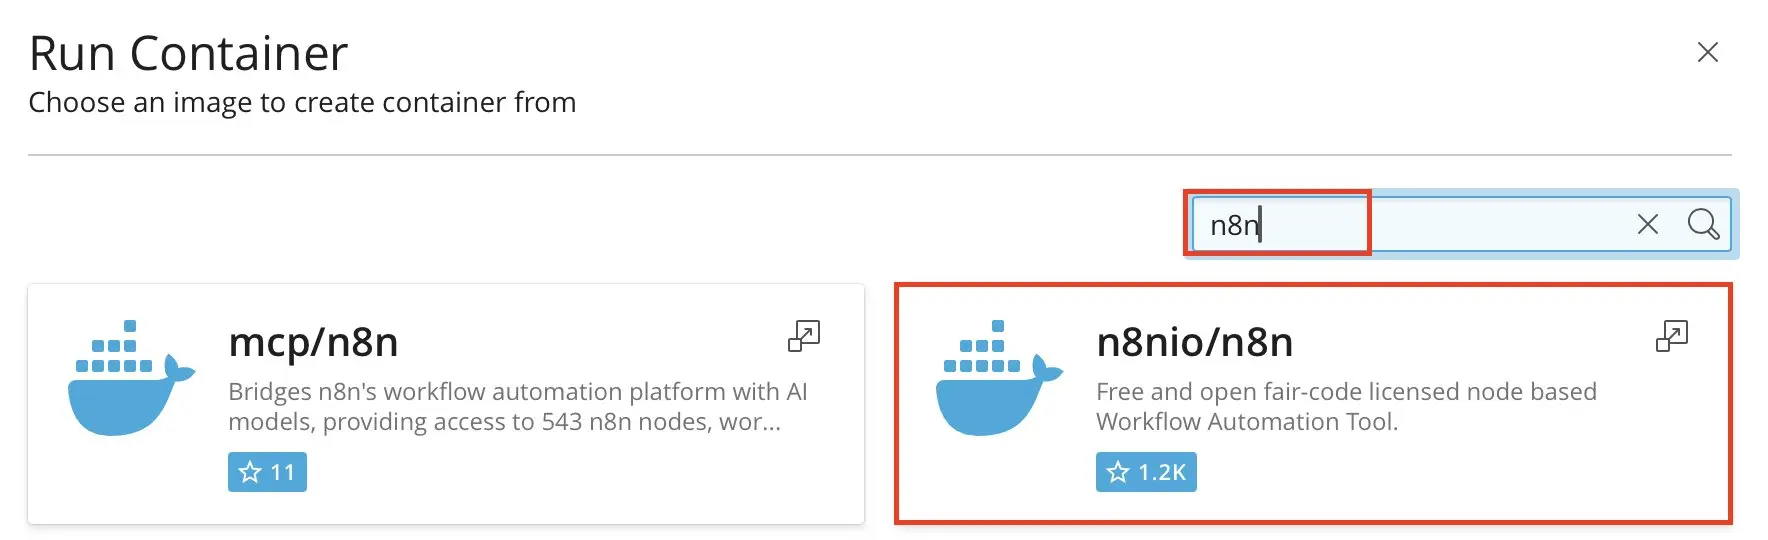
Next, create the n8n container itself. In the Docker extension, search for the official image “n8nio/n8n” and create a new container from it.
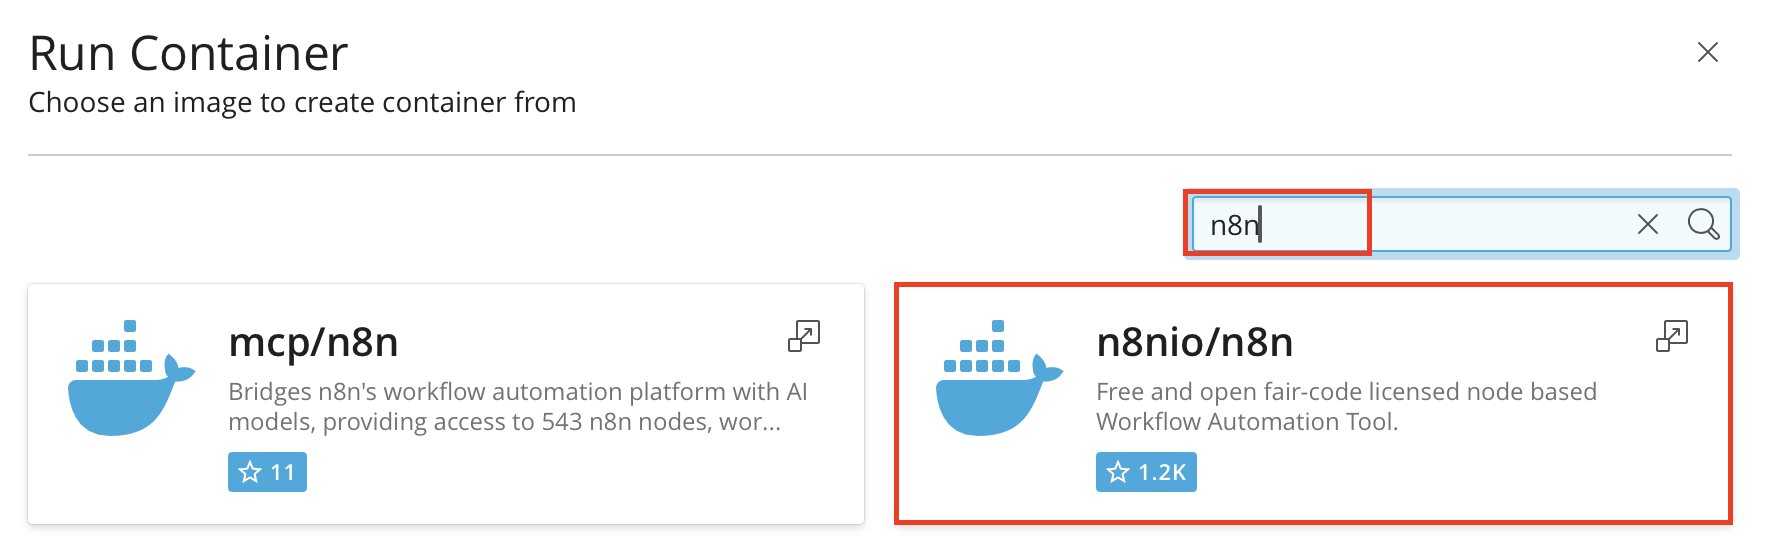
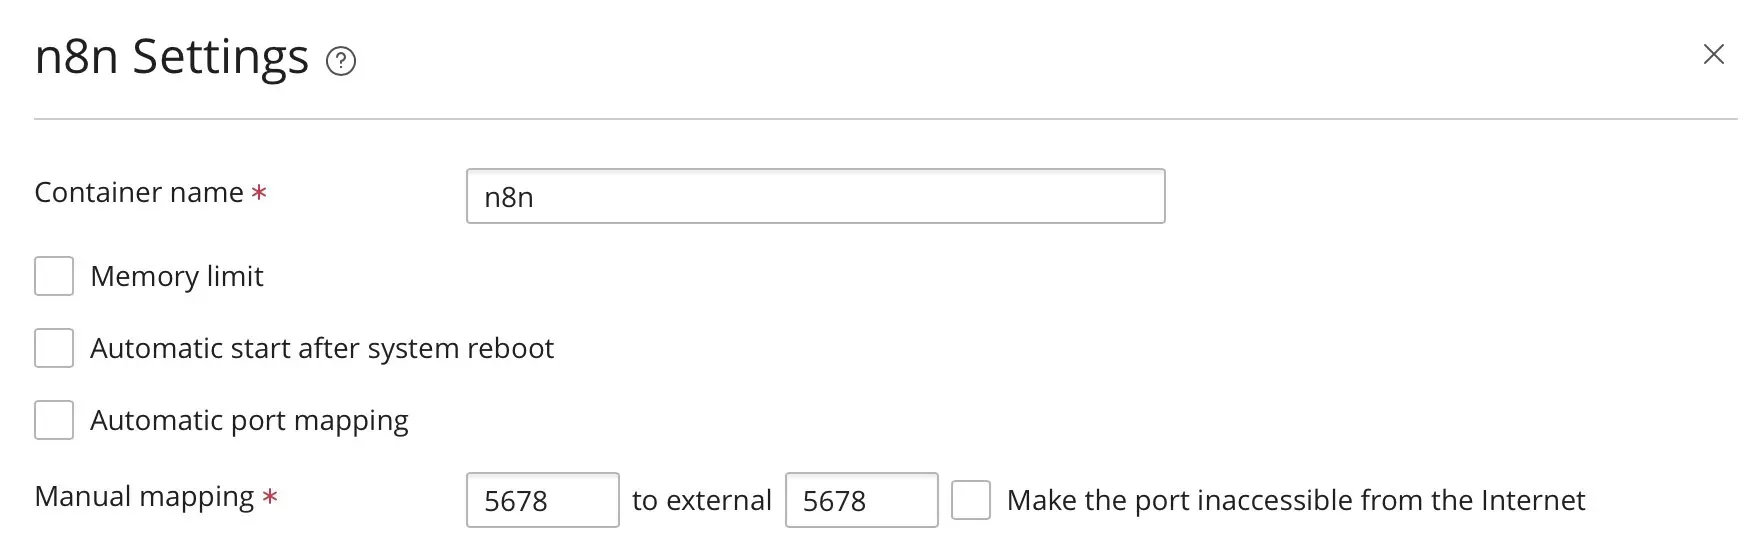
By default, n8n runs on port 5678, so this port needs to stay available. For the host port, use 5678 or another free local port. In Plesk, it is usually better to assign a fixed host port manually instead of using automatic port mapping. This makes the proxy rule easier to configure later. You also need to make sure your n8n data is saved. Create a Docker volume or host directory and mount it to /home/node/.n8n. Use this mapping so your n8n settings and stored data remain available when the container is recreated.
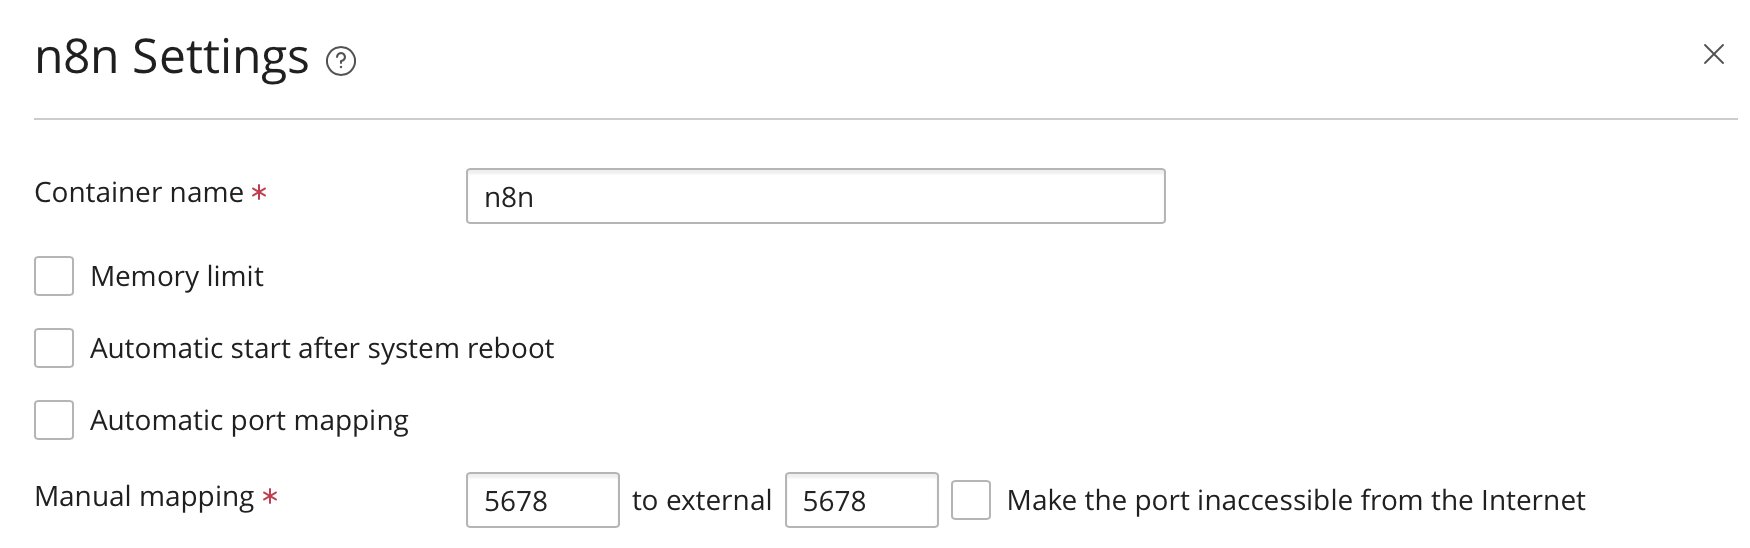
If the container fails to start and the logs show errors such as “permission denied” or “EACCES,” the mapped data directory usually does not have the required write permissions. Update the host directory permissions so n8n can save configuration files and data.
Step 6: Set variables
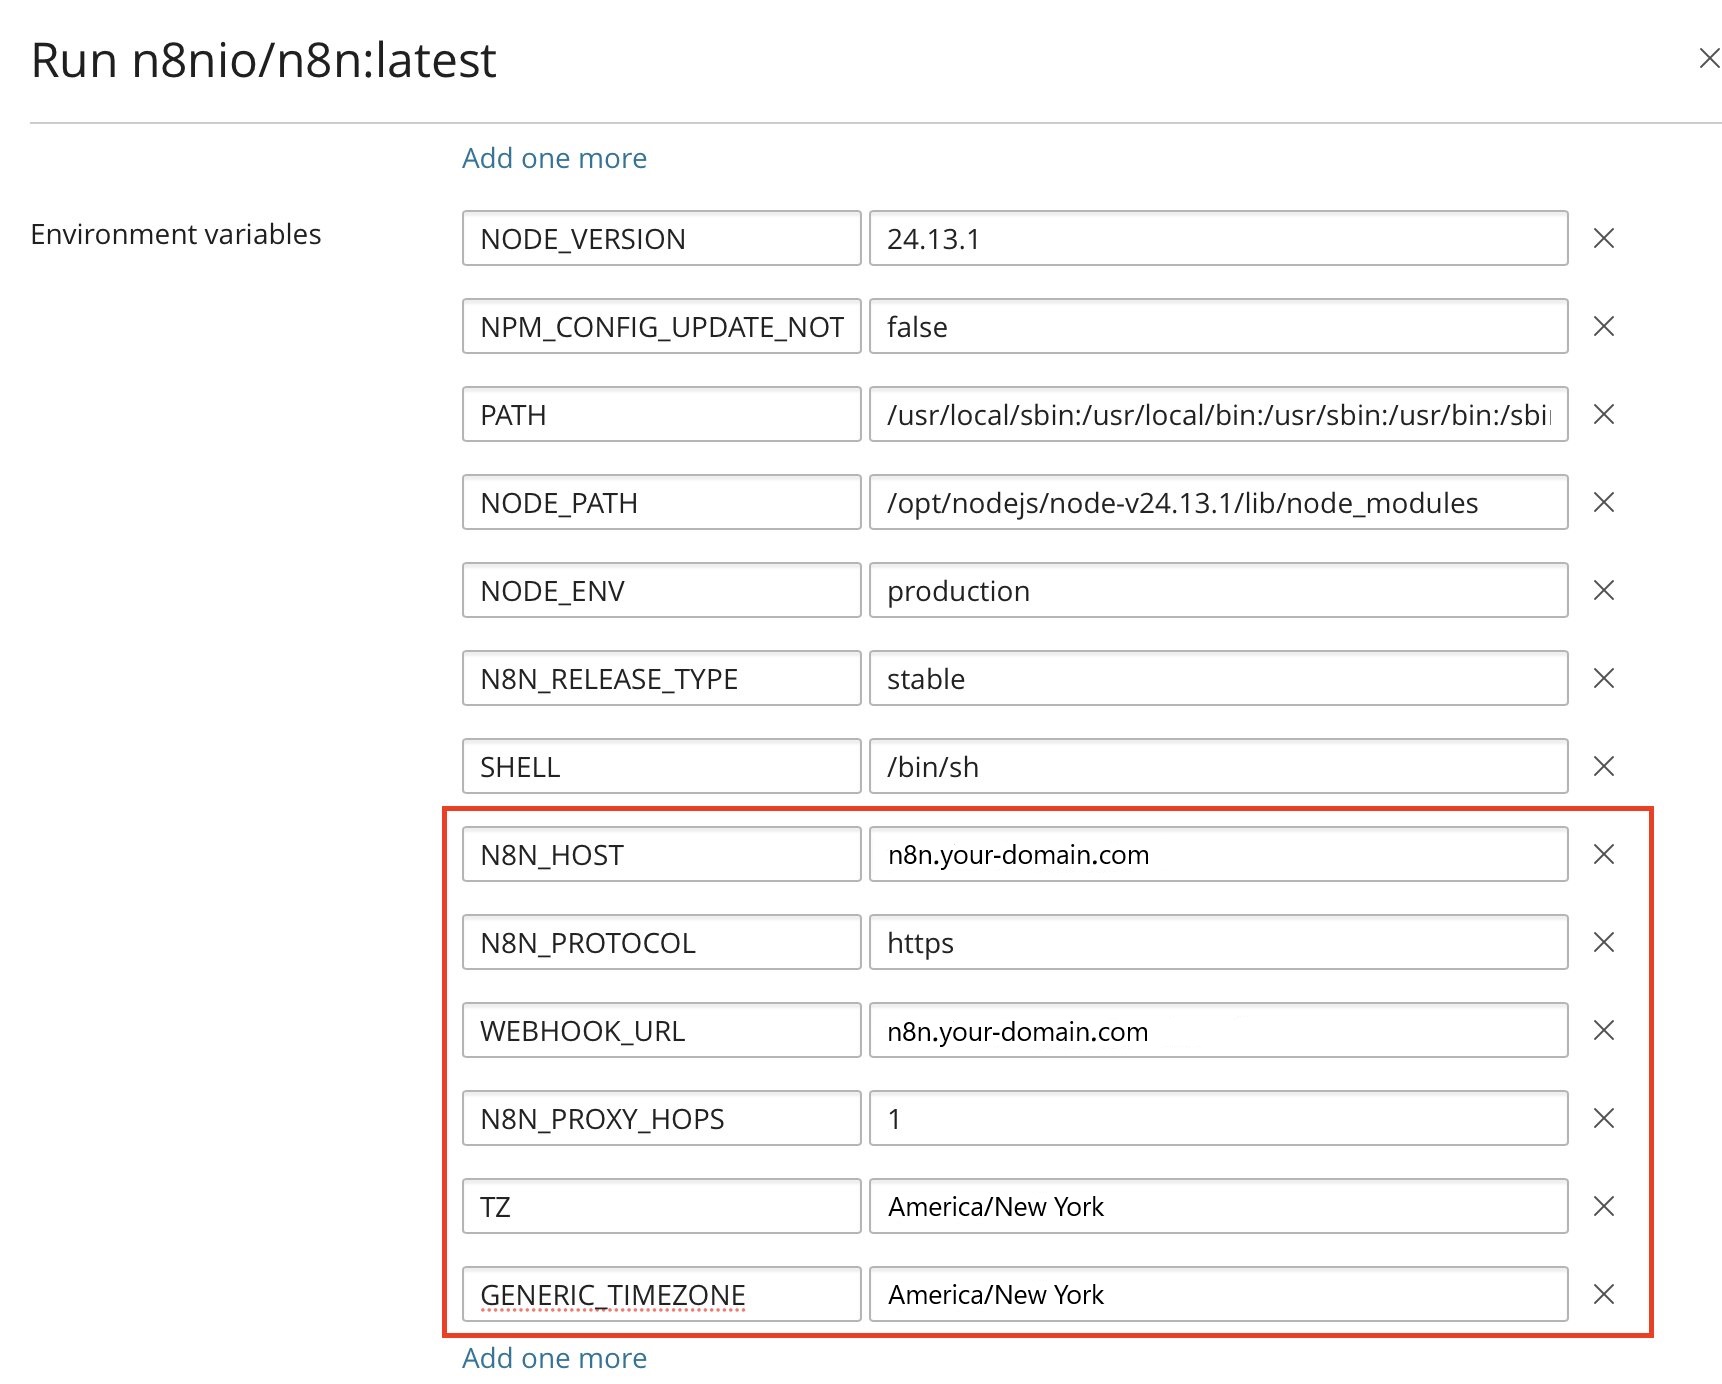
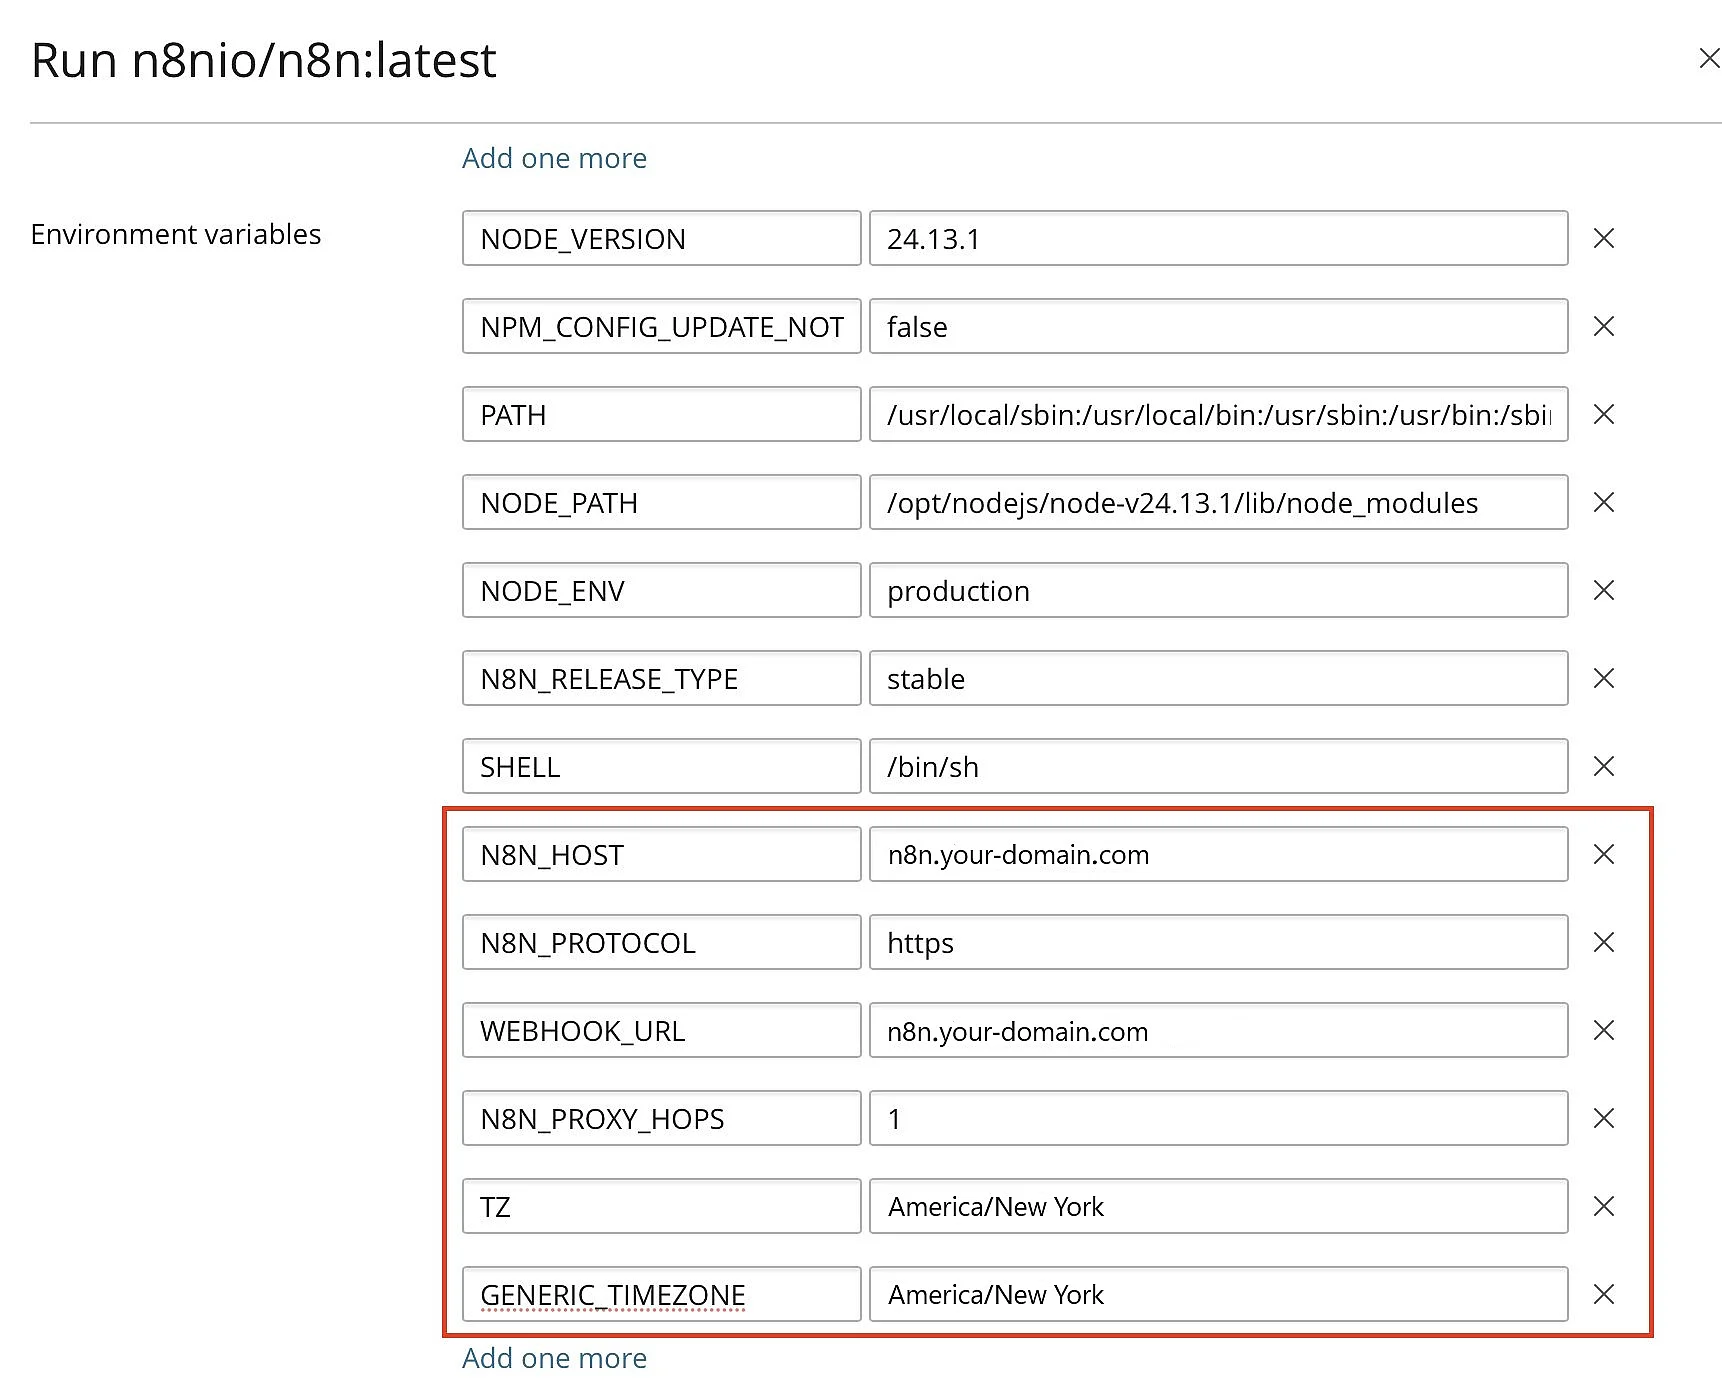
Add a few variables just to begin with. These tell n8n which address to use and how to handle external traffic. n8n needs these settings when it runs behind a reverse proxy such as Plesk. Visitors connect through your public domain, while n8n itself runs internally on a different port.
N8N_HOST, N8N_PROTOCOL, WEBHOOK_URL, and N8N_PROXY_HOPS are key variables. They tell n8n which domain to use, whether HTTPS is enabled, and that a reverse proxy is in front of the container.
If your n8n URL is https://n8n.your-domain.com, use these values:
N8N_HOST=n8n.your-domain.com
N8N_PROTOCOL=https
WEBHOOK_URL=https://n8n.your-domain.com/
N8N_PROXY_HOPS=1
TZ=America/New_York
GENERIC_TIMEZONE=America/New_YorkIn Plesk, enter these values in the container settings under Environment variables.
Step 7: Set up a Docker proxy rule in Plesk
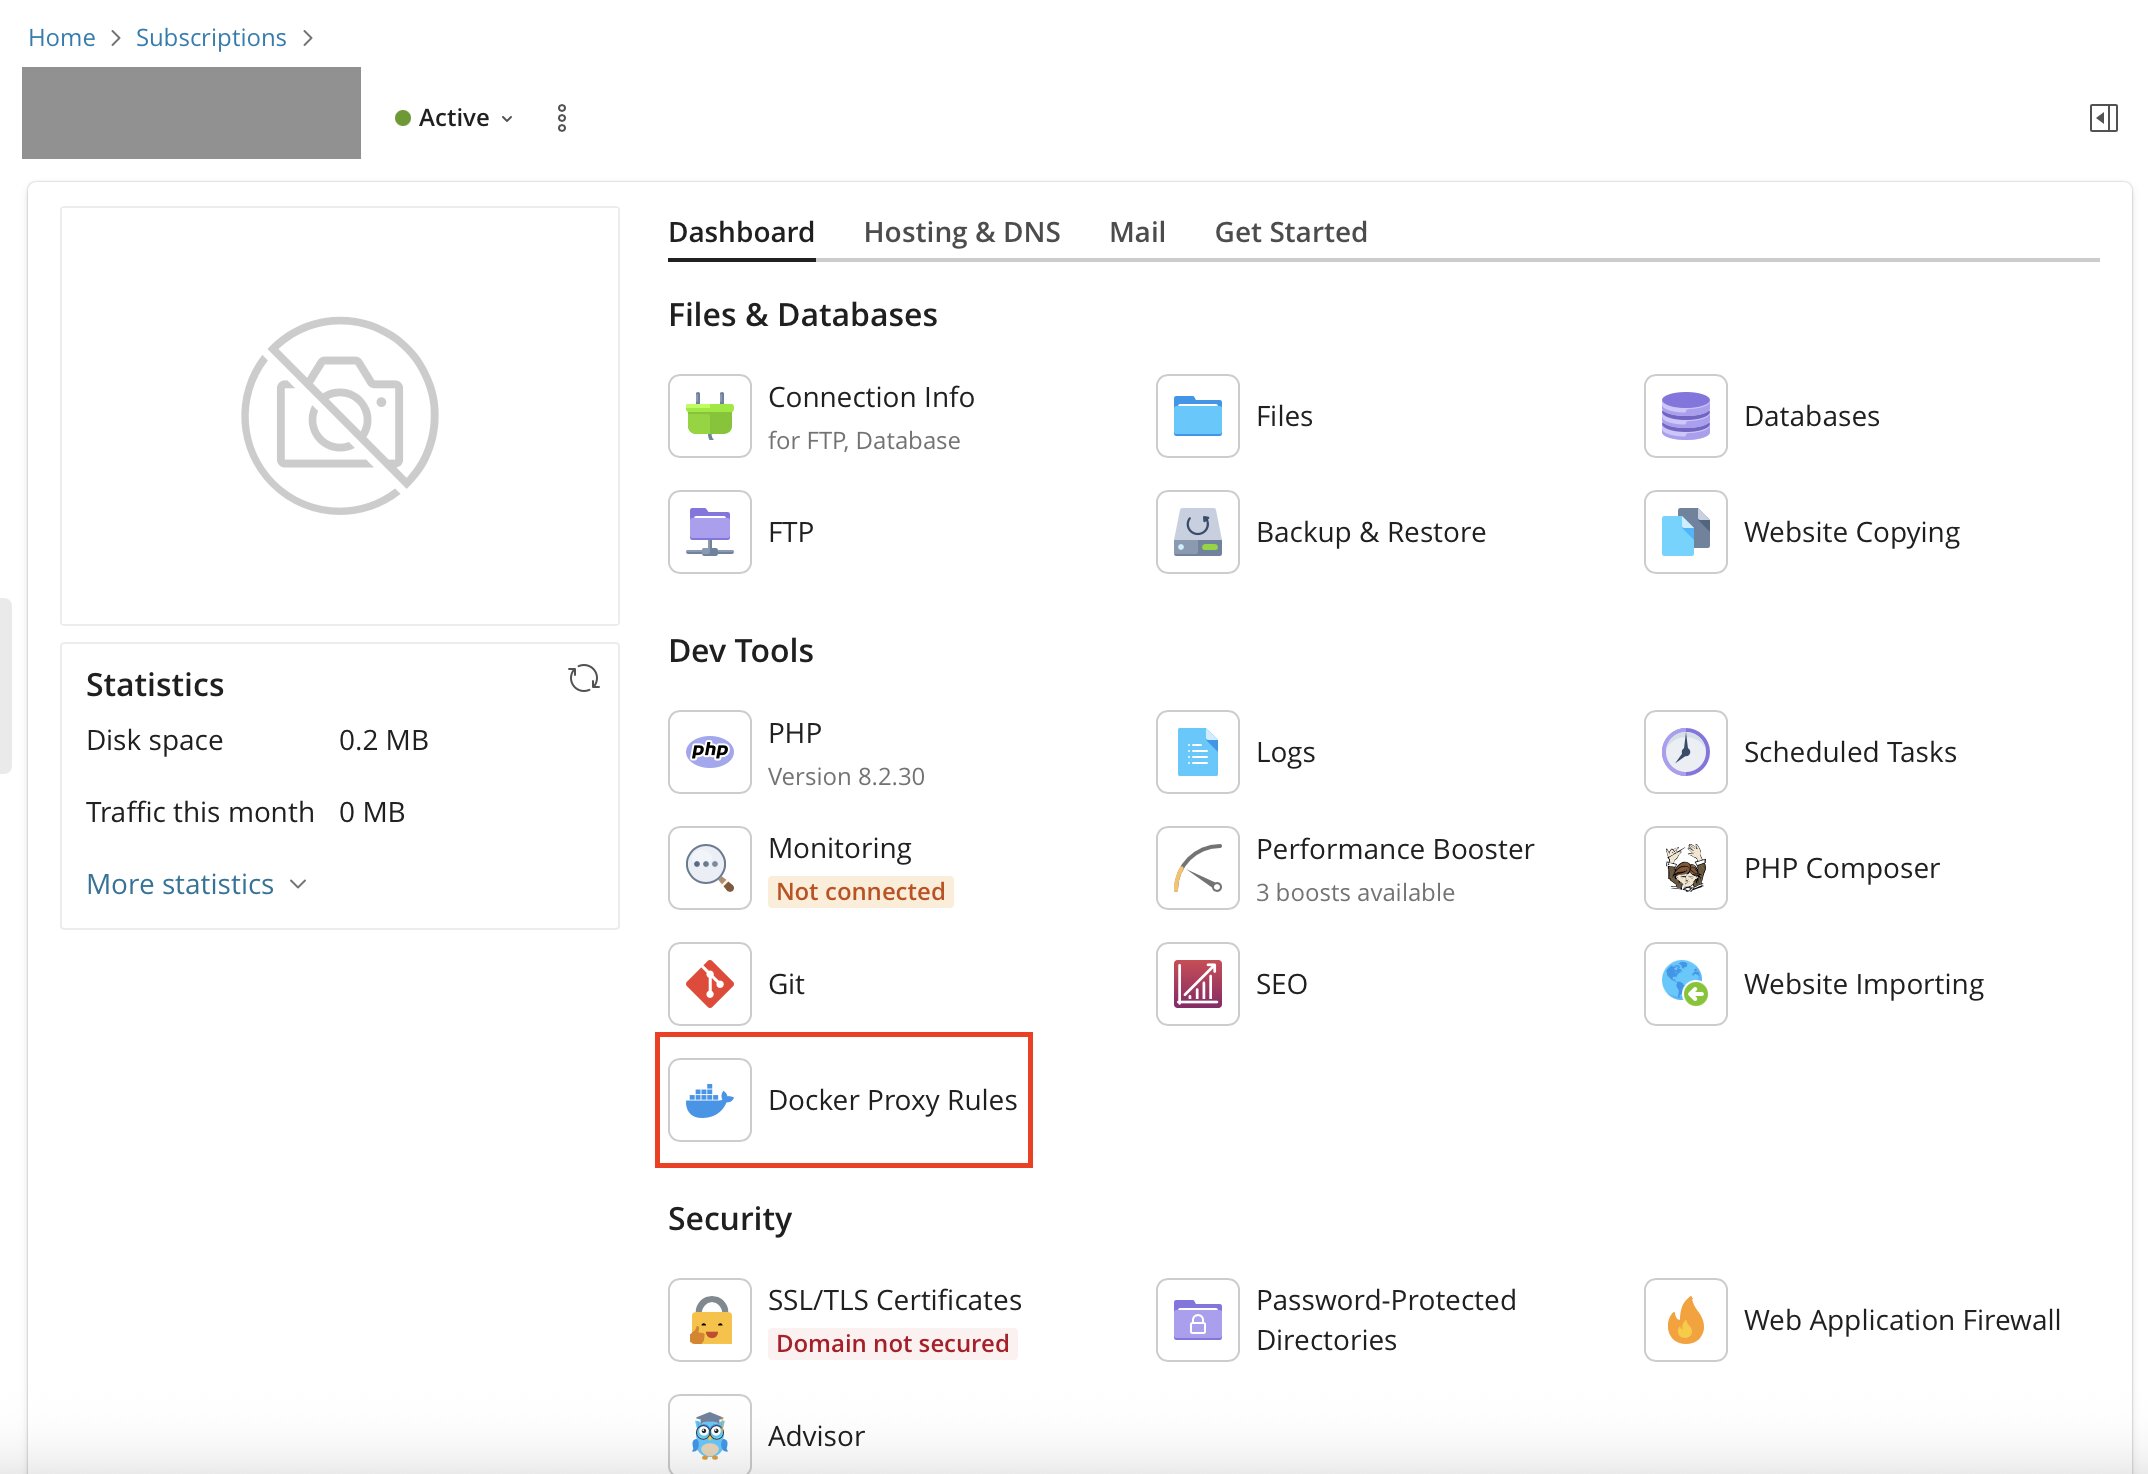
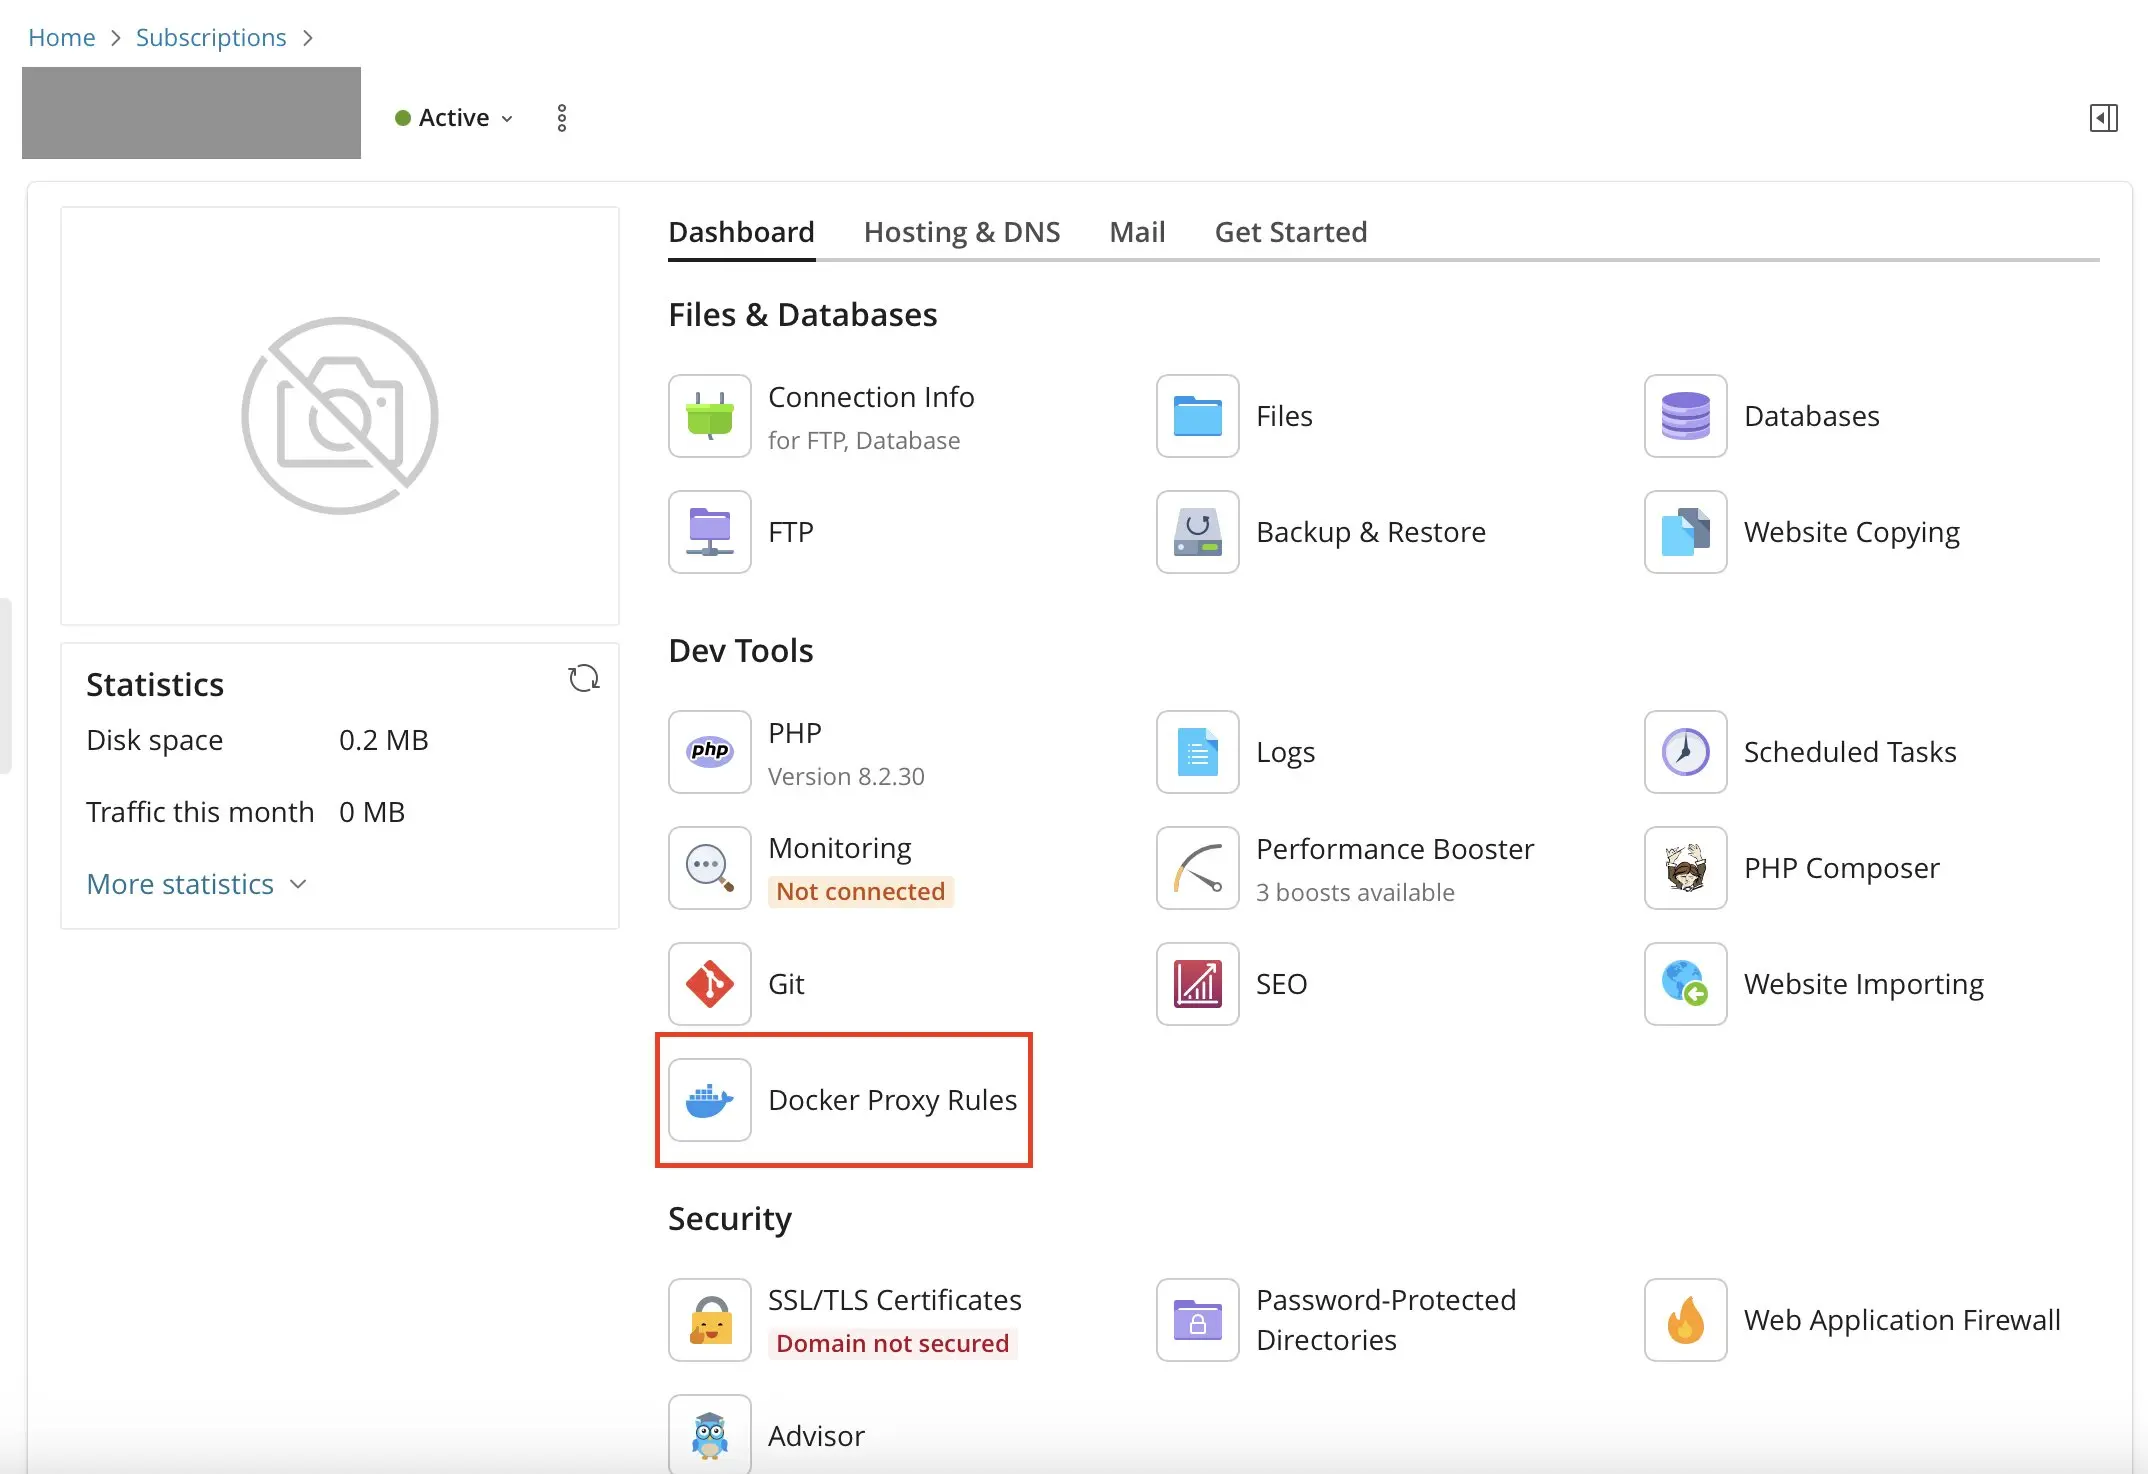
Set up a Docker proxy rule in Plesk. This will make your n8n instance accessible through the main domain on port 443. NGINX will then forward the domain to the container’s local port. This way, users won’t need to type an unusual port in the URL themselves.
In Plesk, go to Websites & Domains for your n8n subdomain. Then select Docker Proxy Rules. Create a new rule, select the n8n container, and assign the port you mapped earlier. For a dedicated subdomain, route the entire domain to the container. NGINX will then forward traffic to the container’s local port.

Step 8: Open n8n in a browser and complete setup
Open your n8n URL in a browser. If everything has been set up correctly, the n8n dashboard will load under your HTTPS domain. On first launch, n8n will guide you through the basic setup, including creating your first user account.
Step 9: Run n8n securely and reliably
If you plan to use n8n for real workflows, don’t stop at the basic setup. Regular updates, backups of the data directory, and a secure TLS configuration are key to minimizing downtime, data loss and security risks.
It’s best to run n8n as a standalone application with its own subdomain, data directory, and proxy configuration. This makes updates, backups and troubleshooting much simpler. As your workflows grow or more people join, scaling to a more powerful setup becomes easier. Your initial server choice is key to reliable performance and long-term stability, not just for reducing costs.
If you’re working with a smaller setup or are just getting started, consider alternative installation methods like n8n with CapRover or n8n with CasaOS. These can simplify the setup process.
Reviewer

Christian Heldmaier
Christian Heldmaier is an experienced online marketing and SEO specialist from Karlsruhe. He has been working as an SEO Manager at IONOS since July 2020.