How to add an email account to Outlook
Outlook users can add email accounts to Outlook, allowing them to merge different accounts into a single email service. This can be useful if you want to use different email addresses for business and personal communications. Find out different ways to add an email account to your Outlook account here.
- Write perfect emails with optional AI features
- Add credibility to your brand
- Includes domain, spam filter and email forwarding
Quick guide on how to add an email account to Outlook
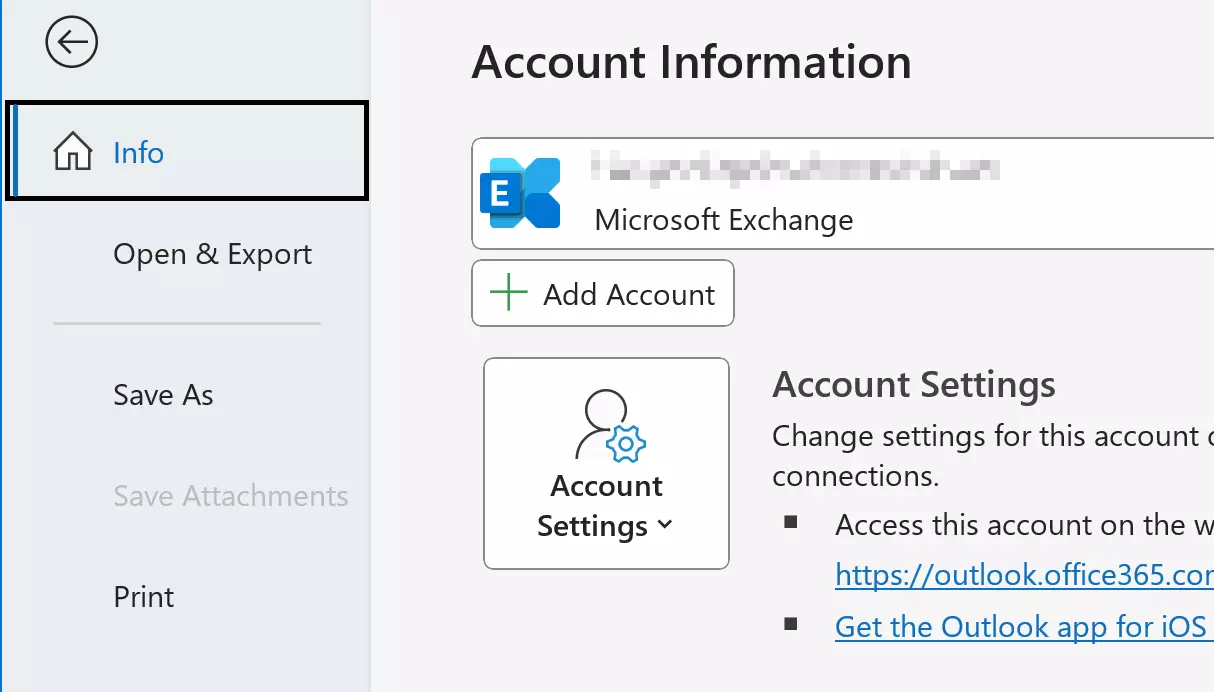
- Click on File > Add Account.
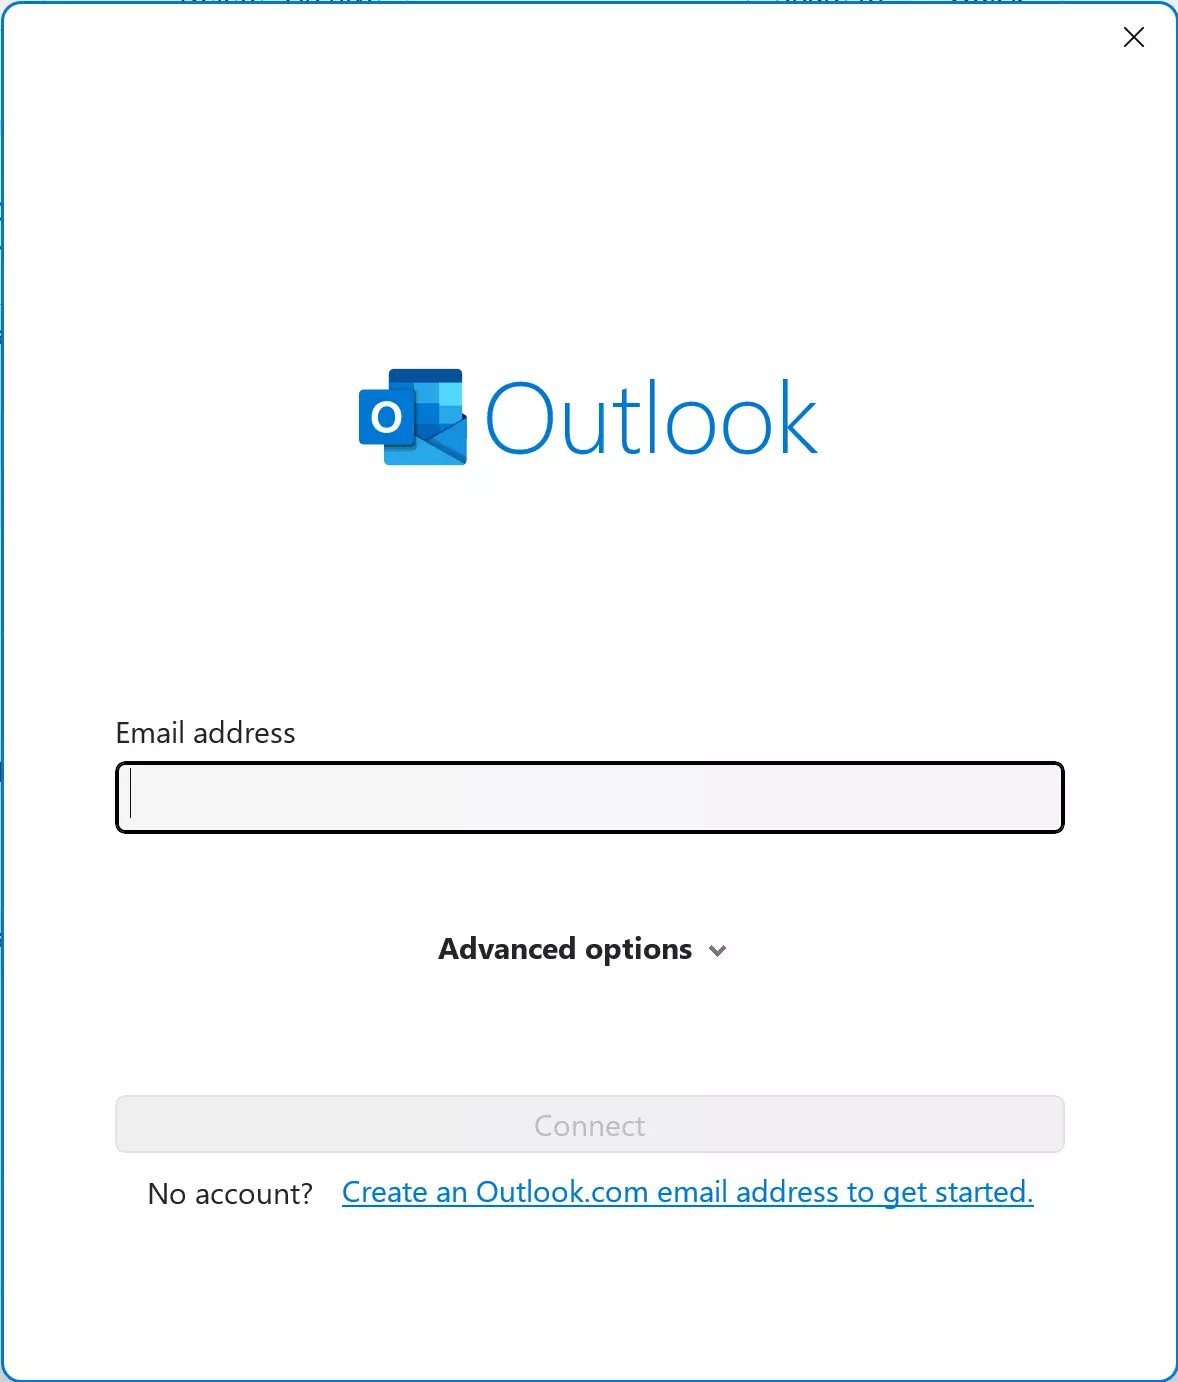
- In the new window, enter the email address of the account you want to add and click on Connect.
- You may be prompted to enter the password of the account you want to add. If so, enter the password.
- You’ll receive a confirmation message letting you know that the email account has been successfully added. Click on Finish. You may need to restart Outlook in order to access the account you just added.
You can synchronize your calendars and share them with other people without going through the process of adding accounts or importing data. Learn how to share Outlook calendars in our Digital Guide.
What you need to know about adding accounts to Outlook
Adding an account to Outlook is similar to setting up an email account with Outlook. The main difference between the two processes is which protocol and address settings are used for the incoming and outgoing mail servers. These settings are determined by your internet service provider. Additionally, some email providers may require you to change certain settings on their website before you can add your email account with them to Outlook.
Here are some of the different types of account that you can add to Outlook:
- Yahoo
- Gmail
- iCloud
- Office 365
- Exchange
- IONOS
To add a new account to Outlook, you typically need the password of that email account. If you have two-factor authentication or other authentication measures set up with your email provider, you’ll also need to have the corresponding secondary device ready. In order to complete the process of adding an account to Outlook, you’ll need to generate a special app password in the settings of the account you want to link.
How to add an email account to Outlook step by step
The steps you need to take to add accounts in Outlook depends on your internet service provider/mail provider and which version of Outlook you are using. You can choose between an automatic setup (not available for all email accounts) and a manual setup.
Below you’ll find detailed instructions for all Microsoft 365 Outlook versions as well as for Outlook 2021, Outlook 2019 and Outlook 2016. We’ll also explain how to add accounts manually and automatically.
Want to take contacts or other data from another email account with you to Outlook? Find out how to import contacts to Outlook or how to import PST files to Outlook in our Digital Guide.
How to automatically add an account to Outlook (desktop)
Regardless of which version you are using, you can start by going to File. The Account Information menu will appear. Now click Add Account. Type the address of the account you want to add and click on Connect.

The desktop version of Outlook offers users many options for personalization. Find out, for example, how to change the view in Outlook in a separate article in our Digital Guide.

If prompted, enter your password. If adding the account was successful, a message will appear letting you know that the account has been added. Now, click Finish. You may need to restart Outlook in order to access the account that you’ve just added.
If the email account hasn’t automatically been configured, check the account settings. The account may have additional protection, such as two-factor authentication, a security e-mail that you need to answer or a feature that blocks third-party applications like Outlook. Some accounts cannot automatically be added to Outlook. If this is the case, you’ll need to use the manual method.
Powerful Exchange email and the latest versions of your favorite Office apps on any device — get started with our free setup assistance.
How to manually add an account to Outlook (desktop)
For manual account setup, you need your login data and the data for the incoming and outgoing mail server of the email service. Similar to the automatic account setup, you’ll begin by clicking on File and then Add Account under Account Information.
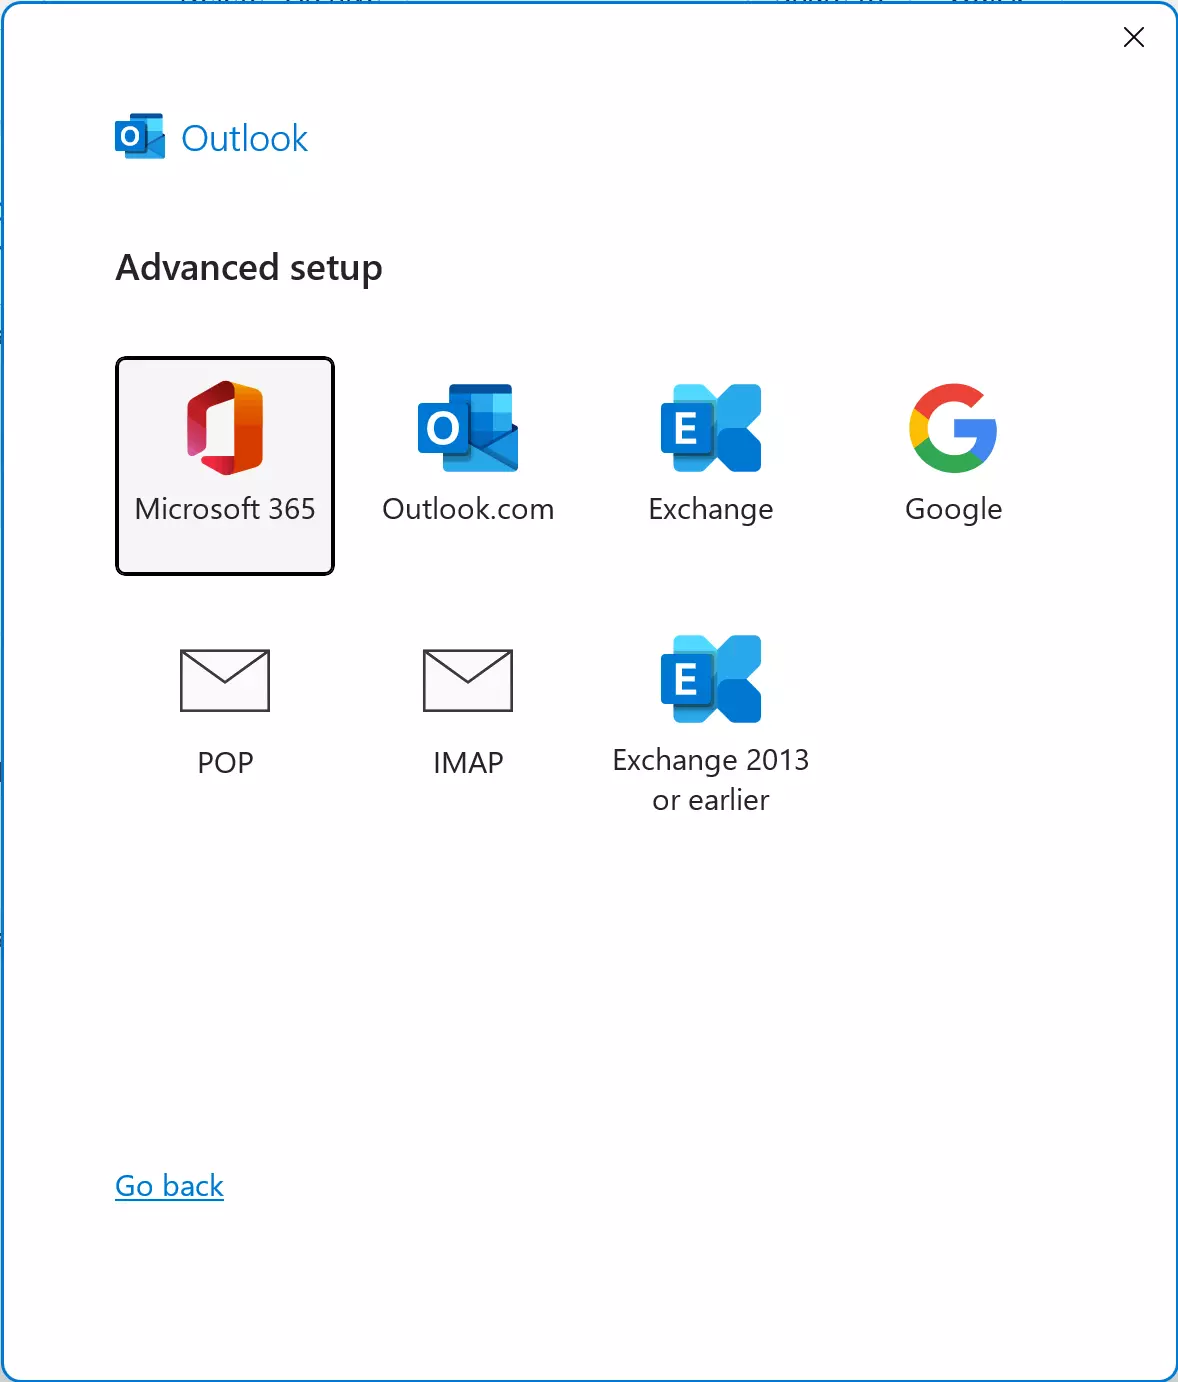
Select Advanced options and check the box Let me set up my account manually. Click Connect. Now, click on either your email provider or POP/IMAP.

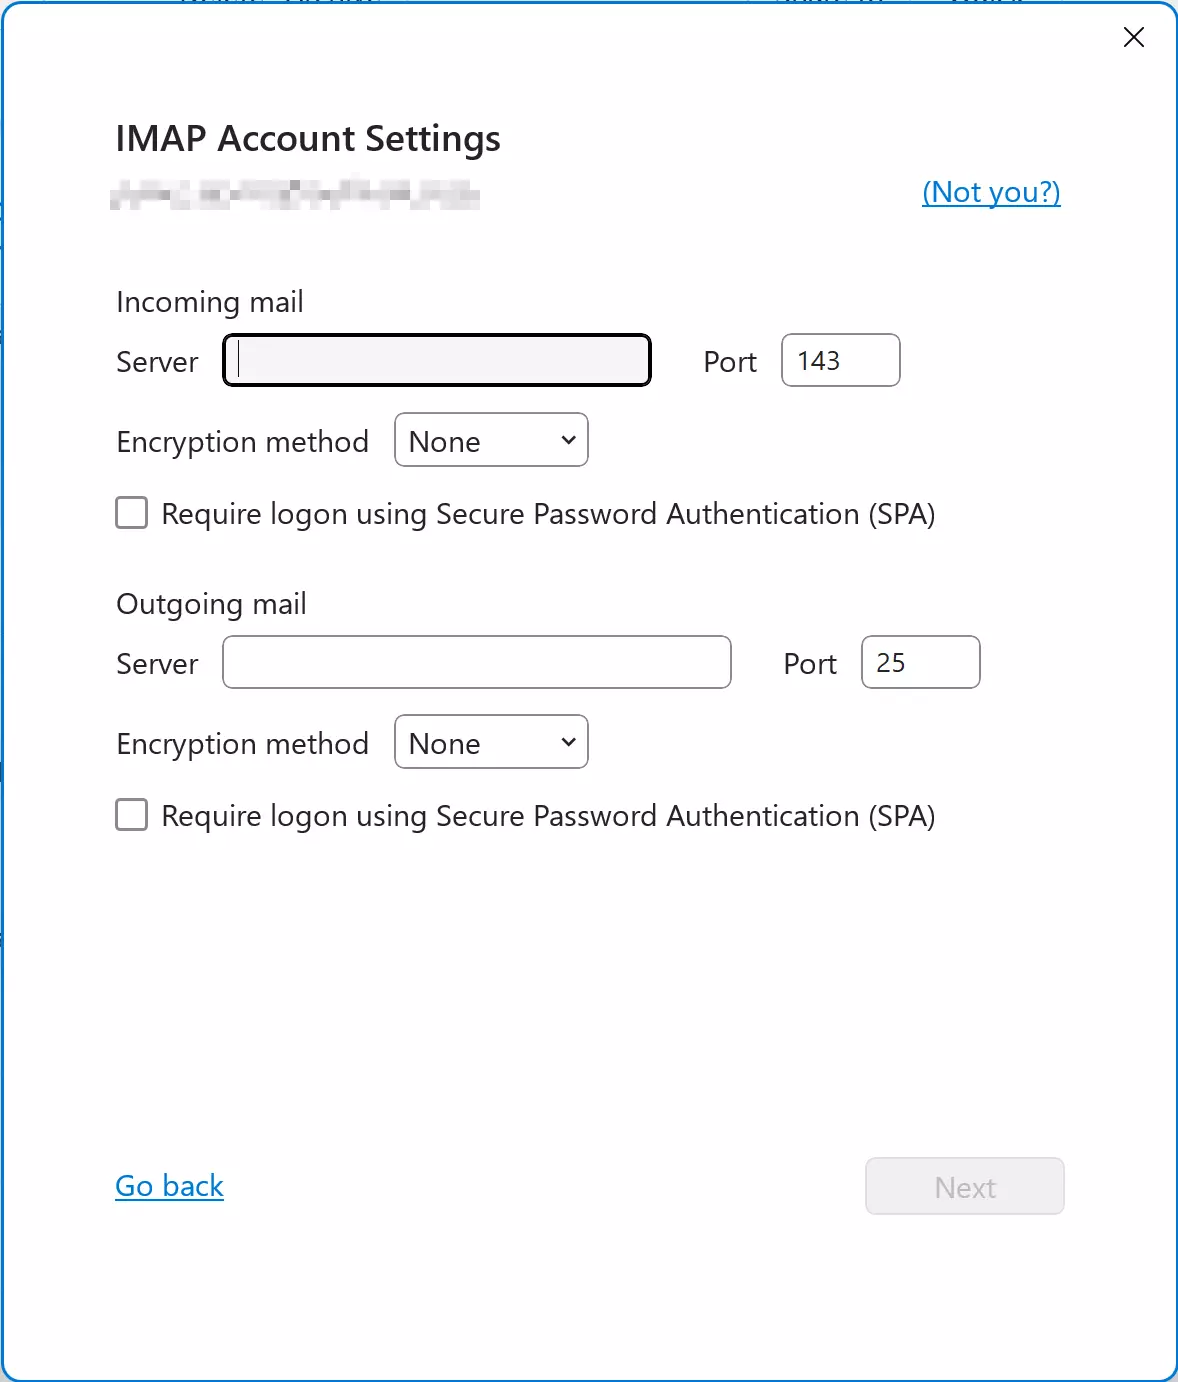
Under Choose E-Mail Service, click on POP or IMAP or Internet E-mail and enter the address and server information of your mail provider. The data you need to enter depends on which service or protocol you select. (You can get this information from your mail provider.) For example, here is the information you would need to enter if you select IMAP:
| Setting | Information needed | Example |
|---|---|---|
| Incoming mail server | Address of the incoming mail server | imap.ionos.com |
| Incoming mail port | Port to be used (Standard port: 143) | 143 |
| Encryption method (Incoming mail) | Encyption protocol | SSL/TLS (Standard: no encryption) |
| Outgoing mail server | Address of the outgoing mail server | smtp.ionos.com |
| Outgoing mail port | Port to be used (Standard port: 25) | 25 |
| Encryption method (Outgoing mail) | Encryption protocol | SSL/TLS (Standard: no encryption) |

Only select the option Require login using Secure Password Authentication (SPA) if it is supported by your provider’s mail servers or explicitly requested by your provider. After you are done entering everything, click on Continue.
If you are uncertain about the choice of transmission protocol, we recommend taking a look at our article about IMAP and POP3.
To complete the process of adding an account to Outlook, enter your password and click on Connect.
In 2018, the option to add multiple accounts to the web version of Outlook was discontinued. If you only use Outlook on the web, you can still set up email forwarding in Outlook, making it possible to have all your mails sent to one account.
- Write perfect emails with optional AI features
- Add credibility to your brand
- Includes domain, spam filter and email forwarding

